Blog

  • Choosing the Right Flooring for Your Home

    Choosing the Right Flooring for Your Home

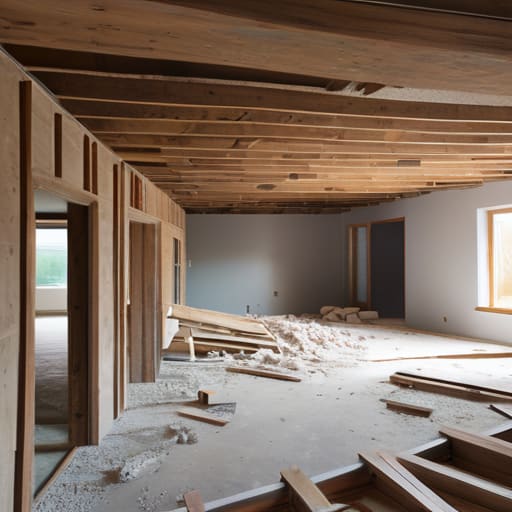
    I still remember standing in the middle of a gutted ranch-style fixer-upper last October, my lungs burning from drywall dust and my knees aching from kneeling on a subfloor that felt like it was made of nothing but hope and old glue. I was staring at a sea of stained, 1970s shag carpet that looked like it hadn’t seen a vacuum since the Nixon administration, realizing that my entire renovation timeline was about to tank. Most people see a messy, uneven subfloor and think they need to hire a specialized crew and blow their entire budget on high-end hardwoods, but that’s a massive waste of capital. In my experience, the real magic of flooring installation isn’t about how much you spend, but about how smart you are with the prep work.

    I’m not here to sell you on some overpriced, boutique flooring brand that’s going to crack the moment the temperature shifts. Instead, I’m going to give you the unfiltered reality of how to handle flooring installation without draining your investment margins. I’ll show you how to identify which materials actually hold their value and how to spot the prep errors that turn a quick weekend job into a long-term nightmare. Let’s get to work.

    Table of Contents

    Navigating Professional Flooring Installation Costs Without Breaking the Ba

    When you’re staring at a quote from a contractor, it’s easy to feel like you’re being taken for a ride. But here’s the reality: the sticker shock usually comes from what you can’t see. I’ve learned the hard way that cutting corners on subfloor preparation techniques is the fastest way to turn a profitable flip into a money pit. If the foundation isn’t level or clean, that expensive hardwood you just bought is going to buckle within six months. Instead of slashing the labor budget, I focus my negotiation efforts on the materials themselves.

    To keep your margins healthy, I always run a quick flooring material durability comparison before signing any contracts. Don’t just go for the cheapest option; look for the sweet spot where longevity meets price point. If you’re working on a rental or a high-turnover property, investing a little extra in a quality underlayment for floor installation can save you thousands in future repairs. My rule of thumb is simple: spend your money where it prevents a callback, and save it on the decorative trim that anyone can swap out later.

    Smart Underlayment for Floor Installation to Protect Your Investment

    Smart Underlayment for Floor Installation to Protect Your Investment

    If you want to avoid the nightmare of seeing your expensive new planks buckle or warp six months after a flip, you cannot afford to skimp on what lies beneath. Most amateur renovators focus entirely on the visible surface, but the real secret to longevity is the underlayment for floor installation. Think of it as the foundation of your aesthetic; if the base is uneven or damp, even the most expensive hardwood is going to fail. I always tell my clients that skipping a quality buffer is just a fast track to a costly callback.

    Before you even think about laying down a single plank, you need to address your subfloor preparation techniques. If you’re dealing with an old fixer-upper, you’re likely going to encounter uneven joists or slight moisture issues. This is where checking your flooring moisture barrier requirements becomes non-negotiable. Whether you’re using a thick foam pad for sound dampening or a specialized vapor barrier for concrete slabs, getting this layer right is what separates a professional-grade rehab from a DIY disaster. It’s about protecting that equity you worked so hard to build.

    Don't Get Burned: 5 Pro Moves for a Flawless Floor

    • Stop obsessing over the prettiest sample in the showroom; instead, grab a sample of the actual material and try to scratch it with a key or spill some coffee on it. If it doesn’t hold up in your own kitchen, it definitely won’t survive a rental or a high-traffic flip.
    • Never, and I mean never, skip the subfloor prep. I’ve seen so many investors try to save a few hundred bucks by laying expensive hardwood over a wonky, uneven subfloor, only to have the boards squeak or buckle six months later. Level it out now, or pay for it later.
    • Always order 10% to 15% more material than your square footage suggests. Between corner cuts, mistakes, and the occasional damaged plank in the box, you do not want to be halfway through a room only to realize you’re short and have to pay more for shipping on a tiny supplemental order.
    • Check your acclimation time religiously. If you’re installing real wood or high-end laminate, let those boxes sit in the actual room where they’ll be installed for at least 48 to 72 hours. If you rush the install, the temperature and humidity shifts will warp your profit margin right out of the house.
    • Focus your budget where it shows. If you’re on a tight margin, go for a high-quality LVP (Luxury Vinyl Plank) in the high-traffic living areas, but don’t skimp on the transitions and baseboards. It’s the little trim details that make a cheap floor look like a custom installation.

    The Bottom Line on Flooring

    Don’t get blinded by high-end material costs; focus your budget on quality underlayment and a level subfloor, because a cheap finish on a bad foundation will fail every single time.

    When you’re quoting contractors, don’t just look for the lowest number—look for the person who understands that a precise installation is what actually protects your profit margins.

    Treat flooring as a strategic equity play rather than just a cosmetic fix; choose durable, timeless materials that won’t need replacing the moment you try to flip the property.

    ## The Real ROI of Your Floors

    “Stop looking at flooring as just another line item in your renovation budget; if you treat it as a strategic asset rather than an expense, you’re not just covering a subfloor—you’re laying the foundation for your profit margin.”

    Gareth Trelawny

    The Bottom Line on Your Floors

    The Bottom Line on Your Floors.

    At the end of the day, flooring isn’t just about picking a color that looks good in a showroom; it’s a strategic move for your property’s value. We’ve talked about how to keep your installation costs from spiraling out of control and why skimping on high-quality underlayment is a mistake you’ll regret when your subfloor starts acting up. If you manage your budget wisely and don’t cut corners on the unseen layers that provide stability, you aren’t just covering up old wood or concrete. You are effectively layering on equity that will show up in your final appraisal.

    I know that looking at a gutted room with bare subfloors can feel overwhelming, especially when you’re staring down a massive project timeline. But remember, every great renovation is just a series of small, calculated decisions. Don’t let the dust and the chaos intimidate you. When you finally walk across those new planks and see the light hitting a clean, finished surface, you’ll realize that the sweat equity was worth every second. Stop looking at the mess and start seeing the potential profit hiding underneath. Now, grab your laser measurer and get to work.

    Frequently Asked Questions

    How do I know if my subfloor is actually level enough for luxury vinyl plank, or if I'm just setting myself up for a nightmare later?

    Grab your laser measurer—or a decent 4-foot level if you’re just starting—and check for dips or humps. For LVP, you really want your subfloor to be within 3/16 of an inch over a 10-foot span. If you see significant waves, don’t just click those planks together and hope for the best; the locking mechanisms will snap underfoot. Level it out with self-leveling compound now, or you’ll be paying for a full replacement later.

    Is it actually worth paying the premium for engineered hardwood in a rental property, or should I just stick to something more durable and budget-friendly?

    Look, if you’re playing the long game, engineered hardwood is a solid move because it looks high-end and holds its value during a resale. But if this is a high-turnover rental? Honestly, don’t overextend yourself. I’d pivot to a high-quality Luxury Vinyl Plank (LVP) instead. It mimics the wood look perfectly, handles spills and heavy foot traffic like a champ, and won’t leave you crying over a scratched-up floor when a tenant moves out.

    What are the biggest red flags I should look for when I'm vetting a flooring contractor to make sure they aren't cutting corners on the prep work?

    If a contractor walks into a room and doesn’t immediately pull out a moisture meter or a straightedge, run. The biggest red flag is someone who wants to lay material directly over uneven subfloors or old, unlevel concrete. They’ll tell you “it’ll flatten out,” but they’re lying. If they aren’t talking about grinding, leveling, or cleaning the substrate before the first plank touches the floor, they aren’t installing a floor—they’re just hiding problems.

  • How to Successfully Flip Houses for Profit

    How to Successfully Flip Houses for Profit

    I still remember the smell of damp drywall and old sawdust from my first solo project—a cramped, single-story bungalow that most people wouldn’t look at twice without gagging. While the “gurus” on social media were busy posting polished photos of luxury mansions and talking about effortless millions, I was on my hands and knees in a dusty basement, wondering if I’d just made the biggest mistake of my life. That’s the reality they don’t show you: property flipping isn’t about the glamorous reveal; it’s about the grit you show when the plumbing fails at 2:00 AM.

    I’m not here to sell you a dream or a get-rich-quick scheme that requires a massive inheritance to start. Instead, I’m going to pull back the curtain on how I actually build equity by spotting the hidden potential in the mess. I’ll share the practical, hard-won lessons I’ve learned from years of managing job sites and navigating renovation disasters. If you’re ready to stop chasing the hype and start learning how to turn crumbling walls into solid financial assets, then you’re in the right place.

    Table of Contents

    Finding Gold in Fix and Flip Real Estate

    Finding Gold in Fix and Flip Real Estate

    When I’m out scouting for my next project, I’m not looking for the “pretty” houses. Those are already priced to perfection, and there’s zero margin left for me to make a profit. Instead, I’m hunting for the houses that make most people cringe—the ones with the overgrown landscaping, the outdated shag carpet, or that suspicious water stain on the ceiling. To find the real wins in fix and flip real estate, you have to look past the cosmetic decay and evaluate the skeleton of the building. I always say that you can replace a kitchen or rip out old flooring, but you can’t fix a bad floor plan or a foundation that’s shifting.

    The secret is staying ahead of the curve by monitoring local real estate market trends before you even step foot on a property. I don’t just bid on a whim; I need to know exactly what the neighborhood can support once the dust settles. Before I ever sign a contract, I’m obsessing over the numbers to ensure the math actually works. If the potential upside doesn’t significantly outweigh the risk of a surprise plumbing disaster, I walk away. You have to be willing to let a deal go to ensure your next one is a winner.

    Winning Property Acquisition Strategies for the Bold

    Winning Property Acquisition Strategies for the Bold.

    If you’re waiting for a perfect turnkey listing to hit the MLS, you’ve already lost the race. Winning in this game requires a shift in mindset; you have to stop looking at what a house is and start seeing what it could be. I’ve found that the best property acquisition strategies usually involve looking where others are afraid to tread—think wholesalers, pre-foreclosures, or even those overgrown properties in quiet neighborhoods that everyone assumes are money pits. You aren’t just buying four walls; you are buying the spread between the purchase price and the potential.

    However, being bold doesn’t mean being reckless. Before I even sign a contract, I am obsessively running my numbers. You cannot rely on gut feelings alone; you need a brutal, realistic after repair value calculation to ensure there’s actually meat on the bone. I spend hours walking through dusty basements, mentally mapping out every plumbing upgrade and structural fix. If the math doesn’t hold up against the current real estate market trends, I walk away. I’d rather miss out on a mediocre deal than sink my capital into a renovation that won’t yield the equity I need.

    The Dirty Work: 5 Rules for Not Losing Your Shirt on a Flip

    • Don’t fall in love with the aesthetics; fall in love with the numbers. I’ve seen plenty of designers get blinded by a gorgeous original fireplace and ignore the fact that the foundation is cracked. If the math doesn’t work after you factor in the “surprise” repairs, walk away.
    • Always, and I mean always, build a 15% contingency buffer into your renovation budget. Between unexpected mold behind a wall or a sudden spike in lumber prices, something is going to go sideways. If you don’t budget for the mess, the mess will eat your entire profit margin.
    • Focus your renovation budget on the “high-impact” zones. In my experience, buyers will forgive a dated bedroom, but they will absolutely crucify you for a mediocre kitchen or a bathroom that feels cramped and cheap. Spend your money where it creates the most perceived value.
    • Get a professional inspection before you sign anything. I know, it feels like an extra hurdle when you’re trying to move fast, but I’d rather spend a few hundred bucks now than find out I’ve inherited a house with a failing sewer line after I’ve already closed.
    • Build your “A-Team” of contractors before you actually need them. You can’t just hire a random guy from a flyer when you’re on a tight timeline. You need reliable subs who actually show up and understand that a renovation schedule is a living, breathing thing.

    The Bottom Line: Turning Sweat Equity into Real Wealth

    Don’t get blinded by shiny finishes; your profit lives in the structural integrity and the “bones” of the house before the first coat of paint ever touches a wall.

    Success in flipping isn’t about luck—it’s about having a disciplined acquisition strategy and the grit to stay the course when a renovation inevitably gets messy.

    Real estate is a game of margins, so master the art of spotting undervalued potential and managing your rehab costs without sacrificing the design elements that drive resale value.

    ## The Reality of the Build

    “Most people see a cracked foundation or outdated wallpaper as a headache, but I see them as the discount you need to build real equity. In this game, your profit isn’t just found in the sale; it’s earned in the grit it takes to see past the mess and uncover the bones.”

    Gareth Trelawny

    Turning Vision into Value

    Turning Vision into Value through property flipping.

    At the end of the day, successful property flipping isn’t about luck or having a bottomless bank account; it’s about the intersection of a sharp eye and a calculated strategy. We’ve walked through how to identify those diamond-in-the-rough properties and the aggressive acquisition tactics needed to secure them before the competition even realizes what they’re looking at. Remember, the profit is baked into the buy, not just the renovation. If you don’t get the numbers right during the acquisition phase, even the most stunning mid-century modern remodel won’t save your margins. You have to be willing to do the math, trust your gut on the structural integrity, and stay disciplined when the renovation gets messy.

    Real estate investing is rarely a clean, polished process. It’s dusty, it’s exhausting, and there will be days when you’re staring at a plumbing disaster wondering why you didn’t just stay in a corporate office. But that’s exactly where the equity is built. Every crumbling wall you fix and every outdated layout you transform is a step toward building something permanent and tangible. Don’t let the fear of a little chaos keep you on the sidelines. Grab your tools, trust your training, and start looking for that next opportunity to turn a neglected house into a wealth-generating asset.

    Frequently Asked Questions

    How do I figure out if a renovation budget is actually realistic before I pull the trigger on a purchase?

    Don’t guess. If you’re guessing, you’re losing money. Before I sign anything, I get a contractor on-site for a walkthrough, but I don’t just take their word for it. I pull my laser measurer out, verify the square footage myself, and build a 15% “chaos buffer” into every estimate. You have to account for the rot behind the drywall that nobody sees until the hammer swings. If the math doesn’t hold with a buffer, walk away.

    What are the red flags I should look for during a walkthrough that signal a house is a money pit rather than a diamond in the rough?

    Don’t let a fresh coat of paint fool you. When I’m walking a site, I’m looking past the staging. If I see fresh drywall in only one corner or a suspicious lack of water stains on a ceiling, my alarm bells go off. Watch out for sagging floorboards or that unmistakable musty smell—it usually means foundation issues or mold hiding behind the studs. If the electrical panel looks like a bird’s nest, walk away. That’s not a renovation; that’s a sinkhole.

    How much of my own cash do I really need to have on hand to manage unexpected contractor delays or material price hikes?

    Look, if you’re banking on your budget being perfect, you’ve already lost. I never step onto a job site without a 15-20% contingency fund sitting in a liquid account. Between supply chain nonsense and contractors disappearing mid-demo, things will go sideways. Don’t mistake a “tight budget” for a “risky one.” That extra cash isn’t just a safety net; it’s the difference between a successful flip and a total financial meltdown.

  • Increasing Home Value Through Kitchen Remodeling

    Increasing Home Value Through Kitchen Remodeling

    I was standing in a gutted Victorian bungalow last Tuesday, dust coating my boots and the smell of old grease hanging heavy in the air, staring at a kitchen that looked like it hadn’t been touched since the Nixon administration. Most people would see a disaster area and walk away, but as I pulled my laser measurer from my bag, I didn’t see a mess—I saw a goldmine. A poorly executed kitchen remodel is one of the fastest ways to bleed a budget dry, but a strategic one? That’s how you build real wealth.

    I’m not here to sell you on marble countertops that cost more than your car or trendy backsplash tiles that will be outdated by next season. My goal is to show you how to navigate the chaos of a renovation without losing your mind or your profit margins. I’m going to give you the straight-up truth on where to splurge for maximum ROI and where to cut corners so you can stop dreaming about equity and start actually building it.

    Table of Contents

    Mastering Modern Kitchen Layout Ideas for Maximum Roi

    Mastering Modern Kitchen Layout Ideas for Maximum Roi

    When I’m walking into a potential flip, I’m not just looking at the color of the cabinets; I’m looking at the flow. You can have the most expensive marble in the world, but if the “work triangle” is broken, you’ve wasted your money. To see a real return, you need to focus on modern kitchen layout ideas that prioritize movement. I always push for an open concept that connects the prep area to the living space. Even in tighter properties, small kitchen space optimization—like using deep drawers instead of lower cabinets or installing a slim peninsula—can make a cramped room feel like a high-end chef’s suite.

    Don’t get distracted by every passing fad, either. While I love keeping an eye on kitchen design trends 2024, my goal is longevity, not just a quick trend cycle. I tend to stick to clean lines and functional zones. If you’re working with a tighter budget, don’t sweat the heavy demolition; sometimes, simply reconfiguring the island placement or improving the lighting can do more for your appraisal than a total gut job. Focus on the bones of the layout, and the equity will follow.

    Navigating the Real Cost of Kitchen Remodeling Without Breaking

    Look, I’ve seen too many investors go into a project with a “dream budget” only to end up staring at a half-finished floor because they underestimated the plumbing. The actual cost of kitchen remodeling isn’t just about the pretty things you see on Pinterest; it’s about what’s hiding behind the drywall. If you want to protect your margins, you have to prioritize function over fluff. I always tell my clients to allocate a contingency fund of at least 15%—because in this business, something always goes sideways once you pull up the old flooring.

    To keep your ROI high without draining your bank account, you need to be strategic about where you spend. Don’t blow your entire budget on high-end kitchen design trends 2024 that might look dated in three years. Instead, focus on the heavy hitters. Investing in high-quality cabinetry and solid countertops will do more for your resale value than a trendy, expensive faucet ever could. It’s about making smart, tactical choices that turn a messy renovation into a high-margin win.

    The High-ROI Checklist: Where to Put Your Money and Where to Hold It

    • Prioritize the “Work Triangle” over aesthetics; if the distance between the sink, stove, and fridge feels clunky, no amount of marble countertops will save the resale value.
    • Don’t go overboard with high-end appliances if you’re flipping; aim for reliable, mid-tier brands that look sleek in photos but won’t eat your entire profit margin.
    • Lighting is your secret weapon for making a small renovation feel expensive—swap out those dated recessed cans for layered task lighting and a statement pendant that actually has some character.
    • Avoid the “trend trap” by keeping your cabinetry neutral; I’ve seen too many investors lose money on navy blue or forest green cabinets that look dated within eighteen months.
    • Never underestimate the power of hardware; replacing cheap, builder-grade pulls with heavy, matte black or brushed brass handles is the fastest way to make a budget remodel look custom.

    The Bottom Line: Turning Kitchen Renos into Real Equity

    Stop chasing every single trend; focus on high-impact layouts and functional zones that actually make sense to a buyer, because a kitchen that works is a kitchen that sells.

    Always keep a “renovation buffer” in your budget for the inevitable surprises behind the drywall—if you don’t account for the hidden mess, you’re bleeding profit before you even install the backsplash.

    Prioritize quality over quantity by investing in durable, mid-range materials that look high-end but won’t eat your entire margin, ensuring your ROI stays in the green.

    The Heart of the Flip

    A kitchen remodel isn’t just about picking out pretty backsplash tiles; it’s about strategic demolition. You aren’t just fixing a room; you’re re-engineering the house’s ability to command a premium price.

    Gareth Trelawny

    The Bottom Line on Your Kitchen Strategy

    The Bottom Line on Your Kitchen Strategy.

    At the end of the day, a successful kitchen remodel isn’t about picking the flashiest backsplash or the most expensive marble slab; it’s about strategic execution. We’ve talked about how a smart layout can dictate the flow of a home and how keeping a tight grip on your budget prevents a renovation from turning into a financial sinkhole. Remember, every dollar you spend needs to be an investment in future equity, not just a personal preference. If you prioritize functional design and manage your costs with a disciplined eye, you aren’t just fixing a room—you are actively building a more valuable asset.

    I know it can feel overwhelming when you’re staring at outdated cabinetry and a floor plan that makes no sense, but don’t let the mess intimidate you. Every gutted kitchen I’ve walked into started as a headache, but they all ended as the primary driver of a property’s appreciation. Real estate isn’t about finding perfection; it’s about finding potential where others see chaos. Grab your laser measurer, stay focused on your ROI, and start turning those crumbling walls into the foundation of your wealth. You’ve got this.

    Frequently Asked Questions

    How do I decide between a full gut renovation and just updating the surfaces to keep my margins high?

    Look, I’ve been on both sides of this, and the answer always comes down to the bones. If the layout is functional and the plumbing is sound, don’t touch the studs—just swap the hardware, paint the cabinets, and slap in new quartz. That’s how you protect your margins. But if you’re staring at a cramped, 1970s galley that kills the flow, you have to gut it. You can’t build equity on a bad floor plan.

    Which specific high-end finishes are actually worth the investment, and which ones are just wasted money in a flip?

    Look, I’ve seen too many investors blow their margins on things buyers only look at for five seconds. Skip the gold-plated faucets and custom-carved cabinetry; they’re vanity projects that won’t move the needle. Instead, sink your capital into high-quality quartz countertops and solid hardware. People touch handles and lean on counters every single day. If it feels substantial and looks clean, it builds value. If it’s just “flashy,” it’s just wasted equity.

    How can I spot potential plumbing or electrical nightmares behind the cabinets before I commit to a layout change?

    Before you tear those cabinets off the wall, do a little detective work. First, check the age of your electrical panel; if it’s a rusted-out relic, a layout change means a massive rewire. Next, look for signs of moisture or “mystery” stains on the subfloor. If you can, use a thermal camera or a simple moisture meter to peek behind the backsplash. Don’t guess—if the plumbing stack is buried deep in a load-bearing wall, your “simple” relocation just became a budget killer.

  • Tips for Painting Interior Walls

    Tips for Painting Interior Walls

    I was standing in the middle of a gutted Victorian fixer-upper last Tuesday, staring at walls that looked more like sandpaper than living space, when I realized something: most people treat interior painting like a weekend hobby rather than a strategic investment. I’ve seen too many novice flippers waste hundreds of dollars on high-end designer pigments only to realize they didn’t bother to prep the drywall properly, leaving them with a streaky, amateur finish that actually kills their resale value. In this business, a brush isn’t just a tool; it’s how you mask a property’s scars and start building that solid equity we’re all after.

    Forget the fluff and the overly complicated color theory you’ll find in glossy magazines. I’m going to show you the gritty, practical reality of how to execute a professional-grade job without hiring a crew. We’re going to dive into the essential prep work that prevents future headaches, how to select finishes that actually withstand the test of time, and the exact workflow I use on my own job sites to maximize impact while minimizing cost. Let’s get to work.

    Table of Contents

    Guide Overview

    Total Time: 1-2 days
    Estimated Cost: $100-250
    Difficulty: Beginner

    Tools & Supplies

    • Paint brushes for cutting in edges
    • Paint rollers for large surfaces
    • Paint tray for holding paint
    • Painter's tape for protecting trim
    • Drop cloths to protect flooring
    • Interior paint (1-2 gallons per room)
    • Painter's tape (1-2 rolls)
    • Sandpaper (medium grit for smoothing)
    • Spackle (small tub for patching holes)
    • Primer (1 gallon if changing colors significantly)

    Step-by-Step Instructions

    • 1. First, you have to clear the deck. I’ve learned the hard way that trying to paint around a heavy oak sideboard is a recipe for a massive headache. Move as much furniture as possible to the center of the room and cover it with heavy-duty drop cloths—not those thin plastic sheets that tear if you even look at them wrong. Clear the walls of every single nail, screw, and stray piece of art. If you leave even one small imperfection, it’ll catch the light once you finish and make the whole job look amateurish.
    • 2. Next, get your hands dirty with some prep work. This is the part most flippers try to skip to save time, but if you want that equity to stick, you can’t skip it. Grab a sanding sponge and smooth out any rough patches or old, peeling paint. Once the surface is level, use a damp cloth to wipe away the dust. If you paint directly over dust, your finish will look gritty and unprofessional, and I promise you, buyers will notice.
    • 3. Now, it’s time to tackle the “cutting in” phase. Before you even think about touching a roller to a wall, you need to use a high-quality angled brush to paint the edges, corners, and around trim where a roller can’t reach. I always keep my laser measurer handy just to double-check room dimensions, but for this step, you just need a steady hand. Work in small sections so the “wet edge” stays consistent; you don’t want visible lines where the brushwork meets the rolled paint.
    • 4. Once your edges are set, grab your roller and start working the main surface area. I prefer using a medium-nap roller for most standard drywall—it gives you the best balance of coverage and texture. Work in a “W” or “M” pattern to distribute the paint evenly, then fill in the gaps. Don’t try to do it all in one thick, gloopy layer. It’s much better to do two thin, even coats than one heavy layer that ends up dripping and looking uneven.
    • 5. Don’t forget the trim and baseboards. This is where a house starts to feel “high-end” versus “cheaply flipped.” Use a dedicated trim paint—usually a semi-gloss or satin—to provide a nice contrast against your wall color. This adds a layer of visual depth that makes the room feel intentional. Just like with the walls, make sure your prep work here is flawless; any drips on the floor or uneven edges on the molding will kill the professional vibe you’re aiming for.
    • 6. Finally, the hardest part: the waiting game. I know you want to move the furniture back in and get the next contractor on-site, but you have to let the paint fully cure. If you rush this and start slamming doors or dragging heavy items against the walls too soon, you’re going to scuff the finish and end up right back where you started. Give it at least 24 to 48 hours depending on the humidity before you start treating the room like a lived-in space.

    Mastering Surface Preparation Techniques for Lasting Value

    Mastering Surface Preparation Techniques for Lasting Value

    Look, I’ve seen it a hundred times: a rookie investor rushes straight to the color swatch, only to realize two weeks later that the finish is peeling because they skipped the prep work. If you want your flip to look high-end rather than “cheaply renovated,” you cannot cut corners here. Mastering proper surface preparation techniques is the difference between a professional-grade finish and a DIY disaster that loses you money. I always tell my clients to spend 70% of their time on the prep—sanding down imperfections, patching those inevitable drywall cracks, and ensuring the surface is bone-dry and dust-free.

    Once the walls are actually ready, don’t just grab the first brush you see at the hardware store. Your interior paint tools dictate the final texture of the room. If you’re working on a large, open-concept living area, your paint roller selection is vital; a high-quality microfiber nap will prevent those annoying stipple patterns that scream “budget job.” Also, keep a close eye on your lighting. I always check my work with a high-lumen work light to ensure there are no streaks or uneven patches before the sheen dries.

    Choosing Wall Paint Finishes That Command Higher Rents

    Choosing Wall Paint Finishes That Command Higher Rents

    When you’re prepping a rental or a flip, you have to stop thinking about what looks pretty in a showroom and start thinking about durability. If you choose a flat finish in a high-traffic hallway, you’re going to be back there with a touch-up brush in six months because every scuff mark will scream for attention. I always lean toward eggshell or satin finishes for living areas and bedrooms. They offer enough of a subtle sheen to feel high-end, but they’re scrubbable enough to handle the inevitable wear and tear of daily life without looking like a disaster.

    Don’t forget that room lighting and color play a massive role in how these finishes actually perform once the job is done. A deep navy in a matte finish can look sophisticated in a sun-drenched study, but in a dark basement, it’ll just make the space feel like a cave. I’ve seen too many investors blow their margins by picking colors that look great on a swatch but turn muddy under LED bulbs. Aim for neutral, versatile tones that make the rooms feel larger and more inviting; that’s how you maximize your ROI and attract the right tenants.

    Five Pro Moves to Protect Your ROI While You Paint

    • Stick to a neutral, sophisticated palette; I’ve seen too many rookies try to get “creative” with bold accent walls that actually shrink the buyer’s imagination and kill the vibe.
    • Don’t skimp on the primer, especially when you’re working over dark colors or patched drywall, because a cheap base job will make your expensive topcoat look patchy and amateur.
    • Focus your budget on high-traffic areas like hallways and kitchens by using durable, washable paints, while you can get away with more matte finishes in the bedrooms.
    • Always test your color swatches under both natural daylight and your evening artificial lighting; a shade that looks like a perfect greige in the store might look like a depressing hospital ward once it’s on all four walls.
    • Invest in high-quality brushes and rollers instead of the bargain bin stuff, because nothing ruins a professional finish faster than shedding bristles and uneven texture left behind by cheap tools.

    The Bottom Line: Painting for Profit

    Never cut corners on prep work; a cheap paint job that peels in six months is a liability, not an asset, and it’ll kill your margins faster than you can fix it.

    Stick to high-durability, mid-sheen finishes like eggshell or satin to ensure the space looks polished while standing up to the wear and tear of future tenants.

    Treat paint as a strategic tool for equity, not just a cosmetic fix—use it to brighten dark corners and mask imperfections that would otherwise tank your appraisal.

    ## The High-ROI Secret

    “Stop looking at paint as just a color choice; in this business, it’s a strategic tool. A well-executed paint job isn’t just about aesthetics—it’s about masking the years of neglect and signaling to a buyer that this property is a clean slate ready for equity.”

    Gareth Trelawny

    The Bottom Line on Paint and Profit

    The Bottom Line on Paint and Profit.

    At the end of the day, interior painting isn’t just about picking a color that looks nice in a showroom; it’s a strategic tool for your renovation toolkit. We’ve covered how meticulous surface preparation prevents costly peeling later on, and how selecting the right finishes can actually protect your investment from the wear and tear of high-traffic rental units. If you skip the prep work or choose a cheap, flat finish in a kitchen, you’re essentially leaving money on the table. Remember, the goal is to create a space that looks high-end but is actually built for durability and long-term value.

    I know that staring at a stack of unprimed drywall can feel overwhelming, especially when you’re trying to balance a tight renovation budget. But don’t let the mess intimidate you. Every gallon of paint you apply is a step toward transforming a neglected property into a high-performing asset. It’s about seeing past the grime and the outdated beige to the true potential hiding underneath. Stop looking at these walls as a chore and start seeing them as the foundation of your equity. Get the rollers ready, stay disciplined with your prep, and let’s get to work.

    Frequently Asked Questions

    How do I decide between painting the trim and baseboards the same color as the walls versus using a contrasting white to maximize resale value?

    If you’re aiming for maximum resale, go with the classic contrasting white. It creates a crisp, clean frame that makes the whole room look polished and intentional. It’s the safe bet for broad appeal. However, if you’re working with a smaller, tighter space, painting the trim the same color as the walls—just in a different sheen—can actually trick the eye into seeing more height and continuity. It’s all about the vibe you’re selling.

    Is it actually worth the extra time and money to use premium paint brands, or can I get away with contractor-grade stuff for a quick flip?

    Look, if you’re doing a quick rental refresh, contractor-grade is fine. But if you’re flipping for a high-end sale? Go premium. Cheap paint is thin, requires three coats to hide imperfections, and looks “flat” under bright lights. I’ve seen too many investors try to save fifty bucks only to realize they’re spending double on labor because the paint won’t cover. Invest in the quality upfront; it saves time and makes the finish look expensive.

    How can I tell if a wall needs a full skim coat versus just a simple patch job to avoid seeing imperfections under the new color?

    Here’s the litmus test: grab your laser measurer—or just a flashlight—and shine it across the wall at an angle. If you see “shadowing” or undulations that span more than a few inches, a patch won’t cut it. A simple patch only fixes a hole; it won’t fix a wavy wall. If the surface feels like a topographical map, you need a full skim coat. Don’t cheap out here; nothing kills a high-end finish faster than uneven light hitting a bumpy wall.