Blog

  • Finding Your Real Estate Niche

    Finding Your Real Estate Niche

    I remember standing in the middle of a gutted mid-century ranch last November, the smell of damp drywall and old sawdust thick in the air, while a contractor tried to explain why I needed a million-dollar fund to even consider a specific market. It’s the same nonsense I hear everywhere: that you have to play in the big leagues of luxury condos or massive commercial developments to see any real return. People get so caught up in chasing the “prestige” markets that they completely overlook the power of finding a profitable real estate niche that actually fits their budget and skill set. You don’t need to compete with the institutional giants; you just need to find the corner of the market that everyone else is too distracted to see.

    I’m not here to sell you on some overnight wealth fantasy or a complicated spreadsheet that requires a math degree. Instead, I’m going to show you how to identify a specific real estate niche where smart design and strategic rehabs can actually move the needle for your bank account. We’re going to talk about spotting undervalued assets, avoiding the hype, and building a portfolio through tangible, physical equity rather than guesswork.

    Table of Contents

    Mastering the Real Estate Niche Selection Process

    Mastering the Real Estate Niche Selection Process

    Look, the biggest mistake I see new investors make is trying to be everything to everyone. They think if they buy a condo in the city, a ranch in the suburbs, and a fixer-upper in the country, they’re “diversifying.” In reality, they’re just spreading themselves too thin and becoming masters of nothing. To actually build equity, you need to treat the real estate niche selection process like a surgical strike. You aren’t just looking for houses; you’re looking for a specific pattern of problems you know how to solve.

    I found my stride when I stopped chasing every shiny new development and started focusing on mid-century builds that just needed a structural overhaul and some updated electrical. By specializing in real estate markets that cater to a specific demographic—like young professionals looking for that industrial-chic aesthetic—I stopped guessing and started winning. When you narrow your focus, you learn the local contractor rates, the specific material costs, and the exact buyer profile better than anyone else. That’s where the real money is made.

    Hunting Down High Yield Property Niches

    Hunting Down High Yield Property Niches

    Once you’ve nailed down your general strategy, it’s time to stop looking at everything and start looking at the right things. You can’t be everything to everyone if you want to see real returns. I’ve learned that the real money isn’t in the broad, generic markets; it’s in identifying high-yield property niches that others are too intimidated to touch. For me, that meant moving away from the polished suburban cookie-cutters and looking toward aging mid-century builds that just needed a surgical touch and some smart structural updates.

    When you’re specializing in real estate markets, you’re essentially looking for an arbitrage opportunity between a property’s current state and its potential. I don’t care about the house that’s already perfect; I want the one with the dated layout and the cracked foundation that’s sitting in a neighborhood poised for gentrification. By focusing your energy on specific profitable real estate sectors—like distressed multi-family units or fixer-upper bungalows—you develop a specialized eye. You start to see the equity hidden behind peeling wallpaper and outdated electrical, which is exactly where the wealth is built.

    Don't Chase Every Trend: How to Actually Pinpoint Your Niche

    • Stop trying to be a jack-of-all-trades. If you try to flip luxury condos, manage short-term rentals, and buy commercial warehouses all at once, you’re going to bleed cash. Pick one specific lane—like mid-century fixer-uppers or small multi-family units—and learn it inside out until you can spot a deal before the listing even hits the MLS.
    • Follow the data, not your gut. Your “feeling” about a neighborhood doesn’t pay the mortgage. Look at the actual absorption rates, school district shifts, and local zoning changes. A niche is only profitable if the math supports the hustle.
    • Look for the “ugly” opportunities that others are too lazy to touch. Most investors want the turnkey properties with zero headache. I look for the houses with the outdated layouts and the cracked foundations—the ones that require a specific skill set to fix. That’s where the real equity is hidden.
    • Match your niche to your actual bandwidth. If you don’t have a crew of contractors on speed dial, don’t commit to a niche that requires heavy structural renovation. Your niche should complement your current resources, not drain them.
    • Test the waters before you dive in headfirst. You don’t need to sink your entire life savings into a new asset class immediately. Start with a smaller project within that niche to see if you actually enjoy the day-to-day grind of that specific property type. If you hate the workflow, you’ll never scale.

    The Bottom Line: Turning Strategy into Equity

    Stop trying to be everything to everyone; pick a specific niche, like distressed mid-century homes or small multi-family units, and learn its quirks inside and out.

    Don’t just look at the aesthetic potential—analyze the numbers and the bones of a property to ensure your design choices actually drive ROI rather than just looking pretty.

    Success in this game isn’t about luck or a huge inheritance, it’s about the grit to find the neglected gems and the discipline to execute a renovation that builds real, tangible wealth.

    Finding Your Edge

    Stop trying to be everything to everyone. You aren’t going to build a massive portfolio by chasing every shiny new development; you build it by finding a specific, neglected corner of the market that everyone else is too afraid to touch, and then mastering it.

    Gareth Trelawny

    Choosing Your Lane and Getting to Work

    Choosing Your Lane and Getting to Work.

    At the end of the day, finding your niche isn’t about chasing every shiny new trend you see on social media; it’s about finding the intersection of what you actually understand and where the market is underserved. We’ve talked about the importance of narrowing your focus, whether that’s through high-yield fixer-uppers or specialized rental properties, and how a targeted approach prevents you from spreading your capital too thin. You can’t be an expert in everything, and trying to do so is the fastest way to burn through your budget and your sanity. Success in this game comes down to specialized knowledge and the ability to spot value where others only see a headache. Once you’ve identified your niche, stop looking sideways and start doubling down on your expertise.

    Look, I know the idea of committing to one specific type of property can feel limiting, but that’s exactly where your power lies. When you stop being a generalist and start being a specialist, you stop guessing and start predicting. You’ll start seeing the potential in a cracked foundation or a dated floor plan before anyone else even walks through the front door. Building a portfolio is a marathon of grit, not a sprint of luck. It’s about having the discipline to stay the course even when a renovation gets messy or a deal falls through. Don’t wait for the perfect market to appear; build your own momentum by mastering the niche you’ve chosen and turning those neglected spaces into your personal wealth engine.

    Frequently Asked Questions

    How do I know if a specific niche is actually profitable or if I'm just falling in love with a renovation style that won't scale?

    Look, I’ve been there. You find a stunning mid-century modern layout and suddenly you’re obsessed with sourcing authentic teak furniture. But passion doesn’t pay the mortgage. To see if a niche scales, run the numbers against local comps, not your Pinterest board. If the math only works when you use cheap materials, it’s a hobby, not a business. A profitable niche is driven by market demand and exit margins, not your personal design aesthetic.

    Is it better to master one hyper-specific niche, like mid-century modern fixer-uppers, or should I keep my options open to whatever property comes my way?

    Look, I get the temptation to chase every lead, but “opportunistic” is often just a fancy word for “unfocused.” If you try to be everything to everyone, you’ll end up spread thin and outbid by specialists. I lean toward hyper-specific niches—like mid-century moderns—because once you master that specific layout and those unique material costs, your margins tighten up. Master one niche to build your foundation, then scale once you’ve got the cash flow.

    How much capital do I realistically need to set aside to test a new niche without blowing my entire renovation budget?

    Look, don’t go betting your entire life savings on a hunch. I always recommend setting aside a “learning fund” of about 10-15% of your total project capital. This covers the extra headaches—the unexpected plumbing issues or the niche materials that cost more than anticipated. Think of it as an insurance policy for your curiosity. You want enough to pivot if the niche isn’t performing, without stalling your main renovation progress.
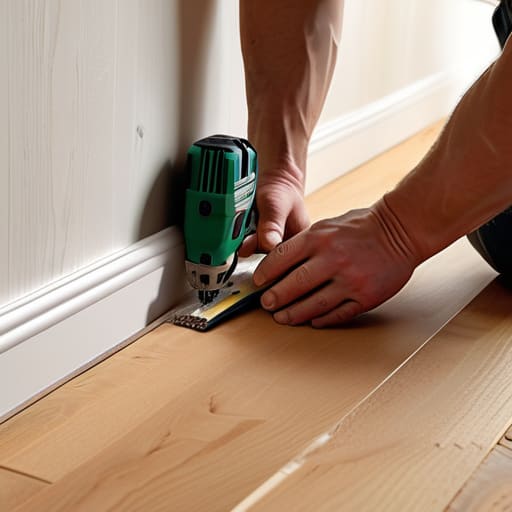

  • Installing Baseboards and Skirting

    Installing Baseboards and Skirting

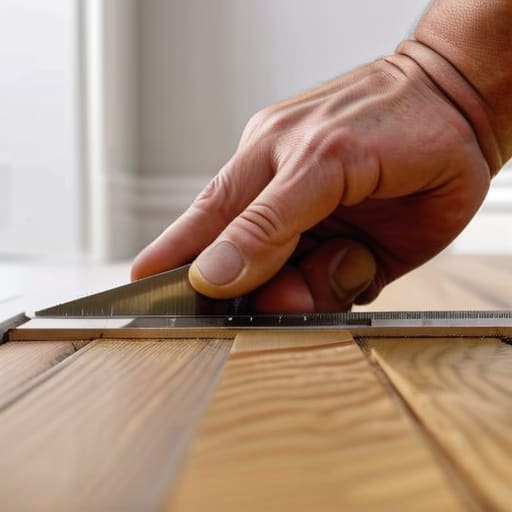
    I was standing in a dusty, half-finished hallway of a Victorian fixer-upper last Tuesday, staring at a gap between a freshly plastered wall and a piece of cheap timber, when it hit me: most people think skirting boards are just a way to hide messy floor edges. That’s a massive mistake. In my experience, a botched skirting board installation is one of the fastest ways to make a high-end renovation look like a budget DIY disaster. You can spend thousands on designer flooring, but if your trim is uneven or poorly fitted, you’re essentially flushing your potential equity down the drain.

    I’ve spent years on job sites learning that the difference between a “flip” and a “flop” lies in these exact finishing details. In this guide, I’m stripping away the fluff to give you the pragmatic, step-by-step process I use on my own investment properties. We’re going to cover everything from choosing the right profile to mastering the cuts, ensuring your skirting board installation adds real, tangible value to your home rather than just covering up a mistake.

    Table of Contents

    Guide Overview

    Total Time: 3-5 hours
    Estimated Cost: $50-$200
    Difficulty: Intermediate

    Tools & Supplies

    • Mitre saw or hand saw for cutting angles
    • Hammer or nail gun for fastening
    • Spirit level to ensure straightness
    • Measuring tape for accurate lengths
    • Skirting boards (length depends on room perimeter)
    • Wood adhesive or construction adhesive
    • Finishing nails or brad nails
    • Wood filler to cover nail holes

    Step-by-Step Instructions

    • 1. Before you even touch a saw, you need to prep your surfaces. I’ve seen too many investors try to hide bad plasterwork under expensive timber, and it’s a waste of money. Use your laser measurer to check for any significant bows in the walls and sand down any major lumps in the plaster. If your walls are wonky, your skirting will follow that line and look amateur.
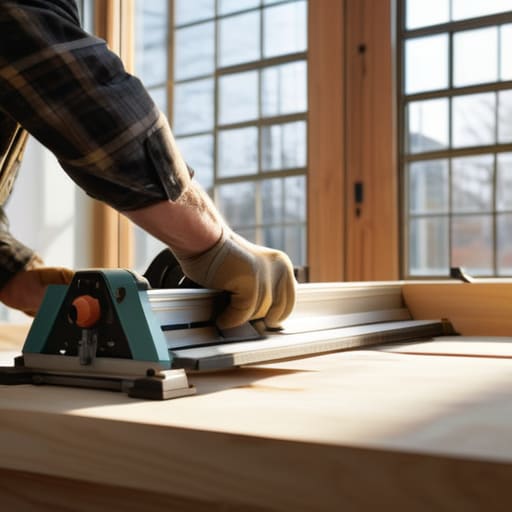
    • 2. Once the walls are smooth, it’s time to measure and cut. Don’t just eyeball it; grab your tape measure and mark out every single run of wall. When you hit a corner, you’re going to need to master the mitre cut. I prefer using a sharp mitre saw for clean, crisp edges, because a jagged corner is a dead giveaway of a DIY job that’s cutting into your resale value.
    • 3. Now, let’s get those boards onto the wall. I usually opt for a high-quality construction adhesive paired with a few headless nails for extra security. Apply the adhesive in a zigzag pattern along the back of the board, then press it firmly against the wall. If you’re working on an older property with uneven walls, you might need to use a rubber mallet to gently tap the board into place without denting the wood.
    • 4. If you’re using nails to secure the boards, make sure you’re hitting the studs or using appropriate wall plugs if you’re dealing with masonry. I always aim to drive the nail heads just slightly below the surface of the wood. This creates a tiny indentation that we can easily hide later, rather than having a protruding nail head that makes sanding an absolute nightmare.
    • 5. Once the boards are physically attached, you need to address the gaps. No matter how precise your cuts are, there will always be tiny hairline cracks where the board meets the wall or the floor. Grab some high-quality decorators’ caulk and run a thin bead along these junctions. Use a damp finger to smooth it out—this is the secret to making the skirting look like it’s part of the architecture rather than just something stuck on top of it.
    • 6. The final step is the most satisfying: filling and sanding. Use a fine-surface wood filler to plug any nail holes or minor imperfections in the timber itself. Once it’s dry, give everything a light sand with a fine-grit sandpaper until the transitions are seamless. If you skip this, your paint job will highlight every single flaw, and nobody wants that when they’re trying to present a polished, high-end finish to a potential buyer.

    Preparing Walls for Trim to Avoid Costly Mistakes

    Preparing Walls for Trim to Avoid Costly Mistakes

    Before you even touch a saw, you need to address the reality of most fixer-uppers: walls are rarely as straight as they look on a blueprint. I’ve seen too many investors rush into a job only to realize their new trim looks like a wavy mess because they ignored the substrate. Preparing walls for trim means more than just a quick wipe-down; it means checking for bowing or uneven plaster that will fight your boards every step of the way. If your walls are significantly out of plumb, you’ll spend more time fighting the material than actually installing it.

    Once the surface is prepped, don’t overlook the transition points. If you aren’t confident with your mitre cutting techniques, you’re going to end up with unsightly gaps at the corners that scream “amateur hour.” Even with a perfect cut, you should always budget time for gap filling and caulking to create that seamless, high-end look that drives up property value. It’s these tiny, meticulous details that separate a quick flip from a professional-grade renovation that actually builds long-term equity.

    The Secret to Miter Saw Corner Joints and Mitre Cutting Techniques

    The Secret to Miter Saw Corner Joints and Mitre Cutting Techniques.

    If you want your renovation to look like a high-end designer did it rather than a DIY weekend warrior, you have to master your angles. I’ve seen so many investors lose money on “cheap” looking finishes because they rushed the corners. When you’re working with mitre cutting techniques, precision is everything. Don’t just trust the markings on your saw; I always double-check my angles with a protractor first. Even a half-degree error might look fine on one wall, but by the time you hit the third corner, that tiny mistake compounds into a massive, ugly gap that no amount of putty can hide.

    The real pro move for seamless miter saw corner joints is to cut slightly “long” rather than too short. It is much easier to shave a hair off a piece of timber with a fine-tooth blade than it is to fix a gap in a corner that’s already nailed in. If you’re dealing with older, wonky walls in a fixer-upper, remember that your angles won’t always be a perfect 90 degrees. You have to adapt to the house, not the other way around.

    Pro Tips to Protect Your Profit Margins and Finish Like a Pro

    • Don’t skimp on the adhesive; I’ve seen too many cheap renovations where the trim starts pulling away from the wall six months later, and nobody wants to deal with a callback or a devalued property.
    • Invest in a high-quality nail gun rather than relying solely on a hammer; it saves your hands and prevents those annoying, unsightly hammer marks that you’ll just end up having to sand out anyway.
    • Always check your floor level before you start; if your subfloor is wonky, you’ll need to scribe the bottom of the skirting to ensure a tight fit, otherwise, you’re just leaving gaps that scream “amateur job.”
    • Use a bit of flexible caulk in the expansion gaps between the trim and the wall; it hides those inevitable little imperfections and makes the entire installation look seamless and high-end.
    • Keep your eye on the scale—if you’re working on a room with high ceilings, don’t try to save a few bucks with flimsy, short skirting boards; go for something with more presence to actually add perceived value to the space.

    Bottom Line: Don't Let the Small Details Drain Your ROI

    Never rush the wall prep; if your plaster is uneven, no amount of expensive trim is going to hide those gaps, and you’ll end up wasting money on caulk and filler just to mask poor workmanship.

    Master your miter cuts before you start nailing anything down, because nothing screams “amateur flip” like visible gaps in your corners that kill the high-end feel of a room.

    Treat skirting boards as more than just decoration—they are a strategic finishing layer that protects your walls and adds that final layer of perceived value that buyers actually notice.

    ## The Equity in the Details

    “You can spend fifty grand on a kitchen remodel, but if your skirting boards are gapped or poorly mitred, you’re essentially telling every potential buyer that you cut corners. In this business, the details aren’t just aesthetics—they’re the difference between a quick sale and a massive headache.”

    Gareth Trelawny

    The Final Polish

    Professional skirting board installation: The Final Polish.

    At the end of the day, successful skirting board installation comes down to the details you can’t see as much as the ones you can. It’s not just about nailing wood to a wall; it’s about the prep work you did to ensure the surface was level, the precision of those mitered corners, and the patience required to get the spacing just right. If you’ve taken the time to prep your walls properly and mastered your saw techniques, you’ve already avoided the most common pitfalls that lead to expensive callbacks or a cheap-looking finish. Remember, those small, technical steps are exactly what separate a DIY disaster from a professional-grade renovation that holds its value.

    I know that staring at a pile of trim and a messy job site can feel overwhelming when you’re in the thick of it, but don’t lose sight of why you’re doing this. Every perfectly fitted piece of molding is a step closer to turning a neglected space into a high-value asset. Real estate investing isn’t always glamorous, and it definitely isn’t easy, but there is nothing quite like the feeling of seeing a room transform because you had the grit to do it right. Keep pushing through the messy parts; that’s exactly where the real equity is built.

    Frequently Asked Questions

    Should I use construction adhesive or just nails to secure the boards to my walls?

    If you want a finish that actually lasts, don’t choose one or the other—use both. I always recommend a “hybrid” approach. Apply a bead of high-quality construction adhesive to the back of the board to prevent it from ever pulling away, then use a nail gun to tack it in place while the glue sets. The nails act as your temporary clamps, while the adhesive provides the long-term bond that protects your equity.

    How do I deal with uneven floors so my skirting doesn't have those annoying gaps at the bottom?

    Look, uneven floors are the bane of every renovation, but they don’t have to ruin your margins. If the gap is minor, a bead of color-matched caulk is your best friend. If it’s a disaster, don’t fight it—scribe the bottom of the board. Trace the floor’s contour onto your trim and cut along that line. It takes more time, but it’s the only way to ensure a seamless, high-end finish.

    Is it better to install the skirting before or after I've finished painting the walls?

    Look, if you want to save your sanity and your margins, paint the walls first. I’ve seen too many renovators struggle to get a clean line between a fresh coat of paint and newly installed trim. It’s a nightmare of masking tape and wasted time. Get your walls finished, then nail in the skirting. It makes the final touch-up much easier and ensures you aren’t fighting a losing battle against messy edges.

  • Adding Decorative Trim to Doors

    Adding Decorative Trim to Doors

    I was standing in a dusty hallway of a 1970s ranch-style fixer-upper last Tuesday, staring at a gap between the casing and the drywall that looked wide enough to swallow my laser measurer. Most people think door trim installation is just about slapping some wood against a wall and calling it a day, but if you leave those uneven gaps, you’re basically throwing money away on a finish that looks amateur at best. I’ve seen too many investors try to cut corners here, only to have a picky buyer point out every single sloppy miter joint during the walkthrough.

    I’m not here to give you some theoretical lecture from a textbook; I’m here to show you how to get it right the first time so you can move on to the next task. In this guide, I’m breaking down the exact process I use to ensure every piece of trim sits flush and looks intentional. We’ll cover everything from prepping your surfaces to mastering those tricky corner cuts, giving you the tools to turn a cheap cosmetic fix into a high-end detail that actually builds your equity.

    Table of Contents

    Guide Overview

    Total Time: 2-4 hours
    Estimated Cost: $40-120
    Difficulty: Beginner

    Tools & Supplies

    • Miter saw for precise angled cuts
    • Brad nailer for securing trim to wall
    • Tape measure for accurate sizing
    • Caulk gun for filling gaps
    • Door casing/trim pieces based on door size
    • Finish nails or brad nails
    • Wood filler or caulk
    • Wood stain or paint

    Step-by-Step Instructions

    • 1. Before you even touch a piece of wood, you need to prep the opening. I’ve seen too many rookies try to slap trim over wonky, uneven drywall, and it’s a recipe for a headache. Grab your laser measurer and check the door jambs for level; if they’re leaning, you might need to shim them first. Once the opening is solid, clean out any debris or old, crumbling caulk from the gap between the jamb and the wall so your new trim sits flush.
    • 2. Measure twice, cut once—it’s a cliché for a reason. Lay your trim pieces out on the floor to visualize how the miters will meet at the corners. When you’re ready to cut, use a miter saw to create your 45-degree angles for the top corners. I always tell my clients to aim for a tight fit; if there’s even a tiny gap, you’re going to spend way too much time trying to hide it with caulk later.
    • 3. Now, it’s time to actually mount the pieces. Start with the side casings, working your way up from the floor. I prefer using a brad nailer to secure the trim to the wall studs or the door jamb itself. Make sure you aren’t just nailing into thin drywall, or that trim is going to pop right off the second someone bumps into it. You want those nails driven deep enough to be flush, but not so deep that they blow out the wood grain.
    • 4. Once the sides are up, tackle the top piece. This is where most people lose their patience, but it’s the most visible part of the job. Align your top piece so it meets the side casings perfectly. If you’re working with a single header, you’ll be mitering those top corners just like you did with the sides. I find that staying organized with my cut list keeps me from making expensive mistakes on higher-end materials.
    • 5. After everything is nailed down, take a close look at the joints. If your miters aren’t perfectly seamless, don’t panic—that’s what wood filler is for. Apply a small amount of filler to the gaps and sand it down once it’s dry until it’s completely smooth to the touch. If you skip this, the light hitting the trim in a renovated house will show every single imperfection, and that’s not the look we’re going for.
    • 6. The final touch that separates a DIY job from a professional renovation is the caulking. Run a thin, steady bead of paintable caulk along the edge where the trim meets the wall. This hides any tiny gaps and gives the whole thing that seamless, high-end finish that buyers crave. Wipe away the excess with a damp finger immediately; you don’t want to be scrubbing dried caulk off your beautiful new trim tomorrow.

    Essential Wood Trim Installation Tools for the Savvy Investor

    Essential Wood Trim Installation Tools for the Savvy Investor

    Look, I’ve learned the hard way that you can’t cut corners when it comes to your kit. If you show up to a job site with a cheap, jittery saw, you’re going to spend more time sanding out mistakes than actually building equity. For me, the holy grail is a high-quality compound miter saw. Getting your miter saw settings for trim dialed in is the difference between a seamless corner and a gap that screams “amateur hour.” I always keep a digital level in my bag alongside my laser measurer; if your door frame isn’t plumb, no amount of fancy wood is going to save the look.

    Beyond the heavy lifting, don’t overlook the small stuff that makes a renovation look high-end. I never head to a property without a high-quality finish nailer and a reliable caulk gun. Mastering applying caulk to door trim is honestly my favorite “secret weapon”—it hides those tiny, inevitable gaps and gives the whole installation that polished, custom-built feel. It’s these small, tactical moves that turn a basic flip into a premium asset.

    Mastering Miter Saw Settings for Trim and Perfect Corners

    Mastering Miter Saw Settings for Trim and Perfect Corners

    Listen, I’ve seen too many investors lose their margins because they rushed the finish work. You can have the most expensive materials in the world, but if your corners look like a jagged mess, the buyer will smell the lack of quality from a mile away. When you’re dialing in your miter saw settings for trim, don’t just trust the notches on the scale. I always take a scrap piece of the exact same profile first. Even a hair’s breadth of error at the saw translates to a massive, ugly gap once you’re actually performing your door casing installation steps.

    If you find yourself staring at a corner that won’t quite close, don’t panic and don’t reach for the hammer. Precision is about adjustment, not force. I prefer to cut my miters slightly “long”—meaning a fraction of a degree past the 45—to ensure a tight, seamless fit. A tight joint means you spend less time applying caulk to door trim and more time moving on to the next room. Remember, in this business, the difference between a “flip” and a “premium renovation” is found in the tightness of your corners.

    Pro Moves to Save Your Margins and Your Sanity

    • Stop eyeballing your gaps. I’ve seen too many rookies try to hide massive gaps with a mountain of caulk, but it looks cheap and it’ll crack in six months. Use a little bit of wood filler for tiny imperfections, but if the gap is huge, you messed up the cut. Do it right the first time so you aren’t spending your profit on remedial repairs.
    • Always test your miter saw on a scrap piece of the exact same trim before you touch the actual door. Lighting and wood grain can play tricks on your eyes, and there is nothing more frustrating than wasting a full stick of expensive primed MDF because your angle was off by a fraction of a degree.
    • Don’t skip the pre-drilling. If you’re working with harder woods or even some dense composites, driving a nail straight in can split the trim right at the corner. A quick pilot hole keeps the wood intact and prevents those ugly cracks that scream “amateur renovation” to any potential buyer.
    • Use a nail gun, but don’t go overboard with the pressure. I always check my compressor settings before I start a new room. If you’re driving nails too deep, you’ll blow out the surface of the trim, and then you’re stuck sanding and patching instead of moving on to the next asset.
    • Think about the floor before you nail anything down. If you’re installing new trim in a house where the subfloor is uneven, your trim might not sit flush against the baseboard or the floor. Take a second to check your levels; it’s much easier to shim a piece of wood now than to explain a crooked doorway during a final walkthrough.

    The Bottom Line: Why Trim Matters for Your ROI

    Stop viewing trim as just a finishing touch; it’s the visual glue that makes a renovation look intentional rather than cheap, and that’s what drives your final sale price.

    Invest in the right miter saw precision now so you aren’t wasting expensive materials on botched corners that scream “amateur” to a potential buyer.

    Focus on the tightest joints possible, because in the world of flipping, those small, clean details are exactly what turn a “fixer-upper” into a high-value asset.

    ## The Equity is in the Edges

    Most people walk right past a doorway without a second thought, but I see it differently: every perfectly mitered corner and seamless piece of trim is a tiny, calculated deposit into your project’s final profit margin.

    Gareth Trelawny

    The Finish Line is Where the Profit Lives

    The Finish Line is Where the Profit Lives.

    At the end of the day, nailing down door trim isn’t just about closing up gaps in a wall; it’s about the precision that separates a amateur DIY job from a professional-grade renovation. You’ve gone through the grind of selecting the right tools, dialing in your miter saw settings, and handling the actual installation. If you’ve done the work correctly, you’ve eliminated those sloppy, uneven lines that scream “cheap flip” to a potential buyer. Remember, it’s the small, technical details like a tight miter joint or a perfectly flush baseboard that signal to an inspector or an appraiser that this property has been maintained with care. Don’t rush the final nail; precision is your best friend when it comes to protecting your margins.

    I know there are moments mid-renovation when you’re covered in sawdust and wondering if the headache is worth the payout. Trust me, I’ve been there, standing in a gutted hallway feeling completely overwhelmed. But once that trim is up and the paint is dry, you’ll see the transformation instantly. You aren’t just fixing a house; you are building tangible wealth one room at a time. Every clean corner and seamless transition is a brick in the foundation of your future portfolio. Keep your eyes on the equity, keep your measurements sharp, and don’t stop until the job is done right.

    Frequently Asked Questions

    How do I handle gaps in the corners if my miter cuts aren't perfectly seamless?

    Look, even with a high-end miter saw, those tiny gaps happen. Don’t panic and don’t rip the trim off. If it’s a hairline crack, a bit of wood filler and some sanding will do the trick. If the gap is wider, grab some caulk. Just remember: caulk is your best friend for painted trim, but if you’re working with stained wood, you’ll need a wood putty that matches the tone perfectly. Keep it clean.

    Is it worth spending the extra cash on primed trim, or should I just buy raw wood and save the margin?

    Look, if you’re chasing every cent of margin, I get it. But in my experience, buying raw wood is a trap that eats your time—and time is money. Primed trim is a massive shortcut; it’s smoother, more consistent, and ready for paint immediately. Unless you’re doing high-end custom millwork where you need to stain the wood, just buy the primed stuff. Save your energy for the big structural wins and let the pre-primed boards do the heavy lifting.

    When should I stop worrying about the trim and move on to the next room to keep my renovation timeline on track?

    Look, I get the urge to chase perfection, but don’t let a single stubborn corner stall your entire ROI. If you’re spending hours sanding a single joint, you’re losing money. Once the trim is structurally sound, the miters are tight enough to pass a visual inspection, and you’ve prepped for paint, move on. Perfection is the enemy of a profitable flip. Get the basics solid in this room and get your momentum back elsewhere.

  • The Art of Property Refurbishing

    The Art of Property Refurbishing

    I still remember the smell of damp drywall and old sawdust from my first solo project—a tiny, gutted bungalow that most people wouldn’t have looked at twice. While the “experts” on social media were busy posting polished, high-budget transformations with professional lighting, I was standing in a dusty hallway, clutching my laser measurer and wondering if I’d made a massive mistake. But that’s the thing about property refurbishing; the real money isn’t made in the glossy finished product you see on a screen, it’s found in the gritty, unglamorous middle where most people lose their nerve.

    I’m not here to sell you a dream of effortless wealth or some magical “hacks” that only work if you have a million-dollar budget. I’m here to give you the actual, unvarnished blueprint for turning a wreck into a high-yield asset. We’re going to talk about how to spot structural potential, how to manage contractors without losing your mind, and how to prioritize the upgrades that actually drive equity. If you’re ready to stop chasing the hype and start building real, tangible wealth, then let’s get to work.

    Table of Contents

    Spotting Hidden Value Through Modernizing Old Properties

    Spotting Hidden Value Through Modernizing Old Properties

    When I walk into a house that hasn’t been touched since 1974, I don’t see the avocado-green appliances or the wood-paneled walls as a headache. I see them as a goldmine. Most buyers see a dated kitchen and run; I see an opportunity for massive property value appreciation. The trick to modernizing old properties isn’t about stripping everything to the studs, though. It’s about identifying those specific, high-impact changes—like opening up a cramped floor plan or updating dated lighting—that fundamentally change how a space feels.

    However, you have to be smart about where your capital goes. I always tell my clients to distinguish between structural vs cosmetic upgrades before they even pick up a sledgehammer. Replacing a roof is necessary, but it won’t wow a buyer. If you want to see a real jump in your renovation ROI for investors, you focus on the “lifestyle” elements: a sleek, functional kitchen or a primary suite that feels like a sanctuary. It’s about finding that sweet spot where your spending directly translates into tangible equity.

    Mastering Your Initial Refurbishment Cost Estimation

    Mastering Your Initial Refurbishment Cost Estimation.

    Look, I’ve seen too many ambitious investors sink their entire capital into a project because they underestimated the “unknowns.” A spreadsheet is a great start, but a theoretical refurbishment cost estimation is worthless if it doesn’t account for what’s hiding behind the drywall. Before you even pick up a sledgehammer, you need to distinguish between structural vs cosmetic upgrades. I always tell my clients: a designer kitchen is a luxury, but a failing foundation is a dealbreaker. If your budget is swallowed by structural repairs, you won’t have a dime left to actually make the property sellable.

    To maximize your renovation ROI for investors, you have to be ruthless with your math. I carry my laser measurer everywhere for a reason—precision prevents expensive mistakes. Don’t just guess the square footage of new flooring; measure it twice and then add a 15% contingency buffer for waste and unexpected hiccups. In this game, your profit isn’t made when you sell; it’s made when you buy and budget correctly. If you can’t control the costs, you can’t control your equity.

    My Non-Negotiable Rules for a Profitable Flip

    • Prioritize the “bones” before the aesthetics. I’ve seen too many investors blow their budget on high-end quartz countertops only to realize the electrical panel is a fire hazard or the foundation is shifting. Fix the structural and mechanical issues first; you can’t style your way out of a bad inspection.
    • Focus on high-impact, low-cost zones. If you’re looking to maximize your ROI, pour your energy into the kitchen and the primary bathroom. These are the rooms that sell houses. A fresh coat of paint, updated hardware, and decent lighting can do more for your equity than a complete structural overhaul in a hallway.
    • Don’t over-spec the finishes. I love mid-century modern furniture as much as the next person, but when I’m refurbishing a rental or a flip, I’m not buying custom designer fixtures. Choose durable, neutral, and high-quality materials that appeal to the widest possible buyer pool without draining your contingency fund.
    • Build a “buffer” into your timeline and budget. In my experience, something always goes wrong once you peel back the wallpaper or lift the floorboards. I always factor in a 15-20% contingency for those “oops” moments. If you don’t account for the mess, the mess will account for your profit.
    • Learn to see the potential, not the disaster. When I walk into a house that smells like damp carpet and old cigarettes, I don’t see a mess—I see an opportunity. You have to train your eye to look past the grime and visualize the layout, the natural light, and the structural possibilities. That’s where the money is made.

    The Bottom Line: Turning Renovations into Returns

    Stop looking at a property’s current state and start looking at its bones; the real profit lies in the gap between what a house is and what it could be with smart, strategic design.

    Never treat your budget like a suggestion; a realistic cost estimation isn’t just about the materials, it’s about accounting for the inevitable surprises that come with old plumbing and uneven floors.

    Focus your capital on high-impact upgrades that drive equity, rather than getting lost in the weeds of expensive, niche aesthetic choices that won’t actually move the needle on the final valuation.

    The Real Value of a Messy Job Site

    “Most people see a cracked foundation or outdated electrical as a reason to walk away, but I see them as the entry price for building real wealth. You aren’t just buying a house; you’re buying the opportunity to manufacture equity with your own two hands.”

    Gareth Trelawny

    Turning Vision Into Value

    Turning Vision Into Value through property refurbishing.

    At the end of the day, successful property refurbishing isn’t about magic; it’s about the discipline to execute a plan. We’ve covered how to look past the dated wallpaper to find the architectural bones that actually matter, and more importantly, how to keep your budget from spiraling out of control during that first chaotic phase of demolition. You have to bridge the gap between seeing the potential and actually managing the math. If you can spot the modernization opportunities and master your initial cost estimations, you aren’t just playing house—you are building a scalable business model that works.

    I know it can feel overwhelming when you’re standing in a dusty living room surrounded by outdated fixtures and cracked floorboards. It’s easy to let the chaos get in your head. But remember, every high-end, polished property you see on a listing started as a mess that someone had the guts to tackle. Don’t wait for the “perfect” market or a massive windfall to get started. Grab your measuring tape, trust your eye, and start looking for those opportunities. The equity is out there, hiding behind those crumbling walls, just waiting for you to unlock it.

    Frequently Asked Questions

    How do I decide which structural repairs are non-negotiable and which cosmetic upgrades are just "nice to haves" for my budget?

    Here’s the rule I live by: if it affects the bones, the roof, or the electrical, it’s non-negotiable. You can’t polish a house that’s sinking or leaking. I’ve seen too many rookies blow their budget on trendy backsplash tiles only to realize they can’t afford to fix a cracked foundation. Prioritize the structural integrity first. Once the house is safe and sound, then—and only then—do we start playing with the “nice-to-haves” like designer hardware.

    What are the biggest red flags I should look for during a walkthrough that could turn a profitable flip into a money pit?

    Look, I’ve seen it happen: a “dream fixer-upper” turns into a financial nightmare in a single afternoon. If you see fresh paint in one specific corner or smell something sweet and cloying, run. That’s often masking mold or water damage. Also, check the foundation for significant cracks and peek at the electrical panel. If it looks like a bird’s nest of outdated wiring, you aren’t just renovating; you’re rebuilding the entire skeleton. Don’t let a pretty kitchen blind you to structural rot.

    How do I manage contractors effectively without letting the renovation timeline spiral out of control?

    Look, I’ve been there—staring at a job site while my timeline evaporates. The secret isn’t micromanaging every nail; it’s about rigid documentation and scheduled checkpoints. Never start a phase without a written scope of work and a firm deadline. I personally insist on a weekly walkthrough every Friday morning. If you aren’t physically standing there with your laser measurer, checking their progress against the plan, you’re just leaving your equity to chance.

  • How Real Estate Wholesaling Works

    How Real Estate Wholesaling Works

    I was standing in a dusty, unheated living room last October, clutching my laser measurer and staring at a floor plan that looked more like a crime scene than a home. The seller was desperate, the roof was sagging, and the air smelled like damp drywall and regret. Most people would have walked away, but I knew that’s exactly where the profit was hiding. That’s the reality of working with real estate wholesalers; they aren’t some magic button for instant wealth, and they certainly aren’t the “get rich quick” gurus you see hawking courses on Instagram. In my experience, they are simply the connective tissue between a distressed property and the person with the capital to fix it.

    I’m not here to feed you a polished, corporate sales pitch about how easy this industry is. Instead, I’m going to pull back the curtain on how to actually leverage real estate wholesalers to find deals that build real equity. I’ll show you how to vet them, how to spot a legitimate contract, and how to ensure you aren’t just buying someone else’s headache. No fluff, no hype—just the raw mechanics of turning a lead into a profitable asset.

    Table of Contents

    Mastering the Art of Finding Off Market Properties

    Mastering the Art of Finding Off Market Properties

    If you’re waiting for a shiny listing to pop up on the MLS, you’ve already lost the race. The real profit is hidden in the houses that aren’t even on the market yet—the ones with overgrown lawns, peeling paint, or a “for sale by owner” sign that’s seen better days. To me, finding off-market properties isn’t about luck; it’s about being proactive and getting your boots on the ground. I spend a lot of my time driving through neighborhoods I know are undervalued, looking for those specific indicators of distress that most people just drive right past.

    Once you find a lead, you have to move fast and be smart about how you secure it. It’s not just about making an offer; it’s about understanding the mechanics of the deal. I’ve learned that mastering different assignment of contract strategies is what separates the amateurs from the pros. You need to know exactly how to lock up a property with minimal personal risk while leaving enough room to pass that deal to a hungry investor. It’s a high-stakes game of chess, but that’s where the real equity is built.

    High Impact Wholesale Real Estate Marketing Strategies

    High Impact Wholesale Real Estate Marketing Strategies

    If you’re waiting for a lead to fall into your lap while you sip coffee, you’ve already lost the deal. Effective wholesale real estate marketing isn’t about being the loudest person in the room; it’s about being the most consistent. I’ve learned that direct mail still holds weight, but if you want to scale, you have to get digital. Targeted social media ads and highly specific SEO can put you right in front of a tired landlord who’s ready to offload a property before it becomes a money pit. You need to show up where the distress is happening.

    Once you’ve actually captured someone’s attention, your strategy shifts from hunting to nurturing. I don’t just blast out generic messages; I focus on building a database of motivated sellers. This is where you refine your assignment of contract strategies to ensure that once you find that diamond in the rough, you have a seamless way to move it to an end buyer. Whether you are leveraging cold calling or running hyper-local mailers, the goal is the same: building a predictable pipeline so you aren’t constantly scrambling for your next paycheck.

    The Wholesaler’s Toolkit: 5 Ways to Stop Guessing and Start Closing

    • Stop chasing every lead like a frantic amateur; focus on building a deep, localized list of motivated sellers. I’ve learned that a single, high-quality relationship with a local probate attorney or a tired landlord is worth more than a thousand cold calls to random numbers.
    • Master the math before you ever step foot on a property. You aren’t just looking at paint colors; you’re looking at the spread. If you can’t calculate the After Repair Value (ARV) and subtract a realistic renovation budget in your head, you’re going to leave money on the table—or worse, lose it.
    • Develop a “boots on the ground” mentality. You can’t wholesale effectively from a laptop in a coffee shop. You need to be driving the neighborhoods, spotting the overgrown lawns and the boarded-up windows that signal a distressed owner before the listing even hits the MLS.
    • Treat your buyers list like your most valuable asset. A wholesaler is only as good as the cash buyers they can call on a Tuesday afternoon. I make it a point to vet my buyers early—know their preferred zip codes, their budget constraints, and exactly what kind of projects they actually want to touch.
    • Learn to communicate the “why” to your sellers. Most people in a distressed situation are overwhelmed and defensive. If you can approach them with a pragmatic, problem-solving attitude rather than a high-pressure sales pitch, you’ll find that the best deals come from conversations, not transactions.

    The Bottom Line on Wholesale Success

    Don’t wait for the perfect listing to hit the MLS; the real money is made in the dirt, finding the off-market deals that others are too intimidated to touch.

    Marketing isn’t just about throwing money at ads; it’s about building a consistent presence so that when a homeowner is ready to offload a headache, your name is the first one they call.

    Success in this game requires a thick skin and a sharp eye—you have to be able to look past the peeling wallpaper and see the raw equity waiting to be unlocked.

    The Reality of the Deal

    Wholesaling isn’t about playing with paper; it’s about being the bridge between a property that’s dying and an investor who has the vision to bring it back to life.

    Gareth Trelawny

    Cutting Through the Noise

    Cutting Through the Noise in real estate.

    At the end of the day, wholesaling isn’t some magic trick or a way to get rich without lifting a finger. It’s about the grind—finding those off-market gems, mastering your marketing so you aren’t just shouting into the void, and building the kind of relationships that actually yield results. Whether you’re cold-calling distressed homeowners or refining your direct mail campaigns, the goal remains the same: connecting the right opportunity with the right investor. If you can bridge that gap efficiently, you aren’t just a middleman; you are the engine that keeps the local real estate market moving.

    Look, I know the learning curve feels steep, and there will be days when a deal falls through at the eleventh hour and you want to throw your laser measurer across the room. But remember that every expert in this game started exactly where you are—standing in front of a pile of rubble, trying to see the equity hidden underneath. Don’t wait for the perfect market or a massive bankroll to take your first step. Stop overthinking the spreadsheets and start hunting for potential. The equity is out there; you just have to be the one with the grit to go claim it.

    Frequently Asked Questions

    How do I actually vet a wholesaler to make sure they aren't just wasting my time with bad deals?

    Don’t just take their word for it—ask for the receipts. A solid wholesaler should be able to walk you through their math immediately. I always ask for the comps they used and the actual repair estimates. If they can’t explain why a deal makes sense or if the numbers feel “fuzzy,” walk away. You aren’t looking for a salesperson; you’re looking for a partner who respects your capital as much as their own.

    Is it better to focus on high-volume wholesale markets or stick to smaller, niche neighborhoods where I can actually build relationships?

    Look, if you’re chasing high volume in massive markets, you’re basically running a marathon against a thousand other people. It’s exhausting and thin on margins. I’ve always found more success in smaller, niche neighborhoods. When you focus on a specific pocket, you aren’t just another name on a mailing list; you become a local fixture. Those deep-rooted relationships with tired landlords and local contractors are where the real, consistent equity is hidden.

    At what point does it make more sense to stop wholesaling and start buying these properties myself to hold for long-term equity?

    The pivot point is when your cash reserves can finally absorb a down payment and a renovation budget without breaking you. If you’re tired of chasing thin assignment fees and you’ve built enough capital to weather a few unexpected plumbing disasters, it’s time to stop passing the deal along. When you can see a property and realize the long-term rental yield far outweighs a quick wholesale check, that’s your signal to buy and hold.

  • Building a Durable Outdoor Patio

    Building a Durable Outdoor Patio

    I remember standing in the middle of a muddy, sloping backyard during my first major flip, staring at a patch of dead grass and a cracked, uneven concrete slab that looked like it had been there since the seventies. Most contractors were already trying to upsell me on a massive, multi-tiered stone staircase that would have eaten my entire renovation budget before I even touched the kitchen. They wanted me to believe that a high-end patio installation required a small fortune in premium materials, but I knew better. I didn’t need a monument; I needed a functional, high-ROI outdoor space that would make the property pop in listing photos without draining my capital.

    In this guide, I’m stripping away the fluff and the overpriced designer nonsense. I’m going to walk you through the actual mechanics of a smart patio installation, focusing on how to choose materials that look expensive but are actually budget-friendly and durable. We aren’t just talking about laying down pavers; we are talking about strategic design choices that turn a neglected backyard into a massive equity driver. If you’re ready to stop guessing and start building, let’s get to work.

    Table of Contents

    Smart Outdoor Living Space Design for Maximum Equity

    Smart Outdoor Living Space Design for Maximum Equity

    When you’re looking at a backyard, I don’t want you to just see a place to put a grill; I want you to see an extension of the home’s square footage. The secret to a high-ROI project is cohesive outdoor living space design that feels intentional rather than an afterthought. If you’re torn between a paver vs concrete patio, remember that while concrete is cheaper upfront, high-quality pavers offer that textured, premium look that buyers crave during a walkthrough. I always tell my clients to design in “zones”—a dining area, a lounge spot, and perhaps a fire pit zone—to make the space feel functional and high-end.

    However, don’t let the pretty aesthetics blind you to the technicalities. I’ve seen too many beautiful projects fail because the owner ignored drainage for outdoor patios. If water pools near your foundation, you aren’t building equity; you’re building a lawsuit. Before you start pouring or laying stone, ensure your grading is spot on. A smart layout that manages water flow seamlessly is what separates a DIY disaster from a professional-grade asset.

    Paver vs Concrete Patio Choosing Your Foundation

    Paver vs Concrete Patio Choosing Your Foundation

    When you’re staring down a blank slate in the backyard, the “paver vs concrete patio” debate is usually the first big hurdle. If you’re looking for the absolute lowest entry price, poured concrete is going to win that battle every time. It’s straightforward, fast, and keeps your initial budget lean. However, as someone who looks at every project through the lens of ROI, I see concrete as a bit of a gamble. It’s prone to hairline fractures and can look incredibly dated if you don’t invest in high-end finishes.

    On the flip side, pavers offer a level of flexibility that’s hard to beat. They allow for intricate patterns and much better drainage for outdoor patios, which is a massive deal if you’re dealing with a slope. While the patio cost per square foot is higher upfront due to the labor involved in setting the base, the long-term value is significantly higher. Pavers don’t just look more expensive; they are easier to repair if the ground shifts. You aren’t replacing a whole slab; you’re just swapping out a few stones. For a high-end flip, I’ll take the pavers every single time.

    Stop Wasting Money: 5 Rules for a High-ROI Patio Install

    • Don’t overbuild for your neighborhood. If you’re flipping a modest suburban ranch, a massive, multi-tiered stone masterpiece will never see a return. Stick to high-quality, clean lines that complement the existing footprint rather than trying to outdo the neighbors.
    • Prioritize drainage from day one. I’ve seen too many investors lose their shirt because they built a beautiful patio that essentially turned their backyard into a swimming pool every time it rained. If the grading isn’t perfect, your foundation—and your profit margin—is at risk.
    • Think about the “flow” of the house. A patio shouldn’t feel like an afterthought tacked onto the back of the property; it needs to feel like a natural extension of your indoor living space. If the transition from your sliding glass door to the pavers feels awkward, the design has failed.
    • Invest in the sub-base, not just the surface. It’s tempting to spend your entire budget on high-end natural stone, but if you skimp on the gravel and sand compaction underneath, those expensive pavers will be shifting and uneven within two seasons. You can’t hide a bad foundation with pretty stones.
    • Plan for lighting and power early. If you’re tearing up the ground for a new installation, now is the time to run conduit for low-voltage LED lighting or outdoor outlets. Adding these features later involves more digging and more headaches, both of which eat directly into your renovation budget.

    The Bottom Line on Your Backyard ROI

    Stop treating a patio like a luxury add-on; treat it as a strategic extension of your square footage that justifies a higher asking price.

    Prioritize durability over cheap aesthetics, because a cracked or uneven foundation will eat your profits faster than a bad kitchen remodel.

    Focus on “lifestyle design”—buyers aren’t just buying pavers, they’re buying the vision of hosting summer dinners and relaxing in a curated outdoor room.

    ## Stop Seeing Dirt, Start Seeing ROI

    “A lot of people treat a patio like an afterthought—just some concrete poured in the backyard to hold a grill. But if you’re looking to build real equity, you have to view outdoor living as a seamless extension of your square footage. I don’t just install pavers; I engineer lifestyle spaces that make a buyer fall in love before they even step through the front door.”

    Gareth Trelawny

    Turning Dirt into Dollars

    Turning Dirt into Dollars with patios.

    At the end of the day, a patio installation isn’t just about picking out some pretty stones or leveling out a patch of mud. It’s a strategic move. We’ve looked at how smart design choices can transform a useless backyard into a high-value outdoor living room, and we’ve weighed the long-term durability of pavers against the budget-friendly nature of concrete. Whether you go for the high-end aesthetic of interlocking pavers or the straightforward utility of a poured slab, the goal remains the same: creating a functional asset that justifies a higher asking price. Don’t let the technical details overwhelm you; just ensure that every dollar you sink into that ground is working toward increasing your overall property equity.

    I know that looking at a muddy, uneven backyard can feel like just another headache on an endless renovation to-do list. But I promise you, once that foundation is set and the vision starts coming together, it’s incredibly rewarding. Real estate isn’t about finding perfection; it’s about seeing the value where others see a mess. Stop viewing your outdoor space as a liability and start seeing it as your next big win. Get out there, measure twice, and start building the wealth you deserve, one square foot at a time.

    Frequently Asked Questions

    How much should I actually budget for a patio if I want to avoid cutting into my renovation margins?

    Look, if you’re trying to protect your margins, don’t guess. A safe rule of thumb for a mid-range patio is roughly 10% to 15% of your total outdoor renovation budget. If you’re going high-end with pavers or natural stone, expect to pay more per square foot. I always bake in a 15% contingency buffer for site prep—because once you start digging, you never know what kind of drainage nightmare you’re going to find.

    Is it worth hiring a pro for the base prep, or can I DIY the grading and gravel to save some cash?

    Look, I get the temptation to save a few hundred bucks by DIYing the grading, but here’s the reality: the base is the one thing you can’t fix easily once the pavers are down. If your slope is off by even a fraction, you’re looking at pooling water and a sinking patio within two seasons. If you aren’t confident with a laser level and a plate compactor, hire a pro for the prep. Don’t trade short-term savings for long-term structural headaches.

    When am I going to see a real return on investment—will a high-end patio actually move the needle on my resale price?

    Look, if you’re thinking about dropping fifty grand on imported Italian travertine just because you like the look, you’re going to kill your margins. You won’t see a return on “luxury” for luxury’s sake. But, if you invest in a high-quality, functional space that extends the living area, you’ll see that needle move during the appraisal. It’s about perceived square footage. Make it look like an intentional room, not just a slab of stone.

  • How to Identify Profitable Houses for Flipping

    How to Identify Profitable Houses for Flipping

    I still remember standing in a damp, windowless basement in East London, the smell of mildew so thick I could practically taste it, clutching my laser measurer like a lifeline. Most people would have seen a disaster and walked away, but I saw something else entirely. While the internet is flooded with glossy, unrealistic “get rich quick” schemes, the reality of successful house flipping strategies is usually much grittier and involves a lot more sawdust than social media influencers would ever admit. You don’t win by buying a pristine house and slapping on some grey paint; you win by finding the hidden value in the wreckage that everyone else is too afraid to touch.

    I’m not here to sell you a dream of effortless wealth or a magic formula that requires zero sweat equity. What I am going to give you is a blueprint built on years of actual, hands-on experience in the trenches of renovation. I’ll show you how to identify high-margin projects, manage a budget when the unexpected inevitably happens, and execute design choices that actually drive equity. This is about turning crumbling walls into solid assets, one strategic rehab at a time.

    Table of Contents

    Finding Undervalued Properties Amidst the Rubble

    Finding Undervalued Properties Amidst the Rubble.

    Most people walk past a house with peeling paint and overgrown weeds without a second glance, but that’s exactly where the money is hiding. To me, a cracked foundation or a dated, wood-paneled living room isn’t a deterrent; it’s an opportunity. Finding undervalued properties requires you to look past the surface-level mess and see the bones of the structure. I’ve learned that the best deals aren’t found in glossy brochures, but in the neighborhoods where the houses look like they’ve been forgotten by time.

    You have to train your eyes to calculate the math before you even step foot on the porch. I’m constantly weighing the potential real estate investment ROI against the reality of what it’s going to take to make the space livable. It’s easy to get blinded by a pretty kitchen, but I’m looking for the structural integrity that allows for a high-margin transformation. If you can spot a property where the price reflects neglect rather than actual structural failure, you’ve already won half the battle.

    Navigating Real Estate Financing Options Without a Massive Inheritance

    Let’s get one thing straight: nobody is handing you a blank check to start your first project. When I first started, I thought I needed a mountain of cash sitting in a high-yield savings account, but that’s a myth that keeps most people on the sidelines. In reality, you have to get creative with your real estate financing options. Whether you’re looking at hard money lenders—who are great for speed but come with higher interest rates—or tapping into private money from friends and family, the key is understanding your leverage.

    The most important thing you can do before signing a single loan document is to run the numbers on your fix and flip renovation costs with brutal honesty. I’ve seen too many beginners get blinded by a beautiful mid-century layout and forget to factor in the “oops” fund for when a subfloor turns out to be rotten. You need to know exactly how much capital you need to bridge the gap between the purchase and the sale. If you don’t have a rock-solid exit strategy for house flippers baked into your financing plan, you aren’t investing; you’re just gambling with borrowed money.

    The Real Work: Making the Numbers and the Dirt Work for You

    • Prioritize the “bones” over the aesthetics. I’ve seen too many rookies get distracted by a gorgeous vintage backsplash only to realize the foundation is shifting. Fix the structural, electrical, and plumbing issues first; you can’t build equity on a house that’s literally sinking.
    • Master the art of the strategic cosmetic refresh. You aren’t trying to build your dream home; you’re building someone else’s. Focus on high-impact, low-cost upgrades like fresh neutral paint, updated hardware, and modern lighting that makes a space feel intentional rather than dated.
    • Get a local contractor on speed dial before you even close. A renovation timeline is a living, breathing thing, and delays are the fastest way to bleed your profit margins dry. Having a reliable crew that understands your vision—and your budget—is non-negotiable.
    • Don’t fall in love with the house; fall in love with the math. It’s easy to get emotionally attached to a mid-century gem you found at an auction, but if the After Repair Value (ARV) doesn’t leave you a healthy cushion for mistakes, walk away. The numbers don’t care about your design taste.
    • Always, always carry a contingency fund for the “hidden” disasters. I keep a mental (and literal) buffer for the things you don’t see behind the drywall—mold, outdated wiring, or rot. If you don’t budget for the mess, the mess will eat your profit.

    The Bottom Line: Turning Sweat Equity into Real Wealth

    Stop looking for turnkey perfection; your profit margin lives in the properties that look like a disaster to everyone else but show structural promise to you.

    Master your numbers before you pick up a sledgehammer, because a smart renovation strategy is built on a foundation of realistic financing and tight budget management.

    Success in this game isn’t about having a massive inheritance; it’s about having the grit to manage the mess and the vision to see the equity hiding behind crumbling walls.

    ## The Real Secret to the Flip

    “Everyone wants the turnkey property with the polished granite and the fresh paint, but those margins are already gone. If you want to actually build equity, you have to learn to look past the peeling wallpaper and the cracked foundation to see the bones underneath. The profit isn’t in the finished product; it’s in the grit it takes to get there.”

    Gareth Trelawny

    The Bottom Line

    The Bottom Line for successful house flipping.

    At the end of the day, successful house flipping isn’t about luck or having a deep pocket of family money; it’s about the intersection of strategic foresight and tactical execution. We’ve covered how to hunt for those undervalued gems hiding behind peeling wallpaper and how to navigate the financing maze without needing a massive inheritance to get your foot in the door. Remember, every profitable flip starts with the ability to see past the immediate mess and recognize the structural bones underneath. If you can master the art of finding the right deal and securing the right capital, you’ve already done the hardest part of the job.

    Don’t let the fear of a messy job site or a complicated loan application keep you on the sidelines. Real estate is a game of grit, and the most significant equity is often found in the projects that make other investors turn tail and run. It won’t always be pretty, and there will definitely be days when you’re covered in drywall dust and questioning your life choices, but that is exactly where the wealth is built. Stop waiting for the perfect market or a windfall of cash. Grab your laser measurer, find a wreck with potential, and start turning those crumbling walls into your own personal legacy.

    Frequently Asked Questions

    How do I figure out if a renovation budget is actually realistic before I commit to a property?

    You can’t just eyeball a room and hope for the best. I always pull out my laser measurer, but the real math happens on paper. First, get a detailed scope of work—don’t just say “kitchen remodel,” say “refacing cabinets and installing quartz countertops.” Then, get three hard quotes from contractors. Most importantly? Add a 15% contingency buffer. If the numbers don’t work with that cushion, walk away. A “deal” isn’t a deal if the budget bleeds you dry.

    What are the red flags that tell me a "fixer-upper" is actually a money pit I should walk away from?

    Look, there’s a fine line between a “diamond in the rough” and a total disaster. If I see foundation cracks that look like spiderwebs or a basement that smells like a permanent swamp, I’m out. Watch out for outdated knob-and-tube wiring or a roof that’s more patch than shingles. If the structural bones are shot, you aren’t building equity—you’re just subsidizing a nightmare. Know when to walk away.

    How do I balance high-end design upgrades with the need to keep my rehab costs low enough to protect my profit margins?

    You have to stop thinking about “luxury” and start thinking about “perceived value.” I don’t waste money on custom cabinetry or imported marble; that’s how you bleed a budget dry. Instead, I focus on the high-impact touchpoints: sleek matte black hardware, designer lighting fixtures, and a killer backsplash. Invest in what people touch and see first. If you nail the aesthetic with smart, mid-range choices, the house feels high-end without nuking your margins.

  • Understanding Mortgage Options for Investors

    Understanding Mortgage Options for Investors

    I remember standing in the middle of a gutted mid-century ranch last October, the smell of damp drywall and old sawdust thick in the air, staring at a stack of repair estimates that felt like a personal insult. I had the vision, I had the floor plan, and I had the laser measurer in my hand, but I was staring down the barrel of a massive financing gap. Most people think you need a mountain of liquid cash to play this game, but that’s a total myth designed to keep you on the sidelines. The truth is, finding the right mortgage for investors isn’t about how much you have in the bank right now; it’s about leveraging the right debt to bridge the gap between a wreck and a masterpiece.

    I’m not here to sell you on some “get rich quick” scheme or drown you in banking jargon that doesn’t move the needle. I’m going to give you the straight talk on how to secure the capital you actually need to fund your rehabs without draining your entire life savings. We’re going to look at the real-world mechanics of how I structure my deals, so you can stop dreaming about equity and start building your own portfolio one renovation at a time.

    Table of Contents

    Hard Money Lender vs Bank Choosing Your Battle Partner

    Hard Money Lender vs Bank Choosing Your Battle Partner

    When you’re staring down a property that needs a total gut job, you’re essentially choosing your teammate for the fight. On one side, you have the traditional bank. They’re reliable and offer lower interest rates, but they move with the speed of a glacier. Banks want to see mountains of paperwork, tax returns, and a perfect credit score. If you’re looking into long-term buy and hold investment strategies, a bank might be your best bet once the dust settles, but they aren’t built for the chaos of a renovation.

    On the other side, you have the hard money lender. This is where things get interesting for those of us chasing quick turns. When comparing a hard money lender vs bank, remember that hard money is about the asset, not just your personal debt-to-income ratio. These lenders care about the after-repair value of the house. They can close in days, which is vital when you’re in a bidding war for a distressed property. It’s more expensive, sure, but in this game, speed is often your greatest competitive advantage.

    Fix and Flip Financing Options for the Bold

    Fix and Flip Financing Options for the Bold.

    If you’re looking to move fast, you need to understand that your financing strategy depends entirely on your exit plan. For those of us chasing the quick turnaround, exploring different fix and flip financing options is non-negotiable. If your goal is to gut a kitchen, update the flooring, and sell within six months, you’re likely looking at short-term, asset-based funding. These lenders care more about the After Repair Value (ARV) of the property than your personal tax returns, which is a lifesaver when you’re trying to scale quickly.

    However, not every project is meant to be a quick flip. If you’re pivoting toward buy and hold investment strategies, your approach shifts toward long-term stability. This is where things like DSCR loans for real estate become your best friend. Instead of stressing over your personal debt-to-income ratio, these loans focus on whether the property’s projected rental income can cover the mortgage. It’s a much more pragmatic way to build a portfolio without letting a single bad month of personal finances stall your momentum.

    5 Rules of Thumb Before You Sign on the Dotted Line

    • Don’t mistake a low interest rate for a good deal; always calculate your total cost of capital, including points and origination fees, because those “small” upfront costs can eat your entire profit margin before you even swing a hammer.
    • Get your personal debt-to-income ratio in check before you approach a traditional lender, because even if the property is a goldmine, a bank won’t care if your personal credit profile is a mess.
    • Always secure your renovation budget upfront rather than trying to “wing it” with a standard mortgage; if your lender isn’t offering a dedicated construction draw, you’re going to end up funding the kitchen remodel out of your own pocket.
    • Build a relationship with your lender during the “quiet” months, not just when you’re desperate to close on a property, so they actually know your track record when you find that perfect, high-stakes fixer-upper.
    • Never leverage yourself to the hilt on a single deal; always keep a cash reserve outside of your mortgage to cover those inevitable “surprises”—like finding outdated wiring behind a freshly stripped wall—that will inevitably blow your budget.

    The Bottom Line on Funding Your Flip

    Don’t get paralyzed by the math; pick the financing that matches your project’s speed, whether that’s the stability of a bank or the velocity of hard money.

    Always keep a buffer in your budget because unexpected structural issues are a guarantee, not a possibility, when you’re buying distressed assets.

    Focus on the exit strategy before you even sign the loan—your mortgage is just a tool to help you reach that final equity payout.

    ## The Real Cost of Playing It Safe

    “Don’t let a traditional bank’s rigid checklist scare you off a goldmine; sometimes, the right mortgage isn’t the one with the lowest rate, but the one that actually gives you the breathing room to turn a disaster zone into a masterpiece.”

    Gareth Trelawny

    The Bottom Line on Funding Your Vision

    The Bottom Line on Funding Your Vision

    At the end of the day, securing the right mortgage isn’t about finding the lowest interest rate on a spreadsheet; it’s about finding the right leverage for your specific strategy. Whether you decide to go the traditional route with a bank for long-term stability or lean on a hard money lender to move quickly on a distressed property, you have to match your financing to your renovation timeline. Don’t let the fear of a complex loan process paralyze you. Once you understand the difference between bridge loans, fix-and-flip lines, and standard conventional mortgages, you stop guessing and start strategizing like a professional.

    I know how intimidating it feels when you’re staring at a stack of blueprints and a mountain of debt, but remember that every empire was built one brick at a time. Real estate investing is messy, loud, and occasionally exhausting, but that is exactly why the rewards are so substantial. You aren’t just buying a house; you are buying your future independence. Stop waiting for the “perfect” market or a massive windfall to fall into your lap. Grab your tools, find a property with untapped potential, and start turning those crumbling walls into the solid equity you deserve.

    Frequently Asked Questions

    How much skin in the game do I actually need for a hard money loan versus a traditional bank mortgage?

    Here’s the reality: hard money lenders are looking at the deal, not your bank account. You might only need 10% to 20% down, and sometimes they’ll even cover closing costs if the asset is juicy enough. Banks, however, are going to scrutinize your personal credit and demand a much larger cash cushion—often 20% or more. If you’re tight on liquidity but found a killer property, hard money is your bridge.

    What kind of credit score am I looking at if I want to skip the hard money lenders and go straight to a bank?

    If you’re looking to bypass the high interest rates of hard money and go straight to a traditional bank, you’d better have your credit in order. Most banks aren’t looking for “potential”—they’re looking for stability. You’re generally looking at a score of 720 or higher to get the best terms. If you’re sitting in the 600s, expect a lot of red tape and much higher rates. Get that score up before you knock on their door.

    Are there specific mortgage products that allow me to pull equity out of my current properties to fund the next renovation?

    Absolutely. If you’ve already built up some sweat equity in your current portfolio, you can definitely tap into it. I usually look at HELOCs (Home Equity Lines of Credit) or cash-out refinances. A HELOC is great because it’s flexible—you only draw what you need as the renovation progresses. A cash-out refi gives you a lump sum upfront, which is better if you’re tackling a massive, high-cost gut job. Use that capital wisely.

  • Basic Home Roof Maintenance

    Basic Home Roof Maintenance

    I still remember standing on a ladder in the pouring rain three years ago, staring at a water stain on a ceiling that looked like a Rorschach test. I had just closed on what I thought was a “diamond in the rough,” only to realize the seller had conveniently glossed over the fact that the shingles were basically held together by prayers and moss. Most people think a roof inspection is just some tedious checkbox for the bank, but if you aren’t treating it like a forensic investigation, you are essentially handing your profit margin over to the next storm.

    I’m not here to give you a lecture or sell you on some overpriced, unnecessary service packages that do nothing but pad a contractor’s pocket. My goal is to teach you how to look at a roof and see the actual numbers hiding underneath those shingles. I’m going to walk you through exactly what to look for—and what to ignore—so you can spot the structural nightmares before they turn into equity-killing disasters. Let’s get into the grit of how to protect your investment.

    Table of Contents

    Spotting Subtle Roof Damage Signs Before They Strike

    Spotting Subtle Roof Damage Signs Before They Strike

    You don’t always need a ladder and a heavy-duty flashlight to spot trouble; sometimes, the house tells you it’s struggling if you actually bother to look. I always start with a walk around the perimeter. Keep an eye out for granules shedding from your shingles and piling up in the gutters like coarse sand. That’s a massive red flag for roof damage signs that most people ignore until a ceiling starts sagging. If you see curling edges or shingles that look like they’re lifting, your protection is already compromised.

    Next, get inside and look up. I’ve seen too many investors lose their shirts because they missed a faint, yellowish ring on a ceiling during a walkthrough. Those stains are the fingerprints of a slow leak. It might not look like a disaster now, but it’s a clear indicator that your preventative roof maintenance has been neglected. Catching these subtle shifts early is the difference between a quick patch job and a full-scale structural nightmare that eats your entire renovation budget.

    Why a Professional Roofing Assessment Saves Your Roi

    Why a Professional Roofing Assessment Saves Your Roi

    Look, I’ve seen too many rookies walk into a deal thinking they can squeeze an extra few thousand out of the budget by skipping the heavy lifting on inspections. That’s a rookie mistake that will haunt your profit margins. A professional roofing assessment isn’t just an extra line item on your closing costs; it’s your primary defense against catastrophic capital expenditures. When you’re flipping, your goal is to maximize equity, not to fund a full roof replacement three months after the sale.

    If you ignore those subtle roof damage signs during your initial walkthrough, you aren’t saving money—you’re just gambling with your ROI. I always tell my clients that a comprehensive residential roofing health check is essentially an insurance policy for your investment. It allows you to differentiate between a simple flashing repair and a structural nightmare that requires a complete tear-off. By catching these issues early, you can budget accurately, negotiate the price down with the seller, and ensure that your “fixer-upper” doesn’t turn into a money pit before you even see a return.

    My Hard-Earned Rules for Not Getting Burned by a Bad Roof

    • Check the attic before you check the kitchen. I always climb up into the crawl space with a high-powered flashlight to look for water stains on the rafters or dark spots that scream mold; if the attic is a mess, the roof is failing.
    • Don’t just look at the shingles; look at the flashing. Most rookies miss the metal bits around chimneys and vents, but that’s exactly where the water finds its way in to rot your subfloor and eat your profits.
    • Watch out for “granule loss” in the gutters. If you see what looks like coarse black sand piling up in your downspouts, your shingles are losing their protective coating and are on their way out.
    • Get a feel for the roof’s age, not just the owner’s word. If they say it’s “nearly new” but the shingles are curling or brittle, trust your eyes over their sales pitch—that’s an immediate negotiation point for me.
    • Always verify the structural integrity of the decking. A few soft spots underfoot might seem minor, but if the plywood is rotting, you’re not just looking at a shingle replacement—you’re looking at a massive, unplanned structural expense.

    Bottom Line: Don't Buy a Money Pit

    Trust your eyes, but verify with a pro; a quick walk-around can catch the obvious, but a professional inspection catches the structural rot that actually kills your margins.

    Treat the roof as a non-negotiable line item in your rehab budget, because negotiating a credit for a failing roof is always better than paying for a full replacement out of your own pocket mid-flip.

    Document everything; knowing the exact age and condition of the shingles isn’t just about the repair, it’s about protecting your resale value and proving to future buyers that the bones of the house are solid.

    The Real Cost of Cutting Corners

    “I’ve seen too many investors try to save a few grand by skipping a proper roof inspection, only to watch their entire profit margin wash away with the next heavy rain. In this game, a cheap roof is the most expensive mistake you’ll ever make.”

    Gareth Trelawny

    Don't Leave Your Equity to Chance

    Don't Leave Your Equity to Chance.

    At the end of the day, a roof isn’t just a structural necessity; it is a massive variable in your profit and loss statement. We’ve talked about how easy it is to miss those subtle signs of decay and why skipping a professional assessment is a gamble that rarely pays off. If you aren’t looking for curling shingles, water stains in the attic, or sagging rooflines, you aren’t just being optimistic—you’re being reckless with your capital. Remember, the goal of a flip or a long-term hold is to build wealth, and you can’t do that if you’re constantly writing checks to fix avoidable water damage that should have been caught during your initial walkthrough. Protect your margins by making the inspection a non-negotiable part of your due diligence.

    Real estate investing is rarely as glamorous as the polished photos on Instagram make it look. It’s gritty, it’s unpredictable, and it requires you to make the tough calls before the first hammer even swings. But that’s exactly where the opportunity lies. When you learn to spot the risks that others overlook, you stop being a spectator and start being a serious player in this game. Don’t let a preventable repair turn your dream project into a financial sinkhole. Stay sharp, stay pragmatic, and keep building. Your future portfolio depends on the decisions you make today, right there on the job site.

    Frequently Asked Questions

    How do I tell the difference between a simple patch job and a full roof replacement when I'm walking a property?

    Look for the “Frankenstein effect.” If you see different shingle colors or textures overlapping, you’re looking at a series of band-aid fixes. A simple patch is usually a localized repair around a vent or a single slipped shingle. But if the flashing is rusted, the granules are washing away like sand in a playground, or you see multiple layers of old shingles peeking through, stop dreaming about a patch. That’s a full replacement waiting to happen.

    At what point during the due diligence phase should I actually bring a contractor in to look at the shingles?

    Don’t wait until you’re under contract to call in the pros. I always bring a contractor in during the initial inspection period—right after I’ve done my own preliminary walkthrough. If I see curling shingles or granule loss from the ground, I want a hard number on the replacement cost before I sign a single piece of paper. You need that quote in your hand to negotiate the purchase price or walk away entirely.

    Are there specific red flags in a roof inspection report that should make me walk away from a deal immediately?

    If you see “structural sagging” or “compromised decking” in that report, walk. Period. Those aren’t quick cosmetic fixes; they’re massive, expensive structural nightmares that can eat your entire profit margin before you even pick up a hammer. Also, watch out for mentions of widespread mold or rot in the attic. If the bones of the roof are failing, you aren’t just buying a renovation project—you’re buying a money pit that will bury your equity.

  • Updating a Traditional Fireplace

    Updating a Traditional Fireplace

    I was standing in the middle of a gutted living room in a 1970s ranch last Tuesday, staring at a massive, soot-stained brick monstrosity that looked like it belonged in a coal mine rather than a modern home. The previous owner had clearly spent a fortune on some “luxury” stone veneer that was now peeling off in chunks, and they’d told me a full fireplace remodel would cost upwards of twenty grand. Honestly? That’s a total scam. Most people see a dated hearth and think they need to gut the entire chimney stack to see a return, but they’re just throwing money into a black hole instead of investing it where it actually counts.

    I’m not here to sell you on expensive, trendy veneers that will look dated by next season. My goal is to show you how to approach a fireplace remodel with a strategist’s mindset, focusing on the specific design choices that actually drive up your equity. I’m going to walk you through the high-ROI moves—from selecting the right mantel to deciding when to rip out the masonry versus when to just resurface it—so you can stop viewing your hearth as a liability and start seeing it as a profit-generating centerpiece.

    Table of Contents

    Modern Fireplace Renovation Ideas for High Roi Living Rooms

    Modern Fireplace Renovation Ideas for High Roi Living Rooms

    When I’m walking through a fixer-upper, I’m looking for that one feature that can anchor the entire floor plan. A dated, oversized brick hearth is usually that feature, but it’s often a massive opportunity in disguise. One of my favorite modern fireplace renovation ideas involves stripping away the heavy, dated masonry and opting for a sleek, minimalist look. If you’re on a budget, a fireplace stone veneer installation can completely transform the texture of the room without the structural headache of moving a chimney stack. It adds that high-end, tactile feel that buyers crave during an open house.

    If you’re looking to maximize your margins, don’t overlook the tech side of things. I often recommend an electric vs gas fireplace conversion for properties where running a new gas line is going to eat all your potential profit. You get the ambiance and the visual impact for a fraction of the cost, allowing you to reallocate those funds into custom mantel styles—like a chunky reclaimed wood beam—that really drive the living room focal point design home. It’s all about spending where the eye lands first.

    The Real Cost of Fireplace Upgrading and Hidden Potential

    The Real Cost of Fireplace Upgrading and Hidden Potential

    Let’s get real about the numbers, because nothing kills a profit margin faster than a “cheap” renovation that turns into a money pit. When you’re calculating the cost of fireplace upgrading, you can’t just look at the price of a new surround. You have to account for the structural integrity of the chimney and the potential for venting issues. I’ve seen investors lose thousands because they underestimated the labor required for a complex fireplace stone veneer installation on an uneven, aged masonry base. If you aren’t budgeting for the prep work, you aren’t budgeting for a successful flip.

    However, where there is risk, there is massive upside. The hidden potential lies in the conversion. I often look for outdated, inefficient wood-burning setups and push for an electric vs gas fireplace conversion. It’s a strategic move; gas offers that premium, high-end feel that buyers crave, while electric can be a cost-effective way to create a clean, minimalist aesthetic. If you nail the execution, you aren’t just fixing a heater—you are creating a high-value living room focal point that justifies a much higher asking price.

    Five Tactical Moves to Maximize Your Fireplace ROI

    • Stop overspending on high-maintenance materials; swap that temperamental natural stone for a high-quality porcelain slab that mimics marble but won’t stain the second a glass of red wine hits it.
    • Focus on the mantel as a focal point rather than just a shelf; a thick, reclaimed wood beam adds instant character and warmth to a minimalist room without costing a fortune.
    • Don’t ignore the surround—if you’re working with a tight budget, sometimes just cleaning and re-grouting old tile can do more for the aesthetic than a half-baked attempt at a full demolition.
    • Prioritize the hearth’s functionality; if you’re flipping, make sure the floor area is level and safe, because a tripping hazard is the fastest way to kill a deal during a walkthrough.
    • Think about the lighting integration; adding dimmable sconces on either side of the mantle can transform a basic fireplace into a high-end design feature that makes buyers feel right at home.

    The Bottom Line on Fireplace ROI

    Stop viewing a dated fireplace as a structural headache; view it as a high-leverage design opportunity that can anchor an entire room’s aesthetic and justify a higher asking price.

    Always budget for the “invisible” costs like venting updates and masonry repairs before you start picking out expensive stone veneers, or your profit margins will vanish.

    Focus on timeless, high-impact materials like sleek tile or minimalist stone rather than chasing fleeting trends, ensuring the renovation adds long-term equity instead of requiring another fix in three years.

    The ROI of a Focal Point

    Stop looking at a cracked, dated hearth as a liability; when you strip away the cheap veneer and rebuild it with intention, you aren’t just fixing a fireplace—you’re creating the emotional anchor that makes a buyer fall in love with the house.

    Gareth Trelawny

    The Bottom Line on Your Hearth

    The Bottom Line on Your Hearth.

    At the end of the day, a fireplace remodel isn’t just about picking out a pretty new stone veneer or a sleek electric insert to satisfy your aesthetic cravings. It’s a calculated move to maximize your property’s value. We’ve looked at how much these upgrades actually cost and, more importantly, how to spot the hidden potential in a dated, crumbling masonry mess that most buyers would run away from. Whether you’re going for a minimalist industrial look or a high-end custom build, the goal remains the same: turn a neglected focal point into a high-ROI asset that makes a buyer stop scrolling and start making offers.

    Don’t let a messy, outdated hearth intimidate you or scare you off from a potential goldmine of a property. I’ve seen more than my fair share of “disaster” living rooms get transformed into the most sought-after rooms in the house just by getting strategic with the renovation. Real estate is about seeing what isn’t there yet. So, grab your laser measurer, do the math, and don’t be afraid to rip out the old to make room for something that actually builds your equity. It’s time to stop looking at what a house is and start seeing what it can become.

    Frequently Asked Questions

    Is it actually worth the money to convert an old wood-burning fireplace to gas, or am I just throwing cash down the chimney?

    Look, if you’re asking if you’re throwing cash down the chimney, you’re looking at it the wrong way. You aren’t just paying for a cleaner burn; you’re paying for convenience and resale appeal. In my experience, buyers want the “instant ambiance” of gas without the mess of hauling logs or the soot cleanup. It’s a strategic upgrade. If you do it right, the ease of use adds more value to the living space than the hardware itself.

    How much of a headache am I looking at if I decide to move the fireplace to a different wall to improve the room's flow?

    Look, I’ll be straight with you: moving a fireplace is a massive undertaking. You aren’t just shifting a feature; you’re potentially rerouting gas lines, messing with venting, and potentially touching structural masonry or floor joists. It’s a high-stakes headache that can blow your budget if you aren’t careful. If the current layout is killing the room’s flow, it might be worth the sweat equity, but only if the ROI justifies the structural chaos.

    Can I really use modern materials like porcelain slab or microcement to hide a structural mess without rebuilding the entire hearth?

    Absolutely. You don’t always need a sledgehammer to fix a visual disaster. If the bones are structurally sound but the aesthetics are stuck in 1974, thin-set applications like microcement are a lifesaver for creating that seamless, industrial look. Porcelain slabs are also incredible for cladding over an existing, bulky hearth to give it a high-end, minimalist profile. It’s all about strategic layering—masking the mess to build equity without the massive labor costs of a full rebuild.