I was standing in a dusty hallway of a 1970s ranch-style fixer-upper last Tuesday, staring at a gap between the casing and the drywall that looked wide enough to swallow my laser measurer. Most people think door trim installation is just about slapping some wood against a wall and calling it a day, but if you leave those uneven gaps, you’re basically throwing money away on a finish that looks amateur at best. I’ve seen too many investors try to cut corners here, only to have a picky buyer point out every single sloppy miter joint during the walkthrough.
I’m not here to give you some theoretical lecture from a textbook; I’m here to show you how to get it right the first time so you can move on to the next task. In this guide, I’m breaking down the exact process I use to ensure every piece of trim sits flush and looks intentional. We’ll cover everything from prepping your surfaces to mastering those tricky corner cuts, giving you the tools to turn a cheap cosmetic fix into a high-end detail that actually builds your equity.
Table of Contents
- Step-by-Step Instructions
- Essential Wood Trim Installation Tools for the Savvy Investor
- Mastering Miter Saw Settings for Trim and Perfect Corners
- Pro Moves to Save Your Margins and Your Sanity
- The Bottom Line: Why Trim Matters for Your ROI
- ## The Equity is in the Edges
- The Finish Line is Where the Profit Lives
- Frequently Asked Questions
Guide Overview
Tools & Supplies
- Miter saw for precise angled cuts
- Brad nailer for securing trim to wall
- Tape measure for accurate sizing
- Caulk gun for filling gaps
- Door casing/trim pieces based on door size
- Finish nails or brad nails
- Wood filler or caulk
- Wood stain or paint
Step-by-Step Instructions
- 1. Before you even touch a piece of wood, you need to prep the opening. I’ve seen too many rookies try to slap trim over wonky, uneven drywall, and it’s a recipe for a headache. Grab your laser measurer and check the door jambs for level; if they’re leaning, you might need to shim them first. Once the opening is solid, clean out any debris or old, crumbling caulk from the gap between the jamb and the wall so your new trim sits flush.
- 2. Measure twice, cut once—it’s a cliché for a reason. Lay your trim pieces out on the floor to visualize how the miters will meet at the corners. When you’re ready to cut, use a miter saw to create your 45-degree angles for the top corners. I always tell my clients to aim for a tight fit; if there’s even a tiny gap, you’re going to spend way too much time trying to hide it with caulk later.
- 3. Now, it’s time to actually mount the pieces. Start with the side casings, working your way up from the floor. I prefer using a brad nailer to secure the trim to the wall studs or the door jamb itself. Make sure you aren’t just nailing into thin drywall, or that trim is going to pop right off the second someone bumps into it. You want those nails driven deep enough to be flush, but not so deep that they blow out the wood grain.
- 4. Once the sides are up, tackle the top piece. This is where most people lose their patience, but it’s the most visible part of the job. Align your top piece so it meets the side casings perfectly. If you’re working with a single header, you’ll be mitering those top corners just like you did with the sides. I find that staying organized with my cut list keeps me from making expensive mistakes on higher-end materials.
- 5. After everything is nailed down, take a close look at the joints. If your miters aren’t perfectly seamless, don’t panic—that’s what wood filler is for. Apply a small amount of filler to the gaps and sand it down once it’s dry until it’s completely smooth to the touch. If you skip this, the light hitting the trim in a renovated house will show every single imperfection, and that’s not the look we’re going for.
- 6. The final touch that separates a DIY job from a professional renovation is the caulking. Run a thin, steady bead of paintable caulk along the edge where the trim meets the wall. This hides any tiny gaps and gives the whole thing that seamless, high-end finish that buyers crave. Wipe away the excess with a damp finger immediately; you don’t want to be scrubbing dried caulk off your beautiful new trim tomorrow.
Essential Wood Trim Installation Tools for the Savvy Investor
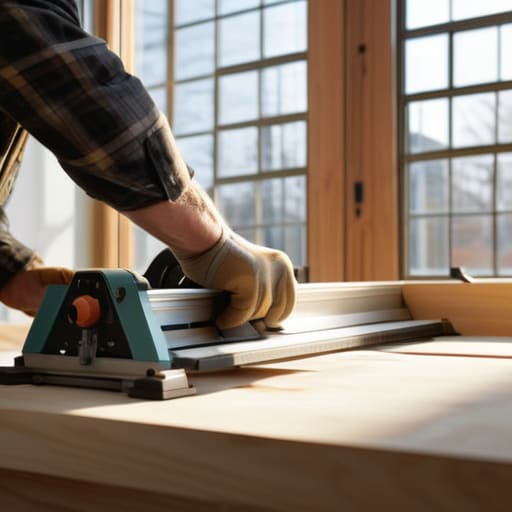
Look, I’ve learned the hard way that you can’t cut corners when it comes to your kit. If you show up to a job site with a cheap, jittery saw, you’re going to spend more time sanding out mistakes than actually building equity. For me, the holy grail is a high-quality compound miter saw. Getting your miter saw settings for trim dialed in is the difference between a seamless corner and a gap that screams “amateur hour.” I always keep a digital level in my bag alongside my laser measurer; if your door frame isn’t plumb, no amount of fancy wood is going to save the look.
Beyond the heavy lifting, don’t overlook the small stuff that makes a renovation look high-end. I never head to a property without a high-quality finish nailer and a reliable caulk gun. Mastering applying caulk to door trim is honestly my favorite “secret weapon”—it hides those tiny, inevitable gaps and gives the whole installation that polished, custom-built feel. It’s these small, tactical moves that turn a basic flip into a premium asset.
Mastering Miter Saw Settings for Trim and Perfect Corners
Listen, I’ve seen too many investors lose their margins because they rushed the finish work. You can have the most expensive materials in the world, but if your corners look like a jagged mess, the buyer will smell the lack of quality from a mile away. When you’re dialing in your miter saw settings for trim, don’t just trust the notches on the scale. I always take a scrap piece of the exact same profile first. Even a hair’s breadth of error at the saw translates to a massive, ugly gap once you’re actually performing your door casing installation steps.
If you find yourself staring at a corner that won’t quite close, don’t panic and don’t reach for the hammer. Precision is about adjustment, not force. I prefer to cut my miters slightly “long”—meaning a fraction of a degree past the 45—to ensure a tight, seamless fit. A tight joint means you spend less time applying caulk to door trim and more time moving on to the next room. Remember, in this business, the difference between a “flip” and a “premium renovation” is found in the tightness of your corners.
Pro Moves to Save Your Margins and Your Sanity
- Stop eyeballing your gaps. I’ve seen too many rookies try to hide massive gaps with a mountain of caulk, but it looks cheap and it’ll crack in six months. Use a little bit of wood filler for tiny imperfections, but if the gap is huge, you messed up the cut. Do it right the first time so you aren’t spending your profit on remedial repairs.
- Always test your miter saw on a scrap piece of the exact same trim before you touch the actual door. Lighting and wood grain can play tricks on your eyes, and there is nothing more frustrating than wasting a full stick of expensive primed MDF because your angle was off by a fraction of a degree.
- Don’t skip the pre-drilling. If you’re working with harder woods or even some dense composites, driving a nail straight in can split the trim right at the corner. A quick pilot hole keeps the wood intact and prevents those ugly cracks that scream “amateur renovation” to any potential buyer.
- Use a nail gun, but don’t go overboard with the pressure. I always check my compressor settings before I start a new room. If you’re driving nails too deep, you’ll blow out the surface of the trim, and then you’re stuck sanding and patching instead of moving on to the next asset.
- Think about the floor before you nail anything down. If you’re installing new trim in a house where the subfloor is uneven, your trim might not sit flush against the baseboard or the floor. Take a second to check your levels; it’s much easier to shim a piece of wood now than to explain a crooked doorway during a final walkthrough.
The Bottom Line: Why Trim Matters for Your ROI
Stop viewing trim as just a finishing touch; it’s the visual glue that makes a renovation look intentional rather than cheap, and that’s what drives your final sale price.
Invest in the right miter saw precision now so you aren’t wasting expensive materials on botched corners that scream “amateur” to a potential buyer.
Focus on the tightest joints possible, because in the world of flipping, those small, clean details are exactly what turn a “fixer-upper” into a high-value asset.
## The Equity is in the Edges
Most people walk right past a doorway without a second thought, but I see it differently: every perfectly mitered corner and seamless piece of trim is a tiny, calculated deposit into your project’s final profit margin.
Gareth Trelawny
The Finish Line is Where the Profit Lives
At the end of the day, nailing down door trim isn’t just about closing up gaps in a wall; it’s about the precision that separates a amateur DIY job from a professional-grade renovation. You’ve gone through the grind of selecting the right tools, dialing in your miter saw settings, and handling the actual installation. If you’ve done the work correctly, you’ve eliminated those sloppy, uneven lines that scream “cheap flip” to a potential buyer. Remember, it’s the small, technical details like a tight miter joint or a perfectly flush baseboard that signal to an inspector or an appraiser that this property has been maintained with care. Don’t rush the final nail; precision is your best friend when it comes to protecting your margins.
I know there are moments mid-renovation when you’re covered in sawdust and wondering if the headache is worth the payout. Trust me, I’ve been there, standing in a gutted hallway feeling completely overwhelmed. But once that trim is up and the paint is dry, you’ll see the transformation instantly. You aren’t just fixing a house; you are building tangible wealth one room at a time. Every clean corner and seamless transition is a brick in the foundation of your future portfolio. Keep your eyes on the equity, keep your measurements sharp, and don’t stop until the job is done right.
Frequently Asked Questions
How do I handle gaps in the corners if my miter cuts aren't perfectly seamless?
Look, even with a high-end miter saw, those tiny gaps happen. Don’t panic and don’t rip the trim off. If it’s a hairline crack, a bit of wood filler and some sanding will do the trick. If the gap is wider, grab some caulk. Just remember: caulk is your best friend for painted trim, but if you’re working with stained wood, you’ll need a wood putty that matches the tone perfectly. Keep it clean.
Is it worth spending the extra cash on primed trim, or should I just buy raw wood and save the margin?
Look, if you’re chasing every cent of margin, I get it. But in my experience, buying raw wood is a trap that eats your time—and time is money. Primed trim is a massive shortcut; it’s smoother, more consistent, and ready for paint immediately. Unless you’re doing high-end custom millwork where you need to stain the wood, just buy the primed stuff. Save your energy for the big structural wins and let the pre-primed boards do the heavy lifting.
When should I stop worrying about the trim and move on to the next room to keep my renovation timeline on track?
Look, I get the urge to chase perfection, but don’t let a single stubborn corner stall your entire ROI. If you’re spending hours sanding a single joint, you’re losing money. Once the trim is structurally sound, the miters are tight enough to pass a visual inspection, and you’ve prepped for paint, move on. Perfection is the enemy of a profitable flip. Get the basics solid in this room and get your momentum back elsewhere.
