Category: DIY

  • How to Replace a Toilet

    How to Replace a Toilet

    I was standing in a cramped, half-gutted bathroom in a fixer-upper I’d just picked up, staring at a cracked porcelain base and a puddle of mystery water, when it hit me: most people think a professional plumber is the only way to save a project’s budget. But here’s the truth—a botched toilet installation is usually just a result of rushing the prep work, not a lack of specialized tools. I’ve spent years learning that the difference between a high-end renovation and a money pit often comes down to these small, unglamorous details that most people try to skip.

    I’m not here to give you a sanitized, theoretical lecture that ignores the reality of a messy job site. Instead, I’m going to walk you through the unfiltered, practical steps of a successful install, from prepping the flange to ensuring a rock-solid seal. My goal is to give you the confidence to handle this task yourself, so you can stop burning cash on service calls and start turning those small repairs into solid equity.

    Table of Contents

    Guide Overview

    Total Time: 1-3 hours
    Estimated Cost: $150-400
    Difficulty: Beginner

    Tools & Supplies

    • Adjustable wrench for tightening bolts
    • Putty knife for scraping old wax
    • Level to ensure proper seating
    • Sponge and bucket for absorbing excess water
    • New toilet unit (bowl and tank)
    • Wax ring with flange bolt kit
    • New braided water supply line
    • Silicone caulk for base sealing
    • Toilet mounting bolts/closet bolts

    Step-by-Step Instructions

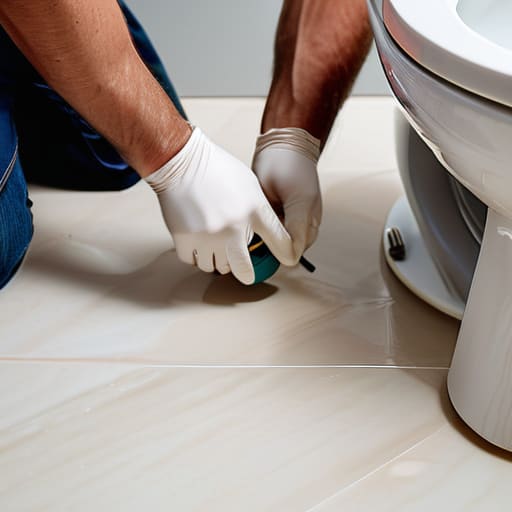
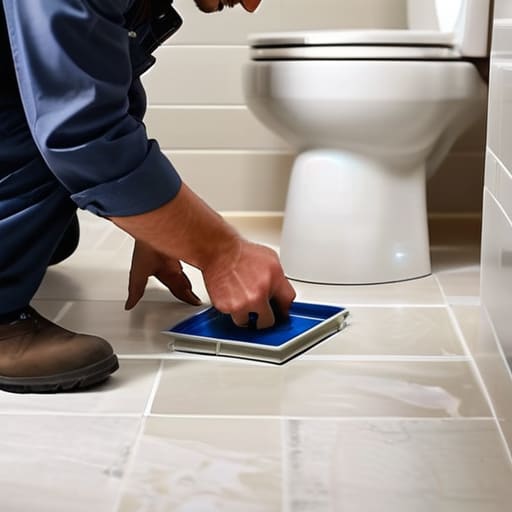
    • 1. First, clear the deck. You can’t build equity if you’re tripping over old porcelain. Get your old toilet out, but more importantly, scrub that floor until it’s spotless. I’ve seen too many rookies try to slap a new wax ring over old, dried-up grime, and trust me, that’s a recipe for a leak that’ll tank your renovation budget before you even get started.
    • 2. Inspect the flange. This is the part where most people get nervous, but it’s actually the most critical step. Check if the flange is cracked or sitting too low. If it’s broken, you’ll need a repair ring, because trying to force a fit with a damaged flange is just asking for a disaster down the road.
    • 3. Prep the new wax ring. Don’t just toss it on there; be intentional. I usually prefer the ones with a plastic flange to help with alignment, but regardless of which you choose, make sure it’s centered perfectly over the flange. You want a tight, airtight seal that’s going to hold up against years of heavy use.
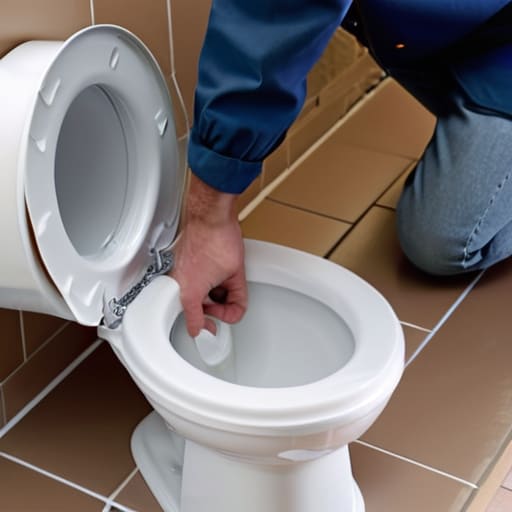
    • 4. Set the bowl. This is the part that requires a bit of muscle and a lot of finesse. Lift your new toilet bowl and lower it straight down onto the flange, making sure it seats right onto that wax ring. Give it a gentle, even downward pressure to compress the wax—don’t rock it side-to-side or you’ll break that seal you just worked so hard to create.
    • 5. Secure the bolts. Take your closet bolts and slide them through the base, then tighten the nuts. Here’s my golden rule: do not overtighten. I’ve seen plenty of beautiful, high-end toilets crack because someone thought “tight” meant “impossible to move.” Tighten them just enough so the toilet doesn’t wiggle when you nudge it.
    • 6. Hook up the water line. Connect your supply line to the fill valve, but before you call it a day, check your work. Turn the water on slowly and watch for any drips around the base or the supply connection. A quick test with a dry paper towel is the best way to ensure you aren’t leaving a hidden leak behind your new, renovated walls.

    Replacing a Toilet Step by Step for Maximum Roi

    Replacing a Toilet Step by Step for Maximum Roi

    When you’re flipping a property, every dollar spent needs to work twice as hard. I don’t just swap out an old porcelain unit for a shiny new one; I look at it as a way to signal quality to potential buyers. To ensure you aren’t calling a plumber back two weeks after closing, you need a solid new toilet installation checklist. Start by inspecting the flange; if it’s cracked or sitting too low, no amount of caulking will save you. I always make sure the floor is perfectly clean and dry before I even think about setting the new base down.

    The real secret to a professional finish—and avoiding those nightmare callbacks—is all in the toilet seal leak prevention. Don’t skimp on a high-quality wax ring or, better yet, a modern rubber gasket. Once the unit is seated, pay close attention to how to level a toilet by using plastic shims if your subfloor is even slightly uneven. A level toilet prevents stress on the supply line and ensures the tank lid sits flush, giving that high-end, intentional look that buyers crave.

    Preventing Toilet Base Leaks and Avoiding Costly Damage

    Preventing Toilet Base Leaks and Avoiding Costly Damage

    Listen, I’ve seen more subfloor rot in my career than I care to admit, and 90% of it comes down to a single, lazy mistake: skimping on the wax ring. If you’re rushing through replacing a toilet step by step, you might be tempted to just slap the new unit down and call it a day. Don’t do that. A faulty seal is a ticking time bomb that will eventually turn your beautiful new bathroom floor into a soggy, expensive mess. For true toilet seal leak prevention, make sure your flange is sitting flush and isn’t cracked or broken before you even think about setting the bowl.

    Once the toilet is positioned, pay close attention to how to level a toilet using plastic shims if your floor isn’t perfectly flat. If the base rocks even a fraction of an inch, it puts uneven pressure on the seal, which is a recipe for a slow, silent leak that eats your profit margins. I always tell my clients: never rely on tightening the floor bolts to fix a wobble. Tightening those bolts too hard can actually crack the porcelain or compromise the seal you just worked so hard to install.

    Pro-Tips for a Flawless Install (And Avoiding the Call-Backs)

    • Don’t skimp on the wax ring; I’ve seen too many “budget” flips ruined by a cheap seal that failed three months after closing. Invest in a high-quality, heavy-duty wax ring or a modern rubber gasket to ensure that seal is airtight and permanent.
    • Check your floor level before you even unbox the new porcelain. If your subfloor is uneven—which happens more often than you’d think in older fixer-uppers—you’ll need to shim the base to prevent the toilet from rocking, which eventually breaks the seal and causes leaks.
    • Clean that flange like your ROI depends on it. If there’s old wax or debris stuck to the flange, your new seal won’t seat properly, and you’ll be back to square one with a messy, expensive mistake.
    • Tighten those closet bolts with a light touch. It’s tempting to crank them down to feel secure, but over-tightening is the fastest way to crack the porcelain base, and once that happens, you aren’t just replacing a toilet—you’re replacing a whole unit.
    • Always test the new install with a “flood test” before you call it a day. Flush it ten times in a row and watch the base closely for any sign of moisture; I’d much rather catch a tiny weep now than deal with a rotted subfloor during a walkthrough later.

    The Bottom Line: Turning a Simple Swap into Real Value

    Don’t cut corners on the wax ring or the flange; a cheap mistake here can lead to subfloor rot that will absolutely tank your renovation budget.

    View every bathroom upgrade as a strategic move toward equity, focusing on clean installs and modern fixtures that appeal to the widest pool of buyers.

    Master the fundamentals of the DIY install to keep your overhead low, because every dollar you save on labor is a dollar that goes straight into your profit margin.

    The Hidden Margin in the Small Stuff

    “A lot of people overlook the bathroom, thinking it’s just plumbing and porcelain, but a clean, professional toilet install is one of the cheapest ways to erase that ‘neglected’ feeling and instantly boost a property’s perceived value.”

    Gareth Trelawny

    Turning Small Fixes into Big Wins

    Turning Small Fixes into Big Wins.

    At the end of the day, a successful toilet installation comes down to the details that most people overlook. It isn’t just about dropping a new porcelain unit onto the floor; it’s about ensuring that the wax ring is seated perfectly, the flange is secure, and your plumbing connections are tight enough to prevent a catastrophic leak down the line. When you take the time to do the dirty work right—from prepping the floor to testing the flush—you aren’t just fixing a bathroom; you are protecting your investment from the kind of water damage that can gut your profit margins in a single afternoon.

    I know that staring at a pile of tools and a leaking base can feel overwhelming when you’re in the middle of a renovation, but don’t let the small stuff intimidate you. These are the exact moments where you separate the hobbyists from the real investors. Every time you master a task like this, you are adding another tool to your belt and building the confidence needed to tackle even bigger projects. Keep your eye on the prize, stay patient through the mess, and remember that every small renovation is a strategic step toward building your long-term wealth.

    Frequently Asked Questions

    How do I know if I need to replace the entire flange or if I can just work around a broken one?

    Look, I’ve seen too many investors lose their shirts to a single bad flange repair. If the plastic is cracked or the bolts are stripped and won’t hold, don’t play games—replace it. If the flange is sitting too low or is structurally compromised, you’re looking at a full replacement to ensure that bathroom stays dry. A cheap fix now is just a massive, water-damaged headache waiting to eat your profit margins later.

    Is it worth spending the extra cash on a high-efficiency model, or should I stick to the cheapest option to keep my margins high?

    Look, if you’re flipping for a quick exit, the cheapest unit might tempt you, but don’t fall for it. I always lean toward high-efficiency models. Buyers today are savvy; they see a low-flow, modern toilet as a selling point for lower utility bills. A cheap, noisy unit feels like a “contractor grade” afterthought, which can actually hurt your perceived value. Spend the extra fifty bucks—it’s a small investment to protect your margins and your reputation.

    What’s the best way to tell if my old wax ring is actually failing before it starts ruining my subfloor?

    Don’t wait for a puddle to appear on your bathroom floor; by then, your subfloor is likely already rotting. Keep an eye out for a persistent, faint sewage smell or any discoloration around the base of the porcelain. If you notice the toilet feels slightly unstable or “wobbles” when you sit down, that’s a massive red flag. It means the seal has likely compromised, and you need to pull that toilet up immediately.

  • Guide to Installing Laminate Flooring

    Guide to Installing Laminate Flooring

    I was kneeling on a dusty subfloor in a drafty Victorian fixer-upper last Tuesday, staring at a gap in the planks that looked wide enough to swallow my laser measurer, wondering why I didn’t just hire a contractor. Most people will tell you that laminate flooring installation is a high-end luxury or a weekend DIY project for the faint of heart, but they’re wrong. In my experience, it is actually one of the fastest ways to inject instant equity into a property without draining your renovation budget. If you approach it with the right mindset, you aren’t just laying down planks; you’re building a margin.

    I’m not here to give you a sanitized, textbook version of how this works. I’m going to show you the gritty reality of how to execute a professional-grade laminate flooring installation that won’t buckle or creak the moment a tenant moves in. We’re going to cover the prep work that most rookies skip, how to avoid those expensive flooring mistakes that eat your profits, and the exact sequence I use to get the job done efficiently. Let’s stop staring at the subfloor and start building some real value.

    Table of Contents

    Guide Overview

    Total Time: 1-2 days per room
    Estimated Cost: $1.50-$4.00 per sq. ft.
    Difficulty: Beginner

    Tools & Supplies

    • Tape measure for precise floor dimensions
    • Rubber mallet for tapping planks into place
    • Spacers to maintain expansion gaps at walls
    • Utility knife or laminate cutter for trimming planks
    • Tapping block to prevent damage during installation
    • Laminate flooring planks based on total area
    • Underlayment rolls to cover the entire floor area
    • Transition strips for doorway thresholds
    • Moisture barrier if installing over concrete

    Step-by-Step Instructions

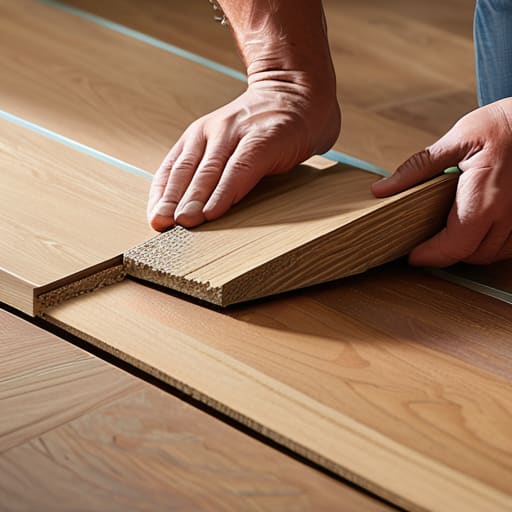
    • 1. Before you even crack open a box, you need to prep the subfloor like your ROI depends on it—because it actually does. Clear out every stray nail, pebble, or bit of dried drywall mud, then run your hand across the surface; if it feels uneven, you’re going to have major clicking issues later. Once it’s clean, lay down your underlayment, making sure the seams don’t overlap, or you’ll end up with a bouncy floor that feels cheap.
    • 2. Grab your laser measurer—mine is practically an extension of my arm at this point—and mark your starting line along the longest wall. You want to ensure the first row is perfectly straight, otherwise, that tiny error will snowball into a disaster by the time you reach the far side of the room. I always use a chalk line for this to keep things precise and professional.
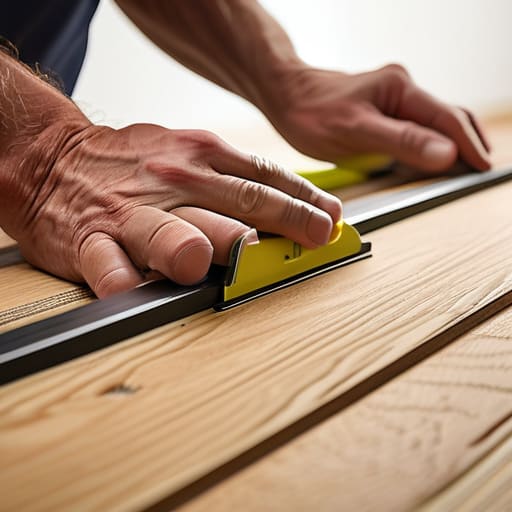
    • 3. Start laying your first row of planks, but here’s the pro tip: don’t forget to leave an expansion gap between the flooring and the wall. Use spacers to keep that gap consistent—usually about 1/4 to 3/8 of an inch—because wood and laminate are going to expand and contract with the seasons. If you skip this, your beautiful new floor will buckle the first time the humidity spikes.
    • 4. When you get to the end of a row, take the leftover piece from the previous plank to start your next one. This “staggered” method is crucial for both structural integrity and making the floor look natural rather than grid-like. Just make sure your end joints are at least six to eight inches apart so you don’t create weak points in the layout.
    • 5. For those tricky cuts around door jambs or corners, don’t try to hack it with a standard saw. Use a jamb saw or a multi-tool to undercut the trim so the flooring can slide seamlessly underneath it. It’s a bit more work upfront, but it’s the difference between a DIY look and a high-end renovation that actually adds value to the property.
    • 6. Once the last plank is clicked into place, it’s time to hide those expansion gaps. Install your baseboards or quarter-round molding, but don’t nail them into the floor—only nail them into the wall. If you pin the flooring down with the trim, you’re essentially inviting the floor to warp and crack under its own pressure.
    • 7. Finally, give the whole floor a thorough sweep and a quick inspection. Walk every inch of it to check for any “hollow” sounds or uneven spots that might indicate a subfloor issue you missed. If it feels solid and looks clean, you’ve just successfully turned a budget-friendly material into a professional-grade asset.

    Leveling Subfloor for Laminate to Ensure Solid Equity

    Leveling Subfloor for Laminate to Ensure Solid Equity

    Look, I’ve seen too many rookies try to skip the prep work because they’re staring down a tight renovation timeline. They think they can just slap the planks over a bumpy floor and hope for the best. Let me tell you: that is a one-way ticket to a clicking, popping floor that will drive your future tenants insane. If you aren’t leveling subfloor for laminate properly, those joints in your click-lock flooring system are going to snap under pressure. You need a flat, clean canvas if you want this asset to actually hold its value.

    Grab a high-quality self-leveling compound and a good trowel. I always check the floor with a long straightedge first; if there’s a dip deeper than a 1/8th inch, you need to fill it. While you’re at it, don’t forget your laminate flooring moisture barrier. If you’re working on a concrete slab, skipping that layer is just asking for mold and ruined margins later. It’s about being pragmatic, not lazy. Spend the extra day on the subfloor now so you aren’t paying for a full replacement in eighteen months.

    The Click Lock Flooring System Fast Results for Small Budgets

    The Click Lock Flooring System Fast Results for Small Budgets

    When you’re racing against a renovation timeline, the click-lock flooring system is your best friend. I’ve seen too many investors blow their margins on expensive hardwoods when a high-quality laminate could have delivered the same aesthetic punch for half the cost. The beauty of this system is the speed; you aren’t messing around with messy adhesives or heavy staplers. You just angle the plank, drop it into the groove, and hear that satisfying click. It’s efficient, it’s clean, and most importantly, it’s easy to DIY if you’re trying to keep your labor costs low.

    However, don’t mistake “easy” for “careless.” If you ignore the technical details, you’re just building a headache into your floor. You absolutely have to account for laminate flooring expansion gaps along every single wall. I always keep a few spacers handy because if those planks don’t have room to breathe when the humidity shifts, your floor is going to buckle, and that’s money straight out of your pocket. Treat the installation with respect, leave the gaps, and you’ll have a finished product that looks like a custom build.

    5 Pro Moves to Protect Your Margins and Your Floors

    • Acclimatize your planks in the actual room for at least 48 hours; if you skip this, the temperature shift will warp your floor before you even close the deal.
    • Leave a generous expansion gap around the perimeter—I’m talking a solid 3/8 of an inch—because if you pin that floor too tight against the wall, it’ll buckle the moment the seasons change.
    • Don’t skimp on the underlayment; a high-quality moisture barrier is the difference between a smooth sale and a nightmare mold claim from a buyer.
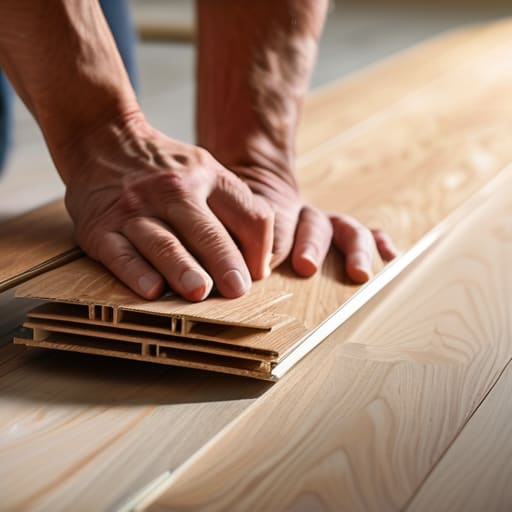
    • Use a tapping block and a rubber mallet for every single row; if you’re just stepping on the edges to force them together, you’re going to snap the click-lock mechanism and waste money on replacement material.
    • Check your layout before you commit to the first row; stagger your seams by at least 8 to 12 inches so you don’t end up with a “staircase” pattern that looks amateur and kills your resale value.

    The Bottom Line on Laminate ROI

    Don’t cut corners on the subfloor; if your base isn’t level, your new floor will bounce, and that’s a callback you can’t afford if you’re trying to protect your margins.

    Treat click-lock systems as your best friend for quick flips, but make sure you leave those expansion gaps—skimping on them now means a buckled floor and a massive headache during inspection.

    Focus on the visual impact of the finish; you’re choosing laminate to boost equity fast, so pick a realistic texture that looks high-end without the high-end price tag.

    ## The Margin is in the Prep

    “Don’t get blinded by a pretty pattern; if you skip the subfloor prep to save a few bucks, those hollow clicks and shifting planks will eat your profit margins faster than a bad contractor can disappear.”

    Gareth Trelawny

    The Bottom Line on Your Floor Flip

    The Bottom Line on Your Floor Flip.

    At the end of the day, installing laminate isn’t just about slapping planks together; it’s about protecting your investment from the ground up. You’ve learned that a perfectly leveled subfloor is your foundation for success, and mastering that click-lock system is what allows you to keep your labor costs low and your timeline tight. If you skip the prep work or rush the installation, you aren’t saving money—you’re just inviting a headache that will eat directly into your margins later. Do it right, do it tight, and make sure every plank is locked in so you can stop worrying about the details and start looking at your ROI.

    Renovating can feel overwhelming when you’re staring at a gutted room, but these are the exact moments where wealth is built. Every square foot of flooring you install correctly is more equity sitting in your pocket and more proof that you have the grit to handle a real project. Don’t let the dust and the DIY stress intimidate you; embrace the mess, trust your eye for potential, and remember that every small win brings you one step closer to that massive portfolio. Now, grab your laser measurer, get to work, and let’s turn that outdated space into a profitable asset.

    Frequently Asked Questions

    How do I know if my subfloor is actually level enough, or am I just wasting time with a self-leveler?

    Grab your straightedge or a long level—don’t rely on your eyes, they’ll lie to you. Lay it across the subfloor and look for light underneath. If you’ve got gaps wider than 3/16 of an inch, you’re asking for clicking joints to snap and your margins to tank. Don’t get precious with it, though; if it’s just a tiny dip, patch it. If it’s a wave, pour the self-leveler. Better to spend the extra day now than replace the whole floor in six months.

    Is there a specific type of underlayment I should use to make cheap laminate feel more like high-end hardwood?

    If you want to stop that hollow, “clacking” sound that screams budget renovation, skip the thin, cheap foam rolls. Invest in a high-density acoustic underlayment—something with a decent rubber or cork component. It adds weight and dampens the sound, making the floor feel solid underfoot rather than bouncy. It’s a small upfront cost that makes a massive difference in perceived value when you’re trying to sell that “high-end” look.

    How do I handle transitions between laminate and existing tile without making the floor look like a patchwork mess?

    Nothing kills the vibe of a clean renovation faster than a clunky, oversized T-molding that looks like an afterthought. If you’re hitting a tile line, don’t just slap a generic transition strip down. Use a slim, color-matched transition piece that sits flush. If the height difference is significant, you might need a reducer, but keep it intentional. I always aim for a seamless flow; if it looks like a patchwork quilt, you’ve already lost your margins.

  • Proper Techniques for Interior Wall Painting

    Proper Techniques for Interior Wall Painting

    I was standing in the middle of a gutted Victorian bungalow last Tuesday, staring at a wall that looked more like a topographical map than a flat surface, realizing I’d just wasted three hundred dollars on high-end pigment. I had followed every “easy” tutorial online, yet the finish was streaky, uneven, and frankly, looked cheap. Most people think that if you buy the most expensive gallon of paint at the big-box store, you’re halfway to a professional finish, but that’s a lie that kills your margins. The truth is, your ROI isn’t determined by the brand on the can, but by mastering specific interior painting techniques that ensure a smooth, high-end look every single time.

    I’m not here to give you a fluff piece on color psychology or how to pick a “cozy” shade. I’m here to show you the grit and the precision required to turn a DIY job into a professional-grade asset. In this guide, I’m breaking down the exact methods I use on my job sites—from proper edge cutting to the secret of managing drying times—so you can stop wasting money on redo’s and start forcing equity through flawless execution.

    Table of Contents

    Guide Overview

    Total Time: 1-2 days
    Estimated Cost: $100-250
    Difficulty: Beginner

    Tools & Supplies

    • Angled brush for cutting in edges
    • Roller frame and covers for large surfaces
    • Paint tray for holding and loading paint
    • Extension pole for high walls and ceilings
    • Painter's tape for protecting trim and edges
    • Sandpaper for smoothing wall imperfections
    • Interior paint (1-3 gallons depending on area)
    • Painter's primer (1-2 gallons)
    • Drop cloths (2-3 sheets)
    • Spackle (1 small container)
    • Cleaning sponge (1 unit)

    Step-by-Step Instructions

    • 1. First, you have to get obsessive about the prep work because a cheap paint job is just a way to waste your capital. Clear the room entirely if you can, but if not, move everything to the center and cover it with heavy-duty canvas drop cloths—never use thin plastic, as it shifts and tears under your feet. Scrape off any loose flakes, sand down the rough patches, and use a high-quality caulk to seal those annoying gaps between the baseboards and the walls. If you skip this, you’re just painting over problems that will show through the second the light hits the wall.
    • 2. Next, grab your painter’s tape and get surgical with your lines. I don’t care how steady your hands are; use a sharp utility knife to score the edge of the tape once you’ve applied it to ensure you don’t peel the drywall off when you’re finished. Run a damp cloth over the tape edges to press them down firmly, which prevents that dreaded paint bleed. This is where you separate the amateur look from the professional finish that actually adds value to a property.
    • 3. Now, it’s time to “cut in,” which is the most tedious but vital part of the process. Instead of jumping straight to the roller, use a 2.5-inch angled sash brush to paint a border around the ceiling, the corners, and the trim. Don’t try to do the whole room at once; work in manageable sections so the “wet edge” stays consistent. If you let your cut-in lines dry before you start rolling, you’ll end up with a distracting texture mismatch that screams “DIY disaster” to any potential buyer.
    • 4. Once your borders are set, grab a high-quality microfiber roller and a tray to start the heavy lifting. Start from the top of the wall and work your way down in a “W” or “M” pattern to distribute the paint evenly before filling in the gaps. Avoid the temptation to press too hard; you want to apply even pressure rather than squeezing every last drop of moisture out of the nap. This technique ensures the coverage is thick and uniform, which is the secret to high-end results.
    • 5. You absolutely cannot cut corners on the second coat, even if the wall looks “good enough” after the first pass. Most high-quality paints require two coats to truly achieve the depth of color and the durability needed for a rental or a flip. Wait for the first coat to be completely dry—check the can for specific drying times—and then repeat your cutting and rolling process. This second layer is what transforms a flimsy-looking wall into a solid, premium surface that commands a higher asking price.
    • 6. Finally, the most satisfying part: the reveal. Peel your painter’s tape off while the paint is still slightly tacky to avoid cracking the dried film. If you find a small drip or a missed spot, don’t panic and try to fix it with a massive brush; use a small artist’s brush or a tiny foam roller to spot-correct the error seamlessly. Once everything is clean and the tools are washed, take a step back and look at the room through the eyes of an investor—you’re looking for flawless, consistent coverage that makes the space feel brand new.

    Wall Surface Preparation Fixing the Mess Before the Magic

    Wall Surface Preparation Fixing the Mess Before the Magic

    Look, I’ve seen too many rookies rush straight to the color palette only to realize their “fresh” coat looks like textured sandpaper because they skipped the prep. If you want to build real equity, you have to treat the substrate with respect. Most of the “cracks” you see in a finished flip aren’t bad paint; they are failures in wall surface preparation. Spend the extra time sanding down those old drywall patches and filling every divot with a high-quality spackle. If you don’t get the surface level, even the most expensive designer paint will highlight every single imperfection.

    Once the walls are smooth, don’t underestimate the power of a solid base. My go-to primer application tips always involve using a high-hide primer if you’re covering dark colors or dealing with fresh patch jobs. This ensures your topcoat adheres perfectly and gives you that flawless, high-end look that buyers crave. It’s about creating a uniform canvas so your actual color work can shine without fighting the wall underneath. Remember, in this business, the work you do before the first drop of color hits the wall is what actually protects your profit margins.

    Achieving a Smooth Finish With Professional Painting Tools

    Achieving a Smooth Finish With Professional Painting Tools

    Look, you can spend all day on perfect wall surface preparation, but if you try to finish the job with a cheap, $5 brush from a big-box store, you’re going to sabotage your margins. I’ve seen too many investors lose money because their “quick flip” looked amateurish under bright lighting. To really nail achieving a smooth finish, you need to invest in high-quality synthetic brushes and high-density foam rollers. These aren’t just luxuries; they are the difference between a textured, streaky mess and a surface that looks like it was sprayed by a pro.

    When you move into the actual application, pay close attention to cutting in edges before you hit the main walls with a roller. If you rush this part, you’ll end up with visible “picture framing” where the edges don’t blend with the field. I always keep a small tray and a dedicated angled sash brush handy to ensure those lines are crisp. Also, don’t skip the step of preventing paint drips by working in smaller sections; if you try to cover too much ground at once, the paint will sag, and you’ll spend more time sanding out mistakes than you would have spent just doing it right the first time.

    Five Pro-Level Moves to Protect Your Margins and Your Finish

    • Stop skimping on the primer; if you’re painting over a dark color or a patchy repair, a high-quality primer is the only way to ensure you aren’t wasting money on three extra coats of expensive finish paint.
    • Master the “cut-in” before you even touch a roller, because if your edges are jagged and messy, no amount of high-end finish can hide the fact that the job was rushed.
    • Watch your lighting like a hawk while you work; I always bring a portable work light to catch those nasty shadows and uneven patches that a standard ceiling fixture will completely miss.
    • Don’t try to be a hero with cheap rollers—invest in high-density microfiber nap so you aren’t fighting texture streaks and “orange peel” effects that make a renovated house look amateur.
    • Always work in small, manageable sections to maintain a “wet edge,” otherwise you’ll end up with those dreaded lap marks that scream “DIY disaster” to any potential buyer.

    The Bottom Line: Don't Skimp on the Details

    Never cut corners on prep work; if you try to paint over a crack or a patch of grease, you’re just wasting expensive product and risking a callback from a buyer.

    Invest in high-quality rollers and brushes—it’s a small upfront cost that pays for itself in the time you save and the professional finish that actually drives up your resale value.

    Master your technique to force equity; a flawless, even coat of paint is one of the cheapest ways to make a dated, neglected room look like a high-end designer space.

    ## The Margin is in the Details

    “Anyone can slap a coat of beige over a cracked wall, but if you want to actually force equity, you have to treat painting like a structural investment—fix the imperfections first, master your technique second, and never let a sloppy finish eat your profit margins.”

    Gareth Trelawny

    Turning Fresh Paint Into Real Equity

    Turning Fresh Paint Into Real Equity

    At the end of the day, a high-end paint job isn’t just about picking a trendy color; it’s about the discipline you put into the process. We’ve covered everything from the grit required for proper wall prep to selecting the right professional-grade tools that prevent those dreaded streaks and drips. If you skip the sanding or try to cheap out on a low-quality roller, you aren’t saving money—you’re just sacrificing your profit margins in the long run. Remember, the magic happens in the preparation, and the value is found in the details that make a room feel intentional rather than just “newly painted.”

    Renovating can be exhausting, and there will be days when you’re covered in dust and wondering why you didn’t just stick to a desk job. But when you step back and see those clean lines and that flawless finish, you’re seeing more than just aesthetics; you’re seeing built-in equity. Every brushstroke is a step toward building that portfolio we all want. Don’t let a little mess intimidate you. Grab your tools, trust your eye, and go turn those tired walls into a high-value asset.

    Frequently Asked Questions

    How do I know if I should spend the extra money on premium paint or if a budget brand will still give me enough ROI on this flip?

    Look, don’t let a cheap bucket of paint eat your margins, but don’t go overboard either. If you’re doing a high-end flip in a luxury zip code, buy the premium stuff; buyers in that bracket spot a patchy finish from a mile away. For a standard rental or a quick mid-market flip, a decent mid-tier brand is your sweet spot. You want high coverage so you aren’t paying for extra coats in labor.

    When am I dealing with heavy water damage or old nicotine stains, what’s the best way to prime so the mess doesn't bleed through the new coat?

    If you see yellow nicotine stains or water damage, standard primer is a waste of your money. It’ll bleed right through your expensive finish and ruin your margins. You need a high-quality shellac-based primer—think Zinsser BIN. It’s the heavy hitter for sealing in odors and stubborn stains. It dries fast and creates an impenetrable barrier, so you aren’t constantly repainting. Don’t skimp here; sealing that mess correctly is how you protect your equity.

    How can I tell if a contractor is actually cutting corners on the prep work versus just rushing through the actual painting?

    Look, I’ve seen it a hundred times: a contractor shows up, slaps on two coats of premium paint, and calls it a day while the clock is ticking. To catch them, ignore the color and watch the prep. If they aren’t sanding the walls between coats, using painter’s tape properly, or actually patching those hairline cracks I spotted during my walkthrough, they’re cutting corners. If the surface feels gritty or uneven, they skipped the most important part.

  • Steps for Installing a New Bathroom Vanity

    Steps for Installing a New Bathroom Vanity

    I was standing in a cramped, dimly lit ensuite last Tuesday, staring at a cracked, dated pedestal sink that looked like it belonged in a museum of bad design choices. My laser measurer was already out, and my gut told me this wasn’t just an aesthetic disaster—it was a missed opportunity for equity. Most people think a bathroom vanity installation requires a crew of expensive contractors and a week of downtime, but that’s just a myth that keeps investors from seeing their margins. In reality, if you can level a shelf and follow a plumbing diagram, you can swap out a tired unit for something that actually commands attention and boosts your property value.

    I’m not here to give you a fluff piece filled with vague suggestions or “lifestyle” inspiration. I’m going to walk you through the gritty, practical reality of a successful bathroom vanity installation from start to finish. We’re going to cover everything from securing those mounting brackets to ensuring your plumbing doesn’t turn into a weekend-ruining flood. By the time you finish this guide, you’ll have the confidence to stop staring at that old sink and start building the ROI you deserve.

    Table of Contents

    Guide Overview

    Total Time: 3-5 hours
    Estimated Cost: $200-800
    Difficulty: Intermediate

    Tools & Supplies

    • Drill/Driver for securing the unit to studs
    • Level to ensure the vanity is perfectly flat
    • Adjustable wrench for connecting water lines
    • Caulk gun for sealing edges
    • Bathroom vanity unit (1)
    • Sink countertop/top (1)
    • Faucet and drain assembly (1 set)
    • P-trap and plumbing connectors (1 set)
    • Silicone caulk (1 tube)
    • Shut-off valves (2)

    Step-by-Step Instructions

    • 1. Before you even think about unscrewing anything, you need to clear the workspace and shut off the water supply to the vanity. I’ve seen too many rookies end up with a flooded bathroom because they assumed the shut-off valve was working when it was actually seized up. Grab a bucket and some old towels, because even with the water off, you’re going to deal with some residual moisture in the lines.
    • 2. Once the area is prepped, disconnect the plumbing and carefully remove the old unit. This is the perfect time to pull out my laser measurer to double-check your dimensions against the new vanity you bought. I cannot tell you enough how frustrating it is to tear out a perfectly good cabinet only to realize your new mid-century modern piece is a quarter-inch too wide for the alcove.
    • 3. Now, inspect the wall and the floor where the new vanity will sit. If you’re working on a fixer-upper, you’ll likely find some uneven drywall or subfloor issues that need a quick patch or a shim. You want a rock-solid, level surface before the new unit goes down, otherwise, your sink will look crooked and your plumbing connections will be a nightmare to align.
    • 4. Position the new vanity in its spot and check the level one more time. If it’s sitting slightly off, don’t panic; just use wood shims to get it perfectly plumb. Once it’s sitting straight, screw the vanity into the wall studs using heavy-duty cabinet screws. I always tell my clients: don’t skimp on the hardware here, because this unit needs to feel immovable when you’re leaning on the sink every morning.
    • 5. Next, it’s time to connect the plumbing. Attach your supply lines to the shut-off valves and connect the P-trap to the drain assembly. I prefer using high-quality braided stainless steel lines because they’re much more reliable than the cheap plastic stuff. Tighten everything by hand first, then give it a slight turn with a wrench, but be careful not to over-tighten and crack the fittings.
    • 6. If your vanity didn’t come with a pre-installed top, this is when you carefully set the countertop into place. Apply a bead of silicone along the back edge of the vanity to prevent water from seeping behind the cabinet. Once the top is seated, secure it with silicone or clips as specified by the manufacturer, ensuring it’s centered and looks seamless.
    • 7. The final, and arguably most satisfying, step is the “wet test.” Turn the water valves back on slowly and run the faucet for several minutes. Grab a dry paper towel and wipe down every single connection—if the towel stays dry, you’ve nailed it. If there’s even a tiny damp spot, you need to tighten that connection immediately before you call it a day.

    Essential Bathroom Vanity Installation Tools for the Savvy Investor

    Essential Bathroom Vanity Installation Tools for the Savvy Investor

    Before you even think about unboxing that new piece, you need to audit your tool kit. I’ve learned the hard way that showing up to a job site without the right gear is the fastest way to blow your budget and your timeline. Beyond the standard drill and driver, you absolutely need a high-quality spirit level. Leveling a bathroom cabinet is the difference between a high-end finish and a DIY disaster that screams “cheap renovation” to potential buyers. If that vanity sits even a fraction of an inch off, your countertop will never sit flush, and you’ll be fighting an uphill battle with every subsequent step.

    Don’t forget the small stuff that makes a big impact on your ROI. I always keep a fresh tube of high-grade silicone sealant for vanity edges in my kit; it’s the easiest way to prevent water damage and keep that “newly renovated” look intact. Also, make sure you have a stud finder that actually works. When you’re mounting vanity to wall studs, precision is everything. If you’re anchoring into something flimsy, you aren’t building equity—you’re building a liability.

    Mastering the Art of Mounting Vanity to Wall Studs

    Mastering the Art of Mounting Vanity to Wall Studs

    This is where most DIYers—and even some sloppy contractors—lose their grip on the project. If you don’t get the structural support right, you aren’t just looking at a crooked sink; you’re looking at a massive liability. When you’re mounting vanity to wall studs, don’t just eyeball it. I always pull my laser measurer out to ensure my marks are dead-on. You need to find those studs with a high-quality scanner and mark them clearly. If your vanity is heavy or floating, those screws need to bite deep into the timber. A vanity that wobbles isn’t just an eyesore; it’s a red flag for any future inspector or buyer.

    Once you’ve got your marks, pay close attention to leveling a bathroom cabinet before you drive those final screws home. I’ve seen too many flips where the countertop looks like a downhill slope because the base wasn’t perfectly flat. Use shims if you have to, but make sure they are tucked in tight so they don’t shift. Precision at this stage saves you a massive headache when you eventually move on to installing the countertop and hardware.

    Pro-Tips to Avoid Costly Mistakes and Protect Your Margins

    • Don’t trust your old plumbing blindly; always inspect the shut-off valves and supply lines before you tear out the old unit, because a tiny leak behind a brand-new vanity is a nightmare for your ROI.
    • Check your floor levelness with a spirit level before you even unbox the new vanity, because if the subfloor is wonky, you’ll spend more time shimmying and cursing than actually installing.
    • Always buy your vanity and sink as a set or double-check the dimensions of the sink cutout; nothing kills my momentum like getting halfway through a job only to realize the sink doesn’t actually fit the cabinet.
    • Leave yourself a little breathing room with your backsplash measurements; I’ve seen too many rookies cut their tile too short and end up with an ugly gap that screams “amateur” to any potential buyer.
    • Seal everything—and I mean everything. Use high-quality silicone around the backsplash and the sink rim to ensure that moisture stays out of your new cabinetry and keeps your renovation looking pristine for years.

    The Bottom Line: Turning a Simple Install into Real Equity

    Never skimp on the mounting process; a vanity that isn’t rock-solid on the studs isn’t just a DIY fail, it’s a liability that will kill your resale value.

    Treat the vanity as the centerpiece of the room, not just a utility—choosing a piece with high design impact can significantly boost your perceived ROI during a walkthrough.

    Precision is your best friend when working with tight bathroom footprints, so use that laser measurer to ensure your plumbing lines and clearances are perfect before you commit to the install.

    ## The Bottom Line on Bathroom Upgrades

    “Don’t get lost in the aesthetics of a high-end vanity; if that unit isn’t anchored dead-center to the studs and perfectly level, you’re just installing a future plumbing headache instead of adding real equity.”

    Gareth Trelawny

    The Final Polish Before the Payoff

    The Final Polish Before the Payoff.

    At the end of the day, a successful vanity installation comes down to the details you don’t see. It’s about ensuring those mounting screws are locked into the studs, your level is telling you the truth, and the plumbing connections are tight enough to prevent a midnight disaster. When you take the time to prep the subfloor and align the hardware correctly, you aren’t just putting in a piece of furniture; you are performing a strategic upgrade that pays dividends. Don’t rush the finishing touches—the caulking and the sink alignment are what separate a professional-grade flip from a DIY disaster that kills your margins.

    I know that staring at a half-finished bathroom can feel overwhelming, especially when you’re covered in drywall dust and wondering if you made the right call. But remember why you’re doing this: every small, manual task you complete is a direct deposit into your future. You are learning how to manipulate physical space to create tangible equity. Keep that laser measurer handy, stay focused on the math, and don’t let a little bit of mess stand in the way of your next big win. You’ve got the vision; now go finish the job.

    Frequently Asked Questions

    What should I do if my existing plumbing lines don't align perfectly with the new vanity's sink placement?

    This is where most rookies panic, but don’t sweat it. If your new sink doesn’t line up with the old pipes, you’ve got two real options: adjust the vanity or adjust the plumbing. If you’re tight on space, I usually recommend re-routing the supply lines and P-trap behind the wall. It’s a bit more grunt work, but it keeps that clean, minimalist look we’re after. Just make sure you don’t compromise the structural integrity for the sake of a quick fix.

    How can I tell if my drywall is too compromised to support a heavy, stone-top vanity without adding extra reinforcement?

    If you tap the wall and it feels soft, spongy, or sounds hollow like a drum, stop right there. That’s a red flag for moisture damage or structural rot. I always do a quick probe with a screwdriver; if it sinks in without resistance, that drywall is toast. For a heavy stone top, you can’t gamble on compromised gypsum. If the substrate isn’t rock-solid, you’ll need to tear it out and add blocking before you even think about mounting.

    Is it worth paying a professional to handle the final silicone sealing and backsplash, or is that a task I can safely tackle myself to save on rehab costs?

    Look, if you’re trying to squeeze every bit of profit out of a flip, I get the urge to DIY the finishing touches. If you’ve got a steady hand and a clean workspace, you can definitely tackle the silicone and backsplash yourself. It’s a great way to shave a few hundred off your rehab budget. But if your lines look wonky or the seal is messy, it’ll kill your perceived value instantly. When in doubt, pay the pro.

  • Methods for Installing a Kitchen Backsplash

    Methods for Installing a Kitchen Backsplash

    I was standing in a cramped, dimly lit kitchen in a fixer-upper I’d picked up last June, staring at a wall of stained, 1970s-era wallpaper that smelled faintly of old grease. Most people would have seen a disaster that required a full gut renovation and a massive budget, but I saw an opportunity. I knew that a strategic approach to kitchen backsplash tiling was the secret weapon needed to bridge the gap between a “distressed property” and a “high-end listing.” It’s not about how much you spend; it’s about where you place your capital to get the highest possible return on your investment.

    In this guide, I’m stripping away the fluff and the expensive designer nonsense to give you a practical, boots-on-the-ground roadmap. I’ll walk you through selecting materials that actually hold their value, the exact tools you need to avoid a messy finish, and how to execute the job without breaking your bank account. Whether you’re trying to flip a house for a profit or just want to stop feeling embarrassed when guests walk into your kitchen, I’m going to show you how to turn a simple wall into serious equity.

    Table of Contents

    Guide Overview

    Total Time: 1-2 days
    Estimated Cost: $150-400
    Difficulty: Intermediate

    Tools & Supplies

    • Tile cutter or wet saw for precise cuts
    • Notched trowel for applying adhesive
    • Rubber grout float for smoothing grout
    • Tile spacers to maintain even lines
    • Sponges and buckets for cleaning
    • Backsplash tiles (enough for area plus 10% extra)
    • Tile adhesive or thin-set mortar
    • Grout (color of choice)
    • Tile sealer to protect grout lines

    Step-by-Step Instructions

    • 1. Before you even touch a single tile, you need to prep your workspace and your surfaces. Clear everything off the counters and lay down some heavy-duty drop cloths; I’ve learned the hard way that thin plastic won’t stop grout from ruining your expensive stone. Scrub the walls down with a degreaser to remove any lingering cooking grease, otherwise, your adhesive isn’t going to bond, and you’ll be looking at a costly repair job six months from now.
    • 2. Once the walls are clean, it’s time to map out your layout. Don’t just start at a corner and hope for the best—that’s a rookie mistake that usually ends with a tiny, pathetic sliver of tile at the other end. Measure the total width and find the center point of your backsplash area. Start your first row of tiles from that center line and work your way out toward the edges to ensure your cuts are symmetrical and look intentional.
    • 3. Now, grab your thin-set mortar and start applying it to the wall using a notched trowel. I prefer working in small sections rather than doing the whole wall at once, because the mortar can skin over too quickly if you’re working alone. Make sure you have consistent ridges in the mortar; these little grooves are what create the suction needed to keep your tiles from sliding down the wall mid-project.
    • 4. This is where the real patience comes in: setting the tiles. Press each piece into the mortar with a slight twisting motion to ensure full coverage, and use tile spacers religiously. If you try to eyeball the gaps between tiles, your lines will look crooked, and any potential buyer will see right through it. I always keep a handful of spacers in my pocket—it’s the easiest way to ensure that professional, high-end look.
    • 5. Once the tiles are set and the mortar has fully cured (usually 24 hours), it’s time to tackle the grout. Mix your grout to a peanut butter consistency and use a rubber grout float to push it into the joints at a 45-degree angle. Be sure to wipe away the excess grout with a damp—not soaking wet—sponge. If you use too much water, you’ll wash out the pigment and end up with patchy, uneven colors that scream “DIY disaster.
    • 6. After the grout has dried and you’ve done a final wipe-down, apply a high-quality grout sealer. This is a non-negotiable step if you want this renovation to actually add value. A good sealer prevents stains from oil and water from seeping into the porous grout lines, ensuring your new backsplash stays looking crisp and clean long after you’ve closed the deal or moved in.

    Choosing the Winner Ceramic vs Porcelain Tile for Maximum Roi

    Choosing the Winner Ceramic vs Porcelain Tile for Maximum Roi

    When you’re staring at a sample board, it’s easy to get caught up in the aesthetics, but as an investor, I’m always looking at the math. The debate of ceramic vs porcelain tile usually comes down to your budget versus your long-term durability goals. Ceramic is your go-to for a quick, cost-effective win; it’s easier to cut and much more forgiving on a tight renovation timeline. However, if you’re tackling a high-end kitchen where the backsplash will take a beating from heavy cooking and steam, porcelain is the heavy hitter. It’s denser and more water-resistant, which means it holds its value longer in a competitive market.

    If you decide to go the porcelain route, don’t get sloppy with your prep. Because porcelain is so much harder, you’ll need to be meticulous about preventing uneven tiles by using the right notched trowel and ensuring your substrate is perfectly flat. I’ve seen too many amateur flips lose their margin because they rushed the install and ended up with lippage that looks cheap under under-cabinet lighting. Stick to the quality materials, and the equity will follow.

    The Precision Play Measuring for Tile Layout and Preventing Uneven Tiles

    The Precision Play Measuring for Tile Layout and Preventing Uneven Tiles.

    Listen, you can buy the most expensive marble slabs in the showroom, but if your lines are crooked, the whole kitchen looks cheap. I’ve seen countless flips lose their “wow factor” simply because the installer didn’t take the time to center the pattern. Before you even touch a bag of thin-set, you need to be obsessive about measuring for tile layout. Start by finding the center point of your main wall and snapping a chalk line. If you start blindly in a corner, you’ll likely end up with tiny, awkward slivers of tile on the opposite end that scream “amateur hour.”

    Once you’ve mapped it out, focus on your physical setup to ensure stability. I never head onto a job site without my leveling system; it’s the only way I can guarantee I’m preventing uneven tiles across a large surface area. Even with the right backsplash installation tools, gravity and varying wall flatness are your enemies. Use spacers religiously and check your level every few rows. If you aren’t seeing a perfectly straight line, stop immediately and adjust. In this business, precision isn’t just about aesthetics—it’s about protecting your margins.

    The Pro Investor’s Checklist: 5 Ways to Avoid Costly Backsplash Blunders

    • Don’t skimp on the grout color; choosing a shade that closely matches your tile creates a seamless, high-end look, whereas a high-contrast grout can make a cheap tile job look busy and dated.
    • Always buy 15% more tile than your measurements suggest to account for cuts, breakage, and those inevitable “oops” moments during the renovation.
    • Plan your outlet placement before you start tiling; nothing kills the aesthetic of a beautiful backsplash faster than a poorly placed electrical socket cutting right through a focal pattern.
    • Invest in a decent tile saw or rent a professional-grade one rather than trying to DIY it with a manual snapper; clean, straight edges are the difference between a “fixer-upper” look and a professional finish.
    • Seal your grout immediately after installation, especially if you’re using a porous material; it’s a ten-minute task that prevents grease and tomato sauce from permanently staining your investment.

    The Bottom Line: Making Every Square Inch Count

    Don’t get distracted by high-end luxury trends; focus on durable, high-impact materials like porcelain that offer the best balance of cost and perceived value for a quick flip.

    Precision is your best friend when it comes to ROI—a perfectly centered, level tile layout prevents the “cheap” look that can kill your resale value during a walkthrough.

    Treat the backsplash as a strategic investment rather than a decoration; it’s one of the lowest-cost ways to modernize a kitchen and instantly boost your equity.

    The ROI of the Details

    “Don’t get blinded by expensive marble or high-end custom patterns; in a flip, the goal isn’t to build your dream kitchen, it’s to use a clean, strategic backsplash to signal to a buyer that the house is well-maintained and ready for move-in.”

    Gareth Trelawny

    The Final Layer of Equity

    Kitchen backsplash: The Final Layer of Equity.

    At the end of the day, a backsplash isn’t just about aesthetics; it’s a tactical decision. We’ve covered how to pick the right material—favoring the durability of porcelain when the budget allows—and why that initial precision in your layout is what separates a professional-grade finish from a DIY disaster. If you nail the measurement and choose a tile that feels intentional rather than trendy, you aren’t just decorating a kitchen; you are optimizing a high-value zone of the home. Remember, the goal is to make the space feel cohesive and expensive without draining your entire renovation budget.

    Renovation is rarely a clean, linear process, and there will be moments when you’re staring at a pile of broken tiles and wondering why you didn’t just stick to a simple coat of paint. But that’s where the real profit is made. When you push through the mess and execute these small, strategic upgrades, you are building something much bigger than a pretty room. You are building tangible wealth one square foot at a time. Keep your eyes on the equity, keep your measurements precise, and don’t let a little grout dust stop you from finishing the job.

    Frequently Asked Questions

    Is it worth paying a pro for the tiling, or can I realistically DIY this to save on my renovation budget?

    Look, if you’re trying to squeeze every cent of profit out of a flip, the temptation to DIY the tile is real. If you’re confident and have a steady hand, you can save a few hundred bucks. But honestly? Unless you’ve practiced on a scrap wall first, hire a pro. Nothing kills my margins faster than a crooked backsplash that makes a high-end renovation look amateur. Don’t risk your equity on a bad grout line.

    How do I pick a grout color that won't look dated or become a nightmare to clean in six months?

    Look, don’t make the mistake of picking a high-contrast grout just because it looks “trendy” on Pinterest right now. If you go with stark white in a kitchen, you’ll be scrubbing it every weekend, and it’ll look dingy in six months. Stick to mid-tone greys or “greiges.” They hide the inevitable grease splashes and discoloration, they don’t scream for attention, and they ensure your renovation stays timeless rather than dated by next season.

    Should I be worried about tiling over existing old tile, or is a full strip-down to the drywall non-negotiable for a clean finish?

    Look, I’ve seen both, and here’s the reality: if you want to protect your margins, don’t just slap new tile over the old stuff. It’s a recipe for a disaster that’ll haunt your resale value. If that old tile is loose or the substrate is wonky, you’re building on a lie. Strip it down to the drywall. It’s more sweat and more time, but a clean, flat surface is the only way to ensure a high-end finish.

  • How to Budget for a Kitchen Renovation

    How to Budget for a Kitchen Renovation

    I was standing in a gutted bungalow last Tuesday, dust coating my boots and the smell of old grease hanging heavy in the air, staring at a set of cabinets that looked like they belonged in a museum of bad decisions. Most “experts” will tell you that you need a six-figure windfall to make a real impact, but they’re selling you a fantasy. I’ve seen too many people get paralyzed by the sheer unpredictability of kitchen remodeling costs, thinking they have to choose between a cheap DIY disaster and a luxury overhaul that eats their entire margin. The truth is, you don’t need a bottomless bank account; you just need to know where to deploy your capital to get the highest return.

    I’m not here to give you a polished, theoretical lecture from a design textbook. I’m going to pull back the curtain on the actual numbers—the ones that include the hidden plumbing surprises and the inevitable “while we’re at it” expenses that blow most budgets. My goal is to give you a strategic roadmap for navigating these costs so you can stop guessing and start building equity. We’re going to focus on high-impact moves that turn a dated, cramped space into a profitable asset without bleeding you dry.

    Table of Contents

    A Sharp Kitchen Renovation Cost Breakdown

    A Sharp Kitchen Renovation Cost Breakdown infographic.

    When you’re staring at a gutted space, the numbers can start to feel overwhelming. To keep your margins healthy, you need a realistic kitchen renovation cost breakdown that separates the “must-haves” from the “nice-to-haves.” I always tell my clients to divide their budget into three buckets: structural/mechanical, cabinetry, and finishes. If you’re dealing with an old fixer-upper, expect a larger chunk of your capital to vanish into plumbing and electrical updates before you even pick out a backsplash. You can’t build equity on top of faulty wiring.

    Once the bones are solid, you’re looking at the more visible expenses. The average kitchen remodel price per square foot can swing wildly depending on whether you’re sourcing reclaimed wood or high-end quartz. I tend to lean toward mid-range, durable materials that look expensive but won’t tank my ROI. Don’t forget that labor costs for kitchen renovation often account for nearly 30-35% of the total spend. If you try to DIY the heavy lifting to save a buck, make sure you aren’t actually setting your profit margin on fire.

    Calculating Average Kitchen Remodel Price Per Square Foot

    Calculating Average Kitchen Remodel Price Per Square Foot.

    When I’m walking through a new property, my mind immediately starts doing the math. Most people see a cramped, outdated galley; I see a square footage calculation. If you want to get serious about your ROI, you have to understand the average kitchen remodel price per square foot. Generally, you’re looking at a wide range, but for a standard flip where we want to maximize appeal without bleeding cash, I aim for a sweet spot that balances quality with efficiency.

    Don’t get it twisted—this number isn’t a fixed law. You can spend $150 per square foot on a basic refresh, or you can easily skyrocket past $400 if you’re diving into custom cabinetry and professional-grade appliances. The real trick to budgeting for kitchen upgrades is knowing where to lean in and where to pull back. I tell my clients all the time: don’t overbuild for the neighborhood, but don’t skimp on the things people touch every single day, like countertops and hardware. That’s where the perceived value lives.

    Five Ways to Protect Your Profit Margin During a Kitchen Rehab

    • Don’t chase every trend; focus on “high-impact, low-cost” upgrades like hardware, lighting, and a fresh coat of paint on existing cabinets to save your budget for the heavy lifting.
    • Always build a 15% “oh crap” fund into your initial estimate because once you tear down those old backsplash tiles, you never know what kind of structural surprises are hiding behind the drywall.
    • Keep your layout mostly intact to avoid the massive expense of moving plumbing lines or gas connections, which can eat up your equity before you even pick out a countertop.
    • Source your mid-century modern accents or unique hardware from thrift stores and estate sales rather than big-box retailers; it adds character to the flip without the premium price tag.
    • Prioritize high-quality appliances over fancy decorative finishes, because a savvy buyer will forgive a simple backsplash, but they won’t forgive a cheap oven that dies six months after closing.

    The Bottom Line: Where Your Money Actually Goes

    Stop obsessing over the price of a single faucet; focus on the big-ticket items like cabinetry and layout changes, because those are the real drivers of your ROI.

    Always bake a 15-20% contingency buffer into your budget—if you haven’t encountered a surprise behind a wall or under a floorboard, you aren’t actually renovating.

    Don’t over-improve for the neighborhood; aim for high-impact, strategic upgrades that build equity rather than spending a fortune on luxury finishes that won’t see a return at resale.

    ## The Bottom Line on Kitchen Budgets

    “Stop looking at a kitchen renovation as a massive drain on your bank account; if you’re doing it right, you aren’t just spending money on new quartz countertops, you’re strategically injecting capital into an asset that’s going to pay you back in equity.”

    Gareth Trelawny

    Turning Numbers into Net Worth

    Turning Numbers into Net Worth: Kitchen Remodeling.

    At the end of the day, understanding your kitchen remodeling costs isn’t just about crunching numbers; it’s about knowing exactly where every dollar of your capital is working. We’ve looked at the square footage math, the breakdown of materials versus labor, and how to avoid those budget-killing surprises that tend to hide behind old drywall. Remember, a kitchen isn’t just a place to cook—it’s the engine room of your home’s value. If you can master the balance between high-impact aesthetic upgrades and sensible structural investments, you aren’t just spending money; you are strategically deploying capital to maximize your eventual return.

    I know it feels overwhelming when you’re staring at a spreadsheet full of contractor quotes and material costs, but don’t let the complexity paralyze you. Every seasoned investor I know started with a single, messy renovation and a lot of trial and error. The difference between someone who just owns a house and someone who builds a portfolio is the willingness to embrace the grit of the process. Stop looking at the renovation as a drain on your bank account and start seeing it for what it truly is: the foundation of your future equity. Grab your tape measure, trust your eye for potential, and let’s get to work.

    Frequently Asked Questions

    How much should I actually set aside for those "hidden" renovation surprises that always seem to pop up once the walls are open?

    Look, if you aren’t planning for the “unknown,” you aren’t planning at all. Once I tear into a wall and find outdated knob-and-tube wiring or a leaky pipe that’s been sweating for a decade, I don’t panic—I just lean on my contingency fund. You need to set aside at least 15% to 20% of your total budget specifically for these surprises. It’s not a “maybe”; it’s a mathematical certainty in real estate.

    Is it worth splurging on high-end appliances if my goal is to flip the property for a quick profit?

    Look, I get the temptation—nothing looks better in a staged photo than a professional-grade range. But if your goal is a quick flip, don’t blow your entire margin on high-end appliances. You want “aspirational but accessible.” Aim for reliable, mid-tier brands that look sleek and modern. Buyers want to see a clean, updated aesthetic, not a chef’s kitchen that eats up all your potential equity. Spend that extra cash on better countertops instead.

    Where can I cut costs on materials without making the entire kitchen look cheap and hurting my resale value?

    Focus on the “touchpoints”—the things people actually feel and see up close. Don’t skimp on hardware or faucets; cheap handles scream “budget renovation” to a buyer. Instead, save big by opting for high-quality laminate countertops that mimic stone, or refinishing your existing cabinet boxes rather than replacing them entirely. It’s about strategic placement. Spend where it adds perceived value and shave costs where the eye won’t immediately judge the quality.

  • Organizing a Home Utility Space

    Organizing a Home Utility Space

    I was knee-deep in a damp, unfinished basement last Tuesday, staring at a mountain of mismatched detergent bottles and tangled cords, when it hit me: most people treat utility room organization like an afterthought, but that’s a massive mistake. I’ve seen too many investors—and homeowners—waste thousands on custom cabinetry and high-end built-ins before they’ve even addressed the basic flow of the space. You don’t need a designer’s budget to fix a chaotic laundry nook; you just need to stop treating your most functional room like a dumping ground for everything that doesn’t have a home.

    I’m not here to sell you on aesthetic bins that look pretty on Instagram but fall apart after three months of heavy use. Instead, I’m going to show you how to apply a strategic renovation mindset to your smallest spaces. We’re going to talk about maximizing vertical storage, prioritizing accessibility, and choosing durable solutions that actually hold up to daily wear and tear. My goal is to help you turn that cluttered corner into a high-functioning asset that adds real value to your property and your sanity.

    Table of Contents

    Small Laundry Room Storage Solutions That Multiply Your Square Footage

    Small Laundry Room Storage Solutions That Multiply Your Square Footage.

    When you’re working with a cramped footprint, you can’t afford to let floor space go to waste. I’ve seen too many investors overlook the tiny laundry nook, but that’s where the real margin is hidden. The secret to maximizing a tight area is leaning into vertical storage for cleaning tools and supplies. Instead of letting mops and vacuums lean awkwardly against a wall, install a wall-mounted track system. It clears the floor instantly, making the room feel larger and more intentional.

    If you’re dealing with a built-in unit, don’t just settle for a single shelf. I always look for ways to implement laundry room workflow optimization by creating tiered zones. Use stackable clear bins for organizing laundry detergents and pods so you can see exactly when you’re running low. If the budget allows, adding custom floating shelves above the washer and dryer can turn a dead zone into a high-functioning workspace. It’s about treating every inch like a piece of real estate—because in a small renovation, it is.

    Utility Closet Decluttering Tips to Reveal Hidden Potential

    Utility Closet Decluttering Tips to Reveal Hidden Potential

    Most people see a cramped utility closet and see a lost cause, but I see wasted square footage that’s dragging down the home’s perceived value. When I walk into a fixer-upper, the first thing I do is strip that closet down to the bare studs. You can’t build equity on top of a mess. My go-to utility closet decluttering tips always start with a brutal purge: if you haven’t touched that half-empty bottle of specialized floor cleaner in two years, toss it. You need to clear the visual noise before you can even think about adding value.

    Once the junk is gone, stop thinking horizontally. You need to leverage every inch of height available. I’m a huge advocate for vertical storage for cleaning tools; hanging your brooms and mops on a sleek rail system immediately frees up the floor and makes the space feel intentional rather than accidental. If you have the budget during a rehab, I’d suggest looking into custom utility room cabinetry ideas to house everything from vacuum attachments to bulk supplies. It’s about creating a system that actually works, transforming a chaotic hole in the wall into a high-functioning asset.

    Stop Wasting Square Footage: 5 Pro Strategies to Maximize Your Utility Room’s Value

    • Stop buying bulky bins and start thinking vertically; install heavy-duty floating shelves all the way to the ceiling to house seasonal supplies and bulk cleaning products without eating up your floor space.
    • Invest in a custom pegboard system for your tool and cleaning supplies because if you can’t see your gear, you aren’t using it, and a disorganized workspace is just wasted momentum.
    • Stop letting loose detergents and half-empty bottles create visual clutter; decant your essentials into uniform, airtight containers to turn a messy shelf into a streamlined, high-functioning zone.
    • Utilize the back of your door with a heavy-duty organizer for smaller items like lint rollers, spray bottles, and microfiber cloths so you aren’t constantly digging through drawers to find what you need.
    • Implement a “one-in, one-out” rule for your utility supplies to prevent the inevitable stockpile creep that turns a functional room into a cramped storage nightmare.

    The Bottom Line: Turning Utility Chaos into Equity

    Stop treating your utility room like a junk drawer; every square inch you reclaim through smart organization is an opportunity to increase the functional value of your property.

    Focus on verticality and built-ins to maximize tight footprints, because in a renovation, wasted floor space is just wasted potential.

    Prioritize high-quality, durable storage solutions that look intentional, ensuring your utility space feels like a planned asset rather than an afterthought.

    The Hidden ROI of Organization

    “Stop looking at your utility room as a junk drawer with a floor; if you can’t manage the chaos in your smallest spaces, you’ll never have the discipline to scale your bigger investments. A high-functioning utility area isn’t just about tidiness—it’s about maximizing every square inch of usable square footage to protect your property’s value.”

    Gareth Trelawny

    Turning Chaos into Capital

    Turning Chaos into Capital through strategic storage.

    At the end of the day, organizing your utility room isn’t just about finding a place for the detergent or hiding the vacuum cleaner; it’s about maximizing the utility of every single square inch you own. We’ve looked at how strategic storage can cheat the limits of a small laundry room and how decluttering a cramped closet can actually reveal the structural potential of your home. When you stop treating these service spaces as afterthoughts and start treating them as intentional assets, you stop losing time to chaos and start gaining control over your environment.

    I know it can feel overwhelming when you’re staring at a mountain of clutter or a cramped layout that feels impossible to fix, but remember that every major renovation starts with these small, tactical wins. You don’t need a massive budget to make a massive impact on your home’s flow and value. Take that laser measurer out of your bag, grab a few smart organizers, and start reclaiming your space. If you can master the mess in your utility room, you’ll have the discipline and the vision to tackle much bigger projects down the road. Now, get to work and build that equity.

    Frequently Asked Questions

    How do I decide which organizational upgrades are actually worth the investment versus just being aesthetic fluff?

    Look, I see people blow their budget on designer wicker baskets all the time, and frankly, it’s a waste of capital. If an upgrade doesn’t improve workflow or increase the home’s resale value, it’s just fluff. Focus your cash on high-impact, functional changes—like built-in shelving or heavy-duty drying racks. Ask yourself: “Does this solve a recurring headache or add tangible utility?” If the answer is no, keep your money in your pocket.

    What are the best ways to organize a utility room when I'm working with zero floor space and everything has to go vertical?

    When you’re fighting for every inch, stop looking at the floor and start looking at the walls. If you have zero floor space, you need to treat your walls like real estate. Install heavy-duty floating shelves or a track system to get everything off the ground. Use wall-mounted drying racks and pegboards for tools or cleaning supplies. It’s about maximizing vertical real estate to keep your footprint clear and your workflow efficient.

    How can I integrate smart storage solutions without making a small utility area feel cramped and claustrophobic?

    The trick is to stop thinking about floor space and start thinking about vertical real estate. When I’m working on a tight renovation, I lean heavily on floating shelves and wall-mounted tracks. If you can get your cleaning supplies and laundry essentials off the floor and up the walls, you’ll instantly breathe life back into the room. Keep the color palette light and the lines clean—don’t let bulky, mismatched bins swallow your visual space.

  • Preventing Damage With Doorstops

    Preventing Damage With Doorstops

    I was standing in the middle of a freshly painted hallway in my latest flip, staring at a massive, jagged hole in the drywall, when it finally clicked. A heavy oak door had swung wide during a walkthrough, slamming straight into the corner with enough force to crack the plaster. It’s one of those infuriatingly avoidable mistakes that eats away at your margins, and honestly, it’s a rookie error I see way too often on job sites. Most people think doorstop installation is just a trivial task for the very end of a project, but if you aren’t treating it as a fundamental part of protecting your investment, you’re basically leaving your walls wide open to damage.

    I’m not here to give you some over-complicated, theoretical lecture on hardware; I want to show you how to do this right so you never have to patch that same corner again. In this guide, I’m breaking down the most efficient ways to handle doorstop installation, from choosing the right floor-mounted options to those sleek wall protectors that won’t ruin your aesthetic. We’re going to focus on practical, durable solutions that save you time, money, and a massive headache during your final inspections.

    Table of Contents

    Guide Overview

    Total Time: 15-30 minutes
    Estimated Cost: $5-20
    Difficulty: Beginner

    Tools & Supplies

    • Drill/Driver for creating pilot holes
    • Pencil for marking installation points
    • Measuring tape for precise placement
    • Doorstop (1 unit)
    • Mounting screws (included with doorstop)

    Step-by-Step Instructions

    • 1. First, grab your tools and pick out your doorstops. I always opt for the heavy-duty rubber ones because they absorb the impact better; you don’t want a cheap plastic piece failing on you when you’re trying to protect your investment. Make sure you have a drill, some small drill bits, a screwdriver, and a pencil ready to go.
    • 2. Decide exactly where the stop is going to live. I like to open the door to the angle where it usually hits the wall and mark that spot with a pencil. You want to be strategic about placement so the door hits the stop, not the drywall, but don’t go so far that the door feels awkward when you’re walking through.
    • 3. If you’re installing floor-mounted stops, you’ll need to drill a pilot hole into the flooring. If it’s hardwood, go slow so you don’t splinter the wood; if it’s tile, you’ll need a masonry bit. I always tell my clients that precision is everything here, because a crooked floor stop looks amateur and cheap.
    • 4. Once your pilot hole is drilled, screw the base of the doorstop into place. If you’re using wall-mounted stops, you might want to find a stud or use a heavy-duty anchor if you’re dealing with plaster. I’ve seen too many DIYers skip the anchor and end up with a hole in the wall and a doorstop lying on the floor a week later.
    • 5. For the wall-mounted variety, check that the screw is tight and the unit isn’t wobbling. If it feels loose, you probably didn’t clear enough debris from the hole or your anchor isn’t seated right. You want that piece to feel like it’s part of the structure, not just something stuck on with luck.
    • 6. Finally, test the swing. Open and close the door a few times to make sure the stop catches the door at the right moment without making a massive racket. It’s a small, five-minute task, but it’s these tiny details that keep a renovation from looking like a “cheap flip” and help it feel like a professional home.

    Protecting Your Equity Preventing Wall Damage and Scuffed Paint

    Protecting Your Equity Preventing Wall Damage and Scuffed Paint

    Look, I’ve seen too many “finished” flips lose their luster because a homeowner didn’t think about the little things. You spend weeks getting the perfect eggshell finish on your walls, only to have a heavy door slam into the drywall every single day. It’s a nightmare. When you’re deciding between screw-in vs adhesive doorstops, remember that your choice should depend on the surface you’re trying to save. If you’re working with high-end finishes, I usually lean toward heavy-duty rubber bumpers that can take a beating without looking like an afterthought.

    Beyond just the walls, keep an eye on your flooring. If you have those beautiful original planks, you have to be careful about preventing wall damage from doors that swing too wide. I’ve seen people try to save a wall only to end up drilling into hardwood floors by mistake while trying to secure a floor-mounted stopper. It’s a rookie mistake that eats straight into your profit margins. Whether you’re using silicone or metal, make sure the placement is precise. Protecting your handles and walls isn’t just about aesthetics; it’s about preserving the integrity of the asset you worked so hard to build.

    Heavy Duty Door Bumpers Choosing Screw in vs Adhesive Doorstops

    Heavy Duty Door Bumpers Choosing Screw in vs Adhesive Doorstops

    When you’re deciding between screw-in vs adhesive doorstops, you have to look past the convenience and think about the long-term durability of the asset. If I’m working on a high-traffic rental or a flip where the doors are constantly being slammed by kids or pets, I’m reaching for the screw-in options every single time. Adhesive bumpers are great for a quick fix in a guest room, but they tend to peel off after a few months of heavy use, leaving behind a sticky, gross residue that’s a nightmare to clean.

    On the flip side, if you’re dealing with high-end finishes where you absolutely cannot risk drilling into hardwood floors or delicate baseboards, that’s when the adhesive or heavy-duty silicone versions become your best friend. I always tell my clients to weigh the “cost of repair” against the “cost of installation.” A screw-in model is a permanent solution that guarantees you won’t be replacing a damaged wall six months after the sale. If you want to truly prioritize protecting door handles and walls without leaving permanent marks on pristine surfaces, choose your mounting method based on the room’s actual usage.

    Pro Tips for a Flawless (and Durable) Install

    • Don’t just eyeball the height; grab that laser measurer or a tape measure and mark the spot at the exact same height on every door in the room to keep things looking professional and intentional.
    • If you’re working with hollow-core doors, don’t just drive a screw into thin air; make sure you’re hitting a stud or use a heavy-duty adhesive version so the doorstop doesn’t just rip right out of the wood the first time a kid slams it.
    • Check your floor clearance before you commit to a floor-mounted stop; there’s nothing worse than installing a beautiful brass bumper only to realize it’s blocking the sweep of your door.
    • Always test the “swing” after installation—give the door a few firm closes to make sure the stop is actually catching the door and not just hitting the trim or leaving a gap that invites wall damage.
    • When in doubt, go for a minimalist aesthetic; I always opt for brushed nickel or matte black hardware that blends into the design rather than something that looks like it belongs in a cheap motel.

    The Bottom Line on Doorstops

    The Bottom Line on Doorstops.

    Don’t cheap out on the hardware; if you’re dealing with heavy solid-core doors, skip the flimsy adhesive stickers and go with a screw-in model that can actually handle the impact.

    Think of doorstops as preventative maintenance for your drywall—it’s a tiny investment that keeps you from having to pay for professional patching and repainting down the line.

    Always measure your clearance before you drill; there’s nothing more frustrating than installing a stop only to realize it’s too bulky to let the door swing fully open.

    The Hidden Cost of Neglect

    “In this business, people obsess over granite countertops and custom cabinetry, but they overlook the small stuff. A five-dollar doorstop is the cheapest insurance policy you’ll ever buy to prevent a hundred-dollar drywall repair.”

    Gareth Trelawny

    The Bottom Line on Doorstops

    At the end of the day, installing doorstops is about more than just preventing a dent in the drywall; it’s about smart asset management. Whether you decided to go with a heavy-duty screw-in model for a high-traffic rental or a quick adhesive bumper for a light-use bedroom, you’ve successfully eliminated a common source of preventable maintenance costs. By taking twenty minutes to secure these small hardware pieces now, you’re saving yourself from the headache of patching, sanding, and repainting scuffed walls during your next walkthrough or inspection. It is these tiny, tactical decisions that separate a sloppy renovation from a professional-grade flip.

    I know it might feel trivial when you’re staring down a massive list of electrical and plumbing upgrades, but don’t overlook the details. Real estate investing isn’t just about the big, flashy kitchen remodels; it’s about the cumulative effect of doing the small things right. Every time you protect a surface or tighten a hinge, you are effectively protecting your margins. Keep that sharp eye on the details, stay patient through the messy parts of the job, and remember that every bit of sweat equity you put into these minor fixes is building the foundation for your long-term wealth.

    Frequently Asked Questions

    What’s the best way to install a doorstop if I’m working with tile or stone floors where I can't just drill a hole?

    If you’re dealing with high-end tile or stone, drilling is a massive risk—one slip and you’ve cracked a slab that costs more to replace than the whole renovation. Skip the drill and go with a heavy-duty adhesive bumper. Just make sure you clean the floor with isopropyl alcohol first so the bond actually holds. If you want something more permanent, look for floor-mounted stops that use a specialized construction adhesive instead of screws.

    If I’m dealing with a heavy, solid-core door, will a standard adhesive bumper actually hold, or am I just setting myself up for a mess?

    If you’re dealing with a solid-core door, forget the adhesive stickers. I’ve seen too many “quick fixes” peel right off the wall after a week because they couldn’t handle the momentum of a heavy door. You’re essentially fighting physics. For anything substantial, skip the mess and go with a screw-in bumper. It’s the only way to ensure that door doesn’t eventually punch a hole straight through your fresh drywall.

    How do I figure out the perfect placement for a doorstop so it actually stops the handle without looking awkward or being in the way?

    Don’t just eyeball it and hope for the best. I always grab my laser measurer to get the exact distance from the corner to where the handle sits when the door is fully open. You want the stop positioned so the handle hits it squarely, not glancing off at an angle. Aim for about two inches from the wall to give yourself a buffer. It keeps the hardware functional without looking like an afterthought.

  • How to Install Wall Shelves

    How to Install Wall Shelves

    I was standing in a dusty hallway of my first fixer-upper, staring at a patch of drywall that looked more like Swiss cheese than a structural support, wondering why I hadn’t just hired a contractor. I had a stack of beautiful reclaimed wood planks and a vision for a custom library, but the reality of shelving installation felt like a recipe for a collapsed wall and a wasted budget. Most people think you need a professional crew to get those clean, floating lines, but the truth is that improperly executed DIY work is what actually kills your property value.

    I’m not here to give you some polished, Pinterest-perfect fantasy that ignores the grit of a real job site. In this guide, I’m breaking down the actual mechanics of a successful shelving installation—from finding the studs to choosing the right anchors so your heavy decor doesn’t end up on the floor. I’ll show you how to navigate wonky walls and leverage your space to create tangible equity without breaking the bank. Let’s stop looking at empty walls and start turning them into assets.

    Table of Contents

    Guide Overview

    Total Time: 1-2 hours
    Estimated Cost: $30-80
    Difficulty: Beginner

    Tools & Supplies

    • Drill/Driver for making holes and driving screws
    • Level to ensure shelves are straight
    • Stud finder to locate wall support
    • Measuring tape for precise placement
    • Pencil for marking drill points
    • Shelving boards (length depends on project)
    • Shelf brackets (set matching board depth)
    • Wall anchors (if not drilling into studs)
    • Screws (appropriate length for thickness)

    Step-by-Step Instructions

    • 1. Before you even touch a drill, you need to find those studs. I’ve seen too many rookies try to hang heavy oak shelves on just drywall anchors, only to have the whole thing come crashing down mid-renovation. Grab your stud finder and trace the vertical supports behind the wall; you want to be hitting solid wood whenever possible to ensure these shelves can actually hold the weight of your decor or books.
    • 2. Once you’ve identified your mounting points, grab that laser measurer I’m always talking about and mark your heights. Don’t just eyeball it—measure from the floor up to ensure your lines are perfectly level across the entire span. I like to use a spirit level to draw a light pencil line across the wall so I have a visual guide that doesn’t lie to me.
    • 3. Now it’s time to prep the hardware. If you’re using floating shelves, you’ll likely be installing a metal bracket first. Position your bracket against your pencil marks and drill your pilot holes. If you missed a stud and absolutely have to use an anchor, make sure you’re using a heavy-duty toggle bolt rather than those cheap plastic ones that crumble under pressure.
    • 4. Secure the mounting system to the wall. Drive your screws in, but don’t go full force immediately. I prefer to start all the screws halfway and then go back to tighten them once I’m sure the bracket is perfectly flush against the drywall. If the bracket is wobbly, your shelves will never look high-end; they’ll just look amateur.
    • 5. Slide your shelving units onto the brackets. This is the moment of truth where you check for any wobbling or misalignment. If the shelf feels loose, check your level one more time. In this business, precision is profit; a crooked shelf can make an entire room feel “off” to a potential buyer, and we want everything looking intentional and sharp.
    • 6. Finally, do a stress test. I always give my shelves a firm, even press with my palms to make sure they aren’t shifting. Once you’re confident, start styling. I like to keep it minimal—maybe a few curated pieces or a trailing plant—to show off the clean lines of the installation without cluttering the visual space you just worked so hard to create.

    Precision Stud Finder Techniques for Structural Integrity

    Precision Stud Finder Techniques for Structural Integrity.

    Look, I’ve seen too many beautiful, expensive floating shelves end up on the floor because someone got lazy with their prep work. If you’re just guessing where the wood is behind that drywall, you’re asking for a disaster. You need to master specific stud finder techniques before you even think about picking up a drill. I always do a double-pass: first, I scan to find the edge of the stud, and then I scan again to find the center. If you don’t hit that center point exactly, your screws are going to pull through the side of the timber, and your structural integrity goes right out the window.

    Once you’ve located your targets, don’t just assume any screw will do. I always keep a mental weight capacity calculations checklist in my head. If you’re planning on stacking heavy art books or mid-century ceramics, you can’t rely on plastic anchors alone; you need to be securing shelves to drywall using heavy-duty lag bolts driven directly into those studs. It’s the difference between a shelf that looks great in a photo and one that actually holds the value you’re trying to build.

    Weight Capacity Calculations to Protect Your Investment

    Weight Capacity Calculations to Protect Your Investment

    Look, I’ve seen too many beautiful renovations ruined because someone got a little too ambitious with their decor. You might think a sleek floating shelf is just for a few lightweight succulents, but if you’re planning to stack heavy art books or stoneware, you need to do your weight capacity calculations before you even touch a drill. It’s not just about the shelf itself; it’s about the physics of the load. If you miscalculate, you aren’t just looking at a broken shelf—you’re looking at a hole in the drywall and a massive headache that eats into your profit margins.

    When you’re planning the load, don’t just guess. Factor in the weight of the items plus the weight of the shelving material itself. If you aren’t hitting a stud, you absolutely cannot rely on standard anchors for heavy loads; that’s how you end up securing shelves to drywall with nothing but hope. I always recommend overestimating your load by about 20%. It’s much better to have a shelf that feels slightly too sturdy than one that starts bowing the moment you add a single heavy vase.

    Pro-Level Moves to Avoid a Renovation Nightmare

    • Stop eyeballing it. Even if the room looks square, it rarely is. Use your laser measurer to check your level lines across the entire wall, because nothing screams “cheap flip” like a shelf that slants just enough to make a buyer uneasy.
    • Don’t skimp on the hardware. I’ve seen too many DIYers use the flimsy plastic anchors that come in the box; if you aren’t hitting a stud, use high-quality toggle bolts. You want these shelves to feel like part of the house, not an afterthought.
    • Plan for the “Visual Weight.” Since I love that minimalist industrial look, I always remind my clients that heavy timber shelves need beefier brackets. If the hardware looks too spindly for the wood, the whole room loses its sense of quality.
    • Mind your clearance. Before you drill a single hole, stand where the person will actually be standing. You don’t want to install a beautiful shelf only to realize it’s at head-height for anyone walking through the room.
    • Think about the lifestyle, not just the look. When I’m staging a rehab, I install shelving with the end-user in mind—if it’s a kitchen, it needs to handle heavy stoneware; if it’s a living room, it’s about displaying those mid-century finds without the fear of a collapse.

    The Bottom Line: Turning Shelving into Equity

    Don’t eyeball your measurements; use that laser measurer to ensure everything is level, because nothing kills the perceived value of a renovation faster than crooked, amateur-looking built-ins.

    Always prioritize the studs over the drywall; if you aren’t anchoring into the structural bones of the house, you aren’t building a feature, you’re building a liability.

    Think about the long-term use, not just the aesthetic; calculating weight capacity upfront means you won’t be dealing with cracked plaster or failed hardware six months after the flip is complete.

    The Real Value of a Straight Line

    “In this business, people get distracted by the expensive finishes, but I’m looking at the bones. If your shelving isn’t anchored into the studs with precision, you aren’t building storage—you’re just building a liability that’s going to cost you more in repairs than it ever added in equity.”

    Gareth Trelawny

    Turning Walls into Value

    Turning Walls into Value with shelving.

    At the end of the day, successful shelving installation isn’t just about making a room look pretty; it’s about the technical discipline behind the aesthetic. We’ve covered why you can’t skip the precision of a stud finder and why calculating weight capacity is the difference between a high-end custom look and a total renovation disaster. If you’ve taken the time to measure twice and anchor into those structural supports, you’ve already done more than most DIYers to ensure these additions actually hold their value. It’s that attention to detail—the stuff that happens behind the drywall—that separates a cheap fix from a strategic property upgrade.

    I know it can feel overwhelming when you’re staring at a pile of brackets and a blank wall, but remember that every major renovation is just a series of small, calculated wins. You aren’t just hanging boards; you are learning how to manipulate a space to maximize its potential. Don’t let the fear of a crooked level or a dusty floor stop you from making your move. Every time you master a new skill like this, you are building your toolkit for the next big flip. Keep your eye on the equity, stay patient through the mess, and keep building.

    Frequently Asked Questions

    What kind of hardware should I use if I can't find a stud exactly where I want my shelf?

    If you’re staring at a perfect spot but there’s no stud in sight, don’t panic—and for heaven’s sake, don’t just rely on those flimsy plastic anchors that come in the box. If you aren’t hitting wood, you need heavy-duty toggle bolts. They grip the back of the drywall and distribute the load much better. It’s a bit more work to drill the hole, but it’s the only way to ensure your investment doesn’t end up on the floor.

    How do I make sure my floating shelves don't start sagging after a few months of heavy books?

    If you’re seeing a sag, you’ve likely ignored the physics of leverage. Floating shelves are essentially long levers trying to pry themselves out of your walls. To prevent this, skip the cheap plastic anchors; you need to sink heavy-duty structural screws directly into the center of your studs. If your layout doesn’t align with the framing, you’ll need to install a solid wood cleat first. Don’t guess on weight—over-engineer the support so your equity stays level.

    Is it worth the extra cost to use heavy-duty anchors, or can I get away with standard drywall plugs for lighter decor?

    Look, if you’re just hanging a lightweight framed print or some dried eucalyptus, standard plugs are fine. But here’s the thing: I never play guessing games with my walls. If there’s even a slight chance you’ll add a heavier piece later—or if you’re installing anything near a high-traffic area—spend the extra few bucks on heavy-duty anchors. It’s a tiny upfront cost to prevent a massive headache (and a hole in your drywall) down the road.

  • Adding Decorative Trim to Doors

    Adding Decorative Trim to Doors

    I was standing in a dusty hallway of a 1970s ranch-style fixer-upper last Tuesday, staring at a gap between the casing and the drywall that looked wide enough to swallow my laser measurer. Most people think door trim installation is just about slapping some wood against a wall and calling it a day, but if you leave those uneven gaps, you’re basically throwing money away on a finish that looks amateur at best. I’ve seen too many investors try to cut corners here, only to have a picky buyer point out every single sloppy miter joint during the walkthrough.

    I’m not here to give you some theoretical lecture from a textbook; I’m here to show you how to get it right the first time so you can move on to the next task. In this guide, I’m breaking down the exact process I use to ensure every piece of trim sits flush and looks intentional. We’ll cover everything from prepping your surfaces to mastering those tricky corner cuts, giving you the tools to turn a cheap cosmetic fix into a high-end detail that actually builds your equity.

    Table of Contents

    Guide Overview

    Total Time: 2-4 hours
    Estimated Cost: $40-120
    Difficulty: Beginner

    Tools & Supplies

    • Miter saw for precise angled cuts
    • Brad nailer for securing trim to wall
    • Tape measure for accurate sizing
    • Caulk gun for filling gaps
    • Door casing/trim pieces based on door size
    • Finish nails or brad nails
    • Wood filler or caulk
    • Wood stain or paint

    Step-by-Step Instructions

    • 1. Before you even touch a piece of wood, you need to prep the opening. I’ve seen too many rookies try to slap trim over wonky, uneven drywall, and it’s a recipe for a headache. Grab your laser measurer and check the door jambs for level; if they’re leaning, you might need to shim them first. Once the opening is solid, clean out any debris or old, crumbling caulk from the gap between the jamb and the wall so your new trim sits flush.
    • 2. Measure twice, cut once—it’s a cliché for a reason. Lay your trim pieces out on the floor to visualize how the miters will meet at the corners. When you’re ready to cut, use a miter saw to create your 45-degree angles for the top corners. I always tell my clients to aim for a tight fit; if there’s even a tiny gap, you’re going to spend way too much time trying to hide it with caulk later.
    • 3. Now, it’s time to actually mount the pieces. Start with the side casings, working your way up from the floor. I prefer using a brad nailer to secure the trim to the wall studs or the door jamb itself. Make sure you aren’t just nailing into thin drywall, or that trim is going to pop right off the second someone bumps into it. You want those nails driven deep enough to be flush, but not so deep that they blow out the wood grain.
    • 4. Once the sides are up, tackle the top piece. This is where most people lose their patience, but it’s the most visible part of the job. Align your top piece so it meets the side casings perfectly. If you’re working with a single header, you’ll be mitering those top corners just like you did with the sides. I find that staying organized with my cut list keeps me from making expensive mistakes on higher-end materials.
    • 5. After everything is nailed down, take a close look at the joints. If your miters aren’t perfectly seamless, don’t panic—that’s what wood filler is for. Apply a small amount of filler to the gaps and sand it down once it’s dry until it’s completely smooth to the touch. If you skip this, the light hitting the trim in a renovated house will show every single imperfection, and that’s not the look we’re going for.
    • 6. The final touch that separates a DIY job from a professional renovation is the caulking. Run a thin, steady bead of paintable caulk along the edge where the trim meets the wall. This hides any tiny gaps and gives the whole thing that seamless, high-end finish that buyers crave. Wipe away the excess with a damp finger immediately; you don’t want to be scrubbing dried caulk off your beautiful new trim tomorrow.

    Essential Wood Trim Installation Tools for the Savvy Investor

    Essential Wood Trim Installation Tools for the Savvy Investor

    Look, I’ve learned the hard way that you can’t cut corners when it comes to your kit. If you show up to a job site with a cheap, jittery saw, you’re going to spend more time sanding out mistakes than actually building equity. For me, the holy grail is a high-quality compound miter saw. Getting your miter saw settings for trim dialed in is the difference between a seamless corner and a gap that screams “amateur hour.” I always keep a digital level in my bag alongside my laser measurer; if your door frame isn’t plumb, no amount of fancy wood is going to save the look.

    Beyond the heavy lifting, don’t overlook the small stuff that makes a renovation look high-end. I never head to a property without a high-quality finish nailer and a reliable caulk gun. Mastering applying caulk to door trim is honestly my favorite “secret weapon”—it hides those tiny, inevitable gaps and gives the whole installation that polished, custom-built feel. It’s these small, tactical moves that turn a basic flip into a premium asset.

    Mastering Miter Saw Settings for Trim and Perfect Corners

    Mastering Miter Saw Settings for Trim and Perfect Corners

    Listen, I’ve seen too many investors lose their margins because they rushed the finish work. You can have the most expensive materials in the world, but if your corners look like a jagged mess, the buyer will smell the lack of quality from a mile away. When you’re dialing in your miter saw settings for trim, don’t just trust the notches on the scale. I always take a scrap piece of the exact same profile first. Even a hair’s breadth of error at the saw translates to a massive, ugly gap once you’re actually performing your door casing installation steps.

    If you find yourself staring at a corner that won’t quite close, don’t panic and don’t reach for the hammer. Precision is about adjustment, not force. I prefer to cut my miters slightly “long”—meaning a fraction of a degree past the 45—to ensure a tight, seamless fit. A tight joint means you spend less time applying caulk to door trim and more time moving on to the next room. Remember, in this business, the difference between a “flip” and a “premium renovation” is found in the tightness of your corners.

    Pro Moves to Save Your Margins and Your Sanity

    • Stop eyeballing your gaps. I’ve seen too many rookies try to hide massive gaps with a mountain of caulk, but it looks cheap and it’ll crack in six months. Use a little bit of wood filler for tiny imperfections, but if the gap is huge, you messed up the cut. Do it right the first time so you aren’t spending your profit on remedial repairs.
    • Always test your miter saw on a scrap piece of the exact same trim before you touch the actual door. Lighting and wood grain can play tricks on your eyes, and there is nothing more frustrating than wasting a full stick of expensive primed MDF because your angle was off by a fraction of a degree.
    • Don’t skip the pre-drilling. If you’re working with harder woods or even some dense composites, driving a nail straight in can split the trim right at the corner. A quick pilot hole keeps the wood intact and prevents those ugly cracks that scream “amateur renovation” to any potential buyer.
    • Use a nail gun, but don’t go overboard with the pressure. I always check my compressor settings before I start a new room. If you’re driving nails too deep, you’ll blow out the surface of the trim, and then you’re stuck sanding and patching instead of moving on to the next asset.
    • Think about the floor before you nail anything down. If you’re installing new trim in a house where the subfloor is uneven, your trim might not sit flush against the baseboard or the floor. Take a second to check your levels; it’s much easier to shim a piece of wood now than to explain a crooked doorway during a final walkthrough.

    The Bottom Line: Why Trim Matters for Your ROI

    Stop viewing trim as just a finishing touch; it’s the visual glue that makes a renovation look intentional rather than cheap, and that’s what drives your final sale price.

    Invest in the right miter saw precision now so you aren’t wasting expensive materials on botched corners that scream “amateur” to a potential buyer.

    Focus on the tightest joints possible, because in the world of flipping, those small, clean details are exactly what turn a “fixer-upper” into a high-value asset.

    ## The Equity is in the Edges

    Most people walk right past a doorway without a second thought, but I see it differently: every perfectly mitered corner and seamless piece of trim is a tiny, calculated deposit into your project’s final profit margin.

    Gareth Trelawny

    The Finish Line is Where the Profit Lives

    The Finish Line is Where the Profit Lives.

    At the end of the day, nailing down door trim isn’t just about closing up gaps in a wall; it’s about the precision that separates a amateur DIY job from a professional-grade renovation. You’ve gone through the grind of selecting the right tools, dialing in your miter saw settings, and handling the actual installation. If you’ve done the work correctly, you’ve eliminated those sloppy, uneven lines that scream “cheap flip” to a potential buyer. Remember, it’s the small, technical details like a tight miter joint or a perfectly flush baseboard that signal to an inspector or an appraiser that this property has been maintained with care. Don’t rush the final nail; precision is your best friend when it comes to protecting your margins.

    I know there are moments mid-renovation when you’re covered in sawdust and wondering if the headache is worth the payout. Trust me, I’ve been there, standing in a gutted hallway feeling completely overwhelmed. But once that trim is up and the paint is dry, you’ll see the transformation instantly. You aren’t just fixing a house; you are building tangible wealth one room at a time. Every clean corner and seamless transition is a brick in the foundation of your future portfolio. Keep your eyes on the equity, keep your measurements sharp, and don’t stop until the job is done right.

    Frequently Asked Questions

    How do I handle gaps in the corners if my miter cuts aren't perfectly seamless?

    Look, even with a high-end miter saw, those tiny gaps happen. Don’t panic and don’t rip the trim off. If it’s a hairline crack, a bit of wood filler and some sanding will do the trick. If the gap is wider, grab some caulk. Just remember: caulk is your best friend for painted trim, but if you’re working with stained wood, you’ll need a wood putty that matches the tone perfectly. Keep it clean.

    Is it worth spending the extra cash on primed trim, or should I just buy raw wood and save the margin?

    Look, if you’re chasing every cent of margin, I get it. But in my experience, buying raw wood is a trap that eats your time—and time is money. Primed trim is a massive shortcut; it’s smoother, more consistent, and ready for paint immediately. Unless you’re doing high-end custom millwork where you need to stain the wood, just buy the primed stuff. Save your energy for the big structural wins and let the pre-primed boards do the heavy lifting.

    When should I stop worrying about the trim and move on to the next room to keep my renovation timeline on track?

    Look, I get the urge to chase perfection, but don’t let a single stubborn corner stall your entire ROI. If you’re spending hours sanding a single joint, you’re losing money. Once the trim is structurally sound, the miters are tight enough to pass a visual inspection, and you’ve prepped for paint, move on. Perfection is the enemy of a profitable flip. Get the basics solid in this room and get your momentum back elsewhere.