Category: DIY

  • Basic Home Roof Maintenance

    Basic Home Roof Maintenance

    I still remember standing on a ladder in the pouring rain three years ago, staring at a water stain on a ceiling that looked like a Rorschach test. I had just closed on what I thought was a “diamond in the rough,” only to realize the seller had conveniently glossed over the fact that the shingles were basically held together by prayers and moss. Most people think a roof inspection is just some tedious checkbox for the bank, but if you aren’t treating it like a forensic investigation, you are essentially handing your profit margin over to the next storm.

    I’m not here to give you a lecture or sell you on some overpriced, unnecessary service packages that do nothing but pad a contractor’s pocket. My goal is to teach you how to look at a roof and see the actual numbers hiding underneath those shingles. I’m going to walk you through exactly what to look for—and what to ignore—so you can spot the structural nightmares before they turn into equity-killing disasters. Let’s get into the grit of how to protect your investment.

    Table of Contents

    Spotting Subtle Roof Damage Signs Before They Strike

    Spotting Subtle Roof Damage Signs Before They Strike

    You don’t always need a ladder and a heavy-duty flashlight to spot trouble; sometimes, the house tells you it’s struggling if you actually bother to look. I always start with a walk around the perimeter. Keep an eye out for granules shedding from your shingles and piling up in the gutters like coarse sand. That’s a massive red flag for roof damage signs that most people ignore until a ceiling starts sagging. If you see curling edges or shingles that look like they’re lifting, your protection is already compromised.

    Next, get inside and look up. I’ve seen too many investors lose their shirts because they missed a faint, yellowish ring on a ceiling during a walkthrough. Those stains are the fingerprints of a slow leak. It might not look like a disaster now, but it’s a clear indicator that your preventative roof maintenance has been neglected. Catching these subtle shifts early is the difference between a quick patch job and a full-scale structural nightmare that eats your entire renovation budget.

    Why a Professional Roofing Assessment Saves Your Roi

    Why a Professional Roofing Assessment Saves Your Roi

    Look, I’ve seen too many rookies walk into a deal thinking they can squeeze an extra few thousand out of the budget by skipping the heavy lifting on inspections. That’s a rookie mistake that will haunt your profit margins. A professional roofing assessment isn’t just an extra line item on your closing costs; it’s your primary defense against catastrophic capital expenditures. When you’re flipping, your goal is to maximize equity, not to fund a full roof replacement three months after the sale.

    If you ignore those subtle roof damage signs during your initial walkthrough, you aren’t saving money—you’re just gambling with your ROI. I always tell my clients that a comprehensive residential roofing health check is essentially an insurance policy for your investment. It allows you to differentiate between a simple flashing repair and a structural nightmare that requires a complete tear-off. By catching these issues early, you can budget accurately, negotiate the price down with the seller, and ensure that your “fixer-upper” doesn’t turn into a money pit before you even see a return.

    My Hard-Earned Rules for Not Getting Burned by a Bad Roof

    • Check the attic before you check the kitchen. I always climb up into the crawl space with a high-powered flashlight to look for water stains on the rafters or dark spots that scream mold; if the attic is a mess, the roof is failing.
    • Don’t just look at the shingles; look at the flashing. Most rookies miss the metal bits around chimneys and vents, but that’s exactly where the water finds its way in to rot your subfloor and eat your profits.
    • Watch out for “granule loss” in the gutters. If you see what looks like coarse black sand piling up in your downspouts, your shingles are losing their protective coating and are on their way out.
    • Get a feel for the roof’s age, not just the owner’s word. If they say it’s “nearly new” but the shingles are curling or brittle, trust your eyes over their sales pitch—that’s an immediate negotiation point for me.
    • Always verify the structural integrity of the decking. A few soft spots underfoot might seem minor, but if the plywood is rotting, you’re not just looking at a shingle replacement—you’re looking at a massive, unplanned structural expense.

    Bottom Line: Don't Buy a Money Pit

    Trust your eyes, but verify with a pro; a quick walk-around can catch the obvious, but a professional inspection catches the structural rot that actually kills your margins.

    Treat the roof as a non-negotiable line item in your rehab budget, because negotiating a credit for a failing roof is always better than paying for a full replacement out of your own pocket mid-flip.

    Document everything; knowing the exact age and condition of the shingles isn’t just about the repair, it’s about protecting your resale value and proving to future buyers that the bones of the house are solid.

    The Real Cost of Cutting Corners

    “I’ve seen too many investors try to save a few grand by skipping a proper roof inspection, only to watch their entire profit margin wash away with the next heavy rain. In this game, a cheap roof is the most expensive mistake you’ll ever make.”

    Gareth Trelawny

    Don't Leave Your Equity to Chance

    Don't Leave Your Equity to Chance.

    At the end of the day, a roof isn’t just a structural necessity; it is a massive variable in your profit and loss statement. We’ve talked about how easy it is to miss those subtle signs of decay and why skipping a professional assessment is a gamble that rarely pays off. If you aren’t looking for curling shingles, water stains in the attic, or sagging rooflines, you aren’t just being optimistic—you’re being reckless with your capital. Remember, the goal of a flip or a long-term hold is to build wealth, and you can’t do that if you’re constantly writing checks to fix avoidable water damage that should have been caught during your initial walkthrough. Protect your margins by making the inspection a non-negotiable part of your due diligence.

    Real estate investing is rarely as glamorous as the polished photos on Instagram make it look. It’s gritty, it’s unpredictable, and it requires you to make the tough calls before the first hammer even swings. But that’s exactly where the opportunity lies. When you learn to spot the risks that others overlook, you stop being a spectator and start being a serious player in this game. Don’t let a preventable repair turn your dream project into a financial sinkhole. Stay sharp, stay pragmatic, and keep building. Your future portfolio depends on the decisions you make today, right there on the job site.

    Frequently Asked Questions

    How do I tell the difference between a simple patch job and a full roof replacement when I'm walking a property?

    Look for the “Frankenstein effect.” If you see different shingle colors or textures overlapping, you’re looking at a series of band-aid fixes. A simple patch is usually a localized repair around a vent or a single slipped shingle. But if the flashing is rusted, the granules are washing away like sand in a playground, or you see multiple layers of old shingles peeking through, stop dreaming about a patch. That’s a full replacement waiting to happen.

    At what point during the due diligence phase should I actually bring a contractor in to look at the shingles?

    Don’t wait until you’re under contract to call in the pros. I always bring a contractor in during the initial inspection period—right after I’ve done my own preliminary walkthrough. If I see curling shingles or granule loss from the ground, I want a hard number on the replacement cost before I sign a single piece of paper. You need that quote in your hand to negotiate the purchase price or walk away entirely.

    Are there specific red flags in a roof inspection report that should make me walk away from a deal immediately?

    If you see “structural sagging” or “compromised decking” in that report, walk. Period. Those aren’t quick cosmetic fixes; they’re massive, expensive structural nightmares that can eat your entire profit margin before you even pick up a hammer. Also, watch out for mentions of widespread mold or rot in the attic. If the bones of the roof are failing, you aren’t just buying a renovation project—you’re buying a money pit that will bury your equity.

  • Upgrading Kitchen Cabinet Hardware

    Upgrading Kitchen Cabinet Hardware

    I was standing in a gutted kitchen in a fixer-upper last Tuesday, staring at a set of mid-century cabinets that looked like they’d seen better decades. Most “design gurus” would tell you that a full custom cabinetry overhaul is the only way to save a room like that, but honestly? That’s just a fast track to bleeding your renovation budget dry. I’ve seen too many amateur investors blow their entire margin on expensive wood because they didn’t realize that the right cabinet hardware can do the heavy lifting for them. You don’t need a total gut job to create a high-end feel; you just need to stop overpaying for things that don’t actually move the needle on your property value.

    I’m not here to sell you on some overpriced, trendy aesthetic that will look dated by next season. Instead, I’m going to show you exactly how I select pieces that bridge the gap between “cheap flip” and “designer home.” We’re going to talk about weight, finish, and placement—the real technical details that turn a standard renovation into a high-ROI asset.

    Table of Contents

    Upgrading Kitchen Aesthetics Without Breaking the Bank

    Upgrading Kitchen Aesthetics Without Breaking the Bank

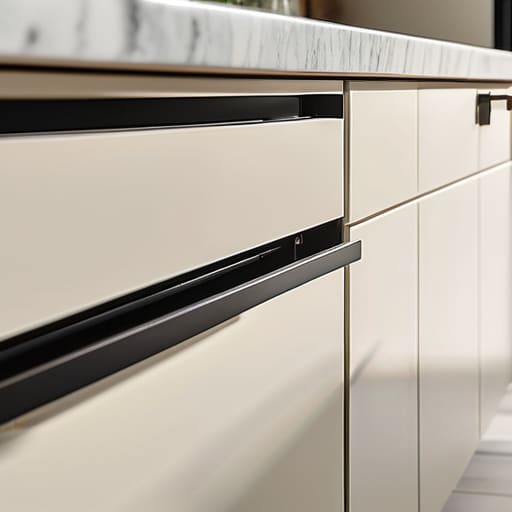
    When I’m walking through a property that’s clearly been neglected, I’m not looking at the outdated backsplash or the chipped laminate; I’m looking at the bones. If the layout works, you can perform a massive facelift without touching a single sledgehammer. One of my favorite ways to handle upgrading kitchen aesthetics on a tight budget is to focus on the touchpoints. If the cabinets are structurally sound but look like they belong in 1994, don’t bother replacing the boxes. Instead, swap out the old, dated pulls for something that feels intentional.

    The real trick to making a budget renovation look high-end is choosing the right finish. Right now, I’m seeing a huge shift in cabinet hardware trends 2024, where people are moving away from the overly polished looks of the past. You’ll often find yourself debating brushed nickel vs matte black hardware; while nickel is a safe, classic bet, matte black offers that sharp, industrial edge that makes a kitchen feel custom. Just make sure you’re measuring center to center distance before you order anything, or you’ll end up drilling unnecessary new holes in your beautiful new doors.

    Modern Kitchen Cabinet Accents for Maximum Roi

    Modern Kitchen Cabinet Accents for Maximum Roi

    When I’m walking through a property, I’m looking for those small, high-impact pivots that signal “luxury” to a potential buyer. Right now, modern kitchen cabinet accents are doing a lot of the heavy lifting in mid-range flips. If you want to tap into current buyer psychology, you have to look at the finish. While I still see a lot of dated chrome, the real money is in the contrast. I’ve been leaning heavily into the brushed nickel vs matte black hardware debate, and for most of my industrial-chic renovations, matte black is the clear winner. It provides that sharp, intentional line against lighter cabinetry that makes a kitchen look curated rather than just “remodeled.”

    However, don’t let a trendy finish mask a sloppy installation. If your pulls are crooked or misaligned, the buyer will feel it immediately. Before you order a single piece, grab that laser measurer and double-check your measuring center to center distance on every single door. Nothing kills the ROI of a high-end renovation faster than uneven spacing that makes a custom kitchen look like a DIY disaster.

    The Investor’s Cheat Sheet: 5 Hardware Rules for a High-Margin Flip

    • Stop buying the “everything” sets from big-box stores. If you want a kitchen to feel custom rather than cookie-cutter, mix your textures—try matte black pulls on shaker cabinets, but keep the finish consistent across the whole room to avoid visual clutter.
    • Scale matters more than you think. I’ve seen too many flips where tiny, dainty knobs are placed on massive, heavy drawer fronts, and it makes the whole kitchen look cheap. Go for longer, substantial pulls to give the cabinetry a sense of weight and quality.
    • Don’t ignore the “touch points.” If you’re aiming for a high-end feel, avoid hollow or lightweight hardware that rattles when you pull it. Real weight in a handle translates to a sense of durability in a buyer’s mind, even if the cabinets underneath are budget-friendly.
    • Alignment is your best friend. There is nothing that screams “amateur DIY” like crooked handles. I always keep my laser measurer handy for this; ensure your spacing is mathematically perfect, or the eye will catch the error immediately, even if they can’t pin down why the kitchen feels “off.”
    • Think about the “after-market” look. Choose finishes that are trending but not volatile. While I love a good mid-century brass moment, avoid overly experimental shapes that might date the house in three years. You want hardware that looks like it belongs in a timeless, well-curated home.

    The Bottom Line: Hardware as a Strategic Asset

    Stop thinking of handles as just decor; treat them as a high-leverage tool to distract buyers from dated cabinetry and drive up perceived value.

    Prioritize weight and texture—investing in solid brass or matte black finishes over hollow, lightweight alternatives is the fastest way to signal quality in a walkthrough.

    Consistency is your best friend for a professional finish; stick to a cohesive hardware theme across the kitchen and surrounding living areas to make the renovation feel intentional rather than patched together.

    The ROI of the Small Details

    “If you’re trying to squeeze every ounce of equity out of a flip, stop obsessing over the expensive backsplash for a second and look at the hardware. Swapping out generic, builder-grade pulls for something heavy, tactile, and intentional is the fastest way to make a budget kitchen feel like a custom build.”

    Gareth Trelawny

    The Bottom Line on Hardware

    The Bottom Line on Hardware strategy.

    At the end of the day, choosing the right cabinet hardware isn’t about following every fleeting trend you see on Pinterest; it’s about making calculated decisions that serve your bottom line. We’ve talked about how swapping out dated pulls for something more intentional can breathe new life into a kitchen, and how selecting high-quality finishes can mask a budget-friendly cabinet refresh. Remember, your goal is to create a space that feels cohesive and high-end without draining your renovation budget. Focus on the strategic impact of every knob and handle you install, because in this business, those small details are what ultimately drive your appraisal upward.

    Don’t let the scale of a renovation intimidate you. It’s easy to get lost in the big-ticket items like countertops or flooring, but I’ve learned through countless job sites that the magic is often in the finishing touches. Real estate investing is a game of margins, and mastering these low-cost, high-impact wins is how you build that solid equity we’re all chasing. Grab your laser measurer, pick out some hardware that actually has some weight to it, and start turning those neglected spaces into profitable assets. You have the eye for it—now go out there and build your portfolio, one detail at a time.

    Frequently Asked Questions

    How do I know if I should go with a matte black finish or something more classic like brushed brass to ensure the house appeals to the widest range of buyers?

    If you’re flipping for maximum resale, play it safe with brushed brass. It’s the “Goldilocks” of hardware—it feels high-end and intentional, but it doesn’t feel like a trend that will look dated in two years. Matte black is punchy and looks great in my personal industrial-chic projects, but it can feel a bit aggressive to some buyers. Stick to the classic finishes to keep the widest net possible for your exit strategy.

    Is it worth the extra labor to drill new holes for a different style of handle, or should I just stick to the existing drill pattern to save time on the flip?

    Look, if you’re chasing a tight margin, the temptation to stick with the existing holes is real. But here’s the truth: if the current pattern feels dated or forces you into “safe” but boring hardware, drill the new holes. It’s a minor labor cost compared to the value of a cohesive, modern look. A mismatched or awkward layout screams “cheap flip.” Do it right once; don’t let a few drill holes kill your equity.

    At what point does spending more on high-end, heavy hardware stop being a smart investment and start eating into my actual profit margins?

    Look, there’s a massive difference between “luxury” and “value.” You hit the diminishing returns wall the moment you start buying designer hardware just for the brand name. If you’re spending $50 per pull on a kitchen with mid-range cabinets, you’re just burning equity. Aim for weight and tactile quality—solid brass or matte black steel that feels substantial—but stop once the cost exceeds 1% of your total kitchen budget. If it doesn’t move the needle on the appraisal, it’s a vanity project, not an investment.

  • Fixing and Maintaining Window Sills

    Fixing and Maintaining Window Sills

    I was standing in the middle of a drafty Victorian fixer-upper last Tuesday, staring at a piece of wood that looked more like wet cardboard than a structural component. Most rookies see a soft, crumbling ledge and immediately start calling expensive contractors, thinking they need a full window replacement to save the house. But here’s the truth: that rot isn’t a death sentence for your budget, and a proper window sill repair is often the difference between a massive headache and a massive profit margin. I’ve seen too many investors walk away from goldmines just because they were intimidated by a little moisture damage.

    I’m not here to give you some polished, theoretical lecture that works in a textbook but fails on a real job site. Instead, I’m going to walk you through the gritty, hands-on reality of identifying rot, stripping it back, and sealing it up so it actually lasts. We’re going to cover the exact tools you need—and the ones you don’t—to tackle window sill repair without blowing your renovation budget. By the time we’re done, you’ll know how to stop the decay in its tracks and turn that crumbling detail into solid, protected equity.

    Table of Contents

    Guide Overview

    Total Time: 2-4 hours
    Estimated Cost: $30-60
    Difficulty: Beginner

    Tools & Supplies

    • Putty knife for scraping and applying filler
    • Sandpaper (various grits) for smoothing surfaces
    • Caulking gun for sealing gaps
    • Wood filler or epoxy putty (1 tube/container)
    • Exterior grade caulk (1 tube)
    • Sandpaper pack (medium and fine grit)
    • Paint or wood stain (small can)

    Step-by-Step Instructions

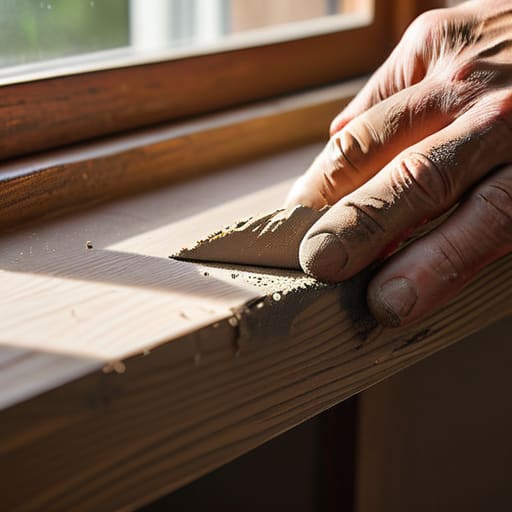
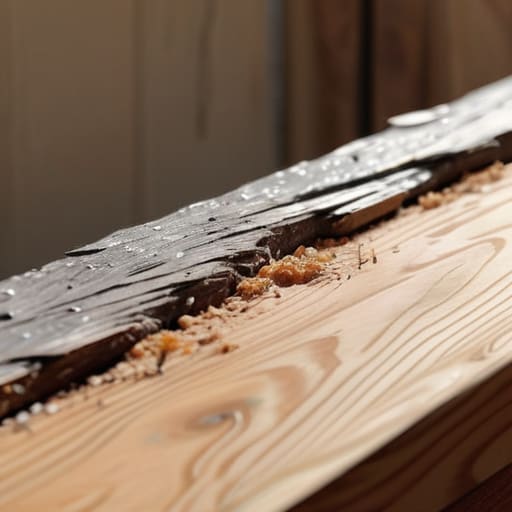
    • 1. First, you need to grab your scraper and a screwdriver to get aggressive with the rot. Don’t just skim the surface; you need to dig out every single bit of soft, crumbling wood until you hit something that actually feels solid. If you leave even a tiny pocket of moisture-soaked timber behind, you’re basically inviting the decay to come back for a second helping in six months.
    • 2. Once you’ve cleared the debris, take a shop vac and suck up every speck of dust, then wipe the area down with a damp cloth. You want a surface that is bone dry and completely clean before you move on. Any lingering sawdust or grit will prevent your repair materials from bonding properly, and in this business, a bad bond is a waste of money.
    • 3. Now, if the damage is significant—and let’s be real, in these older fixer-uppers, it usually is—you might need to swap in a new piece of wood. Measure twice with that laser measurer of mine, cut your replacement piece to fit snugly, and secure it with exterior-grade screws. You want a tight, seamless fit because gaps are just open invitations for water infiltration.
    • 4. For the smaller divots and surface-level damage, it’s time to break out the high-quality wood filler or two-part epoxy. I always prefer the epoxy for window sills because it acts more like a structural replacement than just a cosmetic patch. Spread it on firmly, smoothing it out with a putty knife until it’s flush with the surrounding wood, and then let it cure completely according to the package directions.
    • 5. Once everything is hard and level, grab some medium-grit sandpaper and start smoothing out the transitions. You’re looking for a surface that feels as continuous as the original wood; if you can feel a bump with your fingertip, the buyer will definitely notice it during their walkthrough. Aim for a flawless, seamless finish that won’t scream “cheap patch job” once it’s painted.
    • 6. Before you even think about touching a paintbrush, apply a high-quality, penetrating wood primer. This is the most underrated step in the whole process, but it’s what actually seals the wood and prevents future moisture issues. If you skip this, you’re just painting over a ticking time bomb of rot.
    • 7. Finally, seal the deal with a durable, exterior-grade paint that can handle the elements. Don’t skimp here; use a premium product that offers superior UV and moisture protection. A well-executed sill isn’t just a repair; it’s a way to show any future buyer that you actually take care of the bones of the house.

    Fixing Rotten Wood Window Sills Before They Sink Your Roi

    Fixing Rotten Wood Window Sills Before They Sink Your Roi

    When I’m walking a property during a walkthrough, I’m not just looking at the layout; I’m looking at the edges. A soft, spongy window sill is a massive red flag that tells me the previous owner likely skipped basic exterior window maintenance. If you find rot, don’t just slap some caulk over it and hope for the best—that’s how you end up with a much bigger structural headache six months later. You need to dig in, scrape out the decayed sections, and ensure you’re working with solid, healthy substrate before you even think about applying any patches.

    If the damage is localized, using a high-quality wood filler for windows can be a lifesaver for your margins. However, my rule of thumb is to always prioritize preventing window sill decay through proper sealing. Once you’ve stabilized the wood, invest in a high-grade sealant. It’s a small upfront cost that acts as insurance for your renovation. If you neglect this, you aren’t just losing a piece of trim; you’re potentially inviting moisture into the wall cavity, which is a fast track to eroding your hard-earned equity.

    Waterproofing Window Frames to Stop Future Decay in Its Tracks

    Waterproofing Window Frames to Stop Future Decay in Its Tracks

    Once you’ve finished the heavy lifting of fixing rotten wood window sills, you can’t just walk away and hope for the best. If you don’t seal the deal, you’re basically inviting the next rainstorm to start the decay process all over again. I’ve seen too many investors pour money into a beautiful rehab only to watch moisture creep back into the frame because they skipped the final defense. True waterproofing window frames isn’t just about slapping on a coat of paint; it’s about creating a continuous, impenetrable barrier between the elements and your newly repaired wood.

    I always recommend a multi-layered approach. Start by ensuring your caulk lines are pristine—use a high-quality, solar-resistant sealant where the frame meets the siding. If you’re working with natural wood, don’t skimp on a high-grade exterior stain or a marine-grade sealant. This is the core of smart exterior window maintenance. It might feel like an extra step when you’re exhausted from a long day on the job site, but protecting your investment now is much cheaper than replacing a whole unit in two years.

    Pro Tips for Keeping Your Sills Sharp and Your Equity High

    • Don’t just patch the surface; use a moisture meter to find the hidden rot deep inside the wood before you even touch a scraper, or you’ll be paying for the same repair twice in six months.
    • When you’re replacing sections, always opt for rot-resistant wood like cedar or even composite materials—it costs a little more upfront, but it’s a massive win for long-term maintenance costs.
    • Stop treating caulk like a magic wand; if your substrate is crumbling, the caulk won’t hold, so make sure you’ve stabilized the wood structure first to ensure a seamless, professional finish.
    • Invest in high-quality, exterior-grade wood filler for those smaller divots, but never use it as a structural fix for a sill that’s lost its integrity—know when to swap the wood and when to just skin it.
    • Always check your window’s “slope” after a repair; if the sill isn’t angled slightly outward to shed water, you’re basically building a little pond that will rot your new work out from under you.

    The Bottom Line on Window Sill Repairs

    Don’t just slap some putty over a soft spot; if the wood is compromised, you need to strip it back to the healthy stuff or replace it entirely to protect your investment.

    Prevention is cheaper than a full-scale rehab, so prioritize high-quality waterproofing and sealant application to stop moisture from turning a minor fix into a structural nightmare.

    Treat every repair as an opportunity to build equity—fixing these small, neglected details correctly ensures you aren’t leaving money on the table when it’s time to sell.

    The Hidden Cost of Neglect

    “A rotting window sill isn’t just a maintenance headache; it’s a leak in your profit margin. If you ignore the small stuff like wood rot, you’ll eventually find yourself paying for much bigger, much more expensive structural failures.”

    Gareth Trelawny

    Don't Leave Your Equity to Rot

    Don't Leave Your Equity to Rot.

    At the end of the day, window sill repair isn’t just about aesthetics; it’s about protecting the structural integrity of your investment. We’ve covered how to identify the early signs of decay, the right way to tackle rotten wood before it spreads, and the essential waterproofing steps needed to ensure your hard work actually lasts. If you skip these steps or try to slap a layer of paint over a soft spot, you aren’t saving money—you’re just delaying a much more expensive disaster down the road. Treating these small details with the respect they deserve is what separates a successful flip from a money pit.

    I know that staring down a crumbling window frame can feel overwhelming when you’re in the middle of a renovation, but don’t let it shake your confidence. These are the exact moments where you separate the amateurs from the pros. Every time you patch a sill or seal a frame, you are actively building equity one inch at a time. Real estate investing is a game of patience and precision, and mastering these “unsexy” repairs is precisely how you turn a neglected fixer-upper into a high-performing asset. Grab your tools, get to work, and let’s get that ROI where it belongs.

    Frequently Asked Questions

    At what point should I stop patching the wood and just bite the bullet on a full window replacement?

    Look, I’ve been there—staring at a patch job and wondering if I’m just masking a disaster. Here’s my rule of thumb: if you’ve scraped away the rot and the remaining structural wood is soft, spongy, or crumbling like a stale biscuit, stop patching. If the damage compromises the window’s ability to seal or hold weight, you’re just throwing money into a black hole. Bite the bullet and replace it. Protecting your ROI means knowing when a fix is just a band-aid.

    How can I tell if the rot is just surface-level or if it’s actually compromised the structural integrity of the entire frame?

    Here’s how I vet it on-site: grab a flathead screwdriver and give the wood a firm poke. If it sinks in like butter or the wood flakes away in chunks, you’re dealing with deep rot. If it’s just a little soft on the surface but feels solid underneath, you can likely save it with wood filler. But if the whole frame feels spongy or the window won’t even sit level, walk away—that’s a structural nightmare.

    Which specific wood filler or epoxy works best for a seamless finish that won't crack after the first seasonal temperature shift?

    If you’re looking for something that won’t crack the moment the temperature drops, skip the cheap hardware store wood putty. You need a two-part wood epoxy—I personally swear by Abatron LiquidWood and WoodEpox. It’s a bit more expensive, but it actually bonds to the fibers rather than just sitting on top. It expands and contracts with the wood, meaning you won’t be back there sanding and re-filling the same spot next spring.

  • Updating a Fireplace for Better Aesthetics

    Updating a Fireplace for Better Aesthetics

    I was standing in the middle of a dusty living room last October, staring at a massive, soot-stained brick hearth that looked like it belonged in a 1970s basement, and I realized something: most people see a demolition nightmare, but I saw instant equity. It’s a common mistake to think you need to tear out the entire chimney stack to modernize a room, but that’s just a fast way to blow your budget and kill your margins. A strategic fireplace makeover isn’t about starting from scratch; it’s about identifying the structural bones and layering on the right finishes to command a higher asking price.

    I’m not here to sell you on some expensive, superficial trend that will look dated in two years. Instead, I’m going to walk you through the gritty, practical reality of upgrading your hearth without draining your bank account. We’re going to cover everything from selecting materials that actually hold their value to the specific DIY tweaks that turn a visual eyesore into a high-end focal point. Let’s stop staring at that crumbling masonry and start turning it into a profitable asset.

    Table of Contents

    Guide Overview

    Total Time: 1-2 days
    Estimated Cost: $50-200
    Difficulty: Beginner

    Tools & Supplies

    • Paintbrush or roller for applying finish
    • Sandpaper for smoothing surfaces
    • Drop cloth to protect flooring
    • Painter's tape for clean edges
    • Heat-resistant masonry paint (1 quart)
    • Chalk paint or specialized stone paint (1 quart)
    • Sandpaper assortment (medium and fine grit)
    • Painter's tape (1 roll)

    Step-by-Step Instructions

    • 1. Before you even touch a scraper, you need to assess the structural integrity of the existing unit. I’ve walked into plenty of “fixer-uppers” where a homeowner thought they had a vintage charm, but they actually had a crumbling chimney breast that was a massive liability. Check for cracks in the masonry and make sure the hearth is stable; if the bones are rotten, no amount of tile will save your ROI.
    • 2. Once you’ve confirmed it’s safe to proceed, clear the area and strip away the junk. I’m talking about those dated, brass-tacked wooden mantels or the thick, peeling layers of popcorn paint that scream “1980s basement.” You want a clean slate before you start applying any new materials, so don’t skip the tedious part of sanding down the old surfaces.
    • 3. Now, let’s talk about the heavy lifting: choosing your focal point. If you’re aiming for that minimalist industrial chic look I love, I’d suggest a large-format slate tile or even a sleek, dark concrete finish. Whatever you pick, ensure the scale is right for the room; a tiny mosaic on a massive wall looks cheap and cluttered, which is the exact opposite of what we want when we’re trying to build equity.
    • 4. When you start laying your tile or stone, don’t skimp on the prep work. Use a high-quality thin-set and a level—and yes, I’ll be pulling my laser measurer out for this part—to ensure every single piece is perfectly aligned. If your lines are crooked, every potential buyer who walks through that door will feel it instinctively, and a wonky fireplace is a massive red flag.
    • 5. Grout is where most DIYers lose their edge, so pay close attention here. Choose a color that complements your tile rather than fighting it; I usually go for something neutral that allows the texture of the stone to do the talking. Once the grout is set, wipe it down immediately with a damp sponge to avoid that cloudy, hazy mess that’s a nightmare to scrub off later.
    • 6. The final touch is the mantel, and this is your chance to inject some personality. Instead of buying a pre-fabricated, hollow-core piece from a big-box store, hunt for a solid piece of reclaimed wood at a local salvage yard. A heavy, authentic timber mantel adds a sense of permanence and value that a piece of particle board just can’t replicate.
    • 7. Clean everything up and stage the space with intention. A simple, sculptural vase or a few well-placed books on the mantel is all you need; remember, we aren’t decorating a home to live in, we’re curating an asset. You want the fireplace to look like the heartbeat of the room, drawing the eye exactly where you want it to go.

    Modern Fireplace Design Ideas for Maximum Roi

    Modern Fireplace Design Ideas for Maximum Roi

    When you’re looking at the bottom line, you have to distinguish between “pretty” and “profitable.” If you’re hunting for high-impact modern fireplace design ideas, think about clean lines and texture rather than cluttered ornamentation. I always tell my clients that a monochromatic palette—think slate, matte black, or even a smooth micro-cement finish—creates that high-end, minimalist look that buyers crave. If you’re on a tight budget, don’t underestimate the power of a faux stone fireplace installation; with the right application technique, you can mimic expensive limestone or marble for a fraction of the actual material cost.

    Beyond the structure itself, don’t neglect the finishing touches that pull the room together. Effective fireplace mantel styling tips usually involve a “less is more” approach: a single sculptural piece or a stack of curated art books rather than a collection of knick-knacks. I’ve seen too many investors blow their budget on heavy masonry when a simple, sleek floating mantel would have achieved the same aesthetic lift. Remember, your goal isn’t just to decorate; it’s to create a focal point that makes a potential buyer instantly envision themselves hosting a dinner party in that space.

    Diy Fireplace Renovation Steps for the Patient Investor

    Diy Fireplace Renovation Steps for the Patient Investor

    If you’re looking to squeeze every bit of value out of a fixer-upper without draining your capital, you have to be strategic about your DIY fireplace renovation steps. I’ve learned the hard way that you shouldn’t just jump in with a sledgehammer. Start by assessing the structural integrity of the existing hearth; if the bones are solid, don’t waste money on a full tear-out. Instead, focus on a high-impact surface upgrade. For instance, a faux stone fireplace installation can give you that high-end, textured look that buyers crave, but only if you take the time to prep the surface properly. If you rush the prep work, that expensive veneer is going to peel, and you’ll be staring at a massive loss instead of equity.

    Budgeting is where most amateur flippers trip up. When calculating the cost of fireplace remodeling, always factor in a 15% buffer for unexpected masonry issues or venting repairs. Once the heavy lifting is done, the real magic happens in the finishing touches. I always tell my clients that fireplace mantel styling tips are just as vital as the masonry itself. A well-curated selection of modern decor can bridge the gap between a “renovated house” and a “dream home.”

    Pro-Tips for Avoiding the "Money Pit" Fireplace Trap

    • Check the structural integrity before you buy the tile; I’ve seen too many investors spend thousands on high-end marble only to realize the chimney breast was crumbling underneath.
    • Don’t overlook the mantel; swapping out a heavy, dated oak beam for a sleek, minimalist floating shelf is the fastest way to modernize the entire living room without touching the masonry.
    • Always prioritize the hearth’s functionality; if you’re aiming for a high-end flip, ensure the surround is easy to clean, because buyers will pass on a beautiful fireplace if it’s a maintenance nightmare.
    • Scale your materials to the room size; a massive, dark stone surround can swallow a small living area whole, so use lighter tones or smaller tiles to keep the space feeling open and airy.
    • Invest in a high-quality surround light; adding subtle, recessed lighting or even a well-placed sconce near the hearth can make a mediocre fireplace look like a designer centerpiece during a walkthrough.

    The Bottom Line on Fireplace ROI

    Stop viewing a dated hearth as a structural problem and start seeing it as a high-margin opportunity; a strategic facelift is one of the cheapest ways to boost a property’s perceived value.

    Don’t over-engineer the solution—focus on clean lines and high-impact materials like stone or tile that appeal to the widest range of buyers without blowing your renovation budget.

    Patience pays off during the messy phases, but don’t let perfectionism stall your progress; the goal is a polished, functional focal point that drives equity, not a museum piece.

    The ROI of the Hearth

    “A dated fireplace is just a hole in the wall that’s eating your profit margin; fix it right, and you aren’t just adding decor, you’re adding hard equity.”

    Gareth Trelawny

    From Dust to Dollars

    Fireplace renovation: From Dust to Dollars.

    At the end of the day, a fireplace makeover isn’t just about picking out a trendy new tile or a sleek mantel; it’s about recognizing a high-impact opportunity. We’ve covered everything from selecting modern designs that actually drive up your valuation to the gritty, hands-on DIY steps required to get the job done right. Whether you’re opting for a minimalist industrial look or a classic stone veneer, the goal remains the same: transform that outdated, soot-stained focal point into a strategic asset that commands attention during a walkthrough. Remember, every dollar you spend on a smart, well-executed renovation should be viewed as an investment in your property’s long-term equity.

    I know that staring at a half-demolished hearth can feel overwhelming, especially when the dust is settling and the real work begins. But don’t let the mess intimidate you. Every successful flip I’ve ever completed started with a vision that most people would have walked right past. Real estate investing is rarely about the easy wins; it’s about having the grit to see the potential beneath the grime. Grab your tools, trust your eye for design, and get to work. You aren’t just fixing a fireplace; you are building your future one renovation at a time.

    Frequently Asked Questions

    How do I know if my existing chimney structure can handle a heavy stone veneer without needing structural reinforcement?

    This is where most DIYers blow their budget. Before you order a single pallet of heavy stone, you need to check your math. Realistically, you should consult a structural engineer to verify the load-bearing capacity of your existing masonry. If you’re looking for a quick field test, check for existing cracks in the foundation or bowing in the chimney stack. If the structure looks even slightly compromised, don’t risk it; stick to lightweight, thin-set veneers instead.

    At what point does a DIY fireplace renovation stop being cost-effective and start becoming a liability for my resale value?

    Look, there’s a fine line between “charming character” and “structural nightmare.” You cross into liability territory the moment you touch the venting, the chimney masonry, or anything involving gas lines without a permit. If you’re DIYing a cosmetic tile overlay, go for it. But if you’re messing with the hearth’s structural integrity or the flue, stop. A botched fireplace inspection is the fastest way to kill a closing and tank your ROI.

    Should I prioritize a cosmetic face-lift for a quick flip, or is it worth investing in a full hearth reconstruction to attract higher-end buyers?

    If you’re on a tight timeline for a quick flip, go with the cosmetic facelift. A fresh coat of lime wash or some sleek tile veneer can mask a lot of sins without eating your margins. But, if you’re hunting for that premium buyer, don’t skimp. A full hearth reconstruction—think custom masonry or a floating stone mantel—is what separates a “renovated house” from a “luxury home.” Invest in the bones if you want the big check.

  • Improving a Laundry Room Layout

    Improving a Laundry Room Layout

    I was standing in a cramped, windowless utility closet of a fixer-upper last Tuesday, the smell of damp drywall and old detergent hanging heavy in the air, when I realized something: most people treat the laundry area like an afterthought. They think you need a $20,000 custom cabinetry overhaul to make a difference, but that’s just expensive fluff designed to drain your renovation budget. I’ve seen too many investors blow their margins on high-end marble backsplashes in a room that barely has enough space to turn around, completely ignoring the high-impact laundry room upgrades that actually move the needle for a buyer.

    I’m not here to sell you on a Pinterest-perfect fantasy that won’t survive a single heavy load of towels. Instead, I’m going to show you how to use strategic, low-cost interventions to transform a cluttered mess into a functional, high-value asset. We’re talking about smart sweat equity—the kind of tactical design choices that maximize your ROI without requiring a second mortgage. Let’s get to work on turning that neglected corner into a serious equity builder.

    Table of Contents

    Small Laundry Room Layout Optimization for Maximum Value

    Small Laundry Room Layout Optimization for Maximum Value

    When you’re staring at a cramped utility closet that barely fits a stackable unit, don’t panic. Most people see a dead end, but I see an opportunity for small laundry room layout optimization. The secret isn’t just about fitting the machines in; it’s about creating an efficient laundry room workflow that doesn’t feel like a chore. I always tell my clients to think vertically. If you have zero floor space, stop trying to use it. Instead, look up. Installing high-mounted shelving or custom cabinetry above the machines can reclaim a massive amount of usable territory without making the room feel claustrophobic.

    I’ve seen too many flips lose value because the laundry area was an afterthought. If you’re working with a tight footprint, prioritize laundry room storage solutions that double as workspace. A simple, butcher-block countertop installed over a front-loading washer and dryer provides a much-needed folding station while keeping the room looking intentional. It’s these small, strategic moves that turn a messy nook into a high-functioning zone that buyers will actually fight over.

    Modern Laundry Room Aesthetics That Command Premium Rents

    Modern laundry room aesthetics that command premium rents.

    When you’re pitching a rental or prepping a flip, you have to stop thinking of the laundry area as a hidden utility zone and start treating it like a design feature. Tenants today want spaces that feel intentional, not tucked away in a dark corner. To achieve modern laundry room aesthetics, I lean heavily into a minimalist industrial vibe—think matte black hardware against crisp, white cabinetry. It’s a high-contrast look that feels expensive but doesn’t actually break the bank if you source your fixtures strategically.

    The goal isn’t just to make it look pretty, though; it’s about perceived value. If a potential renter walks in and sees integrated laundry room storage solutions—like built-in shelving or a sleek countertop over a front-loading set—they immediately see a home that is well-maintained and thoughtfully planned. I always tell my clients: don’t just slap on some cheap laminate. Invest in a few high-quality, tactile elements. When a space looks organized and aesthetically cohesive, you aren’t just renting out a room; you’re selling a lifestyle that justifies that higher monthly premium.

    High-ROI Upgrades: Where to Put Your Money for Maximum Equity

    • Stop ignoring the lighting; swap out those dim, flickering overheads for bright, recessed LED lighting or even some sleek industrial pendants to make the space feel intentional rather than an afterthought.
    • Invest in durable, high-end surfaces like quartz or even a polished concrete if you’re going for that industrial chic look, because nothing kills a renovation’s value faster than cheap, peeling laminate.
    • Upgrade your hardware with heavy-duty, matte black or brushed brass pulls on your cabinetry; it’s a small, low-cost touch that makes the entire room feel custom and expensive to a potential buyer.
    • Don’t skimp on smart organization; installing built-in cabinetry or even simple floating shelves creates a sense of order that makes even the smallest utility room look like a high-end designer space.
    • Prioritize the plumbing and electrical layout—ensure your outlets are positioned perfectly for modern machines to avoid a mess of cords that makes a clean renovation look amateur.

    The Bottom Line: Maximizing Your ROI in the Utility Space

    Stop treating the laundry room as an afterthought; it’s a high-impact zone where smart, functional design directly translates into higher appraisal values.

    Focus on “sweat equity” upgrades—like custom shelving or updated hardware—that offer a massive visual punch without the massive contractor bill.

    Always prioritize durability and flow; a beautiful laundry room that’s a nightmare to actually use won’t help you flip the property or keep high-quality tenants.

    The Hidden Equity in the Utility Room

    “Stop treating the laundry room like an afterthought; when you stop viewing it as a cramped utility closet and start treating it as a functional design asset, you’re not just installing new cabinetry—you’re manufacturing equity.”

    Gareth Trelawny

    The Bottom Line on Laundry Room ROI

    The Bottom Line on Laundry Room ROI

    At the end of the day, a laundry room upgrade isn’t just about picking out a pretty backsplash or a trendy tile pattern. It’s about the strategic intersection of utility and aesthetics. We’ve talked about how optimizing your layout can reclaim wasted square footage and how a modern, cohesive design language can significantly increase your property’s marketability. Whether you are prepping a rental for a high-end tenant or getting a fixer-upper ready for a quick flip, remember that every square inch must serve a purpose. Don’t let a cluttered, poorly planned utility space become a detractor during a walkthrough; instead, make it a functional asset that proves you know how to manage a property with precision.

    I know that looking at a cramped, outdated laundry nook can feel overwhelming, especially when you’re staring down a renovation budget. But that’s exactly where the opportunity lies. While other investors are busy obsessing over kitchen islands, you can find your edge in these smaller, high-impact zones. It takes a bit of grit and a sharp eye to see the potential in a messy utility room, but that is how you build real, tangible equity. Stop viewing these rooms as mere afterthoughts and start seeing them as engines for profit. Grab your laser measurer, get to work, and let’s start turning those small spaces into big wins.

    Frequently Asked Questions

    How much should I actually budget for a laundry room refresh if I'm trying to keep my ROI as high as possible?

    Look, if you’re chasing ROI, don’t throw money at high-end appliances just because they look pretty in a showroom. I aim for the “sweet spot”: spend on what people touch and see—think new hardware, a fresh coat of durable paint, and maybe a decent quartz countertop if you’re adding a folding station. Budget around $500 to $1,500 for a cosmetic refresh. Keep it lean; every dollar spent must directly increase the perceived value.

    Is it worth it to upgrade to stacked units in a tiny space, or will that mess with my resale appeal?

    In a tiny footprint, stacked units are a total game-changer for your ROI. When you’re working with limited square footage, floor space is your most valuable commodity. Don’t fear the loss of side-by-side convenience; modern buyers—especially renters—prioritize efficient layouts over everything else. By going vertical, you free up room for built-in cabinetry or a folding station, turning a cramped closet into a high-functioning utility zone that actually adds to the property’s perceived value.

    When I'm gutting a laundry nook, how do I know if I'm looking at a simple cosmetic fix or a massive plumbing nightmare?

    Before you swing that sledgehammer, check the basics. If you see water stains on the drywall or a musty smell, you’re likely looking at a leak or slow drainage issues. Check the floor for unevenness or soft spots—that’s a red flag for subfloor rot. If the existing drains are far from your new layout, you’re staring down a major plumbing overhaul. Always assume the worst; it’s better to budget for a nightmare than to get blindsided mid-reno.

  • Creating a Functional Mudroom Area

    Creating a Functional Mudroom Area

    I was standing in the entryway of a fixer-upper last Tuesday, staring at a pile of damp boots and tangled leashes that had effectively claimed the hallway as their own territory. Most interior design magazines will try to sell you on a “luxury mudroom” that looks like a museum piece—all white lacquer and delicate velvet benches that would be ruined by a single muddy shovel. But let’s be real: if your mudroom design doesn’t prioritize durability and actual flow, it isn’t a functional space; it’s just an expensive way to hide your mess for ten minutes.

    I’m not here to give you a Pinterest board of pretty, impractical ideas that will fall apart the moment a real family moves in. Instead, I’m going to show you how to build a high-utility zone that survives the daily grind while actually increasing your property’s resale value. We’re going to talk about smart storage, rugged materials, and strategic layouts that turn a chaotic entryway into a seamless transition. I want you to stop treating your entryways like an afterthought and start viewing them as a strategic asset for your home.

    Table of Contents

    Custom Built in Cabinetry Investing in High Yield Organization

    Custom Built in Cabinetry Investing in High Yield Organization

    If you’re looking to maximize your ROI, stop thinking about standalone furniture and start thinking about architecture. When I’m evaluating a fixer-upper, I look for how much “dead space” is wasted in the entryway. Installing custom built-in cabinetry isn’t just a luxury; it’s a strategic move to reclaim square footage that would otherwise be lost to clutter. By integrating storage directly into the walls, you create a seamless look that appeals to high-end buyers who value efficiency over bulkiness.

    Don’t just build a row of cubbies and call it a day. To truly turn this area into a family command center, you need to design for the actual chaos of daily life. I always recommend incorporating dedicated zones for mail, charging stations, and even a small nook for school schedules. If you’re working with a tight footprint, a smart small mudroom layout that utilizes vertical height will do more for your property value than any expensive piece of freestanding furniture ever could. It’s about making the space work harder for the homeowner.

    Waterproof Entryway Materials to Protect Your Hard Earned Assets

    Waterproof Entryway Materials to Protect Your Hard Earned Assets

    If you’re serious about building equity, you have to stop thinking about aesthetics alone and start thinking about durability. A beautiful entryway means nothing if a single rainy afternoon turns your flooring into a warped, rotting mess. When I’m scouting a fixer-upper, I look straight at the transition zones. You need to prioritize waterproof entryway materials like luxury vinyl plank (LVP) or high-grade porcelain tile. These aren’t just about looks; they are about preventing moisture from seeping into the subfloor and devaluing the entire property.

    Don’t make the mistake of installing expensive hardwood in a high-traffic zone where wet boots and dog paws are a daily reality. I always tell my clients that a smart material choice is a defensive play for your investment. If you’re working with a cramped, small mudroom layout, stick to large-format tiles to minimize grout lines where dirt and water tend to settle. By choosing materials that can withstand heavy-duty use, you’re ensuring that your renovation efforts actually last long enough to see a return on your investment.

    Five Strategic Moves to Maximize Your Mudroom’s ROI

    • Stop overthinking the aesthetics and focus on the “drop zone.” You need a designated spot for keys, mail, and phones that doesn’t end up as a pile of junk on your kitchen island. If the flow is broken here, the whole house feels cluttered.
    • Don’t skimp on lighting. A dark, dingy entryway makes a house feel small and uninviting. Install bright, layered lighting—think recessed cans for utility and maybe a sleek industrial sconce—to make that first impression pop during showings.
    • Think about the “boots and mud” reality. If you’re installing bench seating, make sure there is actual clearance underneath for heavy-duty boot trays. A beautiful bench is useless if it’s just a place for wet shoes to rot your flooring.
    • Scale your storage to the actual occupants. I’ve seen too many flips with massive, adult-sized cubbies that look ridiculous in a family home. Design for versatility—adjustable shelving is your best friend when you’re trying to appeal to the widest range of buyers.
    • Invest in high-traffic hardware. This is a high-use zone; cheap handles and flimsy hooks will strip or loosen within six months. Buy heavy-duty, tactile hardware that feels substantial—it’s a small detail that signals quality to a potential buyer.

    The Bottom Line: Making Every Square Inch Count

    Stop viewing the mudroom as an afterthought; treat it as a strategic zone that protects your flooring and boosts your resale value.

    Prioritize durability over cheap aesthetics by selecting materials that can actually handle heavy foot traffic and moisture without looking trashed in six months.

    Focus your budget on high-impact, functional built-ins that solve real storage problems rather than wasting money on purely decorative, non-functional trim.

    ## The ROI of a Functional Entryway

    “Stop looking at a mudroom as just a place to drop your boots; look at it as the first line of defense for your flooring and the highest-leverage way to prove to a buyer that this house is actually managed with intention.”

    Gareth Trelawny

    Turning Entryways into Equity

    Turning Entryways into Equity with mudrooms.

    At the end of the day, a mudroom shouldn’t just be a place to dump your boots; it needs to be a strategic component of your property’s overall value. We’ve talked about why custom built-ins are worth the upfront investment and why choosing the right waterproof materials is non-negotiable if you want to avoid a maintenance nightmare down the road. When you stop viewing the entryway as an afterthought and start treating it as a functional asset, you’re no longer just decorating—you’re protecting your margins and ensuring the home stands up to the daily grind of real life.

    Don’t let the mess of a renovation or the complexity of a floor plan intimidate you. Every high-performing property I’ve flipped started with a series of small, smart decisions like these. It’s about seeing the potential in a cluttered corner and having the discipline to execute a design that works as hard as you do. Remember, building wealth isn’t always about the flashy kitchen remodel; sometimes, it’s about mastering the details that turn a standard house into a high-value home. Now, grab your laser measurer and get to work.

    Frequently Asked Questions

    How much should I actually budget for custom built-ins versus just buying some heavy-duty shelving from a big-box store?

    Look, if you’re just trying to survive a weekend, go to the big-box store. You’ll spend a few hundred on heavy-duty shelving, but it looks cheap and won’t survive a real renovation. For custom built-ins, expect to shell out anywhere from $2,000 to $5,000+ depending on the finish. It’s a bigger upfront hit, but that’s where the equity lives. Custom work signals quality to buyers; plastic bins and metal racks just signal “temporary.”

    If I'm flipping this house, is a high-end mudroom renovation actually going to see a return on investment, or is it just a vanity project?

    Look, if you’re just picking out expensive marble tiles to satisfy your own aesthetic, it’s a vanity project. Period. But if you’re designing a functional, durable mudroom that solves a buyer’s daily chaos, it’s an investment. In a flip, you aren’t selling a dream; you’re selling a solution. A smart, organized entryway signals to a buyer that the rest of the house is just as well-maintained. That’s how you build equity, not just decor.

    What are the best flooring options that look high-end but won't be ruined by wet boots and salt during the winter months?

    If you’re looking for that high-end aesthetic without the anxiety of salt damage, skip the natural hardwood. It’s a beautiful trap in a high-traffic entryway. Instead, go with luxury vinyl plank (LVP) or high-quality porcelain tile. A large-format porcelain tile can mimic stone perfectly and is virtually indestructible against slush and grit. If you want the warmth of wood, a high-grade LVP gives you that designer look while standing up to the winter chaos.

  • Fixing Common Ceiling Issues

    Fixing Common Ceiling Issues

    I’ll never forget the look on my first client’s face when I walked into that mid-century bungalow last summer. She was staring up at a massive, yellowish water stain, convinced that the entire roof was shot and she’d need a five-figure overhaul just to fix the aesthetic. I could almost smell the damp drywall and the stale air of a house being neglected, but as I pulled my laser measurer from my bag, I knew better. Most people see a sagging plaster mess and panic, thinking they’re looking at a structural catastrophe, but often, ceiling repairs are just a tactical puzzle waiting to be solved.

    I’m not here to sell you on expensive, unnecessary contractors or high-end architectural fixes that eat your entire profit margin. My goal is to show you how to identify the actual source of the damage and execute repairs that look seamless and professional without draining your bank account. We’re going to strip away the intimidation factor and focus on the grit of the work. I’m going to give you the exact, no-nonsense playbook for turning those unsightly patches into solid equity you can actually bank on.

    Table of Contents

    Cracking the Code on Ceiling Crack Causes

    Cracking the Code on Ceiling Crack Causes

    Before you grab your putty knife, you need to play detective. Not every hairline fracture is a dealbreaker, but ignoring them is a rookie mistake that can tank your ROI. Most of the time, you’re looking at simple settling—the house finding its feet—or maybe just some poor joint compound application during the original build. However, if you see those cracks spiderwebbing near a load-bearing wall, you’re likely looking at a threat to the ceiling structural integrity. That’s when the “quick fix” mentality needs to take a backseat to actual engineering.

    Then there’s the moisture factor. If those cracks are accompanied by discoloration, you aren’t just dealing with cosmetic issues; you’re likely fixing water stains on ceiling surfaces caused by a slow leak upstairs. I’ve seen investors lose thousands because they patched over a damp spot instead of finding the source. Once you’ve ruled out the plumbing and the foundation, you can finally dive into the actual drywall repair techniques needed to smooth things out. Treat the cause first, or you’ll just be painting over the same problem in six months.

    Patching Holes in Ceiling for Instant Value

    Patching Holes in Ceiling for Instant Value

    Once you’ve identified the root cause, it’s time to stop staring at the damage and start fixing it. When I’m walking through a potential flip, nothing kills the vibe faster than a jagged hole or a dented surface; it makes the whole house feel neglected. Patching holes in ceiling surfaces isn’t just about aesthetics; it’s about removing that immediate “red flag” for buyers. If you’re dealing with small punctures, a simple mesh patch and some joint compound will do the trick, but for larger gaps, you’ll need to get more aggressive with your drywall repair techniques to ensure the patch doesn’t sag or crack again in six months.

    The real magic happens in the finish. I always tell my clients that a sloppy patch is worse than no patch at all because it screams “amateur hour.” You need to sand it down until it’s seamless and then prime it thoroughly before applying your topcoat. If you’re lucky enough to be dealing with a minor dent rather than a structural failure, this is one of the fastest ways to boost perceived value without breaking your renovation budget. It’s about making the repair invisible so the buyer focuses on the potential, not the damage.

    My Pro Playbook for Ceiling Fixes That Actually Add Value

    • Stop treating the symptoms and find the source; if you just patch a water stain without fixing the leak, you’re literally throwing your renovation budget down the drain.
    • Invest in a high-quality sanding sponge rather than cheap sandpaper, because nothing ruins a professional-looking finish faster than visible ridges and uneven textures.
    • Don’t skip the priming stage; if you apply paint directly over a patch, that spot will “flash” and look like a glaring mistake the second the light hits it.
    • Use a laser level to check your ceiling’s plane before you start, because if you’re working on a sag, a simple patch won’t hide the fact that the whole room is sloping.
    • Always buy a little more joint compound than you think you need, because there is nothing more frustrating than being halfway through a smooth finish and realizing you’re scraping the bottom of the bucket.

    The Bottom Line on Ceiling Repairs

    Don’t just slap some spackle over a crack and call it a day; if you don’t address the underlying cause—whether it’s settling or a sneaky leak—you’re just painting over a ticking time bomb that will kill your resale value.

    Treat ceiling repairs as a high-leverage opportunity to build equity, because a smooth, flawless ceiling is one of those small, relatively cheap fixes that makes a whole room feel premium and polished to a potential buyer.

    Always prioritize structural integrity over aesthetics; I’d much rather spend an extra weekend making sure a sagging ceiling is properly braced than trying to hide a major issue with fancy lighting and paint.

    The Equity in the Overhead

    Most buyers see a hairline crack in a ceiling and think “structural disaster,” but when I see one, I see a low-cost opportunity to build equity; don’t let a little plaster scare you away from a goldmine.

    Gareth Trelawny

    Turning Ceiling Flaws into Financial Wins

    Turning Ceiling Flaws into Financial Wins

    At the end of the day, fixing a ceiling isn’t just about aesthetics; it’s about protecting your investment. We’ve covered how to identify whether those cracks are just settling or a sign of something more sinister, and we’ve walked through the practical steps of patching holes to instantly boost a room’s appeal. Whether you’re dealing with a minor hairline fracture or a significant water stain, the goal remains the same: stop the damage in its tracks before it eats into your margins. Don’t let a few unsightly patches intimidate you into walking away from a deal. Once you understand the “why” behind the damage, the “how” of the repair becomes just another line item in your renovation budget.

    I know that staring at a crumbling ceiling can feel overwhelming when you’re standing in the middle of a dusty job site, but remember why you started this journey. Every messy repair and every layer of drywall mud is a direct investment in your future. You aren’t just fixing a house; you are building tangible equity one room at a time. Real estate isn’t about finding perfection; it’s about having the grit to find the flaws and the vision to fix them. So, grab your tools, trust your eye, and let’s get to work turning those crumbling walls into generational wealth.

    Frequently Asked Questions

    How do I know if a crack is just cosmetic or if I'm looking at a serious structural red flag?

    Look, I’ve seen my fair share of “scary” cracks that were nothing more than settling, but you can’t afford to guess. If it’s a hairline fracture or a tiny spiderweb, it’s likely just cosmetic—easy equity. But if that crack is wider than a nickel, runs diagonally, or if you notice the floorboards shifting nearby, stop everything. That’s not a patch job; that’s a structural red flag requiring a pro.

    Is it worth hiring a pro for a small patch job, or can I tackle the drywall work myself to save on the rehab budget?

    Look, if it’s just a small patch, save your capital and do it yourself. I’ve spent plenty of weekends covered in joint compound, and honestly, mastering a basic drywall patch is a rite of passage for any serious flipper. If you can handle a sanding block and a bit of patience, you’re saving yourself a massive chunk of the rehab budget. Just don’t get cocky—if the structural integrity is compromised, call a pro.
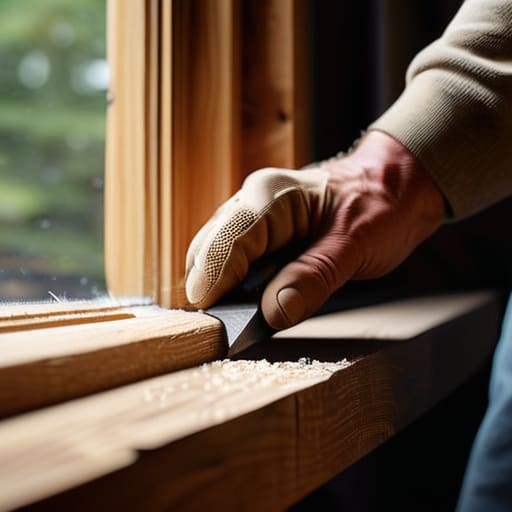
    What's the best way to finish a ceiling repair so the patch doesn't show up under the light once I've repainted?

    The secret is all in the feathering. If you just slap mud on a hole, you’re basically highlighting it with a spotlight once the lights go on. You need to sand the edges until they’re seamless, then apply a second, wider coat of joint compound to “feather” the patch out. I always finish with a high-quality primer; if you skip that, the texture difference will scream at you through the new paint.

  • Building a Stone Patio for Outdoor Use

    Building a Stone Patio for Outdoor Use

    I was standing in the mud of a teardown in East Austin last July, staring at a backyard that was essentially just a graveyard for rusted lawn chairs and cracked, uneven pavers. Most contractors I spoke to were already quoting me figures that looked more like a small mortgage than a renovation budget, trying to sell me on high-end, custom-carved stone that would never actually see a return on investment. They want to treat patio construction like a luxury landscaping spree, but if you’re looking to build real equity, you need to stop thinking about aesthetic fluff and start thinking about structural value.

    I’m not here to give you a Pinterest board of unattainable dreams; I’m here to give you the blueprint for a high-impact outdoor space that actually moves the needle on your property value. I’ve spent years learning which materials survive a heavy rainstorm and which ones just look good in a brochure before they crumble. In this guide, I’m breaking down the no-nonsense essentials of smart patio construction, focusing on how to maximize your square footage and your ROI without draining your renovation fund on things that don’t matter.

    Table of Contents

    Smart Outdoor Living Space Planning for Maximum Value

    Smart Outdoor Living Space Planning for Maximum Value

    When I’m walking a property, I’m not just looking at the grass; I’m looking at how the house flows into the yard. Most rookies make the mistake of slapping down a generic slab of concrete and calling it a day. If you want to actually move the needle on your ROI, you need to treat outdoor living space planning with the same rigor you’d apply to a kitchen remodel. Think about “zones”—a dedicated spot for dining, a separate area for lounging, and perhaps a fire pit zone. This creates the illusion of more square footage, which is a huge selling point for buyers.

    Don’t get so caught up in the aesthetic that you ignore the bones of the site. I’ve seen too many beautiful projects ruined because the owner ignored patio drainage solutions during the initial build. If water pools near your foundation, your “value-add” just became a massive liability. I always advocate for integrating subtle hardscape design ideas, like built-in stone seating or low-profile retaining walls, to manage slopes. It’s about making the transition from indoor to outdoor feel intentional, not accidental.

    Hardscape Design Ideas That Outperform the Competition

    Hardscape Design Ideas That Outperform the Competition

    When you’re looking at a property through an investor’s lens, you have to look past the weeds and see the structural bones. I’ve seen too many flips lose money because the backyard was just a patch of uneven grass. To really stand out in a competitive market, you need cohesive hardscape design ideas that feel intentional rather than slapped together. I’m a huge fan of using natural stone or high-quality pavers to create defined zones—think a dedicated dining area versus a lounge nook. It’s about creating a sense of “outdoor rooms” that make the square footage feel much larger than it actually is.

    However, don’t get so caught up in the aesthetics that you ignore the technicalities. Nothing kills your ROI faster than a beautiful new terrace that turns into a swimming pool every time it rains. I always prioritize effective patio drainage solutions during the initial phase to prevent soil erosion or foundation issues down the line. If you’re dealing with a slope, don’t fight it; instead, look into retaining wall integration to create level, usable tiers. It adds a layer of sophisticated architectural interest while solving a functional problem, which is exactly how you turn a “fixer-upper” into a premium asset.

    Five Pro Moves to Protect Your ROI During Patio Construction

    • Prioritize drainage before you even think about aesthetics; if you don’t slope your patio away from the foundation, you’re just building an expensive swimming pool for rainwater.
    • Invest in high-quality sub-base materials because a cheap gravel layer is the fastest way to end up with a sunken, uneven mess that kills your property’s curb appeal.
    • Stick to a cohesive material palette that pulls from the house’s existing architecture to ensure the new outdoor space feels like a seamless extension rather than a weird afterthought.
    • Don’t skimp on the lighting layout, as integrated low-voltage lighting adds massive perceived value and makes the space functional for evening entertaining.
    • Plan for “zones” instead of just a slab of concrete—delineating a dining area from a lounge area makes the footprint feel much larger and more intentional to potential buyers.

    The Bottom Line on Patio ROI

    Focus on durability over trendy aesthetics; I’ve seen too many investors waste money on cheap pavers that crack within two seasons, killing their margins.

    Treat your outdoor space like an extension of the floor plan, not an afterthought, to ensure the flow actually adds usable square footage to the property.

    Don’t over-improve for the neighborhood, but do invest in high-impact hardscaping that makes a buyer immediately visualize themselves hosting a summer dinner party.

    The Equity in the Dirt

    Stop looking at a patch of uneven grass as a landscaping headache; look at it as an untapped square footage that, with the right hardscape, can significantly bump your property’s appraisal.

    Gareth Trelawny

    Turning Concrete into Capital

    Turning Concrete into Capital with patios.

    At the end of the day, a successful patio project isn’t just about laying down some pavers or pouring a slab; it’s about intentionality. We’ve covered how to bridge the gap between a messy backyard and a high-value outdoor living space by focusing on smart layouts, durable hardscaping, and designs that actually appeal to modern buyers. If you focus on functional aesthetics—meaning spaces that people can actually live in, not just look at—you’re going to see a much higher return on your investment. Remember, every dollar you spend on a well-planned patio should be viewed as a strategic deposit into your property’s equity, rather than just another renovation expense.

    I know that looking at a patch of dirt or a cracked, uneven yard can feel overwhelming, especially when you’re trying to balance a budget. But don’t let the initial mess intimidate you. I’ve spent plenty of afternoons on job sites covered in dust, realizing that the most profitable transformations always start with a little bit of grit and a lot of vision. You don’t need a million-dollar budget to make a massive impact; you just need to see the potential where others only see a headache. Stop viewing your outdoor space as an afterthought and start treating it like the wealth-building asset it truly is.

    Frequently Asked Questions

    How do I decide between expensive natural stone and more budget-friendly pavers without making the project look cheap?

    Look, I’ve seen both sides of this on countless job sites. If you’re on a tighter budget, don’t panic—you don’t need premium flagstone to add value. The secret is in the scale and the pattern. Avoid those tiny, uniform pavers that look like a driveway from the 90s. Instead, opt for larger, multi-sized modular pavers with tight joints. It mimics the organic flow of natural stone without the massive price tag or the headache.

    Is it worth investing in built-in outdoor kitchen infrastructure now, or should I stick to a simple seating area to keep my ROI higher?

    Look, if you’re chasing the highest immediate ROI, a simple, high-end seating area is the safer bet. It’s low risk and broad appeal. But if you’ve found a property with a massive backyard that’s currently just a dead zone, built-in kitchen infrastructure is how you win the “lifestyle” sale. Don’t overbuild, though—stick to the essentials like a grill station and prep space. Turn that empty dirt into a destination, not just a patio.

    What are the biggest red flags I should look for in a backyard before I commit to a heavy hardscape renovation?

    Before you even pick up a shovel, check the grade. If the yard slopes aggressively toward the foundation, you’re looking at a drainage nightmare that’ll eat your profits alive. Also, watch out for massive, ancient trees with shallow root systems; digging around them for a patio is a recipe for structural disaster. Lastly, if the soil feels like pure clay or looks unstable, your hardscape will crack before you even sell. Don’t ignore the dirt.

  • Maintaining and Cleaning Tile Grout

    Maintaining and Cleaning Tile Grout

    I was standing in the middle of a kitchen in my latest fixer-upper, staring at what I thought was a beautiful subway tile backsplash, only to realize the lines between the tiles looked like they’d been drawn with charcoal. It was a gut punch. You can spend thousands on high-end porcelain, but if your tile grout cleaning is non-existent, that entire room looks like a dilapidated rental instead of a luxury asset. Most people think they need to rip everything out and start from scratch when the lines turn black, but that is a massive waste of your renovation budget.

    In this guide, I’m stripping away the fluff and giving you the exact, gritty methods I use on my own job sites to restore those lines to a crisp, clean finish. We aren’t talking about expensive, scented chemical sprays that do nothing; I’m showing you how to tackle deep-seated grime using strategic, heavy-duty techniques that actually work. By the time you’re done reading, you’ll know how to turn those dingy, gray crevices back into a polished feature that adds real, tangible value to your property.

    Table of Contents

    Guide Overview

    Total Time: 1-2 hours
    Estimated Cost: $15-30
    Difficulty: Beginner

    Tools & Supplies

    • Scrub brush or stiff nylon brush for agitation
    • Microfiber cloths or sponges for wiping away residue
    • Baking soda (1-2 cups)
    • White vinegar (1 cup)
    • Warm water (as needed)

    Step-by-Step Instructions

    • 1. First, clear the decks. I can’t stand working around clutter, and neither should you. Move any rugs, floor plants, or furniture out of the way so you have a clear field of vision. If you’re working in a bathroom, clear out the shower mats and bottles. You need to see exactly where the grime is hiding before you even think about touching a sponge.
    • 2. Grab your gear—and I mean the real stuff, not just a flimsy kitchen sponge. You’ll need a stiff-bristled grout brush (or an old toothbrush if you’re on a tight budget), a bucket, some warm water, and a heavy-duty degreaser or a specialized grout cleaner. I usually opt for a pH-neutral cleaner because I’ve seen too many rookies accidentally etch the finish off expensive marble tiles by using something too acidic.
    • 3. Mix your solution and prep the area. Fill your bucket with warm water and add your cleaner according to the bottle’s instructions. Don’t just dump it in; follow the ratio so you don’t end up with a sticky residue that actually attracts more dirt later. Once it’s mixed, test a small, inconspicuous patch of tile first just to make sure you aren’t causing any unexpected discoloration.
    • 4. It’s time to get dirty. Apply your cleaning solution to the grout lines and let it sit for about five to ten minutes. This isn’t just wasted time; you’re letting the chemicals do the heavy lifting by breaking down the oils and buildup. If you try to scrub immediately, you’ll just be exhausting yourself for no reason.
    • 5. Now, get in there with the brush. Scrub the grout lines using firm, circular motions. I know it’s tedious, but if you want that “just renovated” look, you can’t skip the corners. If you hit a particularly stubborn patch of dark grime, don’t panic—just apply a little more pressure and stay consistent. This is where the actual value is being restored.
    • 6. Once you’ve scrubbed the lines, soak up the dirty slurry. Use a large, absorbent sponge or a microfiber cloth to wipe away the grime. I recommend using multiple clean rinses of plain water. If you leave any cleaning solution behind, it’ll dry into a cloudy film that makes your beautiful new tiles look dull and neglected.
    • 7. Let it dry completely before you even think about walking on it or sealing it. If you’re looking to protect your investment, this is the perfect time to apply a high-quality grout sealer. Sealing is the difference between a floor that looks great for a month and one that holds its value for years. It keeps the stains from penetrating the porous grout, turning your hard work into long-term equity.

    Mastering Deep Cleaning Tile Grout to Restore Value

    Mastering Deep Cleaning Tile Grout to Restore Value

    If you’re looking at a bathroom floor that looks more like a petri dish than a high-end rental, you need to move past the surface-level scrubbing. When I’m evaluating a property, I look at the grout lines first; they tell me exactly how much neglect I’m dealing with. Deep cleaning tile grout isn’t just about aesthetics; it’s about stopping the rot before it becomes a structural headache. If you’ve got stubborn, dark lines, you’re likely dealing with deep-seated organic matter or mineral buildup that a simple mop won’t touch.

    To really make an impact, I recommend using a stiff-bristled brush and a dedicated alkaline cleaner to tackle those heavy-duty deposits. When you’re removing grout stains, don’t just scrub blindly—let the solution sit for ten minutes to do the heavy lifting for you. Once you’ve restored that bright, crisp line between the tiles, seal it immediately. Applying a high-quality sealer is the single best way of preventing grout discoloration down the road, ensuring your hard work actually translates into long-term property value rather than a recurring weekend chore.

    Removing Grout Stains Before They Ruin Your Roi

    Removing grout stains before they ruin your ROI.

    Look, if you see dark, stubborn patches creeping into your floor lines, don’t just brush it off as “character.” Those spots are often deep-seated organic matter or mineral deposits that can permanently etch the surface. When I’m walking through a potential flip, I look at those stains as a red flag; they signal neglect, and neglect is expensive. Removing grout stains early is much cheaper than a full regrout or a tile replacement. If you’re dealing with something heavy like grease in a kitchen or mildew in a shower, you need to move beyond basic soap and water. I usually reach for an oxygen-based cleaner or a specialized enzymatic solution to break down the bond without stripping the sealer.

    The real secret to protecting your margins, though, is preventing grout discoloration before it even starts. Once you’ve finished your deep clean, you have to seal that grout. Think of sealer as an insurance policy for your ROI. Without it, your hard work is just a temporary fix. Apply a high-quality penetrative sealer to ensure that moisture and grime stay on the surface where they can be wiped away, rather than soaking into the pores and becoming a permanent liability.

    Five Pro Moves to Keep Your Grout from Eating Your Profits

    • Stop treating grout like an afterthought; if you’re seeing discoloration, it’s a sign the sealant has failed, so re-apply a high-quality sealer immediately after cleaning to lock out future grime.
    • Ditch the harsh, caustic chemicals that eat away at your mortar; stick to pH-neutral cleaners or a simple baking soda paste to avoid damaging the very surfaces you’re trying to restore.
    • Invest in a stiff-bristled nylon brush rather than a wire one; wire brushes can scratch the tile surface and leave micro-scratches that actually trap more dirt over time.
    • Don’t just clean the surface—get into the pores. Use a steam cleaner if you can afford the rental; the heat penetrates deep into the grout lines where a mop will never reach.
    • Watch your moisture levels like a hawk. After a deep clean, make sure the area is bone-dry before you even think about resealing, or you’ll just be trapping moisture inside the walls.

    The Bottom Line: Protecting Your Investment One Joint at a Time

    Don’t mistake a quick surface scrub for actual maintenance; if you aren’t getting deep into those pores, you’re just masking grime that eventually eats away at your tile’s integrity and your property’s value.

    Treat grout cleaning as a preventative ROI strategy rather than a chore, because it’s significantly cheaper to scrub out a stain now than it is to pay a contractor to regrout an entire bathroom later.

    Consistency is your best friend when it comes to equity—keep a regular cleaning schedule so that “neglected fixer-upper” vibes never settle into your high-value assets.

    The High Cost of Neglect

    “I’ve seen plenty of investors overlook a few dingy lines between tiles, but don’t make that mistake. Dirty grout makes a high-end renovation look cheap, and in this business, looking cheap is the fastest way to bleed your margins dry.”

    Gareth Trelawny

    The Bottom Line on Grout and Equity

    The Bottom Line on Grout and Equity.

    At the end of the day, cleaning your grout isn’t just about making a bathroom look “pretty” for a weekend guest; it’s about protecting the integrity of your investment. We’ve covered how to tackle deep-seated grime, how to strip away those stubborn stains that threaten your ROI, and the importance of consistent maintenance to prevent permanent damage. Whether you are using a heavy-duty cleaner or a simple manual scrub, the goal remains the same: stop letting small, neglected details erode your property value. Don’t let a few lines of dirty cement be the reason a potential buyer walks away from a deal.

    I know that getting down on your hands and knees to scrub tile lines feels tedious, especially when you have a dozen other things on your renovation checklist. But remember, real estate wealth isn’t built through grand, sweeping gestures alone; it is built through the relentless attention to detail that most people are too lazy to execute. Every bit of grime you remove is a step toward turning a neglected space into a high-value asset. So, grab your tools, get to work, and start turning those crumbling details into solid equity.

    Frequently Asked Questions

    Is it worth spending the money on professional steam cleaning, or can I actually get decent results with a handheld scrubber and some decent chemicals?

    Look, I’ve been on enough job sites to know that ROI isn’t just about the big stuff like kitchens. If your grout is just looking a bit dull, save your cash—a handheld scrubber, a stiff brush, and some high-quality alkaline cleaner will do the trick. But if you’re dealing with years of deep-set, oily grime in a rental, professional steam cleaning is worth the investment to ensure that value actually sticks.

    How do I know if my grout is just dirty or if it's actually structurally failing and needs a full regrout?

    Look, there’s a massive difference between a stain and a structural disaster. If you can scrub it and the color returns, it’s just grime—don’t overthink it. But if you see cracks running through the lines, or if the grout is crumbling away and leaving gaps between the tiles, that’s a red flag. Loose tiles mean moisture is getting underneath, and that’s how you end up with rot and massive repair bills instead of profit.

    Once I finally get the grout looking pristine, what’s the best way to seal it so I'm not fighting this same battle again in six months?

    Look, cleaning is only half the battle; if you don’t seal that grout, you’re just pouring time and money down the drain. Grab a high-quality, penetrating sealer—not some cheap spray that just sits on top. Apply it evenly to those freshly scrubbed lines and let it soak in. It creates a barrier against moisture and grime, turning your hard work into a long-term asset instead of a recurring headache. Protect your ROI.

  • The Process of Refinishing Hardwood Floors

    The Process of Refinishing Hardwood Floors

    I was standing in the middle of a dusty, gutted colonial last Tuesday, the kind of house where you can practically smell the decades of neglect, when I saw it: a beautiful, original oak floor buried under layers of hideous, dark cherry stain and decades of wax buildup. Most contractors would have looked at those scarred boards and immediately quoted me a fortune for a full replacement, claiming the wood was too far gone. But that’s the industry lie I hate most—they want to sell you expensive new materials when what you actually need is a strategic hardwood refinishing plan to reclaim the value that’s already sitting right under your feet.

    I’m not here to give you a polished, textbook lecture on sanding grits or polyurethane types that sounds like it came from a manufacturer’s manual. Instead, I’m going to pull back the curtain on how I approach these projects to maximize my margins without breaking the bank. I’ll show you how to spot the difference between a floor that’s salvageable and one that’s a total money pit, giving you the exact, no-nonsense tactics I use to turn worn-out surfaces into high-end equity.

    Table of Contents

    Mastering the Hardwood Floor Restoration Process

    Mastering the Hardwood Floor Restoration Process.

    Before you even touch a sander, you have to understand the difference between a quick cosmetic fix and a true overhaul. I often see investors get tripped up by the distinction between sand and finish vs refinishing; one is just a surface refresh, while the other is a deep dive into the wood itself. If you’re dealing with a property that’s been neglected for a decade, you aren’t just applying a new coat of poly. You are likely looking at the intensive task of removing old floor finish that has become gummy or cracked over time. If you don’t strip that old layer completely, your new stain will look patchy and amateur, and nothing kills my ROI faster than a botched floor.

    Once you’ve cleared the slate, the real magic happens during the staining phase. This is where you decide the vibe of the entire house. I always tell my clients to test a few samples on a scrap piece first, because the best wood stains for floors can look drastically different once they hit a sanded grain. You want a tone that feels intentional, not like an afterthought. It’s a gritty, dusty, and often exhausting job, but seeing that raw wood transform into a centerpiece is exactly how we turn a crumbling room into serious equity.

    Removing Old Floor Finish to Reveal Hidden Gold

    Removing Old Floor Finish to Reveal Hidden Gold

    Look, I’ve walked into plenty of flips where the floors look like a disaster zone—cloudy, scratched, or coated in decades of cheap, yellowing polyurethane. Most people see a mess, but when I’m removing old floor finish, I see the potential for a massive ROI hiding underneath. You can’t just slap a new coat of stain over old grime and expect it to look high-end; you have to strip it back to the raw grain. If you skip this step, you’re essentially painting over a dirty canvas, and that’s a rookie mistake that will haunt your resale value.

    The real work happens during the heavy sanding phase. This is where you decide if you’re doing a quick sand and finish vs refinishing the entire subfloor. If the wood is structurally sound, stripping away those layers of old wax and sealant is the most critical part of the hardwood floor restoration process. It’s gritty, it’s dusty, and it’s exhausting, but once that old finish is gone, you finally have a clean slate to apply the best wood stains for floors and truly showcase the character of the timber.

    Pro-Tips for Protecting Your Margins During the Refinish

    • Don’t skip the sanding grit progression; jumping from a coarse grit straight to a fine one is a rookie mistake that leaves swirl marks, and trust me, those are a nightmare to hide under stain.
    • Test your stain on a hidden corner or a scrap piece of wood first—colors look completely different once they hit the actual grain, and you don’t want to realize you’ve ruined a whole room after the first coat is down.
    • Check your moisture levels before you even think about applying a finish; if that wood is too damp from a recent renovation or high humidity, your new coat will peel faster than a cheap rental’s wallpaper.
    • Invest in a high-quality vacuum with a HEPA filter to clear the dust between sanding stages, because even a single speck of grit can ruin the glass-smooth finish you’re aiming for.
    • Watch your sealants like a hawk; applying too much can lead to pooling and unsightly drips, while too little leaves the wood vulnerable to the very wear and tear that killed the previous finish.

    The Bottom Line on Flooring ROI

    Don’t rush the sanding process; if you don’t strip that old, gummy finish completely, your new coat will look amateur and kill your resale value.

    Focus on the bones of the wood rather than replacing it—reclaiming original hardwoods is almost always more profitable than installing cheap, trendy laminate.

    Treat floor refinishing as a strategic equity play, not just a cosmetic fix, because high-quality wood floors are one of the few upgrades that actually pay for themselves in a quick flip.

    ## The Hidden Margin in Your Floors

    “Stop looking at scratched-up oak as a headache and start seeing it as untapped equity; a weekend of sanding and a fresh coat of stain can do more for your ROI than almost any other cosmetic upgrade in the house.”

    Gareth Trelawny

    Turning Grit into Equity

    Refinishing floors: Turning Grit into Equity.

    At the end of the day, refinishing hardwood isn’t just about making a room look pretty for a listing photo; it’s about the technical execution of stripping away years of neglect to reveal the structural value underneath. We’ve walked through the heavy lifting—from the initial prep work and the meticulous sanding process to the critical step of stripping that old, gummy finish that hides the wood’s true character. If you skip the prep or rush the drying times, you aren’t just risking a bad look, you’re risking your entire profit margin. Treat the floor like the foundation of your investment, and it will pay you back tenfold when you finally close the deal.

    I know the dust is overwhelming and your back might be aching by the time you reach the final coat, but don’t lose sight of the big picture. Every layer of grit you sand away is a step closer to turning a dated, depreciating space into a high-value asset. Real estate investing isn’t for the faint of heart, and it certainly isn’t for people who want a quick, easy fix. But for those of us willing to do the dirty work, there is nothing more satisfying than seeing that raw, beautiful grain emerge from the wreckage. Now, grab your gear and go build that equity.

    Frequently Asked Questions

    How do I know if my floors are actually worth refinishing, or if I'm just throwing good money after bad on a thin veneer?

    The quickest way to tell is the “sand test.” Grab a piece of coarse sandpaper and grind it into a corner. If you hit a thin, paper-like layer within seconds, you’re looking at engineered wood with a superficial veneer—refinishing that is a money pit. But if you keep sanding and see thick, solid wood, you’ve struck gold. Real hardwood has the depth to handle the grit and come out looking like a million bucks.

    Is it worth the headache to DIY the sanding process, or am I going to end up destroying the wood and killing my ROI?

    Look, I get the temptation to save a few hundred bucks, but if you’ve never operated a drum sander, you’re playing with fire. One wrong move or too much pressure and you’ll gouge the wood so deep it’ll cost more to repair than the original refinishing would have. If you aren’t confident in your technique, hire a pro for the heavy sanding. Don’t let a DIY ego trip kill your margins and your ROI.

    How do I choose between water-based and oil-based finishes if I want to minimize downtime and maximize durability for a rental?

    If you’re looking to minimize downtime, go with water-based. It dries incredibly fast, meaning you can get tenants back in much sooner, which keeps your cash flow moving. However, for a rental where durability is king, you need to ensure you’re using a high-quality, commercial-grade water-based finish. While oil-based is legendary for its toughness and that classic amber glow, the long dry times and heavy fumes can turn a quick flip into a logistical nightmare.