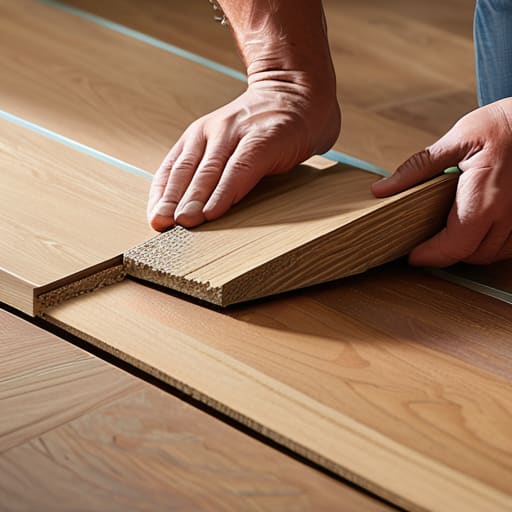
I was kneeling on a dusty subfloor in a drafty Victorian fixer-upper last Tuesday, staring at a gap in the planks that looked wide enough to swallow my laser measurer, wondering why I didn’t just hire a contractor. Most people will tell you that laminate flooring installation is a high-end luxury or a weekend DIY project for the faint of heart, but they’re wrong. In my experience, it is actually one of the fastest ways to inject instant equity into a property without draining your renovation budget. If you approach it with the right mindset, you aren’t just laying down planks; you’re building a margin.
I’m not here to give you a sanitized, textbook version of how this works. I’m going to show you the gritty reality of how to execute a professional-grade laminate flooring installation that won’t buckle or creak the moment a tenant moves in. We’re going to cover the prep work that most rookies skip, how to avoid those expensive flooring mistakes that eat your profits, and the exact sequence I use to get the job done efficiently. Let’s stop staring at the subfloor and start building some real value.
Table of Contents
- Step-by-Step Instructions
- Leveling Subfloor for Laminate to Ensure Solid Equity
- The Click Lock Flooring System Fast Results for Small Budgets
- 5 Pro Moves to Protect Your Margins and Your Floors
- The Bottom Line on Laminate ROI
- ## The Margin is in the Prep
- The Bottom Line on Your Floor Flip
- Frequently Asked Questions
Guide Overview
Tools & Supplies
- Tape measure for precise floor dimensions
- Rubber mallet for tapping planks into place
- Spacers to maintain expansion gaps at walls
- Utility knife or laminate cutter for trimming planks
- Tapping block to prevent damage during installation
- Laminate flooring planks based on total area
- Underlayment rolls to cover the entire floor area
- Transition strips for doorway thresholds
- Moisture barrier if installing over concrete
Step-by-Step Instructions
- 1. Before you even crack open a box, you need to prep the subfloor like your ROI depends on it—because it actually does. Clear out every stray nail, pebble, or bit of dried drywall mud, then run your hand across the surface; if it feels uneven, you’re going to have major clicking issues later. Once it’s clean, lay down your underlayment, making sure the seams don’t overlap, or you’ll end up with a bouncy floor that feels cheap.
- 2. Grab your laser measurer—mine is practically an extension of my arm at this point—and mark your starting line along the longest wall. You want to ensure the first row is perfectly straight, otherwise, that tiny error will snowball into a disaster by the time you reach the far side of the room. I always use a chalk line for this to keep things precise and professional.
- 3. Start laying your first row of planks, but here’s the pro tip: don’t forget to leave an expansion gap between the flooring and the wall. Use spacers to keep that gap consistent—usually about 1/4 to 3/8 of an inch—because wood and laminate are going to expand and contract with the seasons. If you skip this, your beautiful new floor will buckle the first time the humidity spikes.
- 4. When you get to the end of a row, take the leftover piece from the previous plank to start your next one. This “staggered” method is crucial for both structural integrity and making the floor look natural rather than grid-like. Just make sure your end joints are at least six to eight inches apart so you don’t create weak points in the layout.
- 5. For those tricky cuts around door jambs or corners, don’t try to hack it with a standard saw. Use a jamb saw or a multi-tool to undercut the trim so the flooring can slide seamlessly underneath it. It’s a bit more work upfront, but it’s the difference between a DIY look and a high-end renovation that actually adds value to the property.
- 6. Once the last plank is clicked into place, it’s time to hide those expansion gaps. Install your baseboards or quarter-round molding, but don’t nail them into the floor—only nail them into the wall. If you pin the flooring down with the trim, you’re essentially inviting the floor to warp and crack under its own pressure.
- 7. Finally, give the whole floor a thorough sweep and a quick inspection. Walk every inch of it to check for any “hollow” sounds or uneven spots that might indicate a subfloor issue you missed. If it feels solid and looks clean, you’ve just successfully turned a budget-friendly material into a professional-grade asset.
Leveling Subfloor for Laminate to Ensure Solid Equity
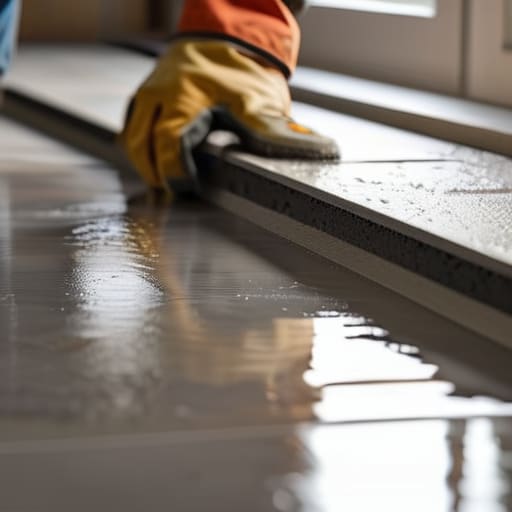
Look, I’ve seen too many rookies try to skip the prep work because they’re staring down a tight renovation timeline. They think they can just slap the planks over a bumpy floor and hope for the best. Let me tell you: that is a one-way ticket to a clicking, popping floor that will drive your future tenants insane. If you aren’t leveling subfloor for laminate properly, those joints in your click-lock flooring system are going to snap under pressure. You need a flat, clean canvas if you want this asset to actually hold its value.
Grab a high-quality self-leveling compound and a good trowel. I always check the floor with a long straightedge first; if there’s a dip deeper than a 1/8th inch, you need to fill it. While you’re at it, don’t forget your laminate flooring moisture barrier. If you’re working on a concrete slab, skipping that layer is just asking for mold and ruined margins later. It’s about being pragmatic, not lazy. Spend the extra day on the subfloor now so you aren’t paying for a full replacement in eighteen months.
The Click Lock Flooring System Fast Results for Small Budgets
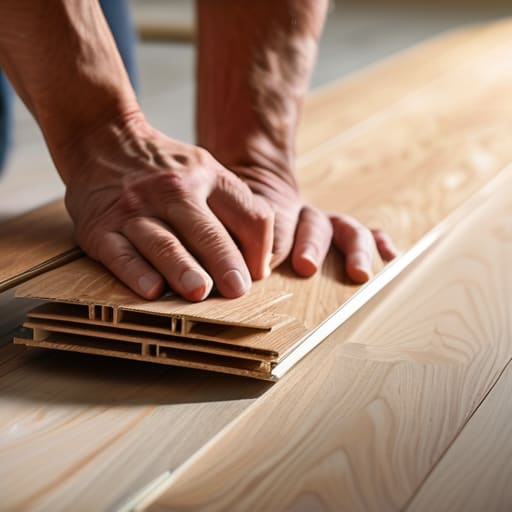
When you’re racing against a renovation timeline, the click-lock flooring system is your best friend. I’ve seen too many investors blow their margins on expensive hardwoods when a high-quality laminate could have delivered the same aesthetic punch for half the cost. The beauty of this system is the speed; you aren’t messing around with messy adhesives or heavy staplers. You just angle the plank, drop it into the groove, and hear that satisfying click. It’s efficient, it’s clean, and most importantly, it’s easy to DIY if you’re trying to keep your labor costs low.
However, don’t mistake “easy” for “careless.” If you ignore the technical details, you’re just building a headache into your floor. You absolutely have to account for laminate flooring expansion gaps along every single wall. I always keep a few spacers handy because if those planks don’t have room to breathe when the humidity shifts, your floor is going to buckle, and that’s money straight out of your pocket. Treat the installation with respect, leave the gaps, and you’ll have a finished product that looks like a custom build.
5 Pro Moves to Protect Your Margins and Your Floors
- Acclimatize your planks in the actual room for at least 48 hours; if you skip this, the temperature shift will warp your floor before you even close the deal.
- Leave a generous expansion gap around the perimeter—I’m talking a solid 3/8 of an inch—because if you pin that floor too tight against the wall, it’ll buckle the moment the seasons change.
- Don’t skimp on the underlayment; a high-quality moisture barrier is the difference between a smooth sale and a nightmare mold claim from a buyer.
- Use a tapping block and a rubber mallet for every single row; if you’re just stepping on the edges to force them together, you’re going to snap the click-lock mechanism and waste money on replacement material.
- Check your layout before you commit to the first row; stagger your seams by at least 8 to 12 inches so you don’t end up with a “staircase” pattern that looks amateur and kills your resale value.
The Bottom Line on Laminate ROI
Don’t cut corners on the subfloor; if your base isn’t level, your new floor will bounce, and that’s a callback you can’t afford if you’re trying to protect your margins.
Treat click-lock systems as your best friend for quick flips, but make sure you leave those expansion gaps—skimping on them now means a buckled floor and a massive headache during inspection.
Focus on the visual impact of the finish; you’re choosing laminate to boost equity fast, so pick a realistic texture that looks high-end without the high-end price tag.
## The Margin is in the Prep
“Don’t get blinded by a pretty pattern; if you skip the subfloor prep to save a few bucks, those hollow clicks and shifting planks will eat your profit margins faster than a bad contractor can disappear.”
Gareth Trelawny
The Bottom Line on Your Floor Flip
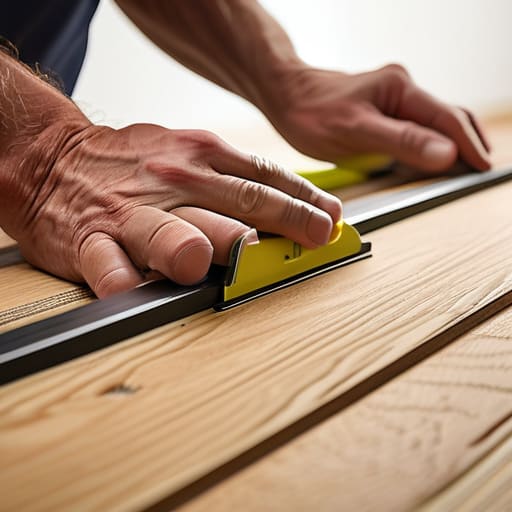
At the end of the day, installing laminate isn’t just about slapping planks together; it’s about protecting your investment from the ground up. You’ve learned that a perfectly leveled subfloor is your foundation for success, and mastering that click-lock system is what allows you to keep your labor costs low and your timeline tight. If you skip the prep work or rush the installation, you aren’t saving money—you’re just inviting a headache that will eat directly into your margins later. Do it right, do it tight, and make sure every plank is locked in so you can stop worrying about the details and start looking at your ROI.
Renovating can feel overwhelming when you’re staring at a gutted room, but these are the exact moments where wealth is built. Every square foot of flooring you install correctly is more equity sitting in your pocket and more proof that you have the grit to handle a real project. Don’t let the dust and the DIY stress intimidate you; embrace the mess, trust your eye for potential, and remember that every small win brings you one step closer to that massive portfolio. Now, grab your laser measurer, get to work, and let’s turn that outdated space into a profitable asset.
Frequently Asked Questions
How do I know if my subfloor is actually level enough, or am I just wasting time with a self-leveler?
Grab your straightedge or a long level—don’t rely on your eyes, they’ll lie to you. Lay it across the subfloor and look for light underneath. If you’ve got gaps wider than 3/16 of an inch, you’re asking for clicking joints to snap and your margins to tank. Don’t get precious with it, though; if it’s just a tiny dip, patch it. If it’s a wave, pour the self-leveler. Better to spend the extra day now than replace the whole floor in six months.
Is there a specific type of underlayment I should use to make cheap laminate feel more like high-end hardwood?
If you want to stop that hollow, “clacking” sound that screams budget renovation, skip the thin, cheap foam rolls. Invest in a high-density acoustic underlayment—something with a decent rubber or cork component. It adds weight and dampens the sound, making the floor feel solid underfoot rather than bouncy. It’s a small upfront cost that makes a massive difference in perceived value when you’re trying to sell that “high-end” look.
How do I handle transitions between laminate and existing tile without making the floor look like a patchwork mess?
Nothing kills the vibe of a clean renovation faster than a clunky, oversized T-molding that looks like an afterthought. If you’re hitting a tile line, don’t just slap a generic transition strip down. Use a slim, color-matched transition piece that sits flush. If the height difference is significant, you might need a reducer, but keep it intentional. I always aim for a seamless flow; if it looks like a patchwork quilt, you’ve already lost your margins.
