Blog

  • Current Trends in Real Estate Investing

    Current Trends in Real Estate Investing

    I was standing in a kitchen last Tuesday, staring at a water-damaged subfloor and a layer of peeling, nicotine-stained wallpaper, when I saw a “market expert” on the news talking about high-end luxury developments. It made me want to roll my eyes so hard they’d get stuck. People keep obsessing over these polished, shiny real estate investment trends that require a massive trust fund to even enter the room. They’re looking at glass towers and suburban mansions, completely missing the fact that the real money is currently sitting in the drafty, unloved fixer-uppers that everyone else is too terrified to touch.

    I’m not here to sell you on some overnight wealth scheme or a collection of overpriced spreadsheets. I’m going to give you the raw, unvarnished truth about where the actual equity is hiding right now. We’re going to look past the mainstream noise and focus on the practical, boots-on-the-ground strategies that actually build a portfolio from scratch. If you’re ready to stop chasing hype and start looking at tangible assets that can actually change your life, then let’s get to work.

    Table of Contents

    Finding Value in Emerging Real Estate Markets 2024

    Finding Value in Emerging Real Estate Markets 2024

    Everyone is staring at the same overpriced zip codes, but if you want to actually build equity, you have to look where the crowds aren’t. For me, the play in 2024 isn’t about chasing the hype in coastal hubs; it’s about identifying emerging real estate markets 2024 that are just starting to wake up. I’m looking for those “middle-ring” suburbs or overlooked mid-sized cities where the bones of the houses are solid, but the aesthetic is stuck in 1974.

    A huge driver for this shift is the ongoing remote work impact on property markets. People aren’t tethered to downtown office towers anymore, which means they’re willing to trade a shorter commute for a backyard and a dedicated home office. When I scout a new area, I’m not just looking at the local school ratings; I’m looking for towns that are upgrading their connectivity and amenities to attract this new breed of professional. If you can find a neighborhood that’s currently undervalued but has the infrastructure to support a digital workforce, you’ve found your goldmine. Get in early, before the renovations become too competitive.

    How Remote Work Impact on Property Markets Creates Opportunity

    How Remote Work Impact on Property Markets Creates Opportunity

    For years, the gold standard was proximity to the downtown core. If you weren’t within a twenty-minute commute of a glass skyscraper, you weren’t “investing.” But the remote work impact on property markets has completely flipped that script. I’m seeing massive potential in the “second-tier” suburbs and even small rural towns that were previously overlooked. People aren’t just looking for a place to sleep anymore; they’re looking for a place to live and work. This means those dated, sprawling ranch-style homes with decent floor plans are becoming gold mines if you can modernize them to include a dedicated, high-speed home office.

    This shift is driving significant demographic shifts in housing demand, moving the focus away from cramped urban studios toward properties with actual breathing room. When I’m scouting a fixer-upper now, I’m not just looking at the kitchen finishes; I’m looking at the layout. Can this old layout support a professional Zoom setup? If you can transform a cluttered living room into a functional workspace, you aren’t just flipping a house—you’re selling a lifestyle that the modern workforce is desperate for.

    Stop Chasing Hype and Start Looking for Real Equity

    • Look for the “unsexy” neighborhoods. Everyone is fighting over the trendy, gentrified pockets where the entry price is already sky-high. I’m looking for the area two zip codes over where the houses have good bones but terrible landscaping and outdated kitchens. That’s where the margin lives.
    • Prioritize “ADU potential” over square footage. With interest rates where they are, a house that can accommodate an Accessory Dwelling Unit (like a basement suite or a backyard cottage) is a goldmine. It’s not just a home; it’s a way for your tenant to help pay your mortgage.
    • Don’t fear the “ugly” renovation. While everyone else is looking for turnkey properties, I’m hunting for the ones with the dated popcorn ceilings and the 1970s shag carpet. You can’t buy instant equity, but you can definitely build it by replacing those eyesores with clean, minimalist finishes.
    • Focus on energy efficiency as a value-add. It’s not just about being green; it’s about the math. Upgrading insulation, windows, or HVAC systems might feel like a heavy upfront cost, but it makes your property significantly more attractive to the modern buyer who is tired of astronomical utility bills.
    • Master the “Micro-Trend” of smart layouts. The era of the massive, formal dining room is dead. I’m looking for properties where I can knock down a single non-load-bearing wall to create a functional, open-concept flow. People want multipurpose spaces that work for both a home office and a living area.

    The Bottom Line: Where to Put Your Money Now

    Stop chasing the polished, turnkey properties in high-priced zip codes; the real equity is hiding in the “unlovable” houses in secondary markets that are just starting to wake up.

    Don’t let the remote work shift fool you into thinking location doesn’t matter—it just means the “location” has changed from a downtown commute to a high-speed internet connection and a decent backyard.

    Success in this market isn’t about timing the macro trends perfectly; it’s about having the grit to buy into a messy renovation while everyone else is waiting for the market to be “perfect.”

    Stop Chasing Shiny Objects

    Everyone is busy staring at high-rise developments and polished luxury condos, but if you want to actually build wealth, you have to look where the gloss has worn off; the real trends aren’t in the skyline, they’re in the overlooked neighborhoods where a little sweat equity can turn a disaster into a goldmine.

    Gareth Trelawny

    The Bottom Line on Finding Your Edge

    The Bottom Line on Finding Your Edge

    At the end of the day, these trends aren’t just numbers on a spreadsheet; they are blueprints for where the next big opportunity is hiding. Whether you are tracking the shift toward remote-work friendly suburbs or scouting emerging markets that haven’t been picked clean by the big developers yet, the goal remains the same: finding the gap between a property’s current state and its true potential. You can’t just wait for the market to hand you a win on a silver platter. You have to actively look for the cracks in the foundation—literally and figuratively—and understand that smart capital follows smart observation.

    Don’t let the noise of the headlines paralyze you. While everyone else is chasing the shiny, overpriced skyscrapers in the city center, I want you to look closer at the houses that need a little grit and a lot of vision. Real estate isn’t about having a massive inheritance; it’s about having the stomach for the mess and the discipline to execute a plan. Stop waiting for the “perfect” moment and start looking for the undervalued gems that others are too intimidated to touch. That is where the real equity is built.

    Frequently Asked Questions

    How do I know if a "trending" neighborhood is actually a solid investment or just a temporary hype cycle?

    Look, don’t get blinded by a sudden influx of trendy coffee shops or a single new boutique gym. That’s just aesthetic fluff. To see if a neighborhood has real legs, look at the bones: check the school district ratings, the diversity of housing stock, and—most importantly—the infrastructure. If you see city-funded utility upgrades or major transit expansions, that’s real investment. Hype is a feeling; infrastructure is a fact. Follow the concrete, not the lattes.

    With interest rates being so unpredictable, how much of a buffer should I build into my renovation budget to avoid getting stuck?

    Look, if you’re planning a renovation with zero margin for error, you’re not investing—you’re gambling. With interest rates swinging like this, your carrying costs can spike overnight. I never touch a project without a 15% to 20% contingency buffer. It sounds steep, but between unexpected structural rot and fluctuating material costs, that cushion is what keeps you from losing your shirt when the budget inevitably bleeds. Don’t let a “surprise” turn your equity into a deficit.

    Should I be focusing my capital on single-family fixer-uppers or looking into multi-family units as these market shifts continue?

    Look, there’s no one-size-fits-all, but here’s my take: if you want to build equity fast, stick to single-family fixer-uppers. I love the control you have over a single renovation—you can turn a disaster into a masterpiece and flip it for a massive margin. Multi-family is great for steady cash flow, but the headaches of managing multiple tenants can kill your momentum if you’re just starting out. Focus on the walls you can actually fix.
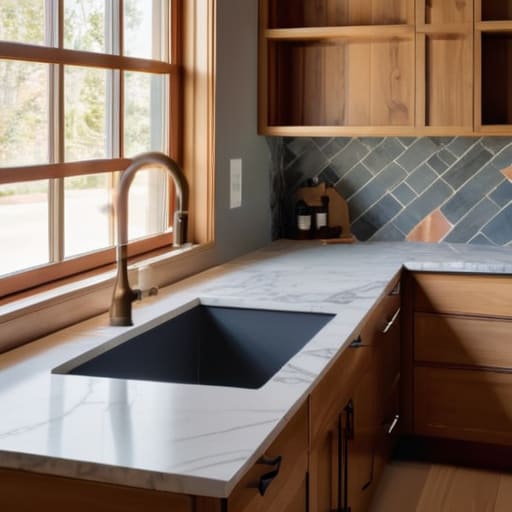
  • Kitchen Renovation Cost Guide

    Kitchen Renovation Cost Guide

    I was standing in a gutted bungalow last Tuesday, dust coating my boots and the smell of old grease hanging heavy in the air, when the contractor handed me a quote that made my blood boil. He was quoting figures that would make a seasoned developer blink, all because he wanted to swap out standard cabinetry for custom Italian imports. This is the biggest lie in the industry: that you need to blow your entire profit margin just to make a kitchen look “high-end.” When you’re calculating kitchen renovation costs, most people get blinded by the shiny showroom catalogs and forget that equity isn’t built on luxury marble, it’s built on smart, strategic spending.

    I’m not here to sell you on a dream lifestyle or push some overpriced designer brand. My goal is to pull back the curtain on where your money actually goes and, more importantly, where it shouldn’t. I’m going to show you how to separate the essential structural upgrades from the superficial fluff that kills your ROI. By the time we’re done, you’ll know exactly how to manage your kitchen renovation costs so you can stop bleeding cash and start building real, tangible wealth.

    Table of Contents

    A Strategic Kitchen Remodeling Budget Breakdown

    A Strategic Kitchen Remodeling Budget Breakdown chart.

    When I’m walking through a potential flip, I don’t just look at the backsplash; I’m mentally running a kitchen remodeling budget breakdown to see if the math actually works. You can’t just throw money at a room and hope for the best. I divide my spending into three distinct buckets: structural/mechanical, cabinetry/surfaces, and the “eye candy.” The structural stuff—plumbing, electrical, and layout changes—is where most rookies bleed cash. If you’re moving a sink to the other side of the room, your costs are going to spike, but that’s often where the real kitchen renovation ROI lives because a modern layout is what sells a house.

    Next, you have to get tactical with your material selection. I always tell my clients that you don’t need custom Italian marble to make a statement. Instead, look for affordable kitchen design ideas like high-quality quartz or even premium butcher block that looks expensive but keeps your margins healthy. I keep a close eye on kitchen renovation material pricing because a 10% jump in lumber or tile costs can be the difference between a profitable flip and a massive headache. Remember, every dollar you spend should be a calculated move toward increasing the property’s final appraisal.

    Decoding Average Cost of Kitchen Upgrades

    Decoding Average Cost of Kitchen Upgrades.

    When you start looking at the numbers, it’s easy to get overwhelmed by the sheer variety of quotes flying around. The truth is, the average cost of kitchen upgrades isn’t a fixed number; it’s a sliding scale based entirely on your appetite for luxury versus your need for utility. If you’re looking at a mid-range refresh, you’re likely spending most of your capital on cabinetry and countertops. However, if you’re chasing high-end custom millwork or professional-grade appliances, those numbers will skyrocket faster than you can say “change order.”

    I always tell my clients to look past the sticker price and focus on the kitchen renovation ROI. There is no point in installing hand-carved marble if the neighborhood comps don’t support it. Instead, I lean toward affordable kitchen design ideas that prioritize durability and clean lines—think quartz instead of marble or high-quality shaker cabinets that look expensive but won’t drain your entire contingency fund. You want to spend where the eye lands first, and save where the details are hidden under the sink.

    My Golden Rules for Keeping Your Renovation Budget from Spiraling Out of Control

    • Stop obsessing over the “dream” materials and start looking at the ROI. I’ve seen investors blow their entire margin on custom Italian marble when a high-quality quartz would have yielded the exact same appraisal bump. Buy for the exit, not for your own Pinterest board.
    • Always, and I mean always, set aside a 15% contingency fund before you even pick up a sledgehammer. You haven’t lived until you’ve opened up a kitchen wall only to find outdated, non-code-compliant wiring or a plumbing nightmare that wasn’t on the blueprints. That buffer is the difference between a profitable flip and a personal financial crisis.
    • Prioritize the “wet zones” and the layout over the aesthetic fluff. If you have to choose between high-end backsplash tile and moving the sink to a better location, move the sink. A functional kitchen layout adds massive value; a fancy tile pattern in a cramped, awkward space is just expensive wallpaper.
    • Don’t be afraid to source secondhand for the non-essential pieces. My secret weapon is scouring estate sales for high-quality, solid wood cabinetry or vintage hardware. If you can refurbish a mid-century piece to look intentional and high-end, you’re saving thousands that can be redirected into the appliances or structural upgrades.
    • Get three hard quotes from contractors, but don’t just pick the lowest number. I’ve learned the hard way that the “budget” contractor who underbids everyone else often ends up being the most expensive one once the change orders start rolling in. I look for the guy who understands my timeline and provides a realistic, itemized breakdown.

    The Bottom Line: How to Protect Your Profit Margin

    Stop treating your budget like a suggestion; always bake a 15% contingency fund into your numbers to cover the inevitable surprises hidden behind those old kitchen walls.

    Focus your capital on high-impact zones like cabinetry and countertops, because fancy smart appliances won’t recoup your investment as fast as a clean, functional layout.

    Prioritize durability over trends; I’d rather see high-quality quartz than a trendy backsplash that will look dated—and cheap—the moment you try to flip the property.

    The Golden Rule of Renovation Math

    Stop looking at a kitchen remodel as a massive expense and start seeing it as a calculated deposit into your equity account; if you aren’t spending money to increase the property’s value, you’re just decorating, and decorating doesn’t pay the mortgage.

    Gareth Trelawny

    Turning Numbers into Net Worth

    Turning Numbers into Net Worth via ROI.

    At the end of the day, navigating kitchen renovation costs isn’t about finding the cheapest possible option; it’s about making sure every dollar you sink into those cabinets and countertops actually works for you. We’ve looked at the breakdowns, from the high-end custom finishes to the strategic budget cuts that won’t tank your resale value. Remember, the goal is to balance your aesthetic vision with a ruthless focus on ROI. If you overspend on a designer backsplash but skimp on the structural plumbing, you aren’t investing—you’re just decorating. Keep your eye on the math, prioritize the upgrades that drive appraisal value, and always, always keep a contingency fund tucked away for when the walls inevitably hide a surprise.

    Renovating a kitchen can feel like a chaotic, expensive mess while the dust is still settling, but don’t let the temporary headache distract you from the long game. I’ve stood in plenty of gutted kitchens that looked like total disasters, but I also know the feeling of seeing that sudden jump in equity once the final tile is laid. This isn’t just about a place to cook breakfast; it’s about building a foundation for your financial future. Stop staring at the spreadsheets with intimidation and start seeing them as your roadmap to building real wealth. Grab your laser measurer, get your budget locked in, and let’s get to work.

    Frequently Asked Questions

    How do I decide which high-end finishes are worth the investment and which ones are just wasting my budget?

    Look, I’ve seen too many investors blow their margins on gold-plated faucets that nobody cares about. If you want ROI, put your money where the eyes land first: high-quality countertops, solid hardware, and functional cabinetry. Those are the tactile elements that scream “luxury” during a walkthrough. Skip the designer backsplash or custom-milled trim if it eats your profit. Invest in the bones and the surfaces people touch; leave the vanity stuff for the homeowners who aren’t trying to build equity.

    What kind of "hidden" costs should I be setting aside for when we inevitably find something wrong behind the drywall?

    Look, if you aren’t budgeting for the “unknowns,” you aren’t investing; you’re gambling. Once we tear down that drywall, we might find outdated knob-and-tube wiring, crumbling plaster, or even some rogue plumbing that hasn’t been touched since the seventies. I always tell my clients to set aside a 15-20% contingency fund specifically for these surprises. It’s better to have that cash sitting there and not need it than to have a project stall mid-rehab because of a leaky pipe.

    Is it actually smarter to buy semi-custom cabinets to save money, or am I better off going full custom for the long-term resale value?

    Look, I’ve seen both sides on a job site, and here’s the truth: don’t go full custom unless you’re building a forever home. For a flip or a rental, semi-custom is your sweet spot. It gives you that high-end, tailored look that buyers crave without the insane price tag that eats your profit margins. You’re looking for ROI, not a museum piece. Buy the semi-custom, spend the savings on better hardware, and maximize your equity.

  • Using Landscape Lighting for Curb Appeal

    Using Landscape Lighting for Curb Appeal

    I was standing in the driveway of a mid-century fixer I picked up last spring, staring at a yard that looked like a black hole the second the sun dipped below the horizon. Most people think you need to drop five figures on a professional designer to make a property look decent after dark, but that’s just a way to bleed your renovation budget dry. I’ve seen too many investors fall for the trap of over-complicated, high-maintenance setups that look more like a cheap Vegas casino than a high-end estate. The truth is, strategic landscape lighting isn’t about blinding your neighbors with expensive floodlights; it’s about using light to define edges and create depth where there was none.

    I’m not here to sell you on some luxury lifestyle fantasy or a list of overpriced gadgets you’ll be digging up in six months. My goal is to show you how to use light as a tool to increase your property’s perceived value without draining your equity. I’m going to walk you through the exact, no-nonsense ways I select fixtures and placement to make a neglected yard look intentional and expensive. We’re going to focus on smart, durable solutions that turn a dark, uninviting perimeter into a massive curb appeal win.

    Table of Contents

    Mastering Low Voltage Landscape Lighting Systems for Maximum Roi

    Mastering Low Voltage Landscape Lighting Systems for Maximum Roi

    When I’m walking a new property, I’m not just looking at the layout; I’m looking at how much it’s going to cost to make it look expensive. If you want to maximize your ROI without draining your renovation budget, you need to stop thinking about high-maintenance electrical overhauls and start looking at low voltage landscape lighting systems. These are a game-changer for flippers because they are safer, easier to install, and significantly cheaper to run. I always push for energy efficient outdoor LED lighting because it’s a low-cost upgrade that signals to a potential buyer that the home has been meticulously maintained.

    Don’t just scatter lights randomly like you’re decorating a Christmas tree; that’s a rookie mistake that kills your resale value. You have to be strategic. I use uplighting techniques for trees to create immediate architectural depth, making even a small yard feel like a sprawling estate. Combine that with some subtle hardscape lighting solutions along your walkways, and you’ve transformed a dark, intimidating perimeter into a high-end, inviting feature. It’s about creating an atmosphere of luxury that justifies a higher asking price.

    Strategic Pathway Lighting Design Ideas to Boost Curb Appeal

    Strategic Pathway Lighting Design Ideas to Boost Curb Appeal

    When I’m walking a new property at dusk, the first thing I look for isn’t the kitchen backsplash—it’s how the entrance feels. If the walkway is a black hole, you’ve already lost the buyer. I always suggest focusing on pathway lighting design ideas that prioritize function without looking like a runway. Instead of lining a path with a dozen identical, cheap solar stakes, try grouping small, low-profile fixtures to create a soft glow that guides the eye toward the front door. It’s about creating a sense of arrival, not a stadium effect.

    I’m a huge proponent of using energy efficient outdoor LED lighting because, let’s be real, nobody wants to deal with a massive electric bill on a rental or a flip. For a more high-end, custom feel, I like to integrate hardscape lighting solutions directly into the masonry. If you have stone steps or a retaining wall, tucking small lights into the edges adds incredible depth and safety. It’s a subtle touch that makes a standard yard feel like a curated, intentional estate.

    Five Lighting Plays to Protect Your Margin and Boost Appeal

    • Focus on “layering” your light rather than just blasting the yard with one massive floodlight; you want a mix of uplighting for trees and soft ground lights to create depth that makes a small lot feel massive.
    • Stick to warm color temperatures—anything too blue or “daylight” white looks cheap and clinical, like a parking lot, which is the fastest way to tank your perceived property value.
    • Prioritize accentuating architectural features like stone facades or columns; if the lighting highlights the house’s best bones, buyers will see the value before they even step through the front door.
    • Don’t overlook the “safety” ROI; well-lit entryways and stairs aren’t just about aesthetics, they reduce liability and make the property feel secure, which is a huge selling point for high-end buyers.
    • Use smart timers or photocells to ensure your lighting actually works when it matters; there’s nothing more unprofessional than a high-end renovation that looks dark and neglected because the lights never kicked on.

    The Bottom Line: Lighting for Profit and Protection

    Stop viewing landscape lighting as a luxury decoration; treat it as a strategic tool to increase curb appeal and perceived property value during a sale.

    Prioritize low-voltage systems to keep your overhead low and your maintenance easy, ensuring your ROI isn’t eaten up by high electricity bills or complex wiring repairs.

    Focus your budget on high-impact zones like pathways and entryways to solve functional safety issues while simultaneously creating that “high-end estate” look that attracts premium buyers.

    Lighting as an Equity Play

    Most people see landscape lighting as a decorative luxury, but I see it as a strategic tool; a well-lit perimeter doesn’t just make a property look expensive, it signals to every potential buyer that the house is well-maintained and secure from the moment they pull into the driveway.

    Gareth Trelawny

    The Bottom Line on Lighting Your Way to Equity

    The Bottom Line on Lighting Your Way to Equity

    At the end of the day, landscape lighting isn’t just about making sure you don’t trip over a rogue garden gnome after sunset. It’s a calculated move to protect your investment and maximize your property’s perceived value. By mastering low-voltage systems that are easy to maintain and implementing strategic pathway lighting that guides the eye, you are essentially staging the exterior of your home just as carefully as you would a living room. Don’t overlook these details; a well-lit perimeter provides both the security buyers crave and the high-end aesthetic that justifies a premium asking price.

    Real estate investing is often about seeing what others miss, and that includes the potential hiding in the shadows of an unlit yard. It might feel like just another line item on your renovation budget, but these small, intentional upgrades are exactly how you turn a standard house into a standout asset. Stop looking at your yard as a maintenance headache and start seeing it as a blank canvas for increasing your equity. Get out there, grab your laser measurer, and start planning a layout that makes your property shine long after the sun goes down.

    Frequently Asked Questions

    Is it actually worth the upfront cost of a professional installation, or can I just DIY a low-voltage setup myself to save on the renovation budget?

    Look, if you’re trying to squeeze every cent of profit out of a flip, DIYing a low-voltage setup is tempting. For a simple, small-scale project, you can definitely hack it together. But if you want a cohesive, high-end look that doesn’t look like a string of Christmas lights, hire a pro. I’ve seen too many “budget” DIY jobs result in messy wiring and dead zones that actually tank your curb appeal.

    How do I balance high-end aesthetic lighting with security features without making the property look like a brightly lit commercial parking lot?

    The trick is to stop thinking about “floodlights” and start thinking about “layers.” If you blast a property with high-intensity security lights, you kill the mood and make it look like a gas station. Instead, use low-profile, motion-activated lights tucked into the landscaping. You get the security coverage you need, but the light feels intentional and high-end. Aim for soft, directional glow rather than overwhelming brightness. Keep it subtle; the goal is safety, not a spotlight.

    When I'm looking at a fixer-upper, what are the specific red flags in an existing outdoor lighting setup that signal I'll need a total overhaul?

    When I walk a property, I’m looking for signs of neglect that translate to massive electrical headaches. If I see frayed, brittle wires or mismatched, cheap plastic fixtures half-buried in the dirt, I know the system is shot. Watch out for flickering lights or “ghosting”—where bulbs dim and brighten on their own—which usually signals a failing transformer or a corroded underground connection. If the layout looks haphazard and doesn’t follow the home’s architecture, factor a total overhaul into your budget immediately.

  • Using Mid Term Rentals for Higher Returns

    Using Mid Term Rentals for Higher Returns

    I was standing in the middle of a dusty, gutted bungalow last October, my laser measurer in hand and a layer of drywall dust coating my boots, when it hit me: the traditional rental market is broken. Everyone is chasing the high-turnover madness of short-term vacation stays or settling for the stagnant, low-yield grind of long-term leases. They’re missing the sweet spot right in the middle. I realized then that mid term rentals aren’t just another buzzword to throw around at networking mixers; they are the strategic bridge between a messy renovation and consistent, high-yield cash flow.

    I’m not here to sell you a get-rich-quick scheme or a polished, Instagram-ready fantasy. I’ve spent enough time on job sites to know that real wealth is built in the details, from the quality of the flooring to the way you structure your lease. In this guide, I’m pulling back the curtain on how I identify properties with high-potential for mid term rentals and how you can pivot your own portfolio to capture that premium. I’ll show you how to stop chasing crumbs and start building real equity through smarter, more intentional property management.

    Table of Contents

    Comparing Short Term vs Mid Term Rentals for Profit

    Comparing Short Term vs Mid Term Rentals for Profit

    When you’re staring at a renovation budget, you have to decide how that property is actually going to pay the bills. Most people immediately jump to the Airbnb model, but the reality of short term vs mid term rentals is a completely different beast. Short-term stays are high-octane; they offer massive nightly rates, but they also come with the constant headache of high turnover, cleaning fees, and the relentless demand for guest hospitality. If you aren’t prepared to play hotel manager 24/7, that “passive” income can quickly feel like a second full-time job.

    I prefer the mid-term route because it strikes a balance between high yield and operational sanity. Instead of managing a revolving door of tourists, you’re catering to professionals needing relocation housing options or travelers seeking digital nomad housing solutions. These tenants typically stay for one to three months, meaning you aren’t scrubbing floors every three days. You get the premium pricing of a furnished unit without the burnout of constant turnover, allowing you to focus more on your next acquisition and less on managing laundry schedules.

    Unlocking Value Through All Inclusive Rental Stays

    Unlocking Value Through All Inclusive Rental Stays

    When I’m scouting a property, I’m not just looking at the square footage or the integrity of the floor joists; I’m looking at how easily I can package the lifestyle inside. This is where the real money is made. By pivoting toward all-inclusive rental stays, you’re essentially selling convenience rather than just four walls and a roof. Instead of dealing with the constant turnover of a vacation rental, you provide a turnkey environment for professionals who need a home, not just a room.

    To maximize your margins, you have to think like a hospitality provider. This means investing in high-quality furnished apartment amenities—think high-speed mesh Wi-Fi, dedicated workspaces, and premium linens—that cater specifically to the growing market of digital nomad housing solutions. When you offer a space that is ready for immediate move-in without the headache of utility setups or furniture assembly, you can command a significant premium over traditional long-term leases. You aren’t just a landlord anymore; you’re a provider of seamless living.

    My Blueprint for Maximizing Mid-Term Rental Returns

    • Target the “Work-From-Anywhere” Crowd: Don’t just look for a nice bedroom; look for a property with a layout that supports a dedicated home office. If I’m scouting a fixer-upper, I’m checking for high-speed fiber internet availability and quiet zones. Digital nomads aren’t just looking for a bed; they’re looking for a functional workspace that won’t make them lose their minds.
    • Invest in “Durability with Style”: Since these tenants stay longer than a weekend traveler, you can’t just buy cheap, flimsy furniture, but you also shouldn’t go overboard with high-end antiques. I lean toward mid-century modern pieces—they look intentional and high-end, but they’re sturdy enough to handle a 30-day stay without looking trashed.
    • Master the All-Inclusive Utility Model: One of the biggest headaches for mid-term tenants is setting up local utility accounts for a short window. I always bake the electricity, water, and high-speed Wi-Fi into the monthly rent. It simplifies my bookkeeping and makes the property an easy “plug-and-play” option for someone relocating for a job.
    • Focus on Proximity to “Life Hubs”: When I’m calculating my ROI on a distressed property, I’m looking at the distance to major hospitals or university campuses. Traveling nurses and grad students are the backbone of the mid-term market. If your property is a twenty-minute drive from a medical center, you’ve already won half the battle.
    • Standardize Your Turnover Process: You aren’t cleaning up after a two-night guest, but you also aren’t dealing with a year-long lease. I treat my turnovers like a professional inspection. I have a checklist that covers everything from deep-cleaning the kitchen to checking the HVAC filters, ensuring the next professional tenant walks into a space that feels brand new.

    The Bottom Line on Mid-Term Investing

    Don’t get blinded by the high nightly rates of short-term rentals; the real money in mid-term stays is found in the reduced turnover costs and the stability of longer-term occupancy.

    Use your renovation skills to create “turnkey” environments—investing in durable, high-quality finishes that can withstand a 3-to-6 month tenant without needing a refresh every single week.

    The sweet spot for equity growth is finding distressed properties that you can rehab into fully furnished, all-inclusive units, effectively turning a standard rental into a high-yield asset.

    The Sweet Spot of Real Estate Strategy

    “Stop obsessing over the high turnover of short-term stays or the stagnant yields of long-term leases. If you want to actually build equity, you need to target the mid-term gap—it’s where you find the stability of a tenant with the premium margins of a hospitality model.”

    Gareth Trelawny

    The Bottom Line on Mid-Term Plays

    The Bottom Line on Mid-Term Plays.

    At the end of the day, pivoting to mid-term rentals isn’t just about chasing a trend; it’s about smarter asset management. We’ve looked at how these stays bridge the gap between the high turnover of short-term rentals and the stability of long-term leases, all while offering a way to maximize your cash flow without the constant headache of weekly cleaning schedules. By focusing on all-inclusive, high-value stays, you aren’t just renting out a room or a house—you are providing a turnkey lifestyle for professionals and travelers who need more than a hotel but less than a year-long commitment. It’s about finding that sweet spot of profitability where your renovation efforts yield the highest possible monthly return.

    Look, I know the idea of taking on a distressed property and reconfiguring your entire business model feels daunting. There will be days when the plumbing fails or a tenant pushes the boundaries of your house rules. But remember, the goal isn’t just to collect a check; it’s to build a foundation of tangible, scalable equity. Don’t let the fear of a messy transition stop you from seeing the potential hidden behind those peeling walls. If you have the patience to execute the strategy and the eye to spot the opportunity, you won’t just be managing properties—you’ll be building a legacy one smart renovation at a time.

    Frequently Asked Questions

    How much extra renovation budget should I set aside to make a property "mid-term ready" compared to a standard long-term rental?

    Don’t get caught off guard by “hidden” costs. For a standard long-term rental, you’re just looking for durability, but for mid-term stays, you’re selling an experience. I always bake an extra 15-20% into my renovation budget specifically for the “lifestyle layer.” This covers the high-end linens, fully stocked kitchenettes, and smart tech that travelers expect. It’s the difference between a place people live in and a place people actually want to book.

    What kind of tenant profile am I actually looking for to ensure they stay long enough to be profitable but don't treat the place like a hotel?

    You aren’t looking for tourists; you’re looking for “transitional professionals.” Think traveling nurses, corporate relocations, or digital nomads on a three-month project. These folks have stable income and a professional reason to be in town, so they treat the space like a home rather than a playground. They want the convenience of a furnished unit, but they actually care about the property because they need a functional place to live and work.

    Are there specific local zoning laws or HOA restrictions that might prevent me from pivoting a fixer-upper into a mid-term rental model?

    Don’t let a beautiful floor plan blind you to the fine print. Before you swing a hammer, check your local zoning ordinances and, more importantly, the HOA bylaws. Some HOAs are aggressive about “transient occupancy” and might try to bucket mid-term stays with short-term Airbnbs. I’ve seen investors get hit with massive fines because they didn’t realize a 30-day minimum was required by the county. Do your due diligence before you commit your capital.

  • How to Level a Concrete Floor

    How to Level a Concrete Floor

    I still remember standing in the middle of a gutted mid-century ranch in East Austin, clutching my laser measurer and feeling my stomach drop. I had just laid down a beautiful, expensive shipment of wide-plank oak, only to realize the subfloor was so warped it looked like a topographical map of the Andes. I watched in horror as the boards began to creak and gap under the slightest pressure. That was the moment I realized that skipping proper floor leveling isn’t just a minor oversight; it is a fast track to throwing your entire renovation budget straight into the trash.

    I’m not here to sell you on some overpriced, magical compound that promises a perfect finish in five minutes. I’ve spent enough time on dusty job sites to know that real results come from understanding your substrate and doing the prep work right the first time. In this guide, I’m going to walk you through the gritty, unglamorous reality of floor leveling so you can stop fighting your materials and start building real equity. We’re going to talk about the tools you actually need and the mistakes that will cost you your profit margins.

    Table of Contents

    Fixing Sloping Floors Turning Structural Floor Repair Into Profit

    Fixing Sloping Floors Turning Structural Floor Repair Into Profit

    When I walk into a fixer-upper and notice a noticeable dip in the hallway or a slant in the kitchen, my brain immediately goes to one of two places: a quick fix or a serious structural issue. If we’re talking about fixing sloping floors that are just slightly off, it’s often a matter of getting the right materials to bridge the gap. I’ve seen too many rookies try to mask a slope with thick padding or heavy rugs, but that’s just a band-aid that will eventually fail. If you want to build real equity, you have to address the underlying surface.

    For most of my mid-range flips, I lean heavily on a precise self-leveling underlayment application to get that surface dead-flat. It’s a game-changer for aesthetics, especially if you’re planning on installing high-end hardwoods or large-format porcelain. However, don’t confuse floor flatness vs levelness; a floor can be perfectly flat but still sit at a weird angle. If the slope is caused by a settling foundation, you’re looking at a much more intensive structural floor repair before you even think about the pretty finishes. Do the hard work now, or pay for it in callbacks later.

    The Hidden Truth of Floor Flatness vs Levelness

    The Hidden Truth of Floor Flatness vs Levelness

    Here is where most DIYers and even some rookie contractors trip up, and it’s a mistake that can cost you thousands in wasted materials. You need to understand the distinction between floor flatness vs levelness before you even touch a bag of compound. Think of it this way: a level floor is perfectly horizontal relative to the earth, but a flat floor is simply free of bumps, dips, or waves. In my experience, you don’t always need a perfectly level house to have a beautiful finish, but you absolutely need a flat surface.

    If you ignore flatness, you’re asking for trouble. I’ve seen investors try to rush into preparing subfloors for tile on a surface that was technically level but riddled with tiny dips. The result? The tile grout lines look like a zig-zag mess, and the whole room feels “off” the moment you walk in. Whether you’re using a heavy-duty self-leveling underlayment application or more manual concrete floor smoothing techniques, your goal is to eliminate the deviations that catch the light and trip up your feet. Focus on the plane, not just the tilt.

    Don't Let a Bad Subfloor Kill Your ROI: 5 Pro Tips for Leveling Success

    • Test your subfloor with a straightedge before you even think about buying materials; I’ve seen too many investors waste thousands on self-leveler only to realize they had a massive structural dip that required more than just a pour.
    • Always check your moisture levels first, because if you pour leveler over a damp subfloor, you’re basically asking for a delamination nightmare that will crack your expensive new tile in six months.
    • Stop trying to save a few bucks by skipping the primer; a high-quality primer is the only thing standing between a smooth finish and a layer of leveling compound that peels off like old wallpaper.
    • Don’t get greedy with the pour depth—if you’re trying to fill a hole deeper than an inch, skip the liquid leveler and use a cementitious patch or a crushed stone base first to avoid massive material costs and long drying times.
    • Mix your compound like your profit depends on it, because nothing ruins a renovation faster than “clumpy” leveler that leaves ridges, making it impossible to lay down that high-end LVP or hardwood you planned for.

    The Bottom Line on Floor Leveling

    Don’t confuse “flat” with “level”—a floor can be perfectly flat but still sit at a slope that makes your high-end cabinetry look like a disaster.

    Always diagnose the root cause before you pour self-leveler; if you’re just masking a structural sag with compound, you’re literally pouring your profit down the drain.

    Prioritize floor flatness early in the rehab process to avoid the nightmare of expensive, corrective repairs once your finish materials are already installed.

    The Cost of Cutting Corners

    “If you try to hide a sloping floor with a thick rug or a heavy piece of furniture, you aren’t saving money—you’re just burying a liability that will tank your resale value the moment a buyer walks through the door.”

    Gareth Trelawny

    Don't Leave Your Equity to Chance

    Don't Leave Your Equity to Chance.

    At the end of the day, floor leveling isn’t just about making sure a dining table doesn’t wobble; it’s about protecting your investment from the ground up. We’ve covered why you can’t ignore structural slopes and why understanding the nuance between flatness and levelness is the difference between a professional finish and a costly DIY disaster. If you ignore these subfloor issues now, you’re just setting yourself up to pay for them twice—once during the demo and again when a buyer’s inspector calls you out on it. Fix it right the first time so your high-end finishes actually sit the way they were intended to.

    I know that staring down a cracked, uneven subfloor can feel overwhelming when you’re staring at your renovation budget, but don’t let it intimidate you. Every messy, dusty job site is just a stepping stone toward a more profitable asset. Real estate isn’t about finding perfect houses; it’s about having the grit to fix the imperfections that others are too lazy to tackle. Grab your laser measurer, get your boots on, and start turning those uneven surfaces into solid, predictable equity. You’ve got this.

    Frequently Asked Questions

    Is it actually worth the extra cost to self-level a floor, or should I just let the contractor handle it?

    Look, if you’re looking to squeeze every cent of profit out of a flip, DIY self-leveling is a tempting way to save a few hundred bucks, but I wouldn’t risk it. It’s a messy, high-stakes game of timing and physics. One bad pour and you’ve got a wavy floor that ruins your expensive LVP or tile. Pay the contractor. It’s better to spend the cash now than to eat the cost of replacing botched flooring later.

    How do I know if my sloping floor is just a minor cosmetic issue or a sign of a serious foundation failure?

    Here’s the deal: if it’s just a slight dip in one room, you’re likely looking at settling or old subfloor issues—manageable. But if you see cracks snaking up the drywall, doors that won’t latch, or windows that are suddenly stuck, stop everything. That’s not a cosmetic fix; that’s a structural red flag. Don’t pour money into self-leveling compound until you’ve ruled out a foundation failure, or you’re just masking a massive money pit.

    What’s the best way to prep a subfloor so the leveling compound doesn't crack or peel after I lay my new flooring?

    Listen, if your leveling compound cracks or peels, you’ve just thrown your profit straight into the trash. The secret is all in the prep. First, you have to scrub that subfloor until it’s spotless—dust is the enemy of adhesion. Once it’s clean, apply a high-quality primer specifically designed for your substrate. It seals the pores and creates a bond so strong that your new floor won’t budge when the house settles.

  • Strategies for Scaling Property Investments

    Strategies for Scaling Property Investments

    I still remember the smell of damp drywall and stale cigarette smoke from my first solo flip—a cramped, neglected bungalow that everyone else in the neighborhood had written off. While the “gurus” on Instagram were busy preaching about high-leverage magic and complex mathematical models, I was standing in a literal puddle of rainwater, realizing that property investment scaling isn’t some mystical formula you unlock with a secret spreadsheet. It’s much grittier than that. It’s about the sweat equity you pour into a foundation and the sheer nerve it takes to see value where others only see a disaster zone.

    I’m not here to sell you on a get-rich-quick scheme or some over-complicated corporate strategy that requires a massive inheritance to pull off. Instead, I’m going to show you how I actually do it: by finding undervalued gems, executing smart renovations, and turning those crumbling walls into solid equity. I’ll be sharing the unvarnished truth about how to grow your portfolio through strategic, hands-on rehabs and disciplined reinvestment. We’re going to focus on building real, tangible wealth, one renovation at a time.

    Table of Contents

    Smart Real Estate Acquisition Strategies for the Scrappy Investor

    Smart Real Estate Acquisition Strategies for the Scrappy Investor.

    If you’re waiting for a windfall to start, you’re going to be waiting forever. The real secret to growth lies in your real estate acquisition strategies. Instead of competing for the pristine, move-in-ready homes that everyone else is bidding on, I look for the properties that make most people cringe. I’m talking about the ones with dated electrical, funky layouts, or those “character” stains on the ceiling. While other investors see a headache, I see an opportunity to buy low and manufacture value through a strategic rehab.

    Once you’ve nailed that first flip or rental, the next step is leveraging equity for growth. This is where the magic happens. You don’t just sit on your wins; you use the value you’ve built in your first property to fund the down payment on the next one. It’s a cycle of reinvestment that keeps your momentum high. It can feel intimidating to move from one house to three, but as long as you keep your eye on the math and your hands on the tools, you’re building something that actually lasts.

    Leveraging Equity for Growth Turning Dust Into Dollars

    Leveraging Equity for Growth Turning Dust Into Dollars

    Once you’ve successfully renovated your first few properties, you’re sitting on a goldmine—literally. Most people see a finished kitchen and a fresh coat of paint as a job well done, but I see them as fuel for my next move. This is where leveraging equity for growth becomes your most powerful tool. Instead of letting that built-up value sit idle in a single house, you use a refinance or a HELOC to pull that cash back out. That capital becomes the seed money for your next acquisition, allowing you to snowball your way upward without needing to save every penny from scratch.

    However, don’t get reckless. As you start scaling your rental property business, you can’t just keep throwing money at more houses and hoping for the best. You have to transition from a “fixer-upper enthusiast” to a disciplined business owner. This means moving beyond just the physical rehab and starting to look at the math of real estate portfolio diversification. You aren’t just collecting keys anymore; you’re managing a complex machine of assets that need to work in harmony to build that generational wealth we’re all after.

    5 Ways to Scale Without Losing Your Mind (or Your Shirt)

    • Stop hunting for turnkey properties. If the house is already pretty, the profit margin is already gone. I look for the “ugly ducklings”—the ones with outdated kitchens and cracked foundations—because that’s where the real equity is hiding.
    • Build your “A-Team” before you need them. You can’t scale if you’re the one swinging the hammer every single time. You need a reliable contractor, a sharp inspector, and a property manager you actually trust, so you can focus on finding the next deal instead of fixing a leaky faucet.
    • Master the art of the BRRRR method. Buy, Rehab, Rent, Refinance, Repeat. It’s the closest thing to a cheat code I’ve found for building a portfolio when you aren’t sitting on a mountain of cash. You use the forced appreciation from your renovation to pull your initial capital back out.
    • Watch your margins like a hawk. It’s easy to get seduced by a beautiful mid-century sideboard or a high-end marble countertop, but if those design choices don’t drive the appraisal up, they’re just expensive hobbies. Every dollar spent on a renovation needs to have a clear ROI.
    • Don’t get emotionally attached to the dirt. I love a good fixer-upper as much as the next person, but once the numbers make sense to sell or refinance, you have to move on. Scaling is a volume game; if you get too attached to one house, you’ll miss the next three opportunities.

    The Bottom Line: Turning Sweat Equity into Scalable Assets

    Stop waiting for the “perfect” turnkey property; the real margins are hidden in the houses that everyone else is too afraid to touch.

    Don’t let your capital sit idle in a finished project—use the equity you’ve built through smart renovations to fund your next acquisition.

    Scaling is a marathon of discipline, not a sprint of luck, so focus on building a repeatable system of sourcing, fixing, and refinancing.

    The Reality of Scaling

    Scaling isn’t about chasing the shiny, turnkey mansions; it’s about having the grit to find the properties everyone else is running away from and seeing the equity hidden behind the peeling wallpaper.

    Gareth Trelawny

    The Blueprint for Your Future

    The Blueprint for Your Future: scaling portfolios.

    Scaling a portfolio isn’t some magic trick reserved for the elite; it’s a calculated game of finding undervalued assets and having the discipline to execute. We’ve covered how to hunt for those diamond-in-the-rough properties, how to navigate the acquisition phase without overleveraging yourself, and most importantly, how to effectively recycle your equity to fund the next project. It’s about moving from one single win to a repeatable, systematic process. Remember, you aren’t just buying houses; you are building a machine that turns renovation sweat into long-term financial freedom.

    Look, the road from your first fixer-upper to a massive portfolio is going to be messy. There will be plumbing disasters, budget overruns, and days when you wonder why you didn’t just stick to a desk job. But that’s where the real equity is built—in the grit it takes to see a project through to the end. Don’t wait for the “perfect” market or a massive windfall to get started. Grab your tools, trust your eye for potential, and start turning those crumbling walls into the foundation of your legacy. You have the blueprint; now it’s time to go out and build it.

    Frequently Asked Questions

    How do I know when I’ve hit my limit and actually need to hire a property manager instead of doing everything myself?

    You’ve hit your limit when you’re spending more time chasing late rent and fixing leaky faucets than you are hunting for your next deal. If the “business” of managing your current portfolio is cannibalizing the time you need for strategic growth, you’re actually losing money. When the mental load of being a landlord starts clouding your ability to spot a good renovation opportunity, it’s time to hand over the keys and scale.

    What’s the best way to protect my personal assets when I start moving from single-family flips to larger, multi-unit portfolios?

    Once you move past single-family flips, you can’t just rely on luck and a good contractor. You need to stop holding everything in your own name. I’m a big believer in setting up separate LLCs for each property or group of units. It creates a firewall between your personal savings and a potential lawsuit on a job site. It’s a bit more paperwork upfront, but protecting your equity is non-negotiable.

    At what point does it make more sense to stop reinvesting every cent into my current renovations and start saving for a down payment on a new property?

    Stop pouring every single cent into a single project once you’ve secured your profit margin and established a solid contingency fund. If you’re constantly running on empty, one unexpected plumbing disaster will tank your liquidity. You need to pivot once your current rehab is stable enough to yield a predictable exit. Start carving out that down payment fund early; you can’t scale your empire if you’re one broken water heater away from bankruptcy.

  • Techniques for Finishing Drywall Joints

    Techniques for Finishing Drywall Joints

    I was standing in the middle of a gutted bungalow in East Nashville, staring at a wall that looked more like a topographical map of the Andes than a flat surface. My contractor had just walked off the job, leaving me with a pile of mud, a handful of sanding blocks, and a mounting sense of dread. Most people think drywall finishing is some magical skill reserved for seasoned pros with decades of experience, but that’s a lie that keeps amateur investors from actually building equity. The truth? It isn’t about having steady hands; it’s about understanding the patience required to layer that mud correctly so you don’t end up with a wavy, amateur mess once the light hits it.

    I’m not here to sell you a dream of effortless perfection; I’m here to give you the grit. In this guide, I’m breaking down the actual, unvarnished process of drywall finishing so you can stop outsourcing the small stuff and start controlling your margins. We’re going to cover everything from the right way to tape your seams to the precise sanding techniques that make a wall look seamless under any lighting. If you’re ready to get your hands a little messy to turn a crumbling room into a high-value asset, let’s get to work.

    Table of Contents

    Guide Overview

    Total Time: 2-4 days (including drying time)
    Estimated Cost: $50-150
    Difficulty: Intermediate

    Tools & Supplies

    • Drywall knives (6-inch and 10-inch for taping and smoothing)
    • Mud pan (to hold joint compound)
    • Sanding sponge (medium and fine grit)
    • Corner tool or taping knife (for inside corners)
    • Joint compound (1 bucket of all-purpose or lightweight)
    • Drywall tape (1 roll of paper or mesh tape)
    • Sandpaper (various grits for smoothing)

    Step-by-Step Instructions

    • 1. First, you need to prep the surface, and I mean really prep it. Grab your utility knife and trim away any frayed paper edges or loose bits of mud that are hanging on for dear life. If you leave those imperfections now, they’ll show up like a sore thumb once you hit them with the lights. Take a sanding sponge to the joints to ensure everything is flush, because a clean start is the difference between a professional finish and a DIY disaster.
    • 2. Once the surface is smooth, it’s time to tape your seams. I always reach for paper tape over the mesh stuff for my bigger flips because it’s way more stable and less likely to crack later on. Apply a thin layer of all-purpose joint compound to the seam, press your tape into it, and then use your knife to squeeze out the excess. You want the tape embedded, not floating in a thick, messy glob.
    • 3. Now we move into the first coat, often called the “bedding” coat. Use a wide taping knife to spread the compound over the tape, feathering the edges outward so the transition from the mud to the drywall is as seamless as possible. Don’t worry if it looks a little rough at this stage; the goal here is structural integrity, not perfection. You’re building the foundation of your finish.
    • 4. After that first coat has dried completely—and I mean bone dry—you’ll need to do some light sanding to knock down any ridges or bumps. Once the dust is cleared, apply your second coat. This time, use a wider knife to cover a larger area. You’re essentially trying to camouflage the seam by spreading the compound further and further out from the center. This is where the magic of “feathering” actually happens.
    • 5. For the third and final coat, we’re talking about the “skim coat.” Use your thinnest layer of compound to fill in any tiny pinholes or scratches that surfaced during your previous sanding sessions. I like to keep this layer incredibly thin to avoid heavy sanding later. This is your last chance to catch those pesky imperfections before the paint goes on.
    • 6. The final step is the most grueling but the most rewarding: the final sand. Use a fine-grit sanding sponge and a bright work light held at an angle against the wall to reveal every single shadow or dip. If you see a bump, sand it; if you see a dip, add a tiny bit more mud and repeat. When you can run your hand across the wall and not feel a single transition, you’ve officially turned a crumbling wall into solid equity.

    Mastering Taping Drywall Seams to Prevent Costly Cracks

    Mastering Taping Drywall Seams to Prevent Costly Cracks

    If you want to avoid the nightmare of a client calling you six months later because a hairline fracture appeared in the living room, you have to get serious about taping drywall seams. I’ve seen too many amateur flippers rush this stage just to get to the paint, only to watch their hard-earned equity literally split apart. The secret isn’t just about slapping the tape on; it’s about ensuring the bond is absolute. I always recommend using a high-quality paper tape rather than mesh if you’re looking for maximum durability in high-traffic areas.

    When you’re applying the first coat of joint compound over that tape, remember that less is often more. You aren’t trying to build a mountain of mud; you’re trying to embed the tape so it becomes one with the board. Use a wide taping knife to press the compound into the seam, squeezing out any excess air bubbles that could cause a bulge later. If you don’t get that initial layer perfectly flat, no amount of sanding is going to save you from a visible bump under the lights.

    Selecting Professional Drywall Finishing Tools for Maximum Equity

    Selecting Professional Drywall Finishing Tools for Maximum Equity

    Look, I’ve seen too many rookie investors blow their margins because they tried to save a few bucks on cheap, flimsy knives. If you’re serious about turning a profit, you can’t treat your tool kit like an afterthought. You need a set of high-quality drywall finishing tools—specifically stainless steel taping knives and a reliable mud pan—that won’t flex or bend when you’re under pressure. When you’re applying the first coat of joint compound, a stiff, well-made knife is the difference between a professional-grade surface and a wavy mess that requires hours of extra sanding.

    I always tell my clients that the right gear is an investment in your time, and in this business, time is literally money. Don’t just grab whatever is on sale at the big-box store; look for ergonomic handles and blades that hold a crisp edge. Having a quality hawk and a variety of corner trowels will make mastering different smooth wall texture methods significantly easier. If your tools are up to the task, you’ll spend less time fighting the material and more time building real equity through a flawless finish.

    Pro Moves to Save Your Margin and Your Sanity

    • Stop chasing perfection on the first pass; your goal is to build up thin, even layers rather than trying to hide a massive gap with one thick, heavy coat that’s guaranteed to crack.
    • Invest in a high-quality lighting setup, like a handheld LED work light, to catch those shadows and bumps that your eyes will inevitably miss once the overheads are on.
    • Don’t skip the sanding prep; if you don’t wipe away every speck of dust before your final coat, you’re just sealing imperfections under a layer of expensive mud.
    • Watch your moisture levels like a hawk, because applying fresh compound over a damp patch is a fast track to a failed inspection and wasted time.
    • Keep your mud consistency consistent—if it feels like peanut butter one minute and water the next, your finish is going to be a nightmare to sand down later.

    The Bottom Line on Drywall Success

    Don’t cut corners on your tape job; a sloppy seam is a crack waiting to happen, and fixing it later eats directly into your profit margins.

    Invest in quality tools upfront because cheap knives and bad pans will turn a simple finish into a multi-day nightmare that stalls your entire renovation timeline.

    Treat the finishing process as a way to build equity, not just a chore—smooth, professional walls are often what separate a mediocre flip from a high-value asset.

    ## The Real Cost of a Sloppy Finish

    “In this business, you can’t hide a bad drywall job behind a coat of expensive paint; if your seams aren’t seamless, you aren’t building equity, you’re just building a liability that’ll haunt your inspection report.”

    Gareth Trelawny

    Turning Dust into Dollars

    Turning Dust into Dollars with drywall finishing.

    At the end of the day, a flawless drywall finish isn’t just about making a room look pretty; it’s about the structural integrity and the long-term value of the property. We’ve covered everything from selecting the right professional-grade tools to the precision required for taping those seams so they don’t crack the moment a tenant moves in. If you skip the prep work or try to cut corners on your finishing technique, you’re essentially throwing money down the drain. Remember, the goal is to create a surface so seamless that it becomes a silent asset rather than a maintenance headache. When you master these steps, you aren’t just smoothing out walls; you are protecting your investment margins from the very start.

    I know that standing in a room covered in white dust, staring at a pile of mud and tape, can feel overwhelming. It’s messy, it’s exhausting, and it’s definitely not glamorous. But that’s exactly where the profit lives. The difference between a amateur flip and a professional-grade renovation is found in these granular, often tedious details. Don’t let the grit discourage you. Every smooth coat and every perfectly sanded corner is a step closer to building that generational wealth we all work so hard for. Keep your laser measurer handy, stay patient with the drying times, and keep pushing forward. You’re turning crumbling walls into solid equity, one pass at a time.

    Frequently Asked Questions

    How do I know when I've applied enough mud to hide the seams without making the sanding process a total nightmare?

    The secret is to stop thinking about “hiding” the seam and start thinking about “feathering” it. If you pile on thick layers to bury the tape, you’re just creating a mountain of dust and a sanding nightmare later. Aim for a thin, consistent coat that gradually widens as you move outward. You want the transition to feel seamless to your trowel, not a heavy ridge. If it looks slightly uneven now, don’t sweat it—it’s easier to skim a thin layer than to grind down a hump.

    Is it actually worth investing in high-quality joint compound, or can I save my margins by using the cheaper stuff from the big-box stores?

    Look, I get the urge to squeeze every cent out of a rehab, but don’t cheap out on your joint compound. I’ve seen too many rookies try to save fifty bucks on a bucket only to spend five hundred in labor trying to sand down the grit and bubbles from the cheap stuff. High-quality compound spreads smoother and dries more predictably. If you want to protect your margins, buy the good stuff; it saves you time, and in this business, time is equity.

    How can I tell if a crack in my finished drywall is just a minor settling issue or a sign of a much more expensive structural problem?

    Look, I’ve seen both. If it’s a hairline crack following a seam, it’s likely just minor settling—patch it, tape it, and move on. But if that crack is diagonal, wider than a nickel, or traveling through a corner where walls meet the ceiling, stop everything. That’s a red flag for structural movement. Don’t just slap mud over it; you need to find the source before you waste a dime on aesthetics.

  • Exploring Various Property Financing Options

    Exploring Various Property Financing Options

    I still remember standing in the middle of a gutted Victorian in East London, the smell of damp plaster thick in the air and my boots sinking into a literal pile of debris. I had the vision—I could see the mid-century modern accents and the clean, industrial lines—but I was staring at a bank statement that felt laughably small for the scale of the project. Most gurus will tell you that you need a mountain of liquid cash to get started, but that’s a total myth designed to keep people like us on the sidelines. The truth is, mastering property financing isn’t about how much you have in your savings account right now; it’s about knowing how to leverage the right tools to turn a crumbling shell into a high-yield asset.

    I’m not here to sell you a dream or some complicated, high-interest scheme that will leave you underwater. Instead, I’m going to pull back the curtain on the real-world strategies I use to fund my rehabs, from hard money loans to creative private lending. I’ll show you how to navigate the messy, unglamorous side of securing capital so you can stop dreaming about renovations and actually start building your portfolio.

    Table of Contents

    Navigating Debt Financing vs Equity in Your First Deal

    When you’re standing in front of a gutted bungalow, the math starts to get heavy. You have to decide whether you’re playing with your own cash or leveraging someone else’s. This is the classic debate of debt financing vs equity, and getting the balance wrong can kill your margins before you even pick up a sledgehammer. Using your own savings—equity—means you aren’t beholden to a bank, but it also means you’re tying up all your liquidity. If you dump every cent into one renovation, you won’t have the capital left to jump on the next deal when it hits the market.

    That’s where most of my successful flips rely on bridge financing for real estate. These are short-term loans designed to cover the gap between buying a distressed property and getting it stabilized enough to refinance. It’s a bit more aggressive than a standard mortgage, but it gives you the breathing room to actually execute a high-end design without worrying about your personal bank account hitting zero mid-project. Just remember: leverage is a tool, not a safety net. Use it to scale, but don’t let the interest eat your profit.

    Smart Property Acquisition Funding Strategies for Hidden Gems

    Smart Property Acquisition Funding Strategies for Hidden Gems

    When you’re hunting for those neglected gems—the ones with great bones but terrible layouts—speed is your best friend. You can’t afford to sit on the sidelines while a wholesaler calls around to five other people. This is where bridge financing for real estate becomes your secret weapon. It’s a short-term solution designed to get you through the acquisition phase and the initial mess of a renovation, allowing you to secure the property before the traditional banks even finish their paperwork.

    I’ve learned the hard way that playing it too safe can cost you a deal. If you’re looking at larger, multi-unit projects rather than single-family flips, you might need to pivot toward commercial real estate lending to scale effectively. The goal isn’t just to find money; it’s to find the right kind of capital that matches the project’s lifecycle. You want to ensure your funding structure doesn’t choke your cash flow mid-renovation, leaving you stuck with a half-finished kitchen and a mounting pile of bills.

    My Rules for Not Getting Buried in Bad Debt

    • Don’t treat your renovation budget like a suggestion; always bake a 15% contingency fund into your financing plan to cover the “surprise” issues that inevitably hide behind old drywall.
    • Prioritize hard money lenders for quick acquisitions if you’re competing in a fast-paced market, but make sure you have a clear exit strategy to refinance into long-term debt before the interest eats your margins.
    • Get your personal credit in order long before you find the perfect property, because your debt-to-income ratio is the difference between a green light and a rejected loan application.
    • Stop looking for the lowest interest rate and start looking for the best terms; sometimes a slightly higher rate with more flexible repayment windows is the lifeline you need during a messy rehab.
    • Keep your personal finances and your investment capital in strictly separate accounts from day one, or you’ll lose track of your actual ROI and find yourself bleeding cash where you shouldn’t.

    The Bottom Line on Funding Your Vision

    Don’t let a lack of liquid cash stall your momentum; leverage the right mix of debt and equity to bridge the gap between a neglected property and a high-value asset.

    Always prioritize funding strategies that protect your margins, ensuring that unexpected renovation hiccups don’t eat your entire profit spread.

    Focus on securing capital that aligns with your specific project timeline, whether that’s a quick flip or a long-term hold for building equity.

    The Real Cost of Hesitation

    Financing isn’t just about how much you can borrow; it’s about how much leverage you can strategically apply to turn a gut-job into a goldmine without bleeding your personal savings dry.

    Gareth Trelawny

    Turning Strategy Into Equity

    Turning Strategy Into Equity for profitability.

    At the end of the day, securing the right financing isn’t just about finding the largest loan; it’s about finding the smartest structure for your specific project. We’ve walked through the tension between debt and equity, and we’ve looked at how to hunt for those hidden gems using creative acquisition strategies. Whether you are leveraging hard money to move fast on a distressed property or using your own skin in the game to secure better terms, remember that every dollar you commit must serve a purpose. Don’t let the complexity of the numbers paralyze you—instead, use them as the blueprint for your profitability.

    Real estate investing is rarely a clean, polished process. It’s dusty, it’s stressful, and sometimes the financing feels like it’s working against you. But if you can master the math before you ever pick up a sledgehammer, you’re already ahead of most people. I didn’t build my portfolio by waiting for the “perfect” market or a massive windfall; I built it by making calculated moves on properties that others were too afraid to touch. Stop waiting for permission to start building your legacy. Grab your tools, trust your eye for potential, and go turn those crumbling walls into the solid equity you deserve.

    Frequently Asked Questions

    How much of my own cash should I actually be setting aside for those inevitable renovation cost overruns?

    Look, if you aren’t budgeting for things to go sideways, you aren’t investing; you’re gambling. I always tell my clients to set aside a minimum of 15% to 20% of the total renovation budget specifically for overruns. Between discovering rot behind a “clean” wall or a contractor suddenly hiking a quote, those surprises add up fast. Treat that contingency fund as non-negotiable. It’s the difference between a profitable flip and a personal financial crisis.

    Is it better to go with a hard money lender to move fast, or should I wait until I can secure a traditional bank loan?

    Look, it’s a trade-off between speed and cost. If you’ve found a diamond in the rough that’s going to be snatched up by another investor by Monday, go with a hard money lender. You pay a premium for that speed, but it lets you win the bid. However, if you aren’t in a bidding war, hold out for the bank. The interest rates are lower, and that extra margin is what builds your equity.

    How do I balance using my own equity from current assets without leaving myself too vulnerable if the market dips?

    Look, I get the anxiety. I’ve been there, staring at my own equity and wondering if I’m being smart or just reckless. My rule of thumb? Never pull the entire lever. I treat my personal equity like a safety net, not a blank check. I aim to use just enough to sweeten the deal or cover the renovation gap, but I always keep a cash reserve. If the market dips, you need liquidity to breathe.

  • Key Factors That Increase House Prices

    Key Factors That Increase House Prices

    I was standing in a kitchen last Tuesday, staring at a cracked subfloor and a dated, mustard-yellow backsplash, when a client asked me if we should spend thirty grand on a high-end marble countertop to “increase the appeal.” I almost laughed. People get so caught up in the flashy, expensive nonsense that they completely ignore the actual property value drivers that move the needle. They think a luxury appliance package is a magic wand, but they’re missing the forest for the trees. In this business, if you chase every shiny trend without understanding the underlying mechanics, you aren’t investing; you’re just expensive hobbyist.

    I’m not here to sell you on the latest Pinterest aesthetic or some overpriced renovation myth. My goal is to strip away the fluff and show you how to identify the structural and functional upgrades that actually build real equity. I’m going to walk you through the gritty, unglamorous reality of what makes a house worth more, from the bones of the building to the strategic layout of a room. If you’re ready to stop guessing and start building wealth through smart, calculated rehabs, let’s get to work.

    Table of Contents

    Maximizing Your Home Renovation Roi With a Sharp Eye

    Maximizing Your Home Renovation Roi With a Sharp Eye

    When I’m walking through a potential fixer-upper, I’m not looking at the outdated wallpaper or the cracked tiles; I’m looking at the layout. To truly maximize your home renovation ROI, you have to prioritize the bones over the fluff. A kitchen remodel is a classic move, but if the floor plan is cramped and dark, a shiny new backsplash won’t save you. I always look for ways to open up sightlines and improve flow. That’s where the real money is made—in the spaces that make a house feel expansive and intentional rather than cluttered.

    I also tend to lean heavily into functional upgrades that buyers actually care about in today’s climate. While everyone wants a spa-like bathroom, I’ve found that energy efficient home upgrades—like updated insulation or high-end HVAC systems—offer a much more pragmatic way to increase residential property worth. It’s about playing the long game. You aren’t just decorating for a quick flip; you are strategically adding value that stands up to scrutiny during a home inspection. Focus on the stuff that works, and the aesthetics will follow.

    Decoding Neighborhood Desirability Factors for Long Term Gains

    Decoding Neighborhood Desirability Factors for Long Term Gains

    When I’m scouting a new fixer-upper, I’m not just looking at the floor plan; I’m looking at the street. You can put a stunning mid-century modern kitchen into a house, but if the neighborhood is stagnant, you’re just spinning your wheels. To see true real estate market appreciation, you have to look at the macro level. Is there a new coffee shop popping up two blocks away? Is the local school district seeing an influx of investment? These are the subtle neighborhood desirability factors that dictate whether your equity grows or stays flat.

    I always tell my clients: don’t get blinded by a pretty backsplash if the location is a dead end. I look for areas with “path of progress” energy—places where the infrastructure is catching up to the potential. Sometimes, that means betting on a slightly gritty area that is on the verge of a revitalization. It’s about finding that sweet spot where your efforts in increasing residential property worth are amplified by the natural momentum of the community around you. If the neighborhood is moving up, your investment is riding that wave.

    5 High-Impact Moves to Drive Your Equity Up

    • Focus on the “Unsexy” Essentials First. Before you go picking out expensive backsplash tile, make sure the roof, HVAC, and electrical are solid. Buyers will forgive a dated kitchen, but they won’t forgive a foundation that’s shifting or a furnace that dies in mid-January.
    • Master the Art of the Layout. Sometimes the best way to add value isn’t by adding square footage, but by reclaiming it. Knocking down a non-load-bearing wall to create an open-concept flow can make a cramped 1,200-square-foot house feel like a much more valuable asset.
    • Curb Appeal is Your First Impression. You only get one shot at that first walkthrough. A fresh coat of paint on the front door, manicured landscaping, and decent lighting can trick a buyer’s brain into seeing a “home” rather than just another listing.
    • Don’t Over-Improve for the Neighborhood. I’ve seen too many investors go overboard with high-end marble in a mid-range zip code. You need to know your ceiling; if the houses on the block are modest, your renovation should be smart and modern, but not so luxury that you can’t recoup the costs.
    • Prioritize the Kitchen and Primary Bath. If you have a limited budget, dump it here. These are the two rooms that drive emotional decisions and, more importantly, the rooms that justify the highest price jumps during a resale.

    The Bottom Line: Turning Potential into Profit

    Stop chasing vanity upgrades; focus your budget on the high-impact structural and functional improvements that actually move the needle on appraisal values.

    Real wealth is built by looking past the ugly wallpaper and spotting the “bones” of a property that allow for strategic, equity-building renovations.

    Location isn’t just a zip code—it’s about identifying the specific neighborhood micro-trends that turn a risky flip into a long-term, appreciating asset.

    ## The Real Math of Equity

    “Stop obsessing over trendy backsplash tiles and start looking at the bones; real value isn’t found in what’s pretty, it’s found in the structural potential that most people are too intimidated to touch.”

    Gareth Trelawny

    The Bottom Line on Building Equity

    The Bottom Line on Building Equity.

    At the end of the day, driving up property value isn’t about chasing every fleeting design trend or slapping a fresh coat of paint on a sinking ship. It’s about the intersection of strategic renovation and location intelligence. We’ve looked at how high-impact upgrades can maximize your ROI, and how understanding the nuances of neighborhood desirability ensures your investment actually holds its ground. If you can master the balance between fixing what’s broken and investing in what the market actually wants, you aren’t just fixing a house—you are engineering a profitable asset.

    I know it can feel overwhelming when you’re staring at a stack of contractor quotes or a neighborhood that looks a little rough around the edges. But remember, the biggest gains aren’t found in the pristine, move-in-ready suburbs; they are hidden behind the cracked drywall and the outdated layouts of properties others are too afraid to touch. You don’t need luck to build a real estate portfolio; you just need the grit to see the potential where everyone else sees a mess. Stop waiting for the perfect market and start looking for the perfect bones.

    Frequently Asked Questions

    How do I know if I'm over-improving for the neighborhood and killing my potential profit margins?

    Look, this is where most rookies bleed cash. You have to stop treating every flip like your personal dream home. Before you drop five figures on custom marble or designer lighting, look at the comps. If the highest-selling house on the block has laminate counters, your quartz waterfall island isn’t an asset—it’s a liability. You aren’t building a palace; you’re building a product. Match the quality to the neighborhood’s ceiling, or you’ll just be subsidizing your buyer’s lifestyle with your own profit.

    At what point does a renovation stop being an investment and start becoming a money pit?

    You know you’ve crossed the line when you’re chasing perfection instead of profit. It’s easy to get seduced by high-end finishes, but if your renovation costs start outstripping the projected After Repair Value (ARV), you’re no longer investing—you’re just subsidizing a hobby. Stop once you’ve addressed the “bones” and the high-impact aesthetic wins. If you’re debating between marble vs. quartz just to satisfy your own taste, you’re officially in the money pit.

    Which specific structural upgrades actually move the needle on equity versus just being cosmetic fixes?

    Look, I love a fresh coat of paint as much as the next designer, but if you want to see real equity movement, you have to look past the surface. Cosmetic fixes are for staging; structural upgrades are for building wealth. Focus on the “bones”—roof integrity, updated electrical, and HVAC systems. These aren’t “sexy” for Instagram, but they eliminate the big-ticket fears for buyers. Fix the foundation and the systems, and you’re securing actual value.

  • Replacing Old Siding to Improve Aesthetics

    Replacing Old Siding to Improve Aesthetics

    I was standing on a muddy job site last October, staring at a Victorian fixer-upper that looked like it was held together by nothing but sheer willpower and old paint. The contractor was trying to sell me on a premium, high-end cedar shake install that would have absolutely gutted my margins before I even got to the kitchen remodel. It’s the same old song I hear in this industry: people treat siding replacement like it’s a luxury lifestyle choice rather than what it actually is—a fundamental structural necessity and a high-leverage equity play. If you’re listening to every salesperson tell you that you need the most expensive materials on the market to “protect your investment,” you’re likely just throwing money down the drain.

    I’m not here to sell you on aesthetics that don’t move the needle; I’m here to help you build wealth. In this guide, I’m stripping away the fluff to give you the raw, unvarnished truth about when to splurge, when to save, and how to execute a siding replacement that actually boosts your ROI. We’re going to talk about material durability and labor costs from a renovator’s perspective, ensuring you turn that crumbling exterior into a massive win for your portfolio.

    Table of Contents

    Mastering the Siding Replacement Process for Maximum Return

    Mastering the Siding Replacement Process for Maximum Return

    When you’re standing on a job site looking at a house that’s clearly seen better days, you have to decide if you’re just slapping on a cosmetic fix or actually investing in the structure. If you want to maximize your ROI, you can’t just pick the cheapest option available. I always tell my clients that the siding replacement process is about more than just a new look; it’s about protecting the bones of the building. I tend to lean toward fiber cement vs vinyl siding depending on the budget and the neighborhood’s vibe, but my priority is always finding the best siding for durability so I’m not back on that same ladder in three years.

    Don’t get tunnel vision on the initial siding installation costs, either. If you skimp on the materials now, you’ll pay for it tenfold in future home exterior maintenance. I look for energy efficient siding options because, in a competitive market, being able to tell a buyer that their utility bills will be lower is a massive selling point. You aren’t just fixing a wall; you’re engineering a more valuable asset.

    Choosing the Best Siding for Durability and Long Term Gains

    Choosing the Best Siding for Durability and Long Term Gains.

    When I’m walking a job site, I’m not just looking at what looks pretty in a staging photo; I’m looking at what’s going to survive the next decade of weather without draining my cash reserves. You have to weigh your upfront siding installation costs against the long-term headache of constant repairs. If you go too cheap, you’ll be back on a ladder in three years, and that’s money straight out of your profit margin.

    The big debate I always run into is fiber cement vs vinyl siding. Vinyl is the budget-friendly route, and it certainly helps with improving curb appeal with siding on a tight timeline, but it can look a bit “plastic” if you aren’t careful. On the flip side, fiber cement is the heavy hitter for anyone serious about building equity. It’s incredibly resilient and offers some of the best siding for durability on the market. I usually push my clients toward fiber cement or high-end composite because, while the initial hit is harder on the wallet, the reduction in home exterior maintenance makes it a much smarter play for a long-term hold.

    5 Pro Moves to Protect Your Margins During Siding Rehab

    • Don’t just slap new boards over old rot; you have to strip it down to the sheathing to make sure you aren’t just masking a structural nightmare that’ll kill your ROI later.
    • Inspect your flashing like your profit depends on it—because it does—and make sure every window and door junction is sealed tight to prevent moisture from eating your equity.
    • Prioritize high-quality house wrap over the cheap stuff; spending an extra few hundred bucks now on a decent moisture barrier saves you a massive headache (and a massive lawsuit) down the road.
    • Keep an eye on your color palette and stick to timeless, high-demand neutrals; I’ve seen too many investors go “creative” with bold siding colors only to realize they just shrunk their buyer pool.
    • Vet your contractors by looking at their previous job sites, not just their polished Instagram feeds; I want to see how their seams look and how they handle the cleanup, not just a pretty finished photo.

    The Bottom Line: Don't Overbuild, Just Outsmart

    Stop treating siding as a cosmetic afterthought; it’s your first line of defense against structural rot that can absolutely tank your ROI if you ignore it.

    Prioritize high-durability materials like fiber cement over cheap vinyl to ensure your renovation holds its value long after you’ve handed over the keys.

    Always inspect the sheathing once the old boards are off—it’s better to fix a small moisture issue now than to face a massive, margin-killing repair later.

    ## The Real Cost of Neglect

    “Stop looking at siding as just a cosmetic fix; if you’re letting old, cracked boards rot, you aren’t just hurting your curb appeal—you’re letting your profit margins leak right out of the structure.”

    Gareth Trelawny

    Turning Curb Appeal into Real Equity

    Turning Curb Appeal into Real Equity.

    At the end of the day, replacing your siding isn’t just about making a house look pretty for a weekend open house; it’s a calculated move to protect your investment from the elements. We’ve covered how to manage the replacement process without letting contractors bleed your budget dry, and we’ve looked at which materials actually hold their value over a decade versus what just looks good in a listing photo. Remember, the goal is to stop the rot before it becomes a structural nightmare that eats your entire profit margin. If you choose the right materials and execute the installation with precision, you aren’t just fixing a house—you are fortifying your asset.

    I know that staring at a peeling, weathered exterior can feel overwhelming, especially when you’re trying to balance a tight renovation budget. But don’t let the mess intimidate you. Every crumbling board and faded panel is just an opportunity to step in, add value, and build that equity we’re all chasing. Real estate isn’t about finding perfection; it’s about having the vision to see past the decay and the grit to make the necessary changes. Grab your laser measurer, get your plan in place, and let’s start turning these liabilities into profitable wins.

    Frequently Asked Questions

    How do I know if I can get away with a simple repair, or if I'm looking at a full-scale replacement to protect my margins?

    Look, I’ve been there—staring at a patch of damaged siding, praying it’s just a quick fix to save my budget. Here’s the reality: if the damage is localized and the substrate underneath is bone-dry, you can patch it. But the second you see soft spots, mold, or widespread warping, stop. Trying to “save” a failing system is a rookie mistake. Replace the whole thing now, or you’ll be paying for structural repairs later.

    Is it worth spending the extra cash on high-end materials like fiber cement, or should I stick to vinyl to keep my ROI high?

    Look, if you’re flipping a quick rental, vinyl gets the job done and keeps your margins fat. But if you’re playing the long game or aiming for a premium resale, go with fiber cement. It looks high-end, handles weather like a champ, and screams “quality” to potential buyers. Don’t cheap out on the curb appeal if you want to command a higher sale price; sometimes, spending more upfront is exactly how you secure that extra equity.

    What are the red flags I should look for during a walkthrough that indicate the underlying structure is rotting beneath the siding?

    When you’re walking a site, don’t just look at the surface. Grab your screwdriver and poke the areas near the foundation or around window casings. If it feels soft or spongy, that’s a massive red flag—you’re looking at rot. Also, keep an eye out for bulging siding or weird gaps; that usually means the sheathing underneath is warping or failing. If you see moisture staining or mold peeking through, stop everything. That’s not just a cosmetic fix; that’s a structural nightmare eating your profit.