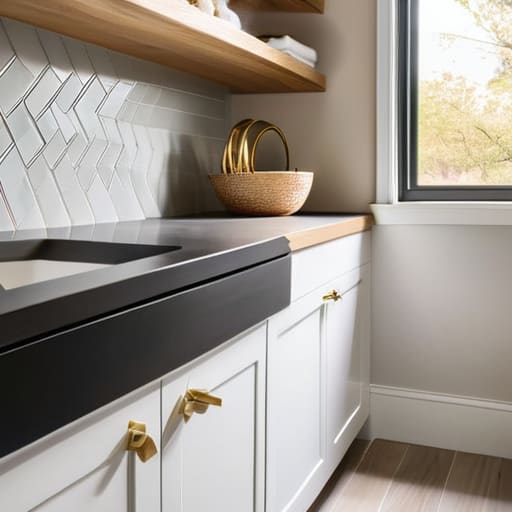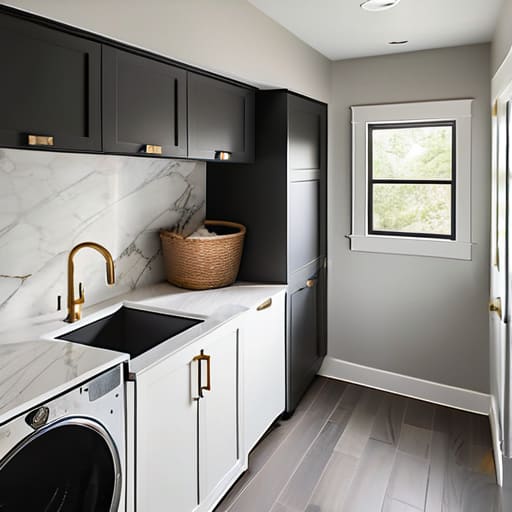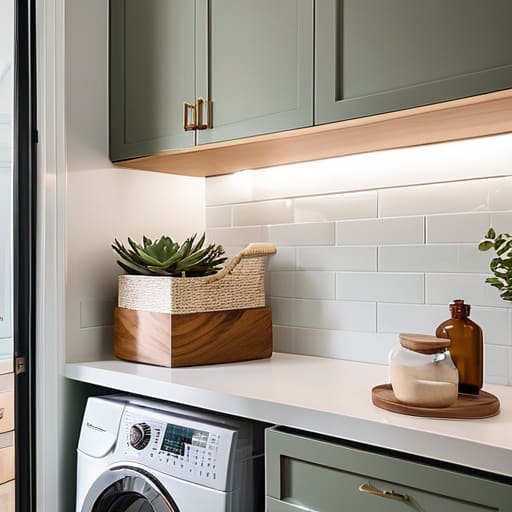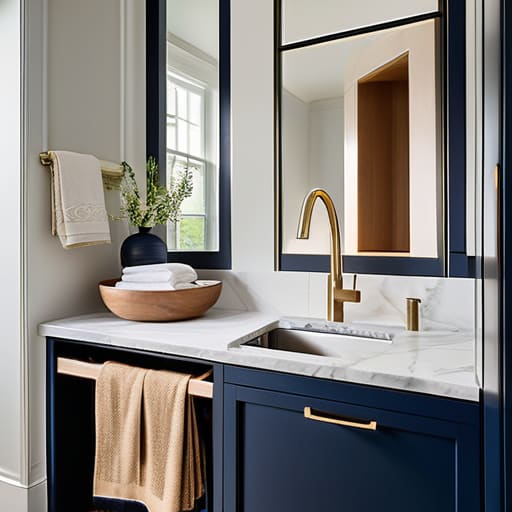
Category: Renovation

  • Maximizing Space in a Small Bathroom

    Maximizing Space in a Small Bathroom

    I was knee-deep in sawdust and lime mortar last Tuesday, staring at a 4×4 powder room in a Victorian fixer-upper that felt more like a broom closet than a functional space. Most “experts” will tell you that you need to tear down load-bearing walls or blow your entire budget on custom Italian marble to make a cramped layout work, but honestly? That’s just expensive nonsense. I’ve seen too many investors bleed cash trying to force a luxury spa aesthetic into a footprint that simply won’t allow it. If you’re hunting for small bathroom ideas that actually move the needle on your property value without draining your bank account, you need to stop looking at Pinterest trends and start looking at spatial efficiency.

    I’m not here to sell you on a dream; I’m here to give you a blueprint. In this guide, I’m stripping away the fluff to share the exact, high-impact strategies I use when I’m on a job site turning neglected, tiny baths into high-value assets. We’re going to talk about smart storage, lighting hacks, and layout tweaks that maximize every single square inch. My goal is to help you build real equity through strategic, no-nonsense renovations that work as hard as you do.

    Table of Contents

    Maximizing Small Bathroom Storage to Boost Asset Value

    Maximizing Small Bathroom Storage to Boost Asset Value

    When I’m walking through a property, I look past the outdated tile and focus on the floor plan. In a small bathroom, clutter is the ultimate value-killer. If a buyer sees piles of shampoo bottles and tangled hair dryers, they don’t see a sanctuary; they see a headache. To fight this, I always push for maximizing small bathroom storage through verticality rather than floor space. This is where floating vanity options become a total game-changer. By lifting the cabinetry off the floor, you create a sense of openness and “visual breathing room” that makes even a cramped powder room feel significantly larger.

    Don’t overlook the walls, either. I’m a huge advocate for integrating recessed shelving into the shower or installing high-quality mirrored medicine cabinets that blend seamlessly into the design. The goal isn’t just to hide the mess, but to create a streamlined, intentional look. When you eliminate the visual noise, you’re not just tidying up; you’re prepping the space to command a higher asking price by proving that even a tiny footprint can be efficient and high-end.

    Smart Small Bathroom Color Palettes for Instant Appeal

    Smart Small Bathroom Color Palettes for Instant Appeal

    When I’m walking into a property with a cramped, dark bathroom, my first instinct isn’t to reach for a sledgehammer—it’s to look at the light. Color is your most cost-effective tool for manipulating perception. If you want to make a tiny footprint feel expansive, stop reaching for heavy, moody tones. Instead, lean into light, airy neutrals like soft whites, pale greys, or even a very muted sage. These shades reflect light rather than absorbing it, which is essential when you’re working with limited square footage.

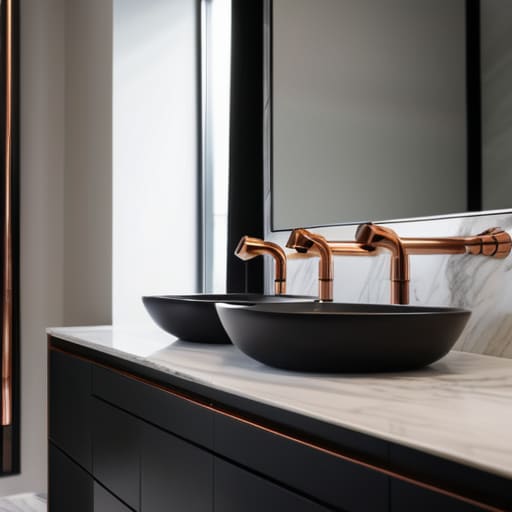
    However, don’t mistake “neutral” for “boring.” To keep the space from feeling clinical, I like to introduce texture through minimalist bathroom decor. Think matte black hardware against a crisp white tile or a light oak vanity to add warmth. If you’re looking to create a high-end, spa-like atmosphere that appeals to future buyers, consider using monochromatic small bathroom color palettes. By keeping the tile, walls, and fixtures within the same tonal family, you eliminate visual clutter, making the entire room feel significantly larger and much more expensive than it actually is.

    High-ROI Tweaks: 5 Ways to Level Up a Cramped Bathroom

    • Stop fighting the layout and start using the vertical space; install floating shelves or custom cabinetry that reaches toward the ceiling to draw the eye up and add much-needed storage without eating into your floor plan.
    • Swap out that bulky, dated vanity for a wall-mounted floating sink; it’s a classic industrial move that exposes more floor area, making the entire room feel significantly less claustrophobic.
    • Upgrade your lighting from a single, sad overhead bulb to layered sources like sleek sconces or dimmable recessed lights; good lighting is the cheapest way to make a budget renovation look like a high-end custom build.
    • Go big with your hardware; replacing generic, builder-grade faucets and pulls with matte black or brushed brass fixtures adds an instant sense of intentional design and “finished” quality that buyers crave.
    • Don’t overlook the mirror game; ditch the small, framed rectangle for a large, oversized mirror that spans the width of the vanity to bounce light around and trick the eye into seeing a much larger footprint.

    The Bottom Line: Turning Square Footage into Equity

    Stop viewing a small footprint as a limitation and start seeing it as a way to minimize renovation costs while maximizing per-square-foot value.

    Prioritize high-impact, functional upgrades—like clever storage and light-reflective palettes—over expensive, purely aesthetic features that don’t solve a spatial problem.

    Always design with the exit strategy in mind; every choice you make in a cramped bathroom should aim to make the space feel larger and more premium to the next buyer.

    ## The Investor’s Mindset on Square Footage

    “Stop looking at a cramped bathroom as a limitation; start seeing it as a high-yield opportunity. In this game, you aren’t just picking tile colors—you’re engineering efficiency to maximize every single square inch of equity.”

    Gareth Trelawny

    Turning Small Spaces into Big Wins

    Turning Small Spaces into Big Wins.

    At the end of the day, renovating a small bathroom isn’t about how much square footage you have to work with; it’s about how strategically you use every single inch. We’ve covered how to maximize your storage to prevent that cluttered, cheap look and how to leverage the right color palettes to make a cramped room feel airy and expensive. Remember, every decision you make—from the floating vanity to the tile choice—should be viewed through the lens of maximizing ROI. If a design element doesn’t add both utility and aesthetic value, it doesn’t belong in your renovation plan. Focus on the details that drive equity, and you’ll find that even the smallest powder room can become a standout feature in your property.

    I know that staring at a gutted, tiny bathroom can feel overwhelming, especially when you’re balancing a budget and a timeline. But don’t let a lack of space shake your confidence. Every crumbling wall and cramped layout is just an opportunity waiting for a sharp eye to see its true potential. Real estate investing is a marathon, not a sprint, and mastering these small-scale wins is exactly how you build the momentum needed for larger, more lucrative flips. Stop looking at the limitations and start looking at the profit potential. Grab your laser measurer, get to work, and let’s turn that wasted space into a high-value asset.

    Frequently Asked Questions

    Is it actually worth the extra cash to knock down a wall for an open-concept layout, or am I just blowing my budget for diminishing returns?

    Look, I’ve seen both sides of this on the job site. If you’re knocking down a wall to create a seamless flow between a cramped vanity and a larger area, do it—it increases the perceived square footage and buyer appeal. But if you’re gutting a structural wall just for the sake of “openness” and blowing your contingency fund on steel beams, stop. You’re trading actual equity for a trend that might not pay off.

    When I'm looking at a fixer-upper, how can I tell if a tiny bathroom is a quick cosmetic win or a structural nightmare waiting to drain my bank account?

    Before you dive in, grab that laser measurer and look at the walls. If the tiles are just dated and the vanity is a relic, you’re looking at a high-margin cosmetic win. But if you see cracks snaking through the grout or feel a weird slope in the floor, run. That’s not just “character”—that’s a plumbing or structural nightmare that will eat your renovation budget alive before you even pick out a faucet.

    Which specific high-end finishes should I prioritize to make a small space feel expensive without over-improving for the neighborhood?

    Focus on the “touchpoints”—the things people actually feel and see up close. Swap out builder-grade chrome for brushed gold or matte black hardware; it’s a low-cost way to signal luxury. I always prioritize high-quality, large-format tiles to minimize grout lines, which makes the floor feel expansive rather than cluttered. Finally, invest in a solid-surface vanity top. It feels substantial and expensive, but it won’t blow your budget like custom cabinetry would.

  • Best Practices for Tiling Surfaces

    Best Practices for Tiling Surfaces

    I still remember the exact moment I realized that most “expert” advice in the renovation world is just a way to pad a contractor’s invoice. I was standing in a cramped, dimly lit bathroom of a fixer-upper I’d just picked up, staring at a crooked, cracked backsplash that looked like it had been laid by someone in a blindfold. I had spent hours scouring the internet for professional tiling tips, only to find endless, fluff-filled articles suggesting I needed a thousand-dollar specialized kit just to handle a basic subway tile. It was infuriating. People act like tiling is some mystical art form reserved for the elite, when in reality, it’s just about smart preparation and not cutting corners when nobody is watching.

    I’m not here to sell you on expensive gadgets or complicated theories that don’t work in a real-world job site. Instead, I’m going to give you the straight talk on how to execute a flawless finish without draining your renovation budget. We’re going to dive into the gritty, practical side of things—from leveling your subfloor to mastering your grout lines—so you can turn a mediocre bathroom into a high-equity asset. If you want the truth about what actually makes a tile job look expensive versus what just wastes your time, you’re in the right place.

    Table of Contents

    Subfloor Preparation for Tile Building on a Solid Foundation

    Subfloor Preparation for Tile Building on a Solid Foundation

    Look, I’ve seen more beautiful, expensive tile jobs ruined by a lazy subfloor than I care to admit. You can buy the most stunning marble slabs on the market, but if your base is uneven or bouncy, you’re essentially throwing money down the drain. Proper subfloor preparation for tile isn’t just about making things look pretty; it’s about structural integrity. If you’re working over plywood, you need to ensure it’s rock-solid and securely fastened to the joists. Any flex in that floor is going to telegraph through your grout lines and eventually crack your tiles.

    Before you even think about opening a bag of thin-set, grab your laser measurer and check for level. If you have dips or high spots, use a self-leveling underlayment to flatten the field. This is the single most important step for preventing lippage during tiling, which is that annoying, uneven lip where one tile sits higher than its neighbor. Trust me, when a potential buyer runs their foot over a lip in a high-end renovation, they don’t see “character”—they see a lack of professional craftsmanship.

    Choosing the Right Tile Adhesive for Long Term Value

    Choosing the Right Tile Adhesive for Long Term Value

    Look, I’ve seen too many beautiful, high-end renovations fall apart because someone tried to cut corners on the thin-set. If you’re looking at a heavy porcelain slab or a natural stone, you can’t just grab the cheapest bucket on the shelf and hope for the best. Choosing the right tile adhesive is about more than just sticking things to the floor; it’s about ensuring that your investment doesn’t start popping loose six months after the closing date. If you’re working with large-format tiles, you need a high-performance, polymer-modified mortar that can handle the weight and the slight shifts in the structure.

    One of the biggest tiling mistakes to avoid is using an adhesive that doesn’t match your tile’s absorption rate. If you use a standard mortar for a highly absorbent stone, the tile will suck the moisture right out of the bond, leaving you with a hollow, crunchy mess underfoot. I always tell my clients: don’t skimp here. A premium adhesive might cost a few extra bucks upfront, but it’s a small price to pay for preventing lippage during tiling and ensuring those floors stay rock-solid for the next twenty years.

    The Details That Separate a Flip from a Fail: 5 Tiling Essentials

    • Stop obsessing over the pattern and start focusing on the layout. I’ve seen too many rookies start in a corner only to realize they’ve left themselves with a tiny, ugly sliver of tile against the far wall. Find your centerline first and dry-lay your tiles to ensure your cuts are balanced and intentional.
    • Don’t skimp on the grout quality. If you’re looking to build long-term equity, you want a grout that actually resists staining and cracking. I always lean toward high-performance, pre-mixed or polymer-modified grouts because I don’t have time to come back to a property six months later to scrub out discoloration.
    • Check your leveling constantly. A single tile sitting a millimeter higher than its neighbor—what the pros call “lippage”—is a massive red flag for any savvy buyer. Use a leveling clip system; it’s a small upfront investment that saves you from a botched job and a much lower appraisal.
    • Respect the drying time. I know it’s tempting to rush into grouting because you want to see the finished product, but if that adhesive hasn’t fully cured, you’re asking for disaster. Patience in the curing phase is what prevents tiles from shifting and ruining your margins.
    • Plan your grout lines with the end goal in mind. If you’re working with large-format tiles, keep those grout lines minimal to create that sleek, seamless look that sells. But if you’re using handmade or textured tiles, give them some breathing room so the natural imperfections don’t look like mistakes.

    The Bottom Line: Don't Cut Corners on the Foundation

    Never skip the subfloor prep; a level base is the difference between a high-end finish and a cracked, money-losing disaster.

    Invest in high-quality adhesive because cheap glue is a shortcut that will eventually cost you double in repairs and lost equity.

    Treat every tile installation as a long-term asset play—if the prep work isn’t professional, the ROI won’t be either.

    ## The Real Cost of Cutting Corners

    “If you try to save a few hundred bucks by rushing the layout or skimping on the thinset, you aren’t actually saving money—you’re just pre-ordering a massive repair bill that’ll eat your entire profit margin on the flip.”

    Gareth Trelawny

    The Bottom Line on Better Tiling

    The Bottom Line on Better Tiling.

    At the end of the day, tiling isn’t just about picking out a pretty pattern at the showroom; it’s about the grit you put in before the first piece even touches the floor. If you skimp on the subfloor prep or grab the cheapest adhesive just to save a few bucks on the budget, you aren’t saving money—you’re just scheduling a future disaster. I’ve seen too many investors lose their margins because they tried to cut corners on the technical stuff. Remember, the goal is to create a finish that looks high-end and, more importantly, stays that way long after the paint has dried. Invest in the prep, and the profit will follow.

    I know that staring at a bare, dusty room can feel overwhelming, especially when you’re midway through a renovation and things are getting messy. But don’t let the dust intimidate you. Every perfectly leveled tile and every clean grout line is a step toward increasing your property’s value and building that generational wealth we’re all after. It’s about seeing the vision through the chaos. Take your time, measure twice, and don’t be afraid to get your hands dirty. You aren’t just laying tile; you are building equity, one square foot at a time.

    Frequently Asked Questions

    How do I figure out if I should go with a standard grout or an epoxy grout to avoid staining issues down the line?

    Look, if you’re renovating a high-traffic area like a kitchen backsplash or a shower floor, just bite the bullet and go with epoxy. Standard grout is basically a sponge; it’ll soak up every drop of grease or soap scum until it looks filthy, and then you’re stuck scrubbing for hours. Epoxy is more expensive and a total pain to apply, but it’s non-porous. It stays clean, which means less maintenance and better long-term value.

    What’s the best way to choose a tile pattern that actually makes a small, cramped bathroom feel more expensive?

    Stop thinking about what looks “pretty” and start thinking about visual lines. If you want to trick the eye into seeing space, go with a large-format tile and minimal grout lines; it reduces visual clutter and makes the floor feel continuous. If you’re feeling bold, a vertical stack pattern can draw the eye upward, making low ceilings feel much higher. Just remember: keep the grout color close to the tile to avoid a choppy, cramped look.

    When am I actually going to see a return on investment from high-end tile versus just using something budget-friendly?

    Look, if you’re flipping a budget rental, don’t waste the capital on hand-painted Moroccan cement tiles. You won’t see that money back. But if you’re targeting the mid-to-high-end market, that’s where the ROI lives. High-end tile in high-impact zones—like a primary ensuite or a kitchen backsplash—creates that “wow” factor in listing photos. It signals quality and tells buyers the house hasn’t been skimped on, allowing you to push your asking price higher.

  • Finishing Window Frames With Trim

    Finishing Window Frames With Trim

    I was standing in a dusty, gutted living room in a mid-century ranch last October, staring at a set of water-damaged, peeling casings, when my contractor suggested we pull the whole window assembly to “do it right.” I nearly laughed in his face. Most people think you need to spend thousands on custom-milled millwork to make a renovation look high-end, but that is a massive waste of capital that eats directly into your margins. The truth is, you don’t need a custom budget to fix bad window trim; you just need to know which specific profiles actually add value and which ones are just expensive filler.

    I’m not here to sell you on a Pinterest-perfect fantasy that leaves your bank account empty. Instead, I’m going to give you the straightforward, boots-on-the-ground truth about selecting, installing, and finishing trim that maximizes your ROI. We’re going to talk about how to spot the difference between a cheap fix and a strategic upgrade, ensuring every dollar you spend on those frames is actually building equity rather than just burning cash.

    Table of Contents

    Choosing Window Trim Material Types That Last

    Choosing Window Trim Material Types That Last

    When you’re staring down a renovation budget, it’s tempting to grab the cheapest MDF you can find at the big-box store. But if you’re looking to build real equity, you need to think about longevity. For high-traffic areas or rooms prone to moisture, I always lean toward solid wood or high-quality polyurethane. Wood gives you that authentic, substantial feel that buyers can actually sense when they walk through a room, but it requires a bit more love in terms of sanding and painting.

    If you’re aiming for a sleeker, more streamlined look, exploring different window trim material types is essential to matching your overall design intent. For instance, if I’m working on a mid-century modern rehab, I might opt for thinner, more precise profiles that don’t scream “builder grade.” You don’t want to pick a material that warps or peels in two years; that’s just throwing your profit margin down the drain. Instead, focus on selecting architectural window detailing that complements the structural integrity of the house, ensuring the finish stays crisp long after the closing papers are signed.

    Finding Value in Decorative Window Frame Profiles

    Finding Value in Decorative Window Frame Profiles

    When you’re walking through a neglected property, the bones tell you a lot, but the details tell you the profit margin. I always tell my clients to look closely at the existing architectural window detailing. If you’re dealing with a house that has character—think Craftsman or Victorian—ripping out heavy, ornate profiles to install basic, flat stock is a rookie mistake that kills your resale value. You want to find a profile that respects the home’s era while feeling intentional. Sometimes, all it takes is a bit of sanding and a fresh coat of paint to make a vintage profile look high-end rather than dated.

    On the flip side, if you’re flipping a mid-century minimalist space, you want to lean into clean, sharp lines. In these cases, I look for modern window trim design ideas that emphasize geometry over fluff. A slim, flat casing can instantly elevate a room from “old fixer-upper” to “curated contemporary.” The goal isn’t just to cover the gap between the wall and the frame; it’s about using those shapes to frame the view like a piece of art. That’s how you turn a standard renovation into a high-value asset.

    My Pro Tips for Getting Window Trim Right the First Time

    • Don’t skimp on the quality of your caulk; if you leave gaps between the trim and the wall, the whole room looks amateur, and you’ll be back fixing it in six months.
    • Always measure your window openings twice before ordering any custom profiles—nothing kills my profit margin faster than a piece of expensive millwork that’s a quarter-inch too short.
    • Think about the paint job, not just the wood; if you’re working with a tight budget, choose a smooth MDF trim that takes paint beautifully so you can save on material costs without sacrificing the look.
    • Use the trim to hide your mistakes, specifically where the drywall meets the window casing, so you don’t have to spend extra hours on perfect plasterwork.
    • Stick to classic, timeless profiles rather than anything too trendy; I want these flips to look high-end for years, not like they were stuck in a specific design fad from three years ago.

    The Bottom Line on Window Trim

    Don’t overspend on high-end exotic woods; focus on durable, moisture-resistant materials like primed MDF or composite that can handle the wear and tear of a new homeowner.

    Prioritize profile over prestige—a clean, modern trim profile can make a dated room feel instantly renovated without the cost of custom millwork.

    Treat trim as the finishing touch that seals the deal; it’s the bridge between your paint job and your walls, so don’t skimp on the quality if you want that “finished” look that drives equity.

    The Small Detail That Protects Your Margin

    “When you’re staring down a renovation budget, it’s easy to want to skip the window trim to save a few bucks, but don’t. It’s one of those small, inexpensive details that bridges the gap between a house that looks ‘rehabbed’ and a home that looks high-end. If you leave the old, beat-up casing in place, you’re essentially leaving equity on the table.”

    Gareth Trelawny

    The Bottom Line on Trim and ROI

    The Bottom Line on Trim and ROI.

    At the end of the day, window trim isn’t just a finishing touch; it’s a strategic decision that bridges the gap between a “renovated house” and a “designer home.” We’ve covered how picking the right material—whether it’s durable MDF or high-end wood—can prevent future maintenance headaches, and how selecting a profile that complements your architectural style can significantly boost perceived value. Don’t let yourself get distracted by the big-ticket items like kitchen islands and forget that it is often these small, structural details that catch a buyer’s eye during a walkthrough. If you invest the time to get the trim right, you aren’t just covering up gaps; you are solidifying the equity you’ve worked so hard to build.

    I know that when you’re staring at a gutted room with dust in your lungs, it’s easy to feel overwhelmed by the minutiae. But remember, every successful flip is just a series of smart, calculated choices stacked on top of one another. You don’t need a perfect, untouched house to start building wealth; you just need the grit to fix the parts that are broken. Treat every piece of molding and every corner bead as an opportunity to transform a liability into an asset. Keep your eyes on the prize, keep your laser measurer handy, and go turn those crumbling walls into real profit.

    Frequently Asked Questions

    How do I figure out if the existing trim is worth saving or if it’s faster to just rip it all out?

    Look, I’ve been there—staring at a wall wondering if I’m about to waste a weekend or save a fortune. If the trim is solid wood and has a profile that isn’t totally dated, save it. It adds character that new MDF just can’t mimic. But if it’s water-damaged, crumbling, or made of cheap, flimsy material, don’t fight the battle. Rip it out. Your time is better spent on things that actually drive equity.

    Is it worth spending more on high-end casing if I'm planning to flip the house in under a year?

    If you’re flipping in under a year, don’t go overboard on custom-milled, high-end casing. You’ll eat your margins before you even hit the closing table. Instead, aim for the “sweet spot”: high-quality, pre-primed MDF with a substantial profile. It looks expensive in listing photos and handles the rigors of a renovation better than cheap pine, but it won’t drain the equity you’re trying to build. Keep it clean, keep it classy, but keep it profitable.

    What's the best way to handle trim installation if the walls in this old fixer-upper are completely unlevel?

    Look, I’ve been in plenty of houses where the walls look like they’re leaning mid-collapse. If the walls are unlevel, do not try to force the trim to follow those crooked lines—you’ll end up with massive, ugly gaps. Instead, use a slightly wider profile to mask the wonkiness and rely on high-quality caulk and wood filler to bridge the seams. It’s all about making the eye believe the line is straight.

  • Updating Your Home Staircase

    Updating Your Home Staircase

    I still remember standing in the middle of my first fixer-upper, staring up at a mahogany-stained, carpet-covered eyesore that looked like it belonged in a 1980s dentist’s office. My contractor wanted to charge me five figures to rip the whole thing out and start from scratch, claiming a full replacement was the only way to go. I knew better. Most people see a crumbling or dated stairwell and think they need to blow their entire budget on a complete overhaul, but that’s a massive mistake if you’re trying to maximize your ROI. A smart staircase renovation isn’t about tearing down the bones; it’s about identifying which parts are actually worth saving and which parts are just draining your bank account.

    I’m not here to sell you on some overpriced, high-end designer fantasy that won’t actually move the needle on your property value. Instead, I’m going to show you how to approach a staircase renovation with a strategic, investor’s mindset. We’re going to talk about what actually works—from swapping out dated spindles to refinishing treads—so you can stop wasting money and start building real equity.

    Table of Contents

    Replacing Carpet With Wood Stairs for Instant Equity

    Replacing Carpet With Wood Stairs for Instant Equity

    If you walk into a fixer-upper and see that chunky, beige, wall-to-wall carpet hugging the steps, don’t panic. That’s not a structural failure; it’s a goldmine. Replacing carpet with wood stairs is one of the highest-impact moves you can make when you’re hunting for value. Carpet is a magnet for pet hair, dust, and general grime, and it makes any entryway look dated and claustrophobic. By ripping that old padding up and exposing the bones underneath, you immediately shift the energy of the entire house from “lived-in rental” to “high-end residence.”

    When I’m calculating my margins, I always look closely at staircase material costs versus the projected bump in appraisal. You don’t necessarily need to drop five figures on exotic hardwoods to see a return. Sometimes, a solid engineered oak or even a high-quality laminate can do the trick if you pair it with some sleek, minimalist trim. The goal isn’t just to make it look pretty; it’s about creating a sense of durability and permanence that buyers can actually feel under their feet. It’s about turning a visual eyesore into a centerpiece that screams equity.

    Smart Staircase Safety Upgrades That Dont Sacrifice Style

    Smart Staircase Safety Upgrades That Dont Sacrifice Style

    Safety shouldn’t be an afterthought, but it also shouldn’t look like a high school gymnasium. When I’m walking a job site, I often see homeowners trying to patch up old, wobbly handrails with cheap, hardware-store fixes. That’s a mistake. Instead, look into custom stair railing options like slim black iron spindles or even frameless glass. These aren’t just aesthetic choices; they provide the structural integrity needed to pass inspection while leaning into those modern staircase design ideas that buyers are currently obsessed with.

    If you’re working with a tighter budget, you don’t always need a total overhaul to make a difference. Sometimes, the smartest move is simply refinishing wooden stairs that are structurally sound but look tired and worn. A fresh coat of a high-quality, slip-resistant matte sealer can transform a dingy flight into a focal point. Just remember: never prioritize the “look” over the grip. I’ve seen too many beautiful, high-gloss installs turn into slip-and-fall hazards, and nothing kills your ROI faster than a liability issue during a walkthrough.

    5 High-Impact Moves to Maximize Your Staircase ROI

    • Swap out those generic, builder-grade spindles for something with actual character, like matte black iron or slim oak balusters, to instantly elevate the entire floor plan.
    • Don’t overlook the lighting; ditch the dim, single-bulb overhead and install low-profile LED step lights or a statement pendant to turn a dark transit zone into a focal point.
    • If your handrails feel flimsy or dated, reinforce them with a solid wood rail—it’s a small structural tweak that makes the space feel premium and much more expensive.
    • Use the “dead space” underneath your stairs to create functional value, whether that’s a custom built-in nook or extra storage, rather than letting it become a dusty graveyard for old boxes.
    • Pay attention to the transition points; ensure your new stair treads meet your flooring seamlessly, because nothing kills a high-end renovation vibe faster than a sloppy, uneven gap.

    The Bottom Line on Your Staircase ROI

    Stop viewing a dated staircase as a structural headache; view it as a high-visibility opportunity to swap cheap, worn-out materials for finishes that command a higher asking price.

    Never sacrifice safety for the sake of a “look,” because a beautiful staircase that feels unstable is a liability that will kill your deal during a home inspection.

    Focus your budget on high-impact, tactile upgrades like handrails and treads, because these are the exact details that make a potential buyer feel the quality of the home the moment they walk up.

    ## The ROI of the Stairwell

    “Stop looking at a staircase as just a way to get from point A to point B; start seeing it as a vertical piece of real estate that can either drain your budget or drive your appraisal through the roof.”

    Gareth Trelawny

    Making the Move from Dated to Profitable

    Making the Move from Dated to Profitable.

    At the end of the day, a staircase renovation isn’t just about picking out a prettier handrail or finally ripping up that crusty, stained carpet. It’s about recognizing that these central architectural bones are often the most overlooked value-add opportunities in a house. Whether you’re opting for the high-end look of hardwood treads to boost your resale value or implementing smart, sleek safety upgrades that keep the home functional without looking like a hospital hallway, every choice you make should serve your bottom line. Don’t get bogged down in the minor details; focus on the strategic upgrades that actually move the needle on your appraisal.

    I know that staring at a demo site can feel overwhelming, especially when you’re knee-deep in sawdust and wondering if you’ve bitten off more than you can chew. But remember, I didn’t build my portfolio by avoiding the messy stuff—I built it by leaning into it. Every crumbling spindle or outdated landing is just a chance to manufacture equity where others only see a headache. Grab your laser measurer, stay focused on the math, and get to work. The profit is waiting on the other side of that renovation.

    Frequently Asked Questions

    How much should I actually budget for a full staircase overhaul versus just a cosmetic refresh?

    Look, don’t let a contractor’s quote blindside you. For a cosmetic refresh—think new paint, updated handrails, or swapping out old treads—budget roughly $500 to $2,000 per flight. But if you’re talking a full structural overhaul, like ripping out a dated winding staircase to install something modern, you’re looking at $5,000 to $15,000+. Always keep a 15% contingency fund tucked away; once you pull up those old treads, you never know what’s hiding underneath.

    If I'm working with a tight timeline, can I refinish my existing treads instead of ripping them all out?

    Absolutely. If you’re racing against a closing date or just trying to keep your rehab budget from spiraling, refinishing is your best friend. Ripping out stairs is a massive, time-consuming headache that can throw your whole schedule off. If the underlying structure is solid, just sand them down, patch the gouges, and apply a high-quality stain. It’s faster, cheaper, and still gives you that high-end look that drives up your ROI.

    Are there specific materials or styles that are currently driving the highest ROI in the resale market?

    Right now, it’s all about the “clean” look. If you want the highest ROI, skip the ornate spindles and go for slim, matte black metal balusters paired with wide oak treads. That minimalist, industrial edge is what buyers are hunting for. I also see massive returns on glass railings in modern builds, but for most flips, a simple, high-quality hardwood finish is your safest bet for turning a quick profit.

  • Installing a Decorative Kitchen Backsplash

    Installing a Decorative Kitchen Backsplash

    I was standing in a gutted kitchen in East Nashville last Tuesday, staring at a wall of cracked, dated ceramic that looked like it belonged in a 1970s cafeteria, when I realized something: most people treat backsplash installation like a purely cosmetic afterthought. They think it’s just about picking a pretty pattern to cover up some old drywall. But if you’re looking to actually force equity into a property, you need to view it as a strategic design move. I’ve seen too many amateur flippers blow their budget on high-end marble that doesn’t move the needle, or worse, settle for cheap peel-and-stick nonsense that makes a house feel cheap the second a buyer walks in.

    In this guide, I’m stripping away the fluff and giving you the real, gritty blueprint for a professional-grade finish. I’ll walk you through everything from calculating your actual material needs—so you aren’t running back to the tile shop mid-job—to the specific tools you’ll need to avoid a messy, uneven grout line. This isn’t just about making a kitchen look “nice”; it’s about mastering the technical execution required to turn a standard renovation into a high-margin asset.

    Table of Contents

    Guide Overview

    Total Time: 1-2 days
    Estimated Cost: $150-400
    Difficulty: Intermediate

    Tools & Supplies

    • Tile cutter or wet saw for precise cuts
    • Notched trowel for spreading adhesive
    • Spacers to maintain even grout lines
    • Rubber grout float for application
    • Level to ensure straight rows
    • Backsplash tiles (enough for square footage plus 10% extra)
    • Tile adhesive or mastic (1-2 tubs depending on area)
    • Grout (1 bag matching tile color)
    • Tile spacers (1 bag)
    • Caulk (1 tube for edges and corners)

    Step-by-Step Instructions

    • 1. Before you even touch a bag of thin-set, you need to prep the surface like your ROI depends on it—because it does. Scrub the walls down with a degreaser to remove every trace of cooking grease or old dust; if you don’t, that tile is going to peel off in six months, and nothing kills a flip faster than a callback for poor craftsmanship.
    • 2. Next, pull out that laser measurer I always talk about and map out your layout. Don’t just start tiling from one corner and hope for the best; you need to find the center point of your wall and work outward to ensure your cuts at the edges are symmetrical. There is nothing more amateur than a kitchen that looks lopsided because you were too lazy to plan the grid.
    • 3. Once you’ve mapped it, it’s time to apply your adhesive. Use a notched trowel to spread the thin-set, and make sure you’re creating even, consistent ridges rather than just globbing it on. If you leave huge gaps or uneven mounds, your tiles will sit at weird angles, and you’ll waste a fortune on expensive tiles that won’t lay flat.
    • 4. Now, start setting your tiles, and for heaven’s sake, use tile spacers. If you try to “eyeball” the gaps between tiles, the pattern will drift, and the entire backsplash will look like a DIY disaster rather than a professional renovation. Keep those lines dead straight—it’s the difference between a high-end finish and a cheap-looking job.
    • 5. After the adhesive has fully cured—and I mean actually cured, so don’t rush this—it’s time to grout. Mix your grout to a peanut butter consistency and push it into the joints using a rubber float, making sure you pack it deep into every single crevice. Wipe away the excess with a damp (not soaking wet) sponge before it sets, or you’ll be scrubbing endless white haze off your tiles for hours.
    • 6. The final touch is the silicone caulk. Don’t use grout in the corners where the backsplash meets the countertop; grout will crack the moment the house settles, and that’s a massive red flag for inspectors. Use a high-quality color-matched silicone to seal those joints, creating a flexible, waterproof barrier that actually lasts through years of heavy kitchen use.

    Finding Value Through Strategic Kitchen Remodel Backsplash Ideas

    Finding Value Through Strategic Kitchen Remodel Backsplash Ideas

    When I’m walking through a potential flip, I’m not just looking at the cabinets; I’m looking at the “bones” of the kitchen. If you want to maximize your ROI, you need to move past the basic, builder-grade subway tile. I look for kitchen remodel backsplash ideas that feel intentional and high-end without breaking the bank. Think about using a herringbone or chevron pattern to create visual interest; it’s a way to force instant equity by making a standard kitchen feel like a custom designer space.

    However, a beautiful pattern won’t save you if the execution is sloppy. I’ve seen too many amateur renovations where the lines look crooked because they skipped using tile spacers for even lines. If your grout lines are inconsistent, the whole room feels cheap, and buyers will sniff that out immediately. My rule is simple: spend the extra twenty minutes ensuring your layout is laser-straight. It’s the difference between a kitchen that looks like a DIY project and one that looks like a professional, high-margin renovation.

    Precision Layouts Using Kitchen Tile Layout Patterns for Profit

    Precision Layouts Using Kitchen Tile Layout Patterns for Profit

    When you’re flipping a house, the difference between a “DIY job” and a professional-grade renovation often comes down to the math. I’ve seen too many investors lose money because they rushed the layout and ended up with awkward, sliver-thin tiles in the corners. To avoid that, you need to obsess over your kitchen tile layout patterns before you even touch a bucket of mortar. Whether you’re going with a classic subway offset or a more high-end herringbone, I always start by finding the center point of the wall. This ensures your cuts are symmetrical, which is exactly what a picky buyer looks for during a walkthrough.

    Don’t just wing it, either. Use tile spacers for even lines to keep everything tight and disciplined; nothing screams “amateur” like crooked grout lines that make a kitchen look lopsided. If your lines aren’t straight, the entire room feels off, and that’s money left on the table. Once you’ve nailed the pattern, the goal is to create a sense of intentional, high-end design that makes the space feel more expensive than it actually was. Consistency is your best friend when you’re trying to force equity.

    Don't Blow Your Margin: 5 Hard Truths About Backsplash Execution

    • Stop obsessing over the “perfect” tile and focus on the grout. If your grout lines are uneven or dirty, it doesn’t matter if you used expensive subway tile; the whole kitchen will look cheap, and buyers will smell the lack of quality from the hallway.
    • Always account for your outlet placement before you even touch a trowel. There is nothing more amateur than realizing your beautiful new backsplash is interrupted by a cluster of ugly, unaligned electrical outlets that you didn’t plan for.
    • Buy 15% more tile than your measurements suggest. I’ve seen too many rookie investors stall a job halfway through because they ran out of material, and then they end up buying a new batch that doesn’t perfectly match the dye lot of the first one.
    • Use a laser level, not your eyes. I carry mine everywhere for a reason; if your horizontal lines are even slightly off, the eye will catch it immediately, and that’s the difference between a professional flip and a DIY disaster.
    • Prioritize durability over trendy patterns. If you’re installing this to flip, avoid anything so “out there” that it limits your buyer pool. Stick to classic textures that look high-end but won’t make a potential buyer think they have to renovate the second they move in.

    The Bottom Line: Turning Tile into Equity

    Don’t treat a backsplash as just a decorative afterthought; treat it as a high-margin tool to force appreciation and make your listing pop in photos.

    Precision matters more than the price tag—a misaligned pattern or a messy grout line will kill your perceived value faster than a cheap tile ever could.

    Focus on timeless, high-durability materials that appeal to the widest buyer demographic rather than chasing fleeting trends that will look dated by your next exit.

    ## The Investor's Edge

    “A backsplash isn’t just a decorative finish; it’s a strategic tool. If you pick the right tile and execute the layout with precision, you aren’t just covering a wall—you’re forcing equity into a room that’s going to sell itself.”

    Gareth Trelawny

    The Bottom Line on Backsplashes

    The Bottom Line on Backsplashes for ROI.

    At the end of the day, a backsplash isn’t just about picking a pretty pattern from a catalog; it’s a calculated move to increase your ROI. We’ve covered how to nail the layout to avoid awkward cuts, how to select materials that actually appeal to a wide buyer pool, and why precision during the installation phase is what separates a professional-grade flip from a DIY disaster. If you focus on the strategic placement of your tile and keep your eyes on the long-term resale value rather than just your personal taste, you’re going to see that extra margin show up in your final numbers. Don’t let a sloppy installation eat your profits.

    Real estate investing is rarely about the easy wins; it’s about the grit you show when you’re standing in a dusty kitchen deciding between subway tile and a patterned mosaic. It’s easy to get overwhelmed by the small details, but those details are exactly where the equity is hidden. Every tile you set correctly is a step toward building that portfolio we’re all after. So, grab your laser measurer, trust your eye for potential, and get to work. The walls might be crumbling now, but you know exactly how to turn them into gold.

    Frequently Asked Questions

    How do I know if I'm overspending on tile when the goal is a quick flip versus a long-term rental?

    If you’re flipping, you’re playing a numbers game. Every dollar spent on a custom mosaic is a dollar taken directly out of your profit margin. For a quick flip, stick to high-impact, low-cost neutrals—think subway tile or a simple herringbone. If it’s a long-term rental, you can afford to spend slightly more on durability and “wow factor” to attract better tenants, but even then, don’t let vanity projects eat your ROI.

    Is it worth the extra labor cost to do a custom herringbone pattern, or should I stick to a standard offset to save on my renovation budget?

    Look, if you’re flipping for a quick margin, stick to a standard offset. It’s faster, less wasteful, and keeps your labor costs predictable. But if you’ve found a property with high-end bones and you’re aiming for a premium buyer, go with the herringbone. That custom pattern creates a “wow” factor that justifies a higher asking price. Just don’t skimp on the installer; a botched herringbone pattern is a massive red flag that screams amateur.

    What are the biggest red flags I should look for in a contractor's backsplash work that might signal future liability or poor equity growth?

    If you see uneven grout lines or tiles that aren’t sitting flush, walk away. That’s a sign of sloppy prep work, and it’s a nightmare for your margins. Look closely at the corners, too; if the silicone is messy or the tiles don’t meet cleanly, you’re looking at future water damage or mold. I’ve seen too many “cheap” installs turn into expensive liability issues during a final inspection. Don’t let bad craftsmanship eat your equity.

  • Fixing Common Ceiling Imperfections

    Fixing Common Ceiling Imperfections

    I’ll never forget the look on my first client’s face when I walked into that mid-century bungalow and saw a massive, water-stained crater staring down from the living room. Most contractors would have immediately quoted them five figures for a full tear-out and replacement, but I knew better. They saw a catastrophe; I saw a lucrative opportunity. People love to act like ceiling repair is some terrifying, structural death sentence that requires a specialized crew and a massive loan, but that’s just how they keep their margins high. In reality, most of these issues are just symptoms of much smaller, fixable problems that are standing between you and a beautiful, high-value room.

    I’m not here to give you a sanitized, textbook lecture on drywall composition. I’m going to show you exactly how I tackle these messes on my own job sites to maximize my ROI. We’re going to strip away the intimidation and focus on the practical, dirty work required to turn a crumbling surface into a polished, professional finish. By the time we’re done, you won’t just know how to patch a hole; you’ll know how to handle a repair like a seasoned investor.

    Table of Contents

    Decoding Ceiling Crack Causes and Solutions

    Decoding Ceiling Crack Causes and Solutions photograph.

    When I first walk into a neglected fixer-upper, I don’t just see a crack; I see a diagnostic puzzle. Before you even grab your putty knife, you have to play detective. If that crack is hairline and superficial, it’s likely just the house “breathing” due to seasonal temperature shifts. But if it’s a wide, jagged fissure, you’re looking at structural movement or settling. Understanding these ceiling crack causes and solutions is the difference between a weekend DIY project and a massive headache that eats your profit margins.

    The real killer, though, is moisture. If you see discoloration or bubbling, stop everything. You aren’t just dealing with aesthetics; you’re fixing water damaged ceilings that could be hiding mold or rotting joists. Once the leak is plugged, you have to decide between plaster vs drywall repair depending on the era of the home. Old-school plaster requires a much more delicate touch and specific mesh tapes, whereas modern drywall is more forgiving. Identifying the source early ensures you aren’t just slapping a bandage on a wound that’s still bleeding.

    Plaster vs Drywall Repair Choosing Your Weapon

    Plaster vs Drywall Repair Choosing Your Weapon

    Before you pick up a putty knife, you need to know exactly what you’re fighting. If you’re walking into an older fixer-upper, there’s a high chance you’re dealing with original plaster. It’s heavy, it’s stubborn, and it’s prone to massive, crumbling chunks if you aren’t careful. While plaster vs drywall repair might seem like a minor distinction, the labor difference is night and day. Plaster requires a more nuanced touch and often more specialized materials to ensure the patch actually bonds with the old substrate.

    On the flip side, modern drywall is much more forgiving and significantly faster to work with. If you’re tackling a standard renovation, most of your drywall repair techniques will involve simple taping and mudding that any DIYer can master with a bit of patience. However, don’t get cocky; if you’re fixing water damaged ceilings, the material matters less than the source of the leak. Whether it’s brittle plaster or a soft sheet of gypsum, you have to ensure the structural integrity is restored before you even think about aesthetics.

    My Pro-Tips for Avoiding a Ceiling Disaster

    • Never, and I mean never, patch over a crack without finding the source first; if you’re just covering up a structural shift or a leak with spackle, you’re literally throwing your renovation budget down the drain.
    • Invest in a high-quality light meter or a powerful work lamp to inspect your repairs; shadows are the enemy of a smooth finish, and you don’t want to realize a patch is lumpy only after the buyer’s inspector shows up.
    • If you’re dealing with old plaster, don’t try to be a hero with just a putty knife; grab some mesh tape to reinforce the area, otherwise, that crack will be back before you’ve even finished your first cup of coffee.
    • Always check the attic or the floor above before you start sanding; I’ve seen too many investors lose money because they fixed a water stain but ignored the slow-dripping pipe that caused it in the first place.
    • Don’t skimp on the primer; if you skip the prep work and go straight to paint, your repair will look like a textured scar on an otherwise perfect ceiling, and that’s a massive red flag during a walkthrough.

    The Bottom Line on Ceiling Fixes

    Don’t panic at the first sign of a crack; identify if it’s just settling or a structural red flag before you start patching, so you don’t waste money on a cosmetic fix for a deep-seated problem.

    Choose your materials wisely by matching the repair method to the existing substrate—trying to patch plaster with drywall compound is a recipe for a hairline crack returning in six months.

    Treat every ceiling repair as an equity play, focusing on a seamless finish that makes the room feel intentional rather than “repaired,” because buyers notice a sloppy ceiling immediately.

    The Equity in the Details

    A crack in the ceiling isn’t just a maintenance headache; it’s a diagnostic tool. If you learn to read what those fissures are actually telling you, you can stop fearing the repair bill and start seeing the opportunity to protect your margins.

    Gareth Trelawny

    The Bottom Line on Ceiling Repairs

    The Bottom Line on Ceiling Repairs.

    At the end of the day, fixing a ceiling isn’t just about smoothing out some bumps; it’s about understanding the structural story the house is trying to tell you. Whether you’re dealing with a simple hairline crack in the drywall or a more complex plaster issue caused by settling, the key is to diagnose before you decorate. Don’t rush into a cosmetic patch if there’s an underlying moisture problem or a shifting joist, because that’s how you end up wasting your capital on a repair that won’t hold. Once you’ve correctly identified your “weapon”—be it fresh drywall or a careful plaster skim—you can move forward with the confidence that you aren’t just masking a problem, you’re building a lasting foundation for your renovation.

    I know that staring up at a water-stained or crumbling ceiling can feel overwhelming, especially when you’re trying to keep your budget tight and your timeline even tighter. But remember, every crack you fix and every uneven surface you level is a direct investment in your property’s value. These aren’t just chores; they are the strategic moves that turn a neglected house into a high-value asset. Don’t let the mess intimidate you. Grab your tools, stay pragmatic, and keep your eyes on the prize: turning that crumbling plaster into solid equity.

    Frequently Asked Questions

    How do I know if a crack in my ceiling is just cosmetic or a sign of serious structural issues that'll tank my ROI?

    Look, I’ve seen both, and the difference is everything for your bottom line. If it’s a hairline crack or a tiny spiderweb pattern, it’s likely just settling—patch it, paint it, and move on. But if that crack is wider than a quarter, running diagonally, or if you see actual sagging, stop. That’s a structural red flag that could turn a quick flip into a money pit. When in doubt, get an inspector before you commit.

    Is it actually worth the sweat equity to patch old plaster myself, or should I just bite the bullet and hire a pro?

    Look, if it’s a minor hairline crack or a small patch, grab your tools and do it yourself. That’s pure profit staying in your pocket. But if you’re staring at a ceiling that’s actively bowing or crumbling in large chunks, stop. Plaster is temperamental, and a botched DIY job will cost you more in professional repairs later than you’ll save now. Know when to sweat for your equity and when to call in the pros.

    What’s the best way to prep a repaired ceiling so the new paint job doesn't look like a patchy, amateur mess?

    The biggest mistake I see? Skimping on the sanding. If you leave even a tiny bump from your joint compound, it’ll scream “amateur” once the light hits it. Once you’ve smoothed things out, hit it with a high-quality primer. Don’t just slap regular paint over the patch; the texture will absorb it differently and leave a dull spot. Prime it first to seal everything, then paint the entire ceiling to ensure a seamless finish.

  • Upgrading Kitchen Cabinets Without Replacement

    Upgrading Kitchen Cabinets Without Replacement

    I was standing in a kitchen last Tuesday—a fixer-upper I just picked up in the suburbs—staring at these heavy, honey-oak carcasses that looked like they belonged in a 1992 sitcom. The contractor I was talking to was already sketching out a quote for a full gut job, talking about tearing out every single stud and replacing the entire layout. Honestly? It made my blood boil. That kind of “all or nothing” mentality is exactly how investors lose their margins. You don’t always need to demolish the bones of a house to fix the aesthetic; sometimes, you just need to realize that cabinet refacing is the smartest way to salvage your budget while still delivering that high-end, modern look.

    I’m not here to sell you on some magic DIY miracle or a way to hide structural rot with a thin layer of veneer. I’m here to give you the unfiltered truth about when this strategy actually builds equity and when it’s just throwing good money after bad. I’ve spent years on job sites learning exactly where the line is drawn between a savvy renovation and a waste of capital. By the end of this, you’ll know how to spot a quality job and how to use this shortcut to maximize your ROI without the headache of a total kitchen demolition.

    Table of Contents

    A Smart Kitchen Remodel Cost Comparison

    A Smart Kitchen Remodel Cost Comparison chart.

    When I’m walking through a property and looking at the numbers, I always run a quick kitchen remodel cost comparison before I even talk to a contractor. If I’m looking at a quick flip, the math is pretty brutal: a full gut job—ripping out everything from the floor to the ceiling—can easily swallow 15-20% of my entire renovation budget. On the flip side, a kitchen cabinetry facelift lets me keep the structural bones that are still perfectly sound while completely changing the visual impact for a tiny fraction of that price.

    In a head-to-head battle of refacing vs replacing cabinets, the winner is almost always decided by your ROI goals. Replacing everything is a massive undertaking that involves demolition dust, plumbing shifts, and weeks of living in a construction zone. However, if you opt for professional cabinet resurfacing, you’re essentially getting that high-end, custom look without the high-end price tag. It’s about being strategic; I’d much rather spend that saved cash on high-quality quartz countertops or updated lighting that actually moves the needle on the final sale price.

    Refacing vs Replacing Cabinets Choosing Equity Over Waste

    Refacing vs Replacing Cabinets Choosing Equity Over Waste

    When you’re staring at a set of dated, honey-oak carcasses, the instinct is often to rip everything out and start fresh. But as someone who looks at every project through the lens of ROI, I have to tell you: that’s often a massive mistake. The debate of refacing vs replacing cabinets usually comes down to one thing—how much of the actual structure is still sound? If the boxes are sturdy and level, tearing them out is just throwing money down the drain. A professional cabinet resurfacing can give you that high-end, custom look without the soul-crushing expense of a full demolition.

    Instead of chasing every fleeting modern kitchen aesthetic trend that requires a complete gut job, I prefer a more surgical approach. By keeping the existing frames and simply updating the doors and drawer fronts, you’re performing a strategic kitchen cabinetry facelift that keeps your budget focused on high-impact areas like quartz countertops or new lighting. It’s about being smart with your capital. You get the durable cabinet finishes and the clean lines you want, while keeping your renovation timeline—and your sanity—on track.

    5 Ways to Maximize Your ROI Without Tearing Out Every Cabinet

    • Check the bones before you buy the finish. I’ve seen people spend thousands refacing cabinets only to realize the boxes were rotting from a slow leak. Before you commit to new doors, open every single drawer and check for structural integrity; if the carcasses are soft, refacing is just putting expensive lipstick on a pig.
    • Don’t overlook the hardware upgrade. If you’re refacing, you have a golden opportunity to swap out those dated, clunky pulls for something more contemporary—think matte black or brushed brass. It’s a low-cost move that makes the entire kitchen feel intentional rather than just “patched up.”
    • Stick to timeless finishes to protect your resale value. When I’m flipping, I avoid the “trendy” trap. Skip the high-gloss navy or the overly distressed farmhouse look; instead, go for clean, neutral tones that appeal to the widest possible pool of buyers when it’s time to exit the investment.
    • Invest in high-quality door profiles. If you’re refacing, the door is the star of the show. Don’t skimp here by choosing cheap, thin MDF doors that warp after one season. Spend the extra bit on solid wood or high-grade materials that feel heavy and substantial when you close them.
    • Match your lighting to your new aesthetic. A kitchen refit can look cheap if you’re still using that one lonely, yellowing overhead light. Once the cabinets look fresh, swap in some under-cabinet LED strips or a modern pendant; it pulls the whole “new kitchen” illusion together and makes the space feel premium.

    The Bottom Line on Your Kitchen ROI

    Don’t let vanity projects kill your margins; if the cabinet boxes are structurally sound, refacing is the fastest way to modernize the space without the massive price tag of a full gut job.

    Focus your renovation budget where it actually moves the needle—use the money you save on cabinets to upgrade high-impact items like quartz countertops or new hardware.

    Think like an investor, not just a decorator; the goal isn’t just a “pretty” kitchen, it’s a strategic upgrade that maximizes your property’s resale value while keeping your renovation costs under control.

    ## Maximizing Your Margin

    “In this business, profit is found in the gap between what a house looks like and what it could look like. If the cabinet boxes are structurally sound, tearing them out is just throwing money away; refacing is how you manufacture that visual transformation without bleeding your renovation budget dry.”

    Gareth Trelawny

    Making the Call

    Making the Call: Cabinet Refacing vs Replacement

    At the end of the day, choosing between a full gut job and refacing comes down to one thing: your bottom line. We’ve looked at how the numbers stack up, and the reality is that you don’t need to tear out perfectly good carcasses to get a high-end look. If the structural bones of your cabinets are solid, a full replacement is often just throwing money down the drain that could be better spent on higher-impact upgrades like quartz countertops or updated lighting. Refacing gives you that fresh, modern aesthetic and a massive boost to your home’s perceived value without the massive headache—and the massive bill—of a total kitchen overhaul.

    Look, I know the idea of a massive renovation can feel overwhelming, especially when you’re trying to play the long game with your finances. But remember, building a real estate portfolio isn’t about making the most expensive moves; it’s about making the smartest moves. Don’t let the fear of a “small” project stop you from seeing the big picture. Whether you’re prepping a house for market or just upgrading your own space, focus on the ROI. Stop chasing perfection and start chasing equity. Grab your measuring tape, look at what you’ve already got, and start building that wealth one smart decision at a time.

    Frequently Asked Questions

    How do I know if my current cabinet boxes are actually sturdy enough to be refaced, or if they're too far gone?

    Before you commit, grab that laser measurer and get hands-on. Open every door and drawer. If you see sagging hinges, crumbling particle board, or any sign of water damage—especially near the sink—run. If the boxes are structurally sound and level, refacing is a goldmine. But if the carcasses are soft or warped, you’re just putting expensive lipstick on a pig. In that case, a full replacement is the only way to protect your investment.

    Does refacing actually hold up against heavy daily use, or will the new doors start peeling after a year?

    Look, I get the skepticism. I’ve seen cheap DIY jobs fall apart in six months, but professional refacing isn’t a “band-aid” fix. When you use high-quality thermofoil or professional-grade wood veneers, they’re built to handle the chaos of a real kitchen. As long as you aren’t blasting the new doors with heavy steam or abrasive chemicals, they’ll hold up just fine. It’s about investing in quality materials upfront so your equity doesn’t peel away.

    If I'm looking for the best ROI, should I focus on changing the door style or just updating the finish and hardware?

    If you’re chasing maximum ROI, don’t overthink it: prioritize the finish and hardware first. Changing the door style is a bigger job that can sometimes backfire if the new aesthetic doesn’t vibe with the existing box construction. However, a high-quality spray finish paired with modern, heavy-duty hardware can make an old kitchen look brand new for a fraction of the cost. It’s about smart cosmetic upgrades that drive perceived value without the heavy lifting.

  • Selecting Durable Countertop Materials

    Selecting Durable Countertop Materials

    I was standing in a dusty kitchen in a mid-century ranch last Tuesday, staring at a slab of Calacatta marble that cost more than my first car. The homeowner was convinced this was the “secret sauce” to a high-end flip, but all I saw was a massive drain on the ROI. People treat countertop selection like it’s a high-stakes fashion show, thinking they need the most expensive stone to impress a buyer. Honestly? That’s a rookie mistake. If you’re pouring your entire renovation budget into a surface that stains the second someone spills a drop of red wine, you aren’t investing; you’re just burning cash.

    I’m not here to sell you on a lifestyle brand or a luxury showroom fantasy. My goal is to show you how to pick surfaces that actually work for your bottom line. In this guide, I’m stripping away the marketing fluff to give you the real-world math behind durable, high-impact materials. We’re going to talk about finding that sweet spot where aesthetic appeal meets maximum equity, ensuring your next project looks expensive without actually costing you the profit you worked so hard to build.

    Table of Contents

    Natural Stone vs Engineered Stone Picking the Real Winners

    Natural Stone vs Engineered Stone Picking the Real Winners

    When you’re staring down a kitchen countertop materials comparison, it’s easy to let the “pretty factor” cloud your judgment. Natural stone, like granite or marble, is the gold standard for high-end aesthetics. There is nothing quite like the unique veining of a real slab to give a property that “wow” factor during a walkthrough. However, if you’re looking for the best countertops for high traffic kitchens, you need to account for the reality of daily life. Natural stone is porous; it’s going to need regular sealing, or you’ll be dealing with permanent wine stains before the first closing date.

    On the flip side, engineered stone—specifically quartz—is the pragmatic investor’s best friend. It’s incredibly consistent and practically indestructible, which is exactly what you want when you’re aiming for a quick flip. While the initial cost of countertop installation might be slightly higher for premium quartz, the lack of intensive upkeep makes it a winner for resale. In my experience, if you want to minimize post-renovation headaches and maximize your ROI, engineered stone usually wins the battle of durability versus maintenance.

    The True Cost of Countertop Installation and Long Term Value

    The True Cost of Countertop Installation and Long Term Value

    When you’re running the numbers on a flip, you have to look past the initial sticker shock and focus on the long-term ROI. It’s easy to get caught up in the cost of countertop installation during the bidding phase, but if you cheap out on low-grade laminate just to save a few hundred bucks, you’re going to pay for it when the next buyer sees the water damage or the scratches. I’ve seen too many investors try to squeeze every penny out of a budget only to realize they’ve actually devalued the entire kitchen by choosing something that looks cheap under bright lighting.

    If you want to build real equity, you need to prioritize durable kitchen surfaces that can stand up to a family’s daily chaos. I always tell my clients to think about the resale buyer: they want something that looks high-end but doesn’t require a PhD in stone care to maintain. Investing a bit more upfront in a quality quartz or a well-sealed granite isn’t just a design choice; it’s a strategic move to ensure your renovation actually holds its value once the dust settles and the closing papers are signed.

    Five Rules for Picking Surfaces That Actually Make You Money

    • Stop chasing trends that will look dated in two years; stick to timeless neutrals like quartz or granite so your resale value doesn’t tank the moment a new design fad hits.
    • Always check the edge profile before you sign the contract, because a complex, custom edge might look high-end, but the extra labor costs will eat directly into your renovation margins.
    • Don’t get seduced by the “luxury” label on showroom floor samples; bring a sample piece to the actual site to see how it reacts to the kitchen’s lighting, or you’ll end up with a color you hate.
    • Prioritize durability over pure aesthetics if you’re flipping; if a buyer can scratch the surface with a kitchen knife during their first week, they’re going to regret the purchase and blame the house.
    • Factor in the sink cutout and faucet holes early in the selection process, because changing your mind on a deep farmhouse sink after the stone is templated is a fast way to blow your budget.

    The Bottom Line: Maximizing Your ROI

    Stop chasing high-end trends that don’t scale; focus on durable, mid-range materials like quartz that offer the best balance of “wow factor” and budget protection.

    Always factor in the installation labor and potential substrate repairs before you sign a contract, or you’ll watch your profit margins vanish into the subfloor.

    Invest in surfaces that appeal to the widest possible buyer pool rather than your personal aesthetic if your goal is a quick, profitable flip.

    The Investor's Rule for Surfaces

    “Stop treating your kitchen remodel like a personal design showcase; if you’re picking a countertop that looks incredible but eats 15% of your projected margin, you aren’t renovating, you’re just subsidizing your own taste at the expense of your equity.”

    Gareth Trelawny

    The Bottom Line on Your Surfaces

    The Bottom Line on Your Surfaces.

    At the end of the day, picking a countertop isn’t about chasing the latest trend on Pinterest; it’s about strategic decision-making. You’ve weighed the durability of engineered stone against the prestige of natural marble, and you’ve factored in the actual labor costs that can sink a budget if you aren’t careful. Remember, every dollar you spend on a slab needs to work twice as hard for you when it comes time to sell. If a high-end material doesn’t directly translate to a higher appraisal or a faster sale, it’s just an expensive mistake. Keep your eyes on the return on investment, not just the aesthetic.

    Renovation is messy, loud, and often incredibly frustrating, but that’s exactly where the opportunity lives. When you walk into a gutted kitchen and see the potential for a stunning, high-value workspace, you’re seeing the foundation of your future equity. Don’t let the overwhelming number of choices paralyze you. Trust your eye, stick to your budget, and choose surfaces that reflect a sense of quality without breaking your bank. You aren’t just installing counters; you are building wealth, one square foot at a time. Now, grab your laser measurer and get to work.

    Frequently Asked Questions

    Should I prioritize high-end aesthetics to attract buyers, or stick to durable, low-maintenance materials that won't require immediate replacement?

    Look, if you’re flipping, don’t get caught in the “luxury trap.” You aren’t building your forever home; you’re building an asset. If you go too high-end, you’re just subsidizing the next owner’s lifestyle with your profit margin. Aim for the sweet spot: high-durability engineered stone that looks expensive but can handle a heavy-handed tenant. You want the “wow” factor in photos, but you need materials that won’t crack before you close the deal.

    How much of my renovation budget should I realistically cap for countertops before I start eating into my projected profit margins?

    Look, if you’re flipping, your countertop budget shouldn’t exceed 5% to 8% of your total renovation spend. I’ve seen too many investors blow their margins chasing a slab of Calacatta marble that looks great in photos but offers zero ROI. You want high-impact, durable surfaces—think quality quartz—that scream “luxury” without the custom-carved price tag. Don’t let a pretty kitchen sink your entire profit margin before you even hit the closing table.

    Are there specific countertop styles or colors that are currently trending but might feel dated by the time I'm ready to flip the property?

    Avoid the “trend traps.” Right now, everyone is obsessed with dramatic, heavy veining in quartz, but that’s a gamble. If you go too bold, you’re designing for yourself, not the buyer. I stick to the neutrals: creamy whites, subtle greys, or classic salt-and-pepper patterns. You want a surface that acts as a canvas for the buyer’s decor, not a centerpiece that screams “2024” the moment they walk through the door.

  • Improving Home Value Through Landscaping

    Improving Home Value Through Landscaping

    I was standing in the mud of a foreclosure in East Austin last Tuesday, staring at a yard that looked more like a graveyard for rusted lawnmowers than a residential lot. Most “experts” would tell you that you need a five-figure budget and a team of architects to fix a mess like that, but honestly? That’s just a way to drain your margins before you even step inside the house. I’ve seen too many investors get paralyzed by a patch of weeds, missing out on massive ROI because they were looking for high-end landscaping ideas instead of looking for strategic value.

    I’m not here to sell you on expensive fountain installations or manicured topiary that requires a full-time gardener to maintain. My goal is to show you how to use smart, low-maintenance greenery and hardscaping to juice your property’s equity without breaking the bank. I’m going to walk you through the exact types of landscaping ideas I use to transform a neglected, dirt-filled lot into a high-value asset that makes buyers fall in love the second they pull into the driveway.

    Table of Contents

    Mastering Low Maintenance Backyard Landscaping for Maximum Roi

    Mastering Low Maintenance Backyard Landscaping for Maximum Roi

    When I’m walking a property, I’m not looking for a garden that requires a full-time groundskeeper; I’m looking for something that looks high-end but runs itself. Buyers want the vibe of an oasis without the weekend-long commitment of weeding and pruning. This is where low maintenance backyard landscaping becomes your best friend for increasing resale value. I always steer my clients toward hardscaping—think clean slate pavers or decomposed granite—paired with hardy, drought-tolerant perennials. It creates a polished, intentional look that says “luxury” rather than “I forgot to mow the lawn.”

    If you’re working with a tight footprint, don’t panic. I’ve seen some of my most profitable flips rely on clever small garden layout solutions to make a cramped yard feel expansive. Instead of sprawling flower beds that invite pests and rot, I lean into structural elements like built-in planters or tiered stone edges. By focusing on clean lines and a limited plant palette, you create an outdoor living space design that feels architectural and expensive. It’s about working smarter, not harder, to ensure that every dollar you sink into the dirt translates directly into equity.

    Small Garden Layout Solutions to Boost Curb Appeal

    Small Garden Layout Solutions to Boost Curb Appeal

    When you’re dealing with a tight lot, you can’t afford to waste a single square inch on dead space. I’ve seen too many investors blow their budget on sprawling lawns that just end up being a chore for the next owner. Instead, focus on small garden layout solutions that prioritize verticality and clean lines. Think built-in planters or tiered stone retaining walls; these don’t just add structure, they create a sense of depth that makes a cramped yard feel intentional rather than accidental.

    If you want to play into current modern landscape architecture trends, stop thinking about “filling holes” with random shrubs. You need to treat the exterior like an extension of the floor plan. I always suggest defining specific zones—a small gravel patio for a bistro set here, a narrow perennial border there. By creating these distinct pockets, you’re essentially designing an outdoor living space design that feels high-end and curated. It’s about maximizing the perceived footprint, which is exactly how you squeeze that extra bit of equity out of a modest property.

    My Top 5 High-Impact Landscaping Plays for Every Flip

    • Focus on hardscaping over softscaping. A clean, stone paver patio or a well-defined gravel path adds much more perceived value than a bunch of expensive perennials that will just die in six months. Hardscape is permanent, looks high-end, and tells a buyer the space is ready for entertaining.
    • Invest in smart, automated irrigation. Nothing kills a sale faster than a buyer seeing withered shrubs or realizing they’ll have to spend every weekend watering the yard. A simple, programmable system is a low-cost install that screams “low maintenance” to a potential buyer.
    • Use native plants to slash the upkeep. I always look for local species that thrive in our specific climate. Not only does this make the garden look intentional and “at home,” but it also means the next owner won’t be fighting a losing battle against the local soil and weather.
    • Layer your lighting for that “magic hour” effect. Don’t just slap a few solar stakes in the ground; install some strategic uplighting on key trees or architectural features. It makes the property look expensive during evening walkthroughs and adds a massive sense of security and depth.
    • Don’t neglect the edges. A crisp, clean line between your mulch beds and the lawn is the cheapest way to make a yard look professionally designed. It’s the difference between a “neglected lot” and a “manicured estate,” and it costs you nothing but a little bit of time and a sharp spade.

    The Bottom Line on Landscaping for Profit

    Stop chasing high-maintenance perfection; focus on hardscaping and hardy plants that look intentional without requiring a full-time gardener to keep them alive.

    Curb appeal is your first handshake with a buyer, so prioritize the entryway and front sightlines to ensure the property’s value is felt the second they pull up.

    Treat every landscaping decision as a math problem—if the cost of the mulch and shrubs doesn’t translate into a measurable bump in equity, it’s just an expensive hobby, not an investment.

    ## Stop Thinking About Flowers, Start Thinking About Margins

    “When I’m walking a property, I’m not looking for a pretty flower bed; I’m looking for a way to use strategic greenery to mask a structural flaw or boost the perceived value of a cramped lot. Landscaping isn’t a hobby—it’s a high-leverage tool to turn a neglected yard into instant equity.”

    Gareth Trelawny

    Turning Dirt into Equity: The Final Blueprint

    Turning Dirt into Equity: The Final Blueprint

    At the end of the day, landscaping isn’t just about making a house look pretty for a weekend photoshoot; it’s about strategic asset management. Whether you’re tackling small-scale curb appeal to win over neighbors or implementing low-maintenance backyard solutions to appeal to the busy modern buyer, every plant and stone you place should serve a purpose. I’ve seen too many investors blow their margins on high-maintenance floral displays that die within a season. Instead, focus on those high-impact, low-effort upgrades we discussed. When you prioritize structural greenery and smart layouts, you aren’t just gardening—you are actively engineering a higher appraisal value for your property.

    Don’t let the prospect of a muddy yard or a neglected lot intimidate you. I know exactly how it feels to stand in front of a property that looks like a disaster zone, but that’s exactly where the profit lives. Every patch of weeds is just an opportunity to build more equity if you have the vision to see past the mess. Grab your tools, keep your eye on the ROI, and remember that the most profitable transformations often start from the ground up. You have the eye for potential; now, it’s time to go out there and build your empire, one garden bed at a time.

    Frequently Asked Questions

    How do I figure out if a massive, overgrown yard is a money pit or a genuine landscaping opportunity?

    Look, don’t let a jungle of weeds spook you. To tell if it’s a money pit or a goldmine, look at the bones. Check the grade of the land and the quality of the soil. If the foundation is solid and the lot has good drainage, that overgrowth is just a temporary setback. I see a massive, neglected yard as a blank canvas—it’s much cheaper to clear out weeds than it is to fix a sloping yard or poor soil.

    At what point does spending more on high-end hardscaping actually stop yielding a positive return on investment?

    Look, I love a high-end bluestone patio as much as the next designer, but you have to watch the math. The moment your hardscaping costs start approaching the total value of the property’s “curb appeal premium,” you’ve overshot the mark. If you’re spending fifty grand on custom masonry for a house that only gains thirty grand in market value, you aren’t investing—you’re just decorating your own loss. Keep it functional, keep it durable, and always prioritize equity over ego.

    Are there specific types of plants or landscaping features that help me flip a property faster in certain markets?

    In high-turnover suburban markets, stick to “safe” perennials like lavender or hydrangeas; they look established and lush without requiring a degree in botany. If you’re flipping in a desert climate, go heavy on drought-tolerant succulents and gravel mulch—buyers love the “low-water” lifestyle pitch. Most importantly, avoid anything too niche or high-maintenance. You want a buyer to see a finished product, not a weekend chore that’s going to eat their Saturday mornings.

  • Choosing the Right Flooring for Your Home

    Choosing the Right Flooring for Your Home

    I still remember standing in the middle of a gutted ranch-style fixer-upper last October, my lungs burning from drywall dust and my knees aching from kneeling on a subfloor that felt like it was made of nothing but hope and old glue. I was staring at a sea of stained, 1970s shag carpet that looked like it hadn’t seen a vacuum since the Nixon administration, realizing that my entire renovation timeline was about to tank. Most people see a messy, uneven subfloor and think they need to hire a specialized crew and blow their entire budget on high-end hardwoods, but that’s a massive waste of capital. In my experience, the real magic of flooring installation isn’t about how much you spend, but about how smart you are with the prep work.

    I’m not here to sell you on some overpriced, boutique flooring brand that’s going to crack the moment the temperature shifts. Instead, I’m going to give you the unfiltered reality of how to handle flooring installation without draining your investment margins. I’ll show you how to identify which materials actually hold their value and how to spot the prep errors that turn a quick weekend job into a long-term nightmare. Let’s get to work.

    Table of Contents

    Navigating Professional Flooring Installation Costs Without Breaking the Ba

    When you’re staring at a quote from a contractor, it’s easy to feel like you’re being taken for a ride. But here’s the reality: the sticker shock usually comes from what you can’t see. I’ve learned the hard way that cutting corners on subfloor preparation techniques is the fastest way to turn a profitable flip into a money pit. If the foundation isn’t level or clean, that expensive hardwood you just bought is going to buckle within six months. Instead of slashing the labor budget, I focus my negotiation efforts on the materials themselves.

    To keep your margins healthy, I always run a quick flooring material durability comparison before signing any contracts. Don’t just go for the cheapest option; look for the sweet spot where longevity meets price point. If you’re working on a rental or a high-turnover property, investing a little extra in a quality underlayment for floor installation can save you thousands in future repairs. My rule of thumb is simple: spend your money where it prevents a callback, and save it on the decorative trim that anyone can swap out later.

    Smart Underlayment for Floor Installation to Protect Your Investment

    Smart Underlayment for Floor Installation to Protect Your Investment

    If you want to avoid the nightmare of seeing your expensive new planks buckle or warp six months after a flip, you cannot afford to skimp on what lies beneath. Most amateur renovators focus entirely on the visible surface, but the real secret to longevity is the underlayment for floor installation. Think of it as the foundation of your aesthetic; if the base is uneven or damp, even the most expensive hardwood is going to fail. I always tell my clients that skipping a quality buffer is just a fast track to a costly callback.

    Before you even think about laying down a single plank, you need to address your subfloor preparation techniques. If you’re dealing with an old fixer-upper, you’re likely going to encounter uneven joists or slight moisture issues. This is where checking your flooring moisture barrier requirements becomes non-negotiable. Whether you’re using a thick foam pad for sound dampening or a specialized vapor barrier for concrete slabs, getting this layer right is what separates a professional-grade rehab from a DIY disaster. It’s about protecting that equity you worked so hard to build.

    Don't Get Burned: 5 Pro Moves for a Flawless Floor

    • Stop obsessing over the prettiest sample in the showroom; instead, grab a sample of the actual material and try to scratch it with a key or spill some coffee on it. If it doesn’t hold up in your own kitchen, it definitely won’t survive a rental or a high-traffic flip.
    • Never, and I mean never, skip the subfloor prep. I’ve seen so many investors try to save a few hundred bucks by laying expensive hardwood over a wonky, uneven subfloor, only to have the boards squeak or buckle six months later. Level it out now, or pay for it later.
    • Always order 10% to 15% more material than your square footage suggests. Between corner cuts, mistakes, and the occasional damaged plank in the box, you do not want to be halfway through a room only to realize you’re short and have to pay more for shipping on a tiny supplemental order.
    • Check your acclimation time religiously. If you’re installing real wood or high-end laminate, let those boxes sit in the actual room where they’ll be installed for at least 48 to 72 hours. If you rush the install, the temperature and humidity shifts will warp your profit margin right out of the house.
    • Focus your budget where it shows. If you’re on a tight margin, go for a high-quality LVP (Luxury Vinyl Plank) in the high-traffic living areas, but don’t skimp on the transitions and baseboards. It’s the little trim details that make a cheap floor look like a custom installation.

    The Bottom Line on Flooring

    Don’t get blinded by high-end material costs; focus your budget on quality underlayment and a level subfloor, because a cheap finish on a bad foundation will fail every single time.

    When you’re quoting contractors, don’t just look for the lowest number—look for the person who understands that a precise installation is what actually protects your profit margins.

    Treat flooring as a strategic equity play rather than just a cosmetic fix; choose durable, timeless materials that won’t need replacing the moment you try to flip the property.

    ## The Real ROI of Your Floors

    “Stop looking at flooring as just another line item in your renovation budget; if you treat it as a strategic asset rather than an expense, you’re not just covering a subfloor—you’re laying the foundation for your profit margin.”

    Gareth Trelawny

    The Bottom Line on Your Floors

    The Bottom Line on Your Floors.

    At the end of the day, flooring isn’t just about picking a color that looks good in a showroom; it’s a strategic move for your property’s value. We’ve talked about how to keep your installation costs from spiraling out of control and why skimping on high-quality underlayment is a mistake you’ll regret when your subfloor starts acting up. If you manage your budget wisely and don’t cut corners on the unseen layers that provide stability, you aren’t just covering up old wood or concrete. You are effectively layering on equity that will show up in your final appraisal.

    I know that looking at a gutted room with bare subfloors can feel overwhelming, especially when you’re staring down a massive project timeline. But remember, every great renovation is just a series of small, calculated decisions. Don’t let the dust and the chaos intimidate you. When you finally walk across those new planks and see the light hitting a clean, finished surface, you’ll realize that the sweat equity was worth every second. Stop looking at the mess and start seeing the potential profit hiding underneath. Now, grab your laser measurer and get to work.

    Frequently Asked Questions

    How do I know if my subfloor is actually level enough for luxury vinyl plank, or if I'm just setting myself up for a nightmare later?

    Grab your laser measurer—or a decent 4-foot level if you’re just starting—and check for dips or humps. For LVP, you really want your subfloor to be within 3/16 of an inch over a 10-foot span. If you see significant waves, don’t just click those planks together and hope for the best; the locking mechanisms will snap underfoot. Level it out with self-leveling compound now, or you’ll be paying for a full replacement later.

    Is it actually worth paying the premium for engineered hardwood in a rental property, or should I just stick to something more durable and budget-friendly?

    Look, if you’re playing the long game, engineered hardwood is a solid move because it looks high-end and holds its value during a resale. But if this is a high-turnover rental? Honestly, don’t overextend yourself. I’d pivot to a high-quality Luxury Vinyl Plank (LVP) instead. It mimics the wood look perfectly, handles spills and heavy foot traffic like a champ, and won’t leave you crying over a scratched-up floor when a tenant moves out.

    What are the biggest red flags I should look for when I'm vetting a flooring contractor to make sure they aren't cutting corners on the prep work?

    If a contractor walks into a room and doesn’t immediately pull out a moisture meter or a straightedge, run. The biggest red flag is someone who wants to lay material directly over uneven subfloors or old, unlevel concrete. They’ll tell you “it’ll flatten out,” but they’re lying. If they aren’t talking about grinding, leveling, or cleaning the substrate before the first plank touches the floor, they aren’t installing a floor—they’re just hiding problems.