Category: Renovation

  • Updating a Traditional Fireplace

    Updating a Traditional Fireplace

    I was standing in the middle of a gutted living room in a 1970s ranch last Tuesday, staring at a massive, soot-stained brick monstrosity that looked like it belonged in a coal mine rather than a modern home. The previous owner had clearly spent a fortune on some “luxury” stone veneer that was now peeling off in chunks, and they’d told me a full fireplace remodel would cost upwards of twenty grand. Honestly? That’s a total scam. Most people see a dated hearth and think they need to gut the entire chimney stack to see a return, but they’re just throwing money into a black hole instead of investing it where it actually counts.

    I’m not here to sell you on expensive, trendy veneers that will look dated by next season. My goal is to show you how to approach a fireplace remodel with a strategist’s mindset, focusing on the specific design choices that actually drive up your equity. I’m going to walk you through the high-ROI moves—from selecting the right mantel to deciding when to rip out the masonry versus when to just resurface it—so you can stop viewing your hearth as a liability and start seeing it as a profit-generating centerpiece.

    Table of Contents

    Modern Fireplace Renovation Ideas for High Roi Living Rooms

    Modern Fireplace Renovation Ideas for High Roi Living Rooms

    When I’m walking through a fixer-upper, I’m looking for that one feature that can anchor the entire floor plan. A dated, oversized brick hearth is usually that feature, but it’s often a massive opportunity in disguise. One of my favorite modern fireplace renovation ideas involves stripping away the heavy, dated masonry and opting for a sleek, minimalist look. If you’re on a budget, a fireplace stone veneer installation can completely transform the texture of the room without the structural headache of moving a chimney stack. It adds that high-end, tactile feel that buyers crave during an open house.

    If you’re looking to maximize your margins, don’t overlook the tech side of things. I often recommend an electric vs gas fireplace conversion for properties where running a new gas line is going to eat all your potential profit. You get the ambiance and the visual impact for a fraction of the cost, allowing you to reallocate those funds into custom mantel styles—like a chunky reclaimed wood beam—that really drive the living room focal point design home. It’s all about spending where the eye lands first.

    The Real Cost of Fireplace Upgrading and Hidden Potential

    The Real Cost of Fireplace Upgrading and Hidden Potential

    Let’s get real about the numbers, because nothing kills a profit margin faster than a “cheap” renovation that turns into a money pit. When you’re calculating the cost of fireplace upgrading, you can’t just look at the price of a new surround. You have to account for the structural integrity of the chimney and the potential for venting issues. I’ve seen investors lose thousands because they underestimated the labor required for a complex fireplace stone veneer installation on an uneven, aged masonry base. If you aren’t budgeting for the prep work, you aren’t budgeting for a successful flip.

    However, where there is risk, there is massive upside. The hidden potential lies in the conversion. I often look for outdated, inefficient wood-burning setups and push for an electric vs gas fireplace conversion. It’s a strategic move; gas offers that premium, high-end feel that buyers crave, while electric can be a cost-effective way to create a clean, minimalist aesthetic. If you nail the execution, you aren’t just fixing a heater—you are creating a high-value living room focal point that justifies a much higher asking price.

    Five Tactical Moves to Maximize Your Fireplace ROI

    • Stop overspending on high-maintenance materials; swap that temperamental natural stone for a high-quality porcelain slab that mimics marble but won’t stain the second a glass of red wine hits it.
    • Focus on the mantel as a focal point rather than just a shelf; a thick, reclaimed wood beam adds instant character and warmth to a minimalist room without costing a fortune.
    • Don’t ignore the surround—if you’re working with a tight budget, sometimes just cleaning and re-grouting old tile can do more for the aesthetic than a half-baked attempt at a full demolition.
    • Prioritize the hearth’s functionality; if you’re flipping, make sure the floor area is level and safe, because a tripping hazard is the fastest way to kill a deal during a walkthrough.
    • Think about the lighting integration; adding dimmable sconces on either side of the mantle can transform a basic fireplace into a high-end design feature that makes buyers feel right at home.

    The Bottom Line on Fireplace ROI

    Stop viewing a dated fireplace as a structural headache; view it as a high-leverage design opportunity that can anchor an entire room’s aesthetic and justify a higher asking price.

    Always budget for the “invisible” costs like venting updates and masonry repairs before you start picking out expensive stone veneers, or your profit margins will vanish.

    Focus on timeless, high-impact materials like sleek tile or minimalist stone rather than chasing fleeting trends, ensuring the renovation adds long-term equity instead of requiring another fix in three years.

    The ROI of a Focal Point

    Stop looking at a cracked, dated hearth as a liability; when you strip away the cheap veneer and rebuild it with intention, you aren’t just fixing a fireplace—you’re creating the emotional anchor that makes a buyer fall in love with the house.

    Gareth Trelawny

    The Bottom Line on Your Hearth

    The Bottom Line on Your Hearth.

    At the end of the day, a fireplace remodel isn’t just about picking out a pretty new stone veneer or a sleek electric insert to satisfy your aesthetic cravings. It’s a calculated move to maximize your property’s value. We’ve looked at how much these upgrades actually cost and, more importantly, how to spot the hidden potential in a dated, crumbling masonry mess that most buyers would run away from. Whether you’re going for a minimalist industrial look or a high-end custom build, the goal remains the same: turn a neglected focal point into a high-ROI asset that makes a buyer stop scrolling and start making offers.

    Don’t let a messy, outdated hearth intimidate you or scare you off from a potential goldmine of a property. I’ve seen more than my fair share of “disaster” living rooms get transformed into the most sought-after rooms in the house just by getting strategic with the renovation. Real estate is about seeing what isn’t there yet. So, grab your laser measurer, do the math, and don’t be afraid to rip out the old to make room for something that actually builds your equity. It’s time to stop looking at what a house is and start seeing what it can become.

    Frequently Asked Questions

    Is it actually worth the money to convert an old wood-burning fireplace to gas, or am I just throwing cash down the chimney?

    Look, if you’re asking if you’re throwing cash down the chimney, you’re looking at it the wrong way. You aren’t just paying for a cleaner burn; you’re paying for convenience and resale appeal. In my experience, buyers want the “instant ambiance” of gas without the mess of hauling logs or the soot cleanup. It’s a strategic upgrade. If you do it right, the ease of use adds more value to the living space than the hardware itself.

    How much of a headache am I looking at if I decide to move the fireplace to a different wall to improve the room's flow?

    Look, I’ll be straight with you: moving a fireplace is a massive undertaking. You aren’t just shifting a feature; you’re potentially rerouting gas lines, messing with venting, and potentially touching structural masonry or floor joists. It’s a high-stakes headache that can blow your budget if you aren’t careful. If the current layout is killing the room’s flow, it might be worth the sweat equity, but only if the ROI justifies the structural chaos.

    Can I really use modern materials like porcelain slab or microcement to hide a structural mess without rebuilding the entire hearth?

    Absolutely. You don’t always need a sledgehammer to fix a visual disaster. If the bones are structurally sound but the aesthetics are stuck in 1974, thin-set applications like microcement are a lifesaver for creating that seamless, industrial look. Porcelain slabs are also incredible for cladding over an existing, bulky hearth to give it a high-end, minimalist profile. It’s all about strategic layering—masking the mess to build equity without the massive labor costs of a full rebuild.

  • Creating a Functional Mudroom

    Creating a Functional Mudroom

    I was standing in the entryway of a fixer-upper last Tuesday, staring at a pile of muddy boots and discarded school bags that looked like they’d survived a natural disaster. It’s the same scene I see in almost every mid-range property I scout: a chaotic, disorganized entryway that makes the whole house feel cheap. Most designers will try to sell you on a $15,000 custom cabinetry package, but let’s be real—you don’t need a massive budget to fix a mess. A strategic mudroom installation isn’t about buying expensive, pre-fabricated furniture; it’s about creating a functional transition zone that protects the rest of your investment from the daily grind of real life.

    I’m not here to give you a Pinterest-perfect fantasy that falls apart after six months of heavy use. Instead, I’m going to show you how to approach a mudroom installation with a renovator’s mindset, focusing on durable materials and smart layouts that actually add value to your property. We’re going to cut through the fluff and talk about high-impact, low-cost solutions that turn a cluttered entryway into a streamlined asset.

    Table of Contents

    Mastering Small Mudroom Layout Planning for Maximum Value

    Mastering Small Mudroom Layout Planning for Maximum Value

    When you’re working with a tight footprint, every square inch needs to pull its weight. I’ve seen too many investors blow their budget on oversized features that actually make a small space feel cramped and claustrophobic. For effective small mudroom layout planning, you have to think vertically. Instead of bulky, freestanding furniture that eats up floor space, I always lean toward built-in entryway lockers. By integrating storage directly into the walls, you maintain a clean, streamlined aesthetic that makes a narrow hallway feel intentional rather than cluttered.

    Don’t just throw some hooks on a wall and call it a day. If you want to maximize the ROI on a renovation, you need to invest in custom cabinetry for entryways that offers specific zones for shoes, bags, and seasonal gear. A well-planned layout prevents the “pile-up” effect that kills a home’s first impression. I always tell my clients: if the storage isn’t smart, the renovation isn’t working. Aim for a design that hides the chaos behind closed doors, ensuring that the transition from the driveway to the living room feels like a premium experience rather than a logistical nightmare.

    Choosing Durable Flooring for Mudrooms That Withstand Real Life

    Choosing Durable Flooring for Mudrooms That Withstand Real Life

    Look, I’ve seen too many investors blow their margins by picking “pretty” floors that fall apart after one season of salt, slush, and muddy paws. If you’re looking to build equity, you need durable flooring for mudrooms that can actually handle the abuse of daily life. I personally lean toward luxury vinyl plank (LVP) or porcelain tile. LVP is a lifesaver for flips because it’s waterproof, scratch-resistant, and gives you that high-end look without the fragile price tag of natural stone. If you go the tile route, make sure you’re using a high-rated slip resistance; there’s nothing that kills a home’s vibe faster than a slick, dangerous entryway.

    While you’re finalizing your material choices, don’t forget how the floor interacts with your storage. I always tell my clients that the floor is the foundation for your entire mudroom organization ideas strategy. If you’re planning on installing built-in entryway lockers or heavy custom cabinetry, ensure your subfloor is rock solid and level. A slight dip in the floor might not matter in a living room, but it will make your expensive cabinetry look cheap and misaligned. Choose materials that work as hard as you do.

    Don't Overbuild: 5 Strategic Moves to Maximize Your Mudroom ROI

    • Prioritize “Drop Zones” over aesthetics; a high-end bench looks great, but if it doesn’t have integrated hooks for heavy backpacks or charging stations for tech, it’s just a piece of expensive furniture that won’t solve the daily chaos.
    • Invest in heavy-duty hardware because cheap handles and hinges are the first thing a picky buyer will notice; if the cabinet doors feel flimsy, they’ll assume the entire renovation was a rush job.
    • Plan for lighting that actually works; ditch the single, weak overhead bulb and install recessed LED task lighting so you aren’t fumbling for your keys in a dark corner every single morning.
    • Go custom with your storage dimensions; standard shelving is a waste of square footage, so measure twice and build cubbies specifically sized for the boots and bins that actually live in your house.
    • Keep your finishes “high-traffic friendly” by choosing semi-gloss or satin paints; you need a surface that can take a wipe-down from muddy handprints without looking like a disaster after three months.

    The Bottom Line: Turning Your Mudroom into a High-ROI Asset

    Stop treating the mudroom as an afterthought; a well-planned, functional entryway is a high-impact way to boost perceived home value and buyer appeal.

    Prioritize materials that can actually handle a beating—investing in durable, easy-to-clean flooring now prevents costly repairs and protects your equity later.

    Maximize every square inch by focusing on smart, vertical storage solutions that turn a chaotic transition zone into a streamlined, organized asset.

    The ROI of the Entryway

    “Don’t view a mudroom as just another renovation expense; view it as a strategic barrier that protects your high-end finishes from the daily grind, effectively preserving the equity you worked so hard to build.”

    Gareth Trelawny

    Turning Chaos Into Capital

    Turning Chaos Into Capital with mudrooms.

    At the end of the day, a successful mudroom installation isn’t just about picking out pretty cubbies or a trendy backsplash; it’s about strategic utility. You’ve looked at how to master a layout that actually works for a family’s flow and how to select flooring that won’t look like a disaster zone after one rainy afternoon. When you combine smart spatial planning with materials that can actually handle the heavy lifting of daily life, you aren’t just fixing a room—you are protecting your investment. Every dollar you spend on durable, well-designed organizational systems is a dollar that directly bolsters your home’s resale value by solving a problem most buyers are desperate to avoid.

    Don’t let the mess of a renovation intimidate you or make you settle for a mediocre, “good enough” solution. I know firsthand that the dust and the logistics can feel overwhelming, but remember that the most profitable flips are built on these exact types of functional, high-impact details. Stop viewing the entryway as a wasted corner and start seeing it as a high-value asset waiting to be unlocked. Get in there, do the work, and turn that chaotic transition zone into a seamless part of your wealth-building strategy.

    Frequently Asked Questions

    How do I balance high-end aesthetic choices with the heavy-duty durability needed for a high-traffic entryway?

    Look, I’ve seen too many investors blow their margins on high-end finishes that crack after one season of salt and slush. You don’t have to sacrifice style for grit. My rule of thumb? Invest heavily in the “hard” surfaces—think porcelain tile that mimics high-end stone or luxury vinyl plank—and save your “pretty” budget for the cabinetry and hardware. That way, you get the designer look without the maintenance nightmare.

    Is it worth investing in custom built-ins, or can I get the same ROI using modular storage solutions?

    Look, if you’re chasing maximum ROI, don’t get blinded by the “custom” label. Custom built-ins look stunning in staging photos, but they’re a massive upfront hit to your budget. For most flips, I lean toward high-quality modular solutions. They give buyers that organized, intentional feel without the custom price tag. Unless you’re working on a high-end luxury build where bespoke is expected, modular storage is the smarter way to add value without bleeding equity.

    What are the biggest red flags I should look for during a renovation that might blow my mudroom budget?

    Watch out for hidden subfloor rot or uneven joists once you pull up the old flooring. If the foundation isn’t level, your custom cabinetry will look crooked, and fixing that mid-install is a budget killer. Also, keep a sharp eye on electrical placement; if you realize too late that you need more outlets for charging stations or smart lighting, you’re looking at expensive, unplanned rewiring. Don’t let these “surprises” eat your profit margins.

  • Optimizing Your Laundry Room Design

    Optimizing Your Laundry Room Design

    I was standing in the middle of a damp, windowless basement last Tuesday, staring at a stack of mismatched plastic bins and a washing machine that sounded like a jet engine taking off. Most “design gurus” will tell you that a high-end laundry room remodel requires custom Italian cabinetry and a marble backsplash just to be considered successful. Honestly? That’s a load of crap. I’ve seen plenty of investors blow their entire margin on frivolous aesthetics that do absolutely nothing to increase the actual appraisal value of a home.

    I’m not here to sell you on a lifestyle magazine fantasy; I’m here to talk about smart equity. In this guide, I’m stripping away the fluff to show you how to approach a laundry room remodel with a developer’s mindset. We’re going to focus on high-impact, functional upgrades—think clever storage solutions and durable finishes—that make a buyer feel like they’re stepping into a luxury space without draining your bank account. I’ll show you how to maximize your ROI by focusing on what actually matters, turning a cluttered utility nightmare into a streamlined, high-value asset.

    Table of Contents

    Maximizing Value With Efficient Laundry Room Floor Plans

    Maximizing Value With Efficient Laundry Room Floor Plans

    When I’m walking through a fixer-upper, I don’t just look at the aesthetic; I look at the flow. A poorly planned layout can turn a simple chore into a daily headache, which is exactly what kills resale value. To get the most bang for your buck, you need to focus on efficient laundry room floor plans that prioritize movement. If you’re working with a tight footprint, I always recommend a galley-style setup or a single-wall run. This keeps your appliances, sink, and folding station within arm’s reach, preventing that awkward dance around a pile of dirty linens.

    Don’t let a cramped space dictate your potential, either. I’ve seen some incredible transformations where smart small laundry room organization turned a dead corner into a high-functioning zone. Think about incorporating verticality; if you can’t expand outward, go up. Integrating custom shelving or even some simple laundry room cabinetry trends—like floating wood tones against a minimalist backdrop—can hide the clutter while adding that high-end, designer feel that buyers crave. It’s about making the space work as hard as you do.

    Modern Laundry Room Cabinetry Trends That Command Higher Rents

    When I’m walking through a fixer-upper, I’m always looking at the cabinetry to see if the previous owner played it safe or played it smart. For a high-yield rental or a quick flip, you want to move away from those dated, builder-grade oak cabinets that scream “1990s suburban basement.” Instead, I’m seeing a massive shift toward flat-panel, minimalist cabinetry in muted tones like sage green or charcoal. These styles feel intentional and high-end without the custom price tag. If you’re working with limited square footage, look into floating shelves or slim-profile cabinets; they keep the space feeling airy while providing essential small laundry room organization that tenants actually value.

    Don’t forget that functionality is what drives the rent premium. I always tell my clients to integrate deep, pull-out drawers rather than standard lower cabinets. It’s much easier for a tenant to manage heavy detergent bottles in a drawer than to be on their hands and knees digging in a dark corner. Integrating these laundry room cabinetry trends with clean lines and durable hardware makes the entire utility space feel like a curated part of the home rather than a neglected afterthought.

    Five Ways to Squeeze More Equity Out of Your Laundry Space

    • Stop treating the laundry room like a dead zone; if you have the footprint, add a folding station or a built-in countertop. It’s a small upgrade that makes the space feel intentional rather than just a place to hide the dirty clothes.
    • Lighting is your best friend when you’re dealing with windowless utility closets. Swap out those dim, flickering overheads for bright, recessed LED lighting so buyers can actually see what they’re doing without feeling like they’re in a basement dungeon.
    • Don’t skimp on the flooring. While I love a good aesthetic, this area takes a beating from moisture and heavy machines, so go for something durable like luxury vinyl plank that looks high-end but can handle a leak without ruining your ROI.
    • Invest in smart storage that hides the chaos. I’m talking pull-out hampers and slim rolling carts that fit between the machines; if a potential buyer can’t see the clutter, they’re more likely to fall in love with the layout.
    • Upgrade your plumbing and electrical before you get fancy with the decor. There is nothing that kills a deal faster than an outdated washer hookup or a lack of dedicated outlets for modern, high-efficiency appliances.

    The Bottom Line on Laundry Room Equity

    Stop treating the laundry area like an afterthought; a smart, functional layout is one of the easiest ways to bump your property’s perceived value during a walkthrough.

    Invest in durable, high-end cabinetry that looks expensive but stands up to daily abuse—renters and buyers both want utility that doesn’t look cheap.

    Focus on the marriage of aesthetics and workflow, because if a renovation doesn’t make a chore easier, it’s just wasted capital.

    ## The Equity in the Utility Room

    “Stop treating the laundry room like an afterthought; if you treat it like a high-utility workspace instead of a dark corner for junk, you aren’t just fixing a room—you’re building instant equity.”

    Gareth Trelawny

    Turning Utility into Equity

    Laundry remodel: Turning Utility into Equity.

    At the end of the day, a laundry room remodel isn’t just about picking out a pretty backsplash or a trendy shaker cabinet; it’s about strategic asset management. We’ve looked at how a smart, efficient floor plan can transform a cramped corner into a functional powerhouse, and how investing in high-quality cabinetry can significantly boost your property’s appeal to high-end renters or buyers. If you focus on these high-impact areas, you aren’t just fixing a room—you are maximizing your return on investment by addressing one of the most overlooked functional spaces in a home.

    Don’t let the dust and the inevitable plumbing headaches intimidate you. Every time I step onto a job site and see a gutted, outdated utility space, I don’t see a mess; I see hidden equity waiting to be unlocked. Real estate isn’t about finding the perfect, turnkey property; it’s about having the vision to see what a space could become once you apply some sweat equity and smart design. So, grab your laser measurer, get your contractor on speed dial, and start turning those cramped closets into profitable square footage.

    Frequently Asked Questions

    How do I decide whether to stick with a side-by-side washer and dryer setup or go for a stacked unit to save floor space?

    Look, it comes down to the footprint you’re working with and your target demographic. If you’re flipping a compact condo or a tiny bungalow, go stacked. It frees up floor space for extra cabinetry or a folding station, which adds massive perceived value. But, if you’re renovating a family home where the buyer wants heavy-duty machines, a side-by-side setup with a continuous countertop is king. Always measure twice; that extra counter space is pure gold.

    Is it actually worth the extra investment to upgrade my plumbing and electrical while the walls are already open?

    If the walls are already open, you’re sitting on a goldmine of opportunity. Do not—I repeat, do not—patch that drywall just to save a few bucks today. Upgrading the guts of the house is the ultimate insurance policy for your investment. New electrical and plumbing prevent catastrophic failures down the line, and they’re massive selling points for savvy buyers. It’s not just a renovation; it’s about securing the structural integrity of your equity.

    What kind of durable countertop materials should I choose if I want a folding station that can actually handle heavy daily use?

    If you’re building a folding station, don’t even think about cheap laminate; it’ll peel or swell the second a damp basket hits it. I always lean toward quartz for my flips. It’s non-porous, practically indestructible, and handles heavy laundry loads without staining. If you’re on a tighter budget but still want durability, go with a high-quality solid surface. You need something that can take a beating and still look high-end for the next tenant.

  • Improving Your Home Entrance

    Improving Your Home Entrance

    I still remember the smell of damp drywall and old floor wax from my first solo flip—a tiny, neglected bungalow that looked like it hadn’t seen a paintbrush since the nineties. I stood in that cramped, dark foyer, clutching my laser measurer, and realized that most people treat entryway design as an afterthought, something you just slap a coat of beige paint on and call a day. They think you need a massive budget for custom millwork or a grand foyer to make an impression, but that’s just expensive nonsense that eats your margins alive.

    I’m not here to sell you on Pinterest-perfect fantasies that cost a fortune and offer zero ROI. Instead, I’m going to show you how to use strategic, high-impact updates to turn a cluttered, dark entrance into a polished statement piece. We’re going to focus on smart, scalable moves—from lighting to functional storage—that actually build equity. If you’re ready to stop wasting money on fluff and start focusing on tangible value, let’s get to work.

    Table of Contents

    Mastering First Impression Home Decor for Maximum Impact

    Mastering First Impression Home Decor for Maximum Impact

    When I’m walking into a property for a walkthrough, my eyes immediately go to the foyer. It’s not just about aesthetics; it’s about how the space functions the moment a person steps through the door. If a buyer walks into a pile of shoes and tangled coats, they’ve already mentally checked out of the house. To prevent that, I focus heavily on entryway console table styling that balances form and function. You want a slim, high-impact piece that provides a landing strip for keys and mail without choking the flow of the room.

    Don’t let a cramped layout stop you from making a statement, either. I’ve seen some of my most profitable flips rely on clever small entryway organization tips to make a tight space feel intentional rather than cluttered. Think about adding a sleek wall-mounted hook system or a slim bench to keep the floor clear. My rule of thumb is simple: if the decor doesn’t serve a purpose or elevate the vibe, it’s just dead weight. You want to create a sense of immediate order that tells a buyer this home is well-managed and ready for them.

    Elevating Space With Modern Foyer Furniture Ideas

    Elevating Space With Modern Foyer Furniture Ideas

    When you’re looking at a cramped or awkward foyer, the temptation is to just shove a bench against the wall and call it a day. But if you’re serious about maximizing your ROI, you need to look at modern foyer furniture ideas that balance aesthetics with actual utility. I’m a huge proponent of the slim-profile console table. It’s a lifesaver in tighter spaces because it provides a landing zone for keys and mail without choking the flow of the room. Pair a sleek, black metal frame with a warm wood top to hit that industrial chic note I love, and you’ve instantly elevated the entire vibe of the house.

    Don’t let the scale of the furniture overwhelm the room, though. If you’re dealing with a narrow hallway, focus on verticality and slim silhouettes. Instead of a bulky chest, try a lightweight pedestal or a narrow floating shelf. This keeps the floor visible, which trickily makes the area feel much larger. It’s all about that strategic balance: you want pieces that feel intentional and high-end, not like you just grabbed whatever was on sale at a big-box retailer.

    Five High-ROI Moves to Level Up Your Entryway

    • Stop neglecting your lighting; swapping out a builder-grade flush mount for a statement pendant can make a cramped foyer feel intentional and high-end without a full electrical overhaul.
    • Invest in a high-quality runner rug to define the zone, but make sure it’s durable—I’ve seen too many investors blow their budget on silk rugs that get shredded by muddy boots in a week.
    • Use mirrors to cheat the square footage, especially in those narrow hallways that feel like tunnels; a large, strategically placed mirror bounces light and makes a small entry feel twice as wide.
    • Create a “drop zone” that actually functions, like a slim console table or a built-in bench, so clutter doesn’t migrate from the door to the living room—clutter is the ultimate equity killer.
    • Don’t underestimate the power of hardware; replacing dated door handles or adding matte black hooks can provide that “designer touch” that makes a renovation feel finished rather than rushed.

    The Bottom Line: Turning Your Entryway into ROI

    Stop treating the foyer as an afterthought; it’s your property’s handshake, and a strategic, high-impact refresh is one of the fastest ways to justify a higher asking price.

    Focus on “smart” furniture—pieces that offer functional storage to hide the daily chaos while maintaining that clean, minimalist aesthetic buyers crave.

    Always prioritize durability and scale; if your entryway pieces look cheap or feel cramped, it signals to a potential buyer that the rest of the house might be poorly maintained.

    The Equity in the Entryway

    “Stop looking at your foyer as just a place to drop your keys; start seeing it as the highest-leverage zone in the house. A strategic entryway refresh isn’t just about decor—it’s about setting the narrative for the entire property before a buyer even reaches the living room.”

    Gareth Trelawny

    From First Impressions to Final Equity

    From First Impressions to Final Equity.

    At the end of the day, an entryway isn’t just a hallway or a place to drop your keys; it’s a strategic tool in your renovation arsenal. We’ve talked about everything from selecting the right statement furniture to ensuring your decor creates that immediate “wow” factor for potential buyers. Remember, you don’t need to gut the entire house to see a return. By focusing on smart, intentional upgrades—like a well-placed console table or a cohesive lighting plan—you are effectively bridging the gap between a cluttered entrance and a high-value asset. It’s about making sure that every dollar you spend on that foyer is a calculated move toward increasing your property’s bottom line.

    I know that staring at a cramped, outdated entryway can feel overwhelming, especially when you’re staring down a long list of renovations. But don’t let the mess intimidate you. Every crumbling wall and dated floorboard is just an opportunity in disguise. If you approach these spaces with a disciplined eye and a clear plan, you’ll find that the most neglected corners often yield the highest rewards. Stop looking at what the space is, and start seeing what it could become. Grab your laser measurer, get to work, and let’s start building that equity.

    Frequently Asked Questions

    How do I balance high-end aesthetic upgrades with a tight renovation budget when I'm flipping a property?

    You have to play the “high-low” game. Don’t blow your budget on designer faucets or custom cabinetry; that’s where the profit dies. Instead, pour your capital into the things buyers touch every day—solid hardware, a statement light fixture, or a high-quality rug. For everything else, thrift a vintage mid-century console or use high-end paint to elevate basic materials. Focus on the visual impact, not the brand name. It’s about perceived value, not luxury labels.

    Are there specific lighting fixtures that provide the best ROI for a small, dark entryway?

    If you’re dealing with a dark, cramped foyer, skip the heavy, ornate chandeliers—they just eat up visual space. For the best ROI, go with a sleek, matte black or brushed brass semi-flush mount. It keeps the ceiling feeling high while adding that designer touch. I also swear by adding a slim wall sconce or even a motion-activated LED strip under a console table. It creates layers of light that make a tiny space feel intentional, not claustrophobic.

    What are the best durable flooring options that look designer but can actually withstand heavy foot traffic during a showing?

    If you’re looking to balance high-end aesthetics with the reality of a busy renovation, go with Luxury Vinyl Plank (LVP). It’s my go-to because it’s waterproof and nearly indestructible, but modern versions mimic wide-plank white oak so well that buyers can’t tell the difference. If your budget allows, engineered hardwood is a solid runner-up for that premium feel, but for high-traffic flips, LVP gives you that designer look without the maintenance headache.

  • Installing Built in Bookshelves

    Installing Built in Bookshelves

    I was standing in the middle of a dusty, gutted living room in a Victorian fixer-upper last Tuesday, staring at a massive, awkward alcove that looked more like a mistake than a feature. Most “design gurus” would tell you that installing custom built in shelving requires a massive budget and a team of high-end carpenters to be worth the investment. They want you to believe that if you aren’t spending five figures on bespoke cabinetry, you’re just wasting your time. Honestly? That’s a complete load of nonsense designed to keep people from seeing the actual profit potential hiding in plain sight.

    I’m not here to sell you on expensive, superficial trends that won’t move the needle on your ROI. Instead, I’m going to show you how to use built in shelving as a strategic tool to maximize square footage and create that “intentional” feel that buyers crave. I’ll walk you through the high-impact, low-cost ways to execute this properly, focusing on smart design and strategic rehabs rather than mindless spending. Let’s stop looking at empty nooks as wasted space and start seeing them as pure, unadulterated equity.

    Table of Contents

    Floor to Ceiling Shelving Ideas for Maximum Impact

    Floor to Ceiling Shelving Ideas for Maximum Impact

    If you really want to change the energy of a room, stop thinking about furniture that sits on the floor and start thinking about structures that reach the ceiling. When I’m walking through a fixer-upper with high ceilings, my first instinct is to utilize that vertical real estate. Floor to ceiling shelving ideas aren’t just about extra storage; they are about creating a sense of permanence. A massive, floor-to-ceiling unit draws the eye upward, making even a modest living room feel grander and more architecturally significant.

    For those of you working with tighter budgets, the material choice is where you win or lose your margins. I usually weigh wood vs MDF for shelving depending on the client’s end goal. If I’m aiming for a high-end, custom look that screams luxury, I’ll push for real wood. However, if we are flipping a property and need to maximize the ROI without breaking the bank, a high-quality MDF with a professional paint finish can look absolutely seamless. It’s all about creating that intentional, high-end look that makes a buyer feel like the home was custom-designed just for them.

    Modern Built in Unit Styles to Elevate Property Value

    Modern Built in Unit Styles to Elevate Property Value

    When you’re looking at modern built-in unit styles, you want to move away from that heavy, dated look and lean into something that feels intentional. I’m a huge fan of the “floating” look—think thick, chunky shelves mounted directly to the wall without the bulky base cabinets. It creates an airy, high-end feel that works perfectly when you’re maximizing small space storage in a tight living area. If you want to go more premium, consider integrating subtle LED strip lighting into the recesses. It’s a small detail, but it makes the entire unit look like a high-end architectural feature rather than just some extra storage.

    Another direction that’s killing it in the current market is the home library aesthetic. We’re seeing a huge demand for moody, sophisticated spaces where floor-to-ceiling units act as a focal point. When you’re deciding on materials, you’ll likely face the wood vs MDF for shelving debate. While real hardwood is stunning, I often recommend high-quality MDF with a professional paint finish for my flips. It’s more cost-effective, resists warping, and gives you that perfectly smooth, minimalist industrial finish that buyers are currently obsessed with.

    Pro Tips for Maximizing ROI with Custom Shelving

    • Don’t go overboard with the decor; when you’re prepping a house for sale, use the shelves to showcase lifestyle, not clutter. A few high-end books and a single ceramic piece are better than a crowded shelf that makes a room feel small.
    • Always account for outlet placement before you start building. There is nothing more amateur than a beautiful custom unit that completely hides a wall outlet, forcing buyers to hunt for a plug or deal with ugly extension cords.
    • Use lighting to your advantage. Adding even a simple, battery-operated LED strip or a discreet puck light to a built-in unit makes the whole room feel more expensive and intentional, which is exactly what you want when driving up an appraisal.
    • Focus on the “visual weight.” If you’re working with a tiny studio or a cramped hallway, opt for thinner, floating-style built-ins. Heavy, chunky cabinetry can swallow a small room and actually make the square footage feel even more limited.
    • Always measure twice—or better yet, use my laser measurer. If your built-ins are off by even half an inch, they’ll look like a DIY mistake rather than a professional installation, and nothing kills a buyer’s confidence faster than sloppy craftsmanship.

    The Bottom Line: Making Built-Ins Work for Your ROI

    Don’t just build for looks; build for utility. A shelf that looks pretty but can’t hold a heavy stack of coffee table books is a wasted investment in a flip.

    Focus on scale to create the illusion of luxury. Floor-to-ceiling units make even a modest room feel custom-designed, which is exactly what buyers are looking for when they want that “high-end” feel.

    Keep your design language consistent with the rest of the renovation. If you’re going for a minimalist industrial vibe, don’t clutter your built-ins with ornate molding that clashes with the property’s new identity.

    The ROI of Intentional Design

    “When I’m walking through a fixer-upper, I’m not just looking at the floor plan; I’m looking for those awkward, dead spaces that most buyers will ignore. A well-placed set of built-in shelves turns a useless corner into a high-value feature, making a home feel custom-built rather than just thrown together.”

    Gareth Trelawny

    Final Thoughts on Maximizing Your ROI

    Final Thoughts on Maximizing Your ROI.

    At the end of the day, built-in shelving isn’t just about finding a place to stash your books or decor; it’s a strategic move to make a property feel custom and high-end. Whether you’re going for that floor-to-ceiling statement piece to draw the eye upward or installing sleek, modern units that scream sophistication, you are essentially selling a lifestyle. By choosing styles that align with current market trends and focusing on clean, functional lines, you’re ensuring that every dollar spent on carpentry translates directly into increased equity and buyer interest. Don’t just fill a void in a room—use these nooks to prove the house was designed with intention.

    I know that staring at a bare, awkward alcove can feel like just another headache on a long renovation checklist, but I promise you, the payoff is worth the dust. Real estate investing is about seeing what others miss, and a well-placed built-in is often the missing piece of the puzzle that turns a house into a home. Stop looking at empty spaces as wasted square footage and start seeing them as opportunities to build wealth. Grab your measuring tape, get a plan in place, and let’s turn those empty walls into your next big win.

    Frequently Asked Questions

    How do I decide between custom cabinetry and cheaper, modular built-ins when I'm trying to protect my margins on a flip?

    Look, if you’re protecting your margins, don’t get fancy for the sake of it. Custom cabinetry is a luxury play; use it only if you’re targeting a high-end buyer who expects bespoke finishes. For most flips, I lean on high-quality modular units. If you choose the right modular pieces and add some custom trim or a solid stone top, you can trick the eye into seeing high-end custom work without the custom price tag.

    Are there specific materials I should avoid to ensure the shelving doesn't look dated or "cheap" in a few years?

    Steer clear of anything that looks like “instant gratification” renovation. Avoid those flimsy, particle-board kits or anything with a high-gloss, fake-wood laminate finish; they peel and look dated within a year. Also, skip the overly ornate, chunky crown molding if you’re aiming for a modern flip. If it feels lightweight or looks like it was glued together in a weekend, don’t use it. Stick to solid wood or high-quality MDF that can take a real finish.

    How much actual ROI can I realistically expect to see from adding built-in shelving versus just leaving the walls bare?

    Look, I’ll give it to you straight: you aren’t going to see a massive jump in the appraisal just because you added some wood and screws. However, the real ROI isn’t just in the math; it’s in the perceived value. Built-ins make a space feel “finished” and intentional. In a competitive market, a buyer seeing a custom library or a sleek media unit will often choose your house over the bare-walled one next door.

  • Updating Electrical Systems in Old Homes

    Updating Electrical Systems in Old Homes

    I’ll never forget the smell of scorched plastic and ozone that hit me when I opened the panel on my first real fixer-upper. I was standing in a kitchen that looked beautiful on the surface, but the moment I tried to plug in a high-end espresso machine, the lights flickered and the whole circuit groaned like it was about to die. That’s when I realized that all the mid-century modern charm in the world won’t save a property if the electrical rewiring is a ticking time bomb. Most people try to paper over these issues with fancy new outlets, but if you aren’t addressing the bones, you’re just masking a disaster that will tank your resale value.

    I’m not here to give you a textbook lecture or some overpriced contractor’s sales pitch. My goal is to show you how to navigate the chaos of a full rewire without letting it bleed your renovation budget dry. I’m going to walk you through how to spot the red flags early, when to bite the bullet on a total overhaul, and how to ensure your investment is built on a solid, safe foundation. Let’s stop guessing and start building real equity.

    Table of Contents

    Using a Home Electrical Inspection Checklist to Find Value

    Using a Home Electrical Inspection Checklist to Find Value

    When I’m walking through a potential flip, I don’t just look at the crown molding or the layout; I’m hunting for the stuff hidden behind the drywall. I always keep a home electrical inspection checklist tucked in my bag because you can’t eyeball the integrity of a circuit. You need to be looking for the telltale signs of outdated electrical systems, like flickering lights, warm outlet covers, or those ancient two-prong plugs that scream “pre-1970s.” If you miss these red flags during your initial walkthrough, you aren’t just looking at a minor headache—you’re looking at a massive budget killer that will eat your projected profit margins alive.

    I treat an inspection like a diagnostic tool for my ROI. If I see a rusted-out fuse box or a panel that’s clearly maxed out, I immediately start factoring in electrical panel replacement costs before I even make an offer. It’s about being proactive rather than reactive. By identifying these issues early, I can negotiate a lower purchase price or budget correctly for the overhaul, ensuring that once I flip the house, the new owners aren’t inheriting a ticking time bomb.

    Preventing Electrical Fires Before They Burn Your Equity

    Preventing Electrical Fires Before They Burn Your Equity

    Look, I’ve walked into plenty of “dream fixer-uppers” only to find that the previous owner treated the electrical system like an afterthought. If you see flickering lights or outlets that feel warm to the touch, don’t just shrug it off as “character.” Those are classic signs of outdated electrical systems that could turn your investment into a total loss overnight. I’ve seen more equity go up in smoke from a faulty junction box than from a bad kitchen layout, and I am not about to let that happen on my watch.

    When you’re evaluating a new property, you have to look past the fresh coat of paint and check the bones. If the house is still running on old-school two-prong outlets, you’re likely looking at a massive job to meet modern grounding and bonding requirements. It’s a headache, sure, but preventing electrical fires is non-negotiable if you want to protect your capital and your reputation. You aren’t just fixing wires; you’re securing the literal foundation of your profit margin.

    Five Ways to Stop Electrical Gremlins From Eating Your Profits

    • Stop playing guessing games with old breaker boxes; if you see a rusted-out panel or one that’s completely maxed out, budget for a full upgrade immediately so you aren’t hit with a massive surprise bill mid-reno.
    • Don’t just patch up old outlets to look pretty; if the house has original two-prong outlets, you need to pull new wire through to get grounded, otherwise, your “modern” kitchen won’t even be able to run a high-end espresso machine without tripping a breaker.
    • Map out your kitchen and bathroom circuits before you even touch a sledgehammer, because nothing kills a renovation timeline like realizing your new high-voltage appliances are fighting for the same overworked circuit.
    • Treat your lighting plan like a strategic asset rather than an afterthought; while you’re ripping out the old junk, run lines for recessed lighting and smart switches now so you can command a premium price tag at resale.
    • Always prioritize a licensed electrician for the heavy lifting, even if it feels like a hit to your initial margins, because one bad DIY connection can turn your entire investment into a smoking pile of ash and a legal nightmare.

    The Bottom Line: Protect Your Margins and Your Assets

    Never eyeball an electrical panel; use a professional inspection checklist early in your due diligence to ensure you aren’t inheriting a massive, unbudgeted rewiring project.

    Treat electrical upgrades as a value-add, not just a cost; modernizing the system is one of the most effective ways to build long-term equity and pass a rigorous home inspection.

    Prioritize safety over aesthetics; you can pick the trendiest mid-century light fixtures you want, but they won’t mean a thing if the underlying wiring is a fire hazard.

    ## The Hidden Margin Killer

    “You can slap a fresh coat of paint and some mid-century hardware on a house all day long, but if you’re ignoring the outdated knob-and-tube wiring behind the drywall, you aren’t building equity—you’re just gambling with your investment.”

    Gareth Trelawny

    Bottom Line: Don't Skimp on the Skeleton

    Bottom Line: Don't Skimp on the Skeleton.

    At the end of the day, electrical rewiring isn’t just another line item on your renovation budget—it’s the literal nervous system of the house. We’ve talked about using inspections to sniff out hidden issues and why you can’t afford to ignore fire hazards that could turn your entire investment into a pile of ash. If you try to hide outdated knob-and-tube or faulty panels behind a fresh coat of paint and some trendy light fixtures, you aren’t just being cheap; you’re being reckless with your capital. You have to ensure the foundation of the home is sound before you start obsessing over the aesthetic finishes, because true value is built on safety and compliance, not just pretty surfaces.

    I know it’s tempting to cut corners when the quotes from electricians start rolling in, but trust me, the math always catches up to you. I’ve seen too many investors lose their shirts because they prioritized a designer kitchen over a functional electrical system. Real estate investing is a marathon of calculated risks, and choosing to do things right the first time is how you protect your margins and build lasting wealth. Stop looking for the easy way out and start looking for the way that actually builds solid, long-term equity. Get the wiring done, do it right, and then go build that empire.

    Frequently Asked Questions

    How do I figure out if I can just swap out old outlets and switches, or if I'm looking at a full-blown, budget-breaking rewire?

    Look, I’ve been there—staring at a wall wondering if it’s a quick cosmetic fix or a total gut job. If you’ve got modern Romex wiring behind the walls and the panel is up to code, swapping out dated outlets and switches is an easy win for aesthetics. But if you see knob-and-tube, aluminum wiring, or a fuse box that looks like a relic, stop. That’s not a facelift; that’s a full-blown rewire.

    At what point in the renovation timeline should I pull the trigger on electrical work so I'm not paying contractors to work around my other crews?

    Timing is everything if you want to protect your margins. You need to pull the trigger on electrical work during the “demolition and rough-in” phase. Do not wait until the walls are up or the new floors are laid. You want your electricians in there right after the guts are exposed but before the drywall goes up. If you delay, you’re just paying premium rates for crews to move around each other in a cramped, inefficient mess.

    How much of a dent is a complete electrical overhaul actually going to take out of my projected ROI on a flip?

    Look, I’ll give it to you straight: a full overhaul is a heavy lift, and it’ll definitely bite into your initial margins. You might see a 3% to 5% dip in your projected ROI depending on the square footage. But here’s the thing—I’d rather take a hit on the upfront cost than have a buyer’s inspector flag a death trap during due diligence. Replacing the guts now builds the kind of equity that actually sticks.

  • Upgrading Outdated Plumbing Systems

    Upgrading Outdated Plumbing Systems

    I’ll never forget the smell of stagnant water and old copper that hit me when I first opened the crawlspace of my first fixer-upper. I had spent weeks obsessing over the perfect mid-century modern light fixtures, only to realize the entire house was essentially a ticking time bomb of rusted pipes and failing drains. Most people think they can just slap on a new faucet and call it a day, but if you aren’t serious about strategic plumbing upgrades, you’re just painting over rot. You can have the most beautiful marble countertops in the world, but they won’t mean a thing if your water pressure is pathetic or your pipes are leaching contaminants into the system.

    I’m not here to sell you on some overpriced, aesthetic-only renovation that does nothing for your bottom line. My goal is to show you how to identify the specific, high-ROI plumbing upgrades that actually protect your investment and prevent catastrophic failures down the road. I’m going to cut through the contractor jargon and give you the straight truth on what’s worth your capital and what’s just a waste of time. Let’s stop playing house and start building real equity.

    Table of Contents

    Modernizing Residential Plumbing Systems for Maximum Resale Value

    Modernizing Residential Plumbing Systems for Maximum Resale Value

    When I’m walking through a potential flip, I’m not just looking at the backsplash or the flooring; I’m listening. If I hear a faint hiss behind the drywall or see a yellowish tint in the guest bathroom, my internal alarm goes off. Modernizing residential plumbing systems isn’t just about aesthetics; it’s about erasing the “hidden” red flags that scare off serious buyers during an inspection. If you’re looking at an older property, don’t just patch the leaks. I always advocate for upgrading old copper pipes or replacing outdated galvanized steel if the signs of corrosion are there. It’s a heavy lift upfront, but it’s the difference between a smooth closing and a buyer demanding a massive credit.

    Beyond the heavy-duty structural work, I look for ways to integrate water efficiency upgrades that appeal to the modern, eco-conscious buyer. Installing low-flow, high-performance fixtures is a low-cost way to add value without a massive overhaul. I’ve also seen a huge uptick in interest when I mention smart plumbing technology, like leak detection sensors that connect to a smartphone. It’s about selling peace of mind. You aren’t just selling a house; you’re selling a home that won’t flood the kitchen the moment someone forgets to turn off a faucet.

    Upgrading Old Copper Pipes to Build Solid Equity

    Upgrading Old Copper Pipes to Build Solid Equity

    Look, I’ve walked into enough houses to know that seeing shiny, new faucets doesn’t mean a thing if the guts of the house are rotting. If you’re staring at a property with aging copper lines, don’t just think about the aesthetic; think about the liability. While copper is technically durable, decades of corrosion and pinhole leaks can turn a profitable flip into a financial sinkhole overnight. Upgrading old copper pipes isn’t just about fixing what’s broken; it’s about replacing outdated, brittle systems with high-quality PEX or newer copper configurations that give buyers peace of mind.

    When I’m calculating my margins on a new project, I treat these deep-wall fixes as non-negotiable. You can’t build long-term wealth on a foundation of leaky infrastructure. Investing in these structural changes during your initial phase of home renovation plumbing improvements saves you from the nightmare of a post-closing emergency call. It’s about shifting the narrative from “this house might have issues” to “this house is turnkey and reliable.” That distinction is exactly where your equity lives.

    Stop Ignoring the Pipes: 5 Strategic Plumbing Moves to Protect Your Margins

    • Stop playing whack-a-mole with tiny leaks. If you see signs of corrosion or slow drains during your walkthrough, budget for a full system overhaul. It’s much cheaper to replace the lines now than to face a catastrophic burst mid-renovation that eats your entire profit margin.
    • Don’t skimp on the fixtures just to save a few bucks at the big-box store. I always swap out dated, crusty faucets for something with a clean, minimalist aesthetic. It’s a low-cost way to make a bathroom feel high-end and “move-in ready” during a showing.
    • Check the water heater’s age immediately. If that tank is sitting there looking rusty or is over a decade old, swap it out for a modern, high-efficiency unit. It’s one of those “invisible” upgrades that buyers actually check, and it gives them peace of mind that they won’t be dealing with a flood in their first month.
    • Upgrade the shut-off valves while the walls are already open. There is nothing more unprofessional than a contractor or a new homeowner struggling with a seized-up valve during an emergency. Installing modern, easy-to-turn quarter-turn ball valves is a tiny investment that screams quality craftsmanship.
    • Pay attention to the drainage slope. If you’re dealing with an older property where the floor drains or toilets feel “off,” don’t just mask it with a new toilet. Ensure the pitch is correct. A slow drain is a massive red flag during a home inspection that can kill a deal instantly.

    The Bottom Line on Plumbing ROI

    Don’t get cute with aesthetics when it comes to what’s behind the walls; prioritize replacing outdated, corroded piping over fancy fixtures if you want to protect your margins and avoid a post-sale nightmare.

    Treat plumbing as an equity builder, not just a maintenance cost—upgrading to modern, high-efficiency systems is one of the most effective ways to turn a “fixer-upper” into a premium listing.

    Always inspect the bones before you pick out the faucets; a beautiful vanity won’t save your profit if you’re fighting constant leaks and low water pressure during the inspection period.

    The Hidden Cost of Cutting Corners

    “New buyers don’t care how pretty your backsplash is if they’re staring at a puddle under the kitchen sink a month after closing. Stop treating plumbing as an afterthought; if you want to protect your margins, you fix the bones of the house before you start picking out the paint colors.”

    Gareth Trelawny

    Don't Let Your Margins Go Down the Drain

    Don't Let Your Margins Go Down the Drain.

    At the end of the day, plumbing isn’t the “sexy” part of a renovation that shows up in glossy magazine spreads, but it is the backbone of a profitable flip. We’ve covered why you can’t afford to ignore outdated copper, why modernizing your residential systems is non-negotiable for resale, and how these behind-the-wall upgrades directly protect your bottom line. If you skip these steps to save a few bucks upfront, you aren’t saving money—you’re just handing a massive liability to your next buyer. A house with beautiful quartz countertops but failing pipes is a house that won’t pass inspection, and an inspection failure is the fastest way to kill your ROI.

    Building a real estate portfolio is about more than just aesthetics; it’s about structural integrity and smart, strategic decision-making. It’s easy to get distracted by paint colors and light fixtures, but the real wealth is built in the guts of the home. When you invest in high-quality plumbing, you aren’t just fixing a leak; you are securing your equity and building a reputation as a serious investor. So, grab your laser measurer, get into the crawlspace, and do the work. It might be messy, but turning those crumbling systems into reliable, modern assets is exactly how you build lasting wealth.

    Frequently Asked Questions

    How do I decide if it's worth replacing the entire stack or if I can just patch up specific leaks to save my margins?

    Look, I get it—every dollar spent on a stack is a dollar taken away from your finishings. But here’s the reality: if you’re just patching leaks in an aging, corroded stack, you’re essentially putting a designer band-aid on a broken limb. If the pipe shows systemic degradation or multiple leak points, rip it out. Don’t gamble your margins on a callback or a catastrophic failure three months after closing. Replace the stack; protect your equity.

    Are there specific high-end fixtures that actually move the needle on resale value, or is it all just about what's behind the walls?

    Look, what’s behind the walls is your foundation, but the fixtures are your closing argument. You can’t hide a mediocre bathroom behind high-end pipes. I always tell my clients: invest in “touchpoints.” Think matte black widespread faucets, rainfall showerheads, or a sleek, high-efficiency dual-flush toilet. They’re tactile. When a buyer turns that heavy, quality handle, they feel the value. Don’t go overboard on gold leaf, but high-quality, modern hardware signals a premium renovation.

    At what point does a plumbing issue stop being a minor fix and start becoming a massive "red flag" that will scare off potential buyers?

    Look, if you’re just swapping out a leaky faucet or a loose handle, don’t sweat it. But the moment you see water staining on a ceiling, smell sewage, or find yourself replacing sections of pipe every single month, you’ve hit a red flag. If the issue is systemic—like a cracked main sewer line or widespread galvanized corrosion—it’s no longer a “quick fix.” It’s a deal-killer that will send buyers running.

  • Addressing Common Foundation Problems

    Addressing Common Foundation Problems

    I remember standing in the mud of my first major flip, staring at a hairline crack in a basement wall that looked like it was about to swallow my entire profit margin. My contractor wanted to quote me a figure that felt more like a down payment on a Tesla, claiming that any sign of movement meant a total, catastrophic overhaul. Honestly, the industry loves to blow these things out of proportion because fear sells. But here’s the truth: not every crack is a death sentence, and most people get intimidated by foundation repair costs before they even understand what they’re actually looking at.

    I’m not here to sugarcoat the mess or sell you on some magical, quick fix that won’t last. My goal is to strip away the jargon and show you how to distinguish a minor settlement from a structural nightmare. I’m going to give you the straight-up reality of what it costs, what actually matters, and how to manage these repairs without letting them sink your entire investment. Let’s stop sweating the small stuff and start focusing on building real equity.

    Table of Contents

    Spotting the Subtle Signs of Foundation Failure

    Spotting the Subtle Signs of Foundation Failure.

    When I’m walking through a new fixer-upper, I’m not just looking at the crown molding or the backsplash; I’m looking for the stories the house is trying to tell me. You won’t always find a massive, gaping fissure right in the middle of the living room. Often, the real red flags are much more subtle. Keep your eyes peeled for settlement cracks in walls, specifically those diagonal lines that start at the corners of door frames or windows. If those gaps are widening, the house is telling you the ground beneath it is shifting.
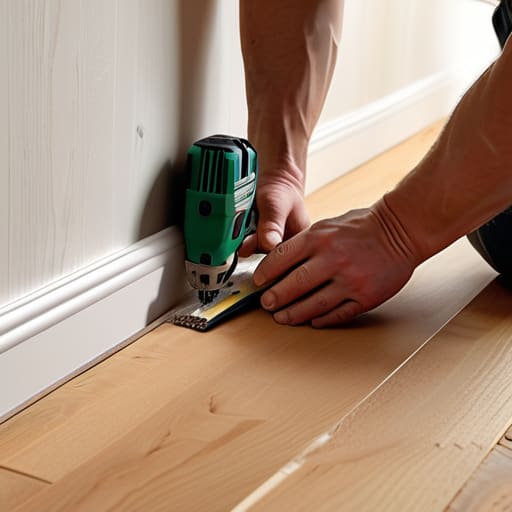
    I also pay close attention to how the floors feel under my boots. If you notice a slight slope or doors that suddenly refuse to latch properly, you’re likely dealing with uneven movement. This is frequently caused by soil expansion and contraction, especially in areas with heavy clay. It’s easy to dismiss a sticking door as “just an old house quirk,” but in this business, those little annoyances are often the first symptoms of a much deeper structural headache that could eat your margins alive.

    Settlement Cracks in Walls a Warning Sign

    Settlement cracks in walls a warning sign.

    When you’re walking through a potential flip, don’t just look at the paint colors or the updated kitchen; look at the corners of the rooms. If you see diagonal cracks creeping up from the baseboards or near door frames, pay attention. These settlement cracks in walls aren’t just cosmetic annoyances that a quick patch of spackle can fix. They are often the first physical evidence that the house is literally shifting beneath your feet.

    I’ve seen plenty of rookies try to ignore these lines, thinking they can just “drywall it away” and move on. That’s a massive mistake. Usually, these cracks are a direct result of soil expansion and contraction, where the ground moves too much due to moisture changes, leaving the structure unsupported. If the cracks are widening or if you can actually see daylight through them, you aren’t just looking at a minor fix; you’re looking at a structural red flag that could eat your entire profit margin if you aren’t careful.

    My Hard-Won Rules for Navigating Foundation Repairs Without Losing Your Shirt

    • Hire a structural engineer, not just a contractor. I’ve seen too many flippers let a general contractor tell them a crack is “just cosmetic” when it’s actually a structural nightmare. Pay for a real engineer’s report; it’s the only way to know exactly what you’re walking into before you sign the closing papers.
    • Check your drainage before you touch the concrete. Half the time, a foundation issue is just a glorified plumbing or landscaping problem. If your gutters are dumping water right against the footing, you’re just throwing money at a symptom instead of fixing the cause. Fix the water, and you might save yourself a massive piering bill.
    • Get multiple quotes, but watch for the “lowball trap.” If one contractor quotes you $5k and another quotes $15k, don’t immediately jump at the cheaper option. In this business, the cheap guy is often the one who’s going to disappear halfway through the job or leave you with a patch job that fails in six months.
    • Budget for the “unknown unknowns.” When I’m looking at a fixer-upper, I always bake an extra 15% into my renovation contingency specifically for the stuff behind the walls. If you’re digging up a foundation, you might find more than just dirt—you might find old pipes or unexpected soil shifts that weren’t in the initial inspection.
    • Don’t let a “scary” foundation stop a smart buy. I’ve walked away from plenty of beautiful mid-century gems because of foundation fears, but sometimes a little piering and some strategic grading are all that stand between you and a massive equity jump. Learn to distinguish between a deal-breaker and a manageable headache.

    The Bottom Line on Foundation Red Flags

    Don’t panic at every hairline fracture; learn to distinguish between minor cosmetic settling and the structural cracks that actually eat your profit margins.

    Always prioritize a professional structural engineer’s assessment over a contractor’s quick quote to ensure you aren’t throwing good money after bad.

    View foundation issues as a negotiation tool, not a dealbreaker, because a well-planned repair is just a stepping stone to building massive equity.

    The Real Cost of Ignoring the Basics

    “I’ve seen too many rookie investors get blinded by a gorgeous kitchen or a trendy open floor plan, only to realize they’ve bought a beautiful house sitting on a sinking ship. You can slap on all the designer paint you want, but if the bones are broken, you aren’t building equity—you’re just subsidizing a disaster.”

    Gareth Trelawny

    The Bottom Line on Foundation Integrity

    The Bottom Line on Foundation Integrity.

    At the end of the day, don’t let a few cracks in the drywall or a slightly uneven floorboard send you running for the hills. We’ve covered how to distinguish between harmless cosmetic settling and the serious structural red flags that can actually tank your ROI. Whether it’s those diagonal cracks in the plaster or doors that suddenly refuse to latch, the goal isn’t to avoid every single imperfection—it’s to identify which ones are manageable repairs and which ones are deal-breakers for your budget. Knowledge is your best tool here; once you can read a house like a blueprint, you won’t be guessing anymore.

    Look, I know the idea of digging up a crawlspace or dealing with piering can feel overwhelming, but that’s exactly where the opportunity lies. While other investors are scared off by a little bit of structural drama, you’ll be the one with the strategic plan to fix it and move on to the profit. Every crumbling wall is just a hurdle between you and the equity you’re working so hard to build. Stay pragmatic, keep your laser measurer handy, and remember: the best deals are often hidden behind the messiest repairs.

    Frequently Asked Questions

    How do I tell the difference between a cosmetic crack in my drywall and a structural issue that's actually going to drain my bank account?

    Here’s the rule of thumb I use: look at the direction and the width. If it’s a hairline, vertical crack in your drywall, it’s usually just the house breathing—purely cosmetic. But if you see diagonal cracks, or anything wider than a nickel that seems to be traveling from the ceiling down to the floor, stop right there. That’s not just an aesthetic nuisance; that’s your equity leaking out of the foundation.

    Is it worth sinking money into a foundation repair if I'm planning to flip the house in under a year?

    Look, I’ll give it to you straight: if the foundation is compromised, you don’t have a choice. You can’t hide structural failure with a fresh coat of paint and some mid-century modern accents. If you try to flip a house with active movement, the inspector will flag it, and your buyer’s financing will fall through. Fix it now. It’s a heavy upfront cost, but it’s the difference between a profitable exit and a total money pit.

    At what point do I stop DIY-ing the minor fixes and call in a professional engineer before the whole thing becomes a money pit?

    Look, I love a good DIY project as much as the next person, but foundation work isn’t the place to play hero. If you see cracks that are wider than a nickel, or if your doors and windows are suddenly sticking like they’re glued shut, stop touching it. That’s when you call a structural engineer. It’s better to pay for a professional assessment now than to pour thousands into a “fix” that doesn’t actually stabilize the house.

  • Signs You Need a New Roof

    Signs You Need a New Roof

    I still remember standing in the middle of a muddy driveway last October, staring up at a sagging roofline while a contractor tried to sell me a “premium architectural system” that cost more than my entire kitchen budget. He was talking about aesthetics and prestige, but all I could see was the leaking dark spots on the ceiling of the master bedroom and the way my profit margins were evaporating with every raindrop. Most people treat a roofing replacement like a luxury upgrade or some complex engineering mystery, but let’s get one thing straight: it’s a structural necessity and a high-stakes math problem. If you let a bad roof dictate your renovation budget, you aren’t investing; you’re just subsidizing a contractor’s new boat.

    I’m not here to sell you on fancy shingles or give you a lecture on architectural history. My goal is to show you how to approach a roofing replacement as a strategic asset move that protects your downside and maximizes your equity. I’m going to walk you through how to spot the real red flags, how to vet a crew without getting played, and how to ensure you’re spending your money on longevity rather than just marketing fluff.

    Table of Contents

    Spotting the Signs You Need a New Roof Before Disaster Strikes

    Spotting the Signs You Need a New Roof Before Disaster Strikes

    When I’m walking a new property, I’m not just looking at the crown molding or the layout; I’m looking up. You can have the most stunning mid-century modern interior, but if the structure above you is failing, your investment is a ticking time bomb. One of the first signs you need a new roof is curling or missing shingles. If you see granules—those little sandy bits—clogging your gutters, your shingles are losing their protective layer and are likely nearing the end of their functional life.

    Don’t wait for a ceiling stain to tell you there’s a problem; by then, you’re already paying for water damage remediation on top of the actual fix. I always tell my clients to keep a close eye on the roof lifespan by material when they are calculating their initial rehab budget. An asphalt roof won’t last as long as metal, and knowing that upfront prevents a massive hit to your margins three years down the line. If you see sagging ridge lines or light peeking through the attic, stop stalling and get a pro out there.

    Using a Roof Replacement Cost Estimator to Protect Your Capital

    Using a Roof Replacement Cost Estimator to Protect Your Capital

    When you’re hunting for your next flip, your margins are your lifeline. The last thing I want to see is a surprise $15,000 bill popping up halfway through a rehab because I didn’t account for a failing roof. This is exactly why I never step onto a job site without first running the numbers through a roof replacement cost estimator. It isn’t about being cheap; it’s about precision. You need to know if you’re looking at a simple patch job or if you need to budget for a complete overhaul before you even make an offer on the property.

    Don’t just take a contractor’s word for it, either. I always compare their quotes against my own estimates, specifically looking at the trade-offs between asphalt shingles vs metal roofing. While metal might offer a longer lifespan, the upfront cost can eat into your immediate cash flow. Use these tools to build a realistic contingency fund so that when the unexpected happens, it’s just a line item in your budget rather than a catastrophic hit to your ROI.

    Five Strategic Moves to Protect Your Margins During a Roof Replacement

    • Don’t just hire the cheapest contractor you find on a flyer; vet them like you’re hiring a business partner because a botched install will cost you triple in repairs and lost equity down the line.
    • Always get at least three detailed quotes that break down labor versus materials so you can see exactly where your capital is going and spot any “fluff” added to the estimate.
    • Prioritize high-quality underlayment and flashing over flashy shingles; the stuff you can’t see is what actually protects your structural integrity and keeps the moisture out of your investment.
    • Factor in the “hidden” costs like debris removal and potential deck repairs when you’re budgeting, otherwise, your renovation math is going to be a disaster by the time the crew leaves.
    • Use the replacement as an opportunity to upgrade your ventilation; a well-ventilated attic prevents heat buildup and extends the lifespan of your new roof, making your asset much more durable for the long haul.

    The Bottom Line: Protecting Your Margins and Your Asset

    Don’t play guessing games with a failing roof; identify the red flags early so you aren’t hit with a massive, unplanned capital expenditure that kills your ROI.

    Use a cost estimator as a shield for your bank account, ensuring you have a realistic budget for materials and labor before you ever sign a contract.

    View a roof replacement not as a drain on your cash flow, but as a strategic investment that secures the structural integrity and resale value of your property.

    The Hidden Margin Killer

    “A bad roof is a silent equity killer; you can put all the mid-century modern charm and designer lighting you want into a house, but if the ceiling is bowing from water damage, you aren’t building wealth—you’re just subsidizing your neighbor’s renovation.”

    Gareth Trelawny

    Protecting Your Investment from the Top Down

    Protecting Your Investment from the Top Down

    At the end of the day, a roof isn’t just some boring architectural necessity; it is the primary shield for your entire investment. We’ve talked about how to spot the red flags before they turn into a structural nightmare and why you absolutely cannot afford to guess on your budget without using a reliable cost estimator. If you ignore the curling shingles or the slow leaks, you aren’t just saving money in the short term—you are actively eroding your profit margins and inviting expensive mold remediation down the line. Treat your roofing replacement as a strategic capital expenditure rather than an annoying chore, and you’ll keep your equity safe from the elements.

    I know that staring down a massive renovation bill can feel overwhelming, especially when you’re trying to build something from the ground up. But remember, the most successful investors aren’t the ones who avoid the mess; they are the ones who tackle the critical repairs head-on so the foundation of their wealth remains unshakable. Don’t let a neglected roof stand between you and your next big flip. Get in there, do the work right the first time, and turn that unprotected liability into a solid, high-value asset that will serve you for decades.

    Frequently Asked Questions

    How do I know if I should just patch a few shingles or if I'm looking at a full, expensive replacement?

    Look, I’ve been in enough crawlspaces to know the difference. If it’s just a handful of shingles blown off by a storm, grab some sealant and patch it—don’t overspend. But if you’re seeing widespread granule loss, curling edges, or water stains on your ceiling, stop playing games. A patch is just a band-aid on a hemorrhage. At that point, you aren’t saving money; you’re just delaying an expensive disaster that’ll eat your margins.

    Which roofing materials actually hold their value best when I'm trying to flip the property?

    If you’re flipping, don’t get distracted by flashy, high-end luxury materials that won’t see a return. You want the sweet spot between durability and curb appeal. For most of my projects, I stick with architectural asphalt shingles. They look premium enough to wow buyers but won’t blow your margins. If you’re in a high-end market, metal roofing is a solid play for that modern aesthetic, but for pure ROI? Stick to high-quality shingles.

    How much of a buffer should I bake into my renovation budget to account for unexpected structural damage once the old roof comes off?

    Look, if you’re playing it safe, you need to bake at least a 15% to 20% contingency buffer into your roofing budget. When those old shingles come off, you never truly know what’s lurking underneath—rotted decking, compromised rafters, or even mold. I’ve seen too many flips stall because a “simple” roof job turned into a structural nightmare. Don’t let a lack of cash flow turn your equity into a money pit.

  • Creating an Open Concept Living Space

    Creating an Open Concept Living Space

    I still remember standing in the middle of a 1970s ranch-style fixer-upper last June, covered in drywall dust and feeling the sheer claustrophobia of a kitchen that felt more like a bunker than a living space. I pulled my laser measurer from my bag, staring at a load-bearing wall that stood like a fortress between the stove and the dining area. Everyone tells you that an open concept layout is the holy grail of modern real estate, but they rarely mention the headache of structural engineering or the sheer chaos of a renovation gone wrong. Most people see a Pinterest board; I see a logistical puzzle that can either make you a fortune or drain your bank account before the first coat of paint is even dry.

    I’m not here to sell you on a lifestyle trend or some overpriced architectural fantasy. My goal is to give you the unvarnished truth about how to execute an open concept layout that actually increases your property value. I’ll show you how to identify which walls are worth losing and which ones are essential for your bottom line. We’re going to focus on smart, strategic demolition that turns cramped, dated floor plans into high-equity assets.

    Table of Contents

    Mastering Kitchen Living Room Integration for Maximum Profit

    Mastering Kitchen Living Room Integration for Maximum Profit

    When you’re looking at a house that feels like a series of cramped, dark boxes, the kitchen-to-living-room connection is usually where the biggest profit is hiding. Most older builds have a wall separating the cook from the guests, which kills the vibe and the resale value. My approach to kitchen living room integration isn’t just about swinging a sledgehammer; it’s about understanding how people actually move through a space. You want to create a seamless transition that makes the entire footprint feel twice as large without actually adding a single square foot of construction.

    The real headache—and the part where most rookies blow their budget—is load bearing wall identification. Before you start dreaming of massive islands and breakfast bars, you have to know if that wall is holding up the second floor or if it’s just a cosmetic partition. Once you clear that hurdle, focus on zoning open spaces through subtle cues like lighting or floor transitions rather than physical barriers. This maintains that airy, modern home floor plan feel while ensuring the kitchen doesn’t just bleed into the sofa area in a messy, disorganized way.

    Natural Light Optimization Making Small Spaces Feel Massive

    Natural Light Optimization Making Small Spaces Feel Massive

    When you’re working with a tighter footprint, you can’t rely on sheer square footage to impress a buyer. Instead, you have to play with perception. One of my favorite ways to trick the eye is through natural light optimization. If I’m looking at a dark, cramped renovation, I’m not just looking at where the windows are—I’m looking at what’s blocking them. Replacing a heavy, dark wood door with a glass-paneled version or swapping out a standard interior door for something with a transom window can change the entire vibe. It’s about letting that light travel deeper into the house, which makes a modest room feel significantly more expensive.

    I also pay close attention to the interior design flow when it comes to window placement. If you’re dealing with a tricky layout, consider using mirrors strategically opposite your primary light source. It sounds like a basic design school trick, but in a real-world flip, it’s a high-impact, low-cost way to bounce brightness around. When the light hits the right angles, those small, awkward corners suddenly disappear, and you’re left with a space that feels airy and intentional rather than squeezed.

    Don't Just Tear Down Walls—Design the Flow

    • Define your zones with furniture, not just floor space. If you open up a room without using area rugs or strategic sofa placement to anchor the kitchen and living areas, the whole space ends up feeling like a disorganized warehouse instead of a high-end home.
    • Mind your sightlines before you swing the sledgehammer. I always grab my laser measurer to check what someone will see from the front door; if the first thing they see is a cluttered sink full of dishes, you haven’t created an open layout, you’ve just created a visual mess.
    • Invest in consistent flooring throughout the entire footprint. Nothing kills the “expensive” feel of an open concept faster than awkward transitions between different types of wood or tile; you want a seamless flow that makes the entire square footage feel unified and expansive.
    • Plan your lighting layers with precision. You can’t rely on a single overhead fixture anymore; you need a mix of recessed lighting for general brightness, pendants over the island for task work, and floor lamps to create mood in the seating area so the space doesn’t feel flat.
    • Don’t overlook the acoustic nightmare. Open spaces echo, and nothing makes a house feel cheap like a loud, hollow sound; I always recommend adding soft textures—like heavy drapes or acoustic ceiling treatments—to soak up the noise and keep the vibe sophisticated.

    The Bottom Line: Turning Layouts into Leverage

    Don’t just demo for the sake of it; ensure every wall you knock down creates a logical flow that justifies the renovation cost in the final appraisal.

    Prioritize the “sightline” effect—if a buyer can’t see from the kitchen island through to the living area, you’ve missed the primary value driver of an open layout.

    Use strategic lighting and flooring continuity to bridge the gap between zones, making the transition feel intentional rather than just a big, empty room.

    The Real Value of a Floor Plan

    “Stop looking at a floor plan as just a series of rooms; look at it as a series of barriers. When I’m walking through a fixer-upper, I’m not seeing walls—I’m seeing the potential for flow, light, and the kind of spatial freedom that actually drives a property’s resale value.”

    Gareth Trelawny

    The Bottom Line on Open Layouts

    The Bottom Line on Open Layouts.

    At the end of the day, creating an open concept layout isn’t just about following a trend or making a house look “pretty” for a listing photo. It’s a strategic move to maximize your ROI by fixing the fundamental flaws that drive buyers away—specifically cramped kitchens and dark, claustrophobic hallways. By integrating the living areas and prioritizing natural light, you aren’t just moving walls; you are fundamentally changing how a person experiences a home. When you focus on these high-impact zones, you stop selling square footage and start selling lifestyle and flow, which is exactly what turns a modest fixer-upper into a high-value asset.

    I know that looking at a blueprint full of load-bearing walls and outdated partitions can feel overwhelming, especially when you’re staring down a massive renovation budget. But remember, every great portfolio I’ve built started with a single, messy demolition. Don’t let the dust and the chaos intimidate you. If you can see the potential where others only see a headache, you’ve already won half the battle. Stop looking at what a house is and start seeing what it could be. Grab your laser measurer, get to work, and let’s start turning those crumbling walls into solid equity.

    Frequently Asked Questions

    How do I manage the loss of privacy or noise control when I tear down the walls between the kitchen and the living area?

    Look, I’ll be the first to admit: the “open concept” dream can quickly become a noisy nightmare if you aren’t careful. If you’re worried about losing that acoustic barrier, don’t just leave it wide open. I love using glass-paneled sliding doors or even stylish steel-framed partitions. You get all that beautiful visual flow and natural light, but you can actually shut the door when the dishwasher is running or you need some peace.

    At what point does an open concept become a liability for resale, especially for buyers looking for formal dining rooms or quiet workspaces?

    You hit on the exact trap that ruins a lot of flips. An open concept becomes a liability the moment you sacrifice every single “zone” in the house. If a buyer can’t find a quiet corner for a home office or a dedicated spot for a dinner party, they’ll pass. My rule of thumb? Always leave room for intention. If you’re gutting everything, make sure you’ve built in at least one semi-private nook or a defined dining alcove.

    How can I use flooring and lighting to define specific zones without having to put the walls back up?

    Think of it like invisible boundaries. If you want to separate the dining area from the lounge without losing that airy feel, use flooring to anchor the space. A sudden shift from wide-plank oak to a textured tile or a strategically placed area rug tells the eye exactly where one room ends and another begins. Pair that with layered lighting—think recessed cans for general flow, but a low-hanging statement pendant over the dining table to claim that zone.