Category: Renovation

  • Essential Bathroom Upgrades for House Flipping

    Essential Bathroom Upgrades for House Flipping

    I still remember the smell of damp drywall and old grout from my first solo flip—a cramped, 1970s ranch where the master ensuite looked more like a crime scene than a sanctuary. Most “experts” will tell you that a high-end bathroom renovation requires a six-figure budget and custom Italian marble to see a return, but honestly? That’s just expensive noise designed to separate you from your cash. I’ve stood in enough dusty job sites to know that the real money isn’t made in the gold-plated faucets; it’s found in the strategic decisions you make before the first tile is even laid.

    I’m not here to sell you on a lifestyle magazine fantasy or a list of overpriced trends that will be dated by next season. Instead, I’m going to show you how to approach a bathroom renovation with a cold, calculated eye for ROI. We’re going to talk about where to spend your hard-earned capital and, more importantly, where to cut corners safely to maximize your equity. If you’re ready to stop guessing and start building real wealth through smart, tactical rehabs, let’s get to work.

    Table of Contents

    Modern Bathroom Remodeling Ideas for Maximum Equity

    Modern Bathroom Remodeling Ideas for Maximum Equity

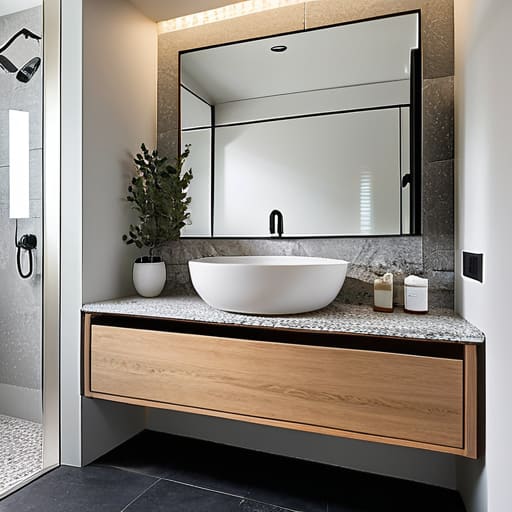
    When I’m walking through a potential flip, I’m not looking for a pristine master suite; I’m looking for the bones that can support a high-end finish. To hit those luxury bathroom aesthetic trends without draining your entire renovation budget, focus on high-impact, tactile elements. Think matte black fixtures paired with floating vanities to create a sense of airiness. If you’re dealing with a cramped layout, don’t panic—small bathroom space optimization is where the real money is made. Using large-format tiles can actually make a tiny room feel expansive, provided you choose the right grout color to minimize visual clutter.

    Don’t get distracted by flashy, expensive gadgets that won’t actually move the needle during a resale. Instead, prioritize the stuff that buyers can’t see but will definitely notice if it fails. I always tell my clients to budget for bathroom plumbing upgrades early in the process. It’s much better to swap out old, corroded pipes while the walls are open than to face a catastrophic leak six months after you’ve closed the deal. Solid, functional infrastructure is what turns a quick flip into a long-term asset.

    Navigating Your Bathroom Renovation Cost Estimator Without Breaking

    Look, I’ve seen too many investors go into a project with a “vibe” and no actual math, only to end up bleeding cash before they even pick out a tile. Using a bathroom renovation cost estimator isn’t about being stingy; it’s about protecting your margins. When I’m walking a site, I’m not just looking at the pretty finishes; I’m looking at the guts. You have to account for the invisible stuff—like essential bathroom plumbing upgrades—that can easily blow a budget if you’re only focusing on the surface level.

    The trick is to categorize your spending into “equity builders” and “aesthetic fluff.” If you’re working with a tight budget, prioritize high-impact changes like new fixtures or better lighting over high-end stone that won’t actually move the needle on your resale price. I always tell my clients to build a 15% contingency buffer into their estimates. Whether you’re dealing with unexpected mold or a subfloor that’s seen better days, that buffer is the difference between a profitable flip and a financial sinkhole.

    My Golden Rules for Avoiding Renovation Money Pits

    • Prioritize the “wet” work first; I’ve seen too many investors waste money on high-end vanity installs only to have to tear them out because they ignored a hairline crack in the subfloor or a slow leak in the waterproofing.
    • Stop chasing trends and start looking at timeless durability; a trendy brass fixture might look great on Instagram today, but if it’s hard to clean or looks dated in two years, you’re eating that cost when it’s time to flip.
    • Don’t skimp on the lighting plan; a single, lonely overhead light makes even the most expensive tile look cheap, so always budget for layered lighting—task, ambient, and accent—to create that high-end boutique feel.
    • Think about the layout before you think about the aesthetics; moving a toilet or a drain is the fastest way to blow your budget, so if the current footprint works, keep it and pour that saved cash into premium finishes instead.
    • Always, always over-order your tile; there is nothing more soul-crushing than being three tiles short on a Sunday afternoon when the supplier is closed, and trust me, you’ll need those extras for future repairs once the house is sold.

    Bottom Line: Turning Tiles into Equity

    Stop chasing expensive trends; focus on high-impact, durable upgrades like modern fixtures and clean tiling that appeal to the widest range of buyers.

    Always keep a buffer in your renovation budget for the “hidden” issues—because once you peel back those old bathroom tiles, you never know what kind of water damage you’re actually dealing with.

    View every renovation through the lens of ROI, ensuring that every dollar spent on your bathroom is a calculated move toward increasing the property’s total market value.

    The Real Value of a Dirty Bathroom

    Stop looking at a cracked vanity and water-stained ceiling as a headache; look at them as a discount on your entry price. In this game, a messy bathroom isn’t a dealbreaker—it’s your biggest opportunity to manufacture equity before you even list the property.

    Gareth Trelawny

    The Bottom Line on Bathroom ROI

    The Bottom Line on Bathroom ROI.

    At the end of the day, a successful bathroom renovation isn’t about picking the most expensive marble slab or chasing every passing design trend. It’s about the strategic intersection of aesthetics and utility. We’ve walked through how to select modern fixtures that actually move the needle on appraisal, and more importantly, how to use a cost estimator to keep your budget from spiraling into a money pit. Remember, your goal isn’t just to create a pretty space; it’s to ensure every dollar you pour into those tiles and vanities translates into tangible, measurable equity. If you keep your eye on the numbers and your hands on the quality of the materials, you aren’t just remodeling—you are building an asset.

    I know that looking at a gutted bathroom with exposed pipes and outdated plumbing can feel overwhelming, but that’s exactly where the opportunity lives. Don’t let the dust and the chaos intimidate you. Every time I step onto a job site that looks like a disaster zone, I don’t see a mess; I see the future profit margin waiting to be unlocked. Real estate investing is a marathon, not a sprint, and mastering these high-impact renovations is how you win. So, grab your laser measurer, trust your gut, and get to work. It’s time to turn those crumbling walls into wealth.

    Frequently Asked Questions

    How do I decide whether to gut the entire bathroom or just swap out the fixtures to keep my margins high?

    Look at the bones first. If the plumbing is solid and the layout works, don’t go tearing out walls just for the sake of it—that’s how you bleed your margins dry. Swap the fixtures, refresh the tile, and go heavy on high-end hardware to create that “wow” factor. But, if you’re staring at moldy subfloors or ancient, leaking pipes, gut it. You can’t build equity on a shaky foundation.

    What are the biggest "hidden" red flags I should look for behind the walls before I commit to a renovation budget?

    Look, if you’re only looking at the pretty tile, you’re doing it wrong. Before you commit a dime to those mid-century fixtures, you need to know what’s lurking behind the drywall. I always check for water staining around the tub—that’s a sign of slow, systemic leaks. Also, watch for uneven flooring or cracks in the subfloor; that usually means structural rot or a failing joist. If the plumbing looks like a spaghetti mess of galvanized steel, budget for a total overhaul.

    At what point does spending more on high-end finishes stop being a smart investment and start eating into my actual profit?

    Look, I love a high-end matte black fixture as much as the next person, but there’s a hard ceiling. You stop seeing a return the moment you start buying for your own taste instead of the neighborhood’s ceiling price. If you’re in a mid-range suburb, installing a $3,000 designer soaking tub won’t magically jump your sale price by $5,000. You’re just subsidizing your hobby with your profit margin. Stick to high-quality, durable essentials and save the luxury splurges for your personal sanctuary.

  • Choosing Durable Flooring for Rental Properties

    Choosing Durable Flooring for Rental Properties

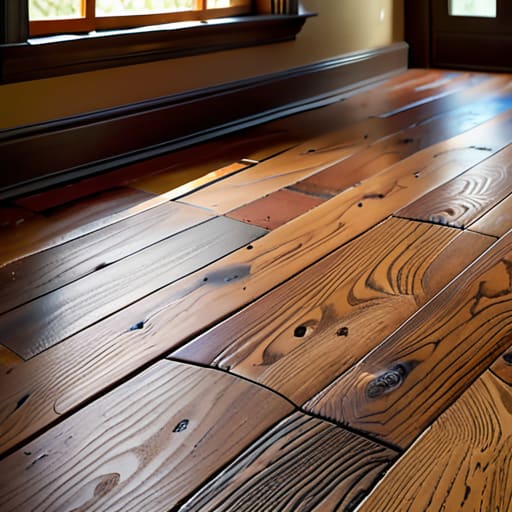
    I was standing in the middle of a gutted ranch-style fixer-upper last Tuesday, the smell of damp subflooring and old sawdust thick in the air, when I realized I was staring at a total profit killer. Most people see a dated, stained carpet and think they can just steam it or lay a cheap rug over the mess, but they’re dead wrong. If you want to actually see a return on your investment, you have to stop treating flooring replacement like an optional cosmetic tweak and start seeing it as a foundational equity builder. I’ve seen too many rookie investors bleed cash by choosing materials that look great in a showroom but crumble under the reality of a rental or a high-traffic flip.

    I’m not here to sell you on some high-end, boutique designer trends that will eat your margins alive. Instead, I’m going to give you the straight truth on which materials actually hold up and which ones are just expensive distractions. I’ll show you how to navigate the chaos of a job site to pick flooring that maximizes your resale value without breaking your bank account. Let’s get to work.

    Table of Contents

    Navigating Flooring Installation Costs Without Breaking the Bank

    When you’re looking at a spreadsheet of potential renovation expenses, it’s easy to get paralyzed by the numbers. I’ve seen investors blow their entire profit margin because they chased a luxury aesthetic without calculating the true flooring installation costs. You have to look past the price per square foot and account for the hidden killers—specifically, the labor and the prep work. If your joists are uneven or the old adhesive is caked on, your subfloor preparation for new floors is going to eat your budget alive before you even unbox a single plank.

    My rule of thumb? Don’t buy for the look; buy for the math. If you’re flipping a rental or a high-turnover property, you need to prioritize the flooring material lifespan over everything else. I rarely touch cheap laminate that’s going to buckle in six months. Instead, I lean toward waterproof flooring solutions like high-grade LVP. It’s durable, it’s easy to install, and most importantly, it won’t force you back into a costly rehab two years down the line. Focus on materials that offer the best ROI, not just the lowest upfront sticker price.

    Selecting Home Renovation Flooring Options That Command Premium Rents

    Selecting Home Renovation Flooring Options That Command Premium Rents

    If you’re looking to maximize your ROI, you have to stop thinking like a homeowner and start thinking like a landlord. When I’m scouting a new flip or a rental, I’m not looking for what I personally like; I’m looking for what won’t result in a maintenance call six months after a tenant moves in. This is where choosing the right home renovation flooring options becomes a strategic play rather than a design choice.

    For high-end rentals, I almost always lean toward luxury vinyl plank (LVP). It’s easily the best flooring for high traffic areas because it can take a beating from pets, spilled wine, and heavy foot traffic without losing its luster. If you’re aiming for a premium price point, don’t skimp on the quality—invest in waterproof flooring solutions that mimic the look of hardwood. It gives your tenants that high-end aesthetic they crave while ensuring the flooring material lifespan actually justifies your initial investment. You want something that looks expensive but is functionally indestructible.

    My Non-Negotiable Rules for Flooring That Actually Pays Off

    • Stop chasing trends with trendy patterned tiles; stick to neutral, high-quality tones like light oak or slate grey that appeal to the widest possible pool of buyers or renters.
    • Always factor in a 10% waste buffer for your materials, because nothing kills my profit margins faster than running short on planks halfway through a job and paying a premium for emergency shipping.
    • Don’t skimp on the underlayment—if you’re installing LVP, a solid subfloor and high-quality padding are what prevent those annoying squeaks and gaps that make a house feel “cheap” during a walkthrough.
    • Prioritize durability over everything else; if you’re flipping a rental, skip the delicate hardwoods and go for high-grade luxury vinyl plank that can survive a spilled glass of wine or a heavy pet.
    • Check your subfloor before you even order the new stuff—I’ve seen too many investors blow their budget by trying to lay expensive flooring over uneven, rotting plywood that should have been replaced weeks ago.

    The Bottom Line on Flooring ROI

    Stop chasing trends; stick to durable, neutral materials like LVP that can withstand heavy foot traffic and won’t look dated by the time you’re ready to sell.

    Always buffer your budget for the “hidden” costs, because once you rip up that old carpet, you’re almost guaranteed to find subfloor issues that need fixing before the new stuff goes down.

    View flooring as a tool for equity, not just an aesthetic choice—if a material doesn’t actively increase your property value or decrease your maintenance headaches, it’s a waste of capital.

    The Margin is in the Materials

    Don’t treat flooring like an afterthought or a way to save a buck; if you pick cheap, flimsy materials just to get the job done, you’re essentially throwing your profit margin straight into the landfill.

    Gareth Trelawny

    Making the Call on Your Next Floor

    Making the Call on Your Next Floor.

    At the end of the day, flooring isn’t just about picking a color from a swatch book; it’s a calculated move in your investment strategy. You’ve looked at the numbers, weighed the installation costs against your budget, and identified the specific materials that will actually make a tenant stop scrolling and start applying. Remember, the goal isn’t to create a museum-quality masterpiece that eats your entire profit margin. It’s about finding that sweet spot between durability and aesthetics. Don’t get paralyzed by choice—pick a high-quality, hard-wearing option that looks expensive but stays within your projected ROI, and then get the installers in there so you can move on to the next task.

    Renovating is messy, loud, and occasionally frustrating, but that’s exactly where the money is made. While everyone else is looking at a house and seeing outdated carpet and scratched hardwoods, you’re seeing the hidden equity waiting to be unlocked. Every square foot of new flooring you lay down is a brick in the foundation of your financial future. Stop overthinking the perfect shade of grey and start building your portfolio. Get your laser measurer out, grab your contractor, and start turning those crumbling surfaces into solid assets.

    Frequently Asked Questions

    How do I know if my subfloor is actually worth saving or if I'm just throwing money into a structural nightmare?

    Look, I’ve seen too many investors get blinded by a pretty tile sample only to realize their foundation is a disaster. Grab your laser measurer and check for level. If you find soft spots, water staining, or significant bowing, stop right there. That’s not a “minor fix”; that’s a structural nightmare. Don’t patch over rot to save a buck today if it means losing your entire margin to a subfloor failure tomorrow.

    Which flooring materials actually hold up to heavy foot traffic without looking trashed after six months?

    If you’re looking for durability that won’t tank your margins, skip the cheap laminate. It looks trashed the second a heavy boot hits it. I swear by Luxury Vinyl Plank (LVP) for my rentals; it’s waterproof, scratch-resistant, and handles heavy foot traffic like a champ. If you have a higher budget, engineered hardwood is the gold standard. It gives you that premium feel while standing up to real life, ensuring your equity stays intact.

    Is it better to go with a high-end hardwood that costs more upfront, or a durable LVP that protects my margins?

    Look, if you’re playing the long game for a high-end rental or a luxury flip, hardwood is the gold standard for equity. But if you’re looking to protect your margins and minimize headache, go with high-quality LVP. It’s virtually indestructible, waterproof, and much easier on the budget. For most of my mid-range rehabs, I choose LVP—it keeps the tenants happy and prevents the costly floor replacements that eat my profits alive.

  • Kitchen Design Strategies for Property Value

    Kitchen Design Strategies for Property Value

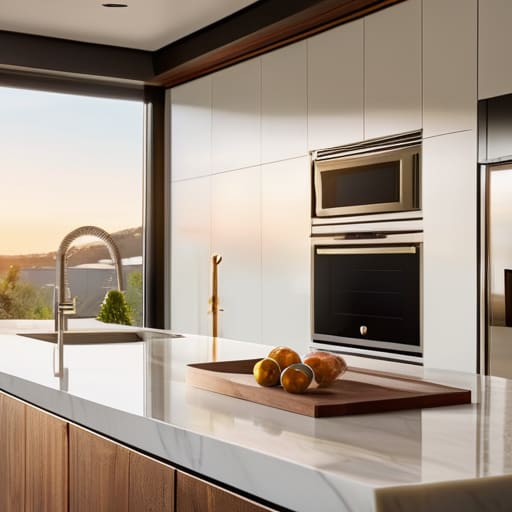
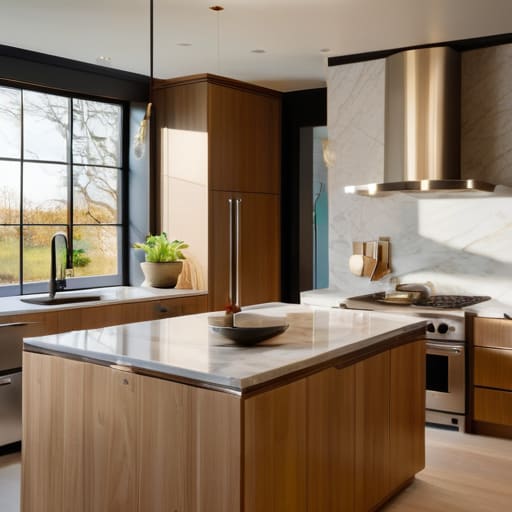
    I remember standing in the middle of a 1970s ranch-style fixer-upper last October, clutching my laser measurer and staring at a kitchen that looked like it hadn’t been touched since the Nixon administration. The air was thick with the smell of damp particle board and decades of stale grease, and honestly, most people would have seen a total loss. But while the “experts” on HGTV would tell you that you need a six-figure budget and a complete gut job to make it livable, I saw something else entirely. To me, kitchen remodeling isn’t about buying the most expensive marble slabs to impress your neighbors; it’s about identifying the structural bones and making surgical, high-impact moves that actually move the needle on your property value.

    I’m not here to sell you on a dream or walk you through a Pinterest board of unattainable luxury. I’m going to show you how to approach your project with a developer’s mindset, focusing on the strategic upgrades that turn a messy renovation into solid, tangible equity. We’re going to cut through the fluff and talk about real costs, smart material choices, and how to avoid the common traps that bleed your budget dry.

    Table of Contents

    Mastering Modern Kitchen Layout Ideas for Maximum Value

    Mastering Modern Kitchen Layout Ideas for Maximum Value

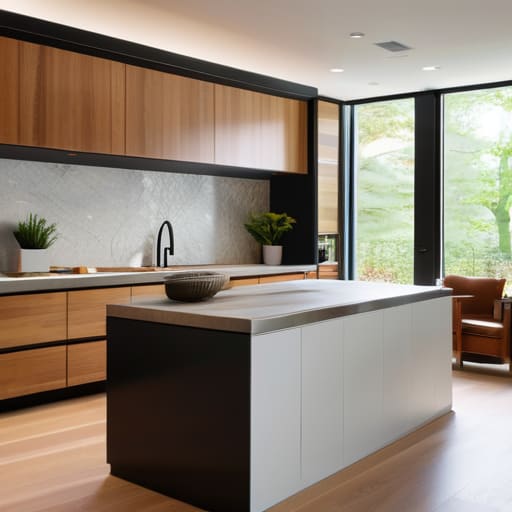
    When I’m walking through a potential flip, I’m not just looking at the backsplash; I’m looking at the flow. You can have the most expensive marble in the world, but if the floor plan is a disaster, you’ve wasted your money. I always prioritize the kitchen workspace triangle—the relationship between the sink, stove, and fridge. If a buyer feels cramped while trying to prep a meal, they won’t care how pretty the pendant lights are. Efficiency is what drives resale value.

    I’ve also noticed that current modern kitchen layout ideas are leaning heavily into open-concept zones that blend prep work with social areas. I love a well-placed island that doubles as a breakfast bar, but don’t overextend yourself. I tell my clients to focus on high-impact cabinetry and countertop materials that feel premium without breaking the bank. If you can create a layout that feels intentional and spacious, you aren’t just fixing a room; you are engineering a massive chunk of equity.

    Smart Kitchen Technology Investing in Future Proof Returns

    Smart Kitchen Technology Investing in Future Proof Returns

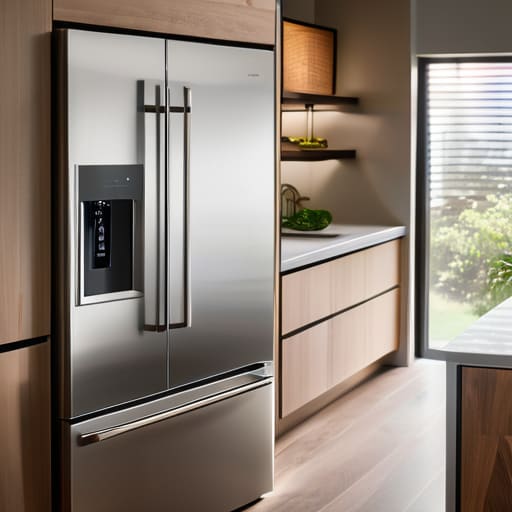
    When I’m walking through a property, I’m not just looking at the current state of the appliances; I’m looking at how much friction they’ll create for a future buyer. Integrating smart kitchen technology isn’t about buying every expensive gadget on the market; it’s about strategic upgrades that scream “low maintenance” and “modern living.” Think smart refrigerators that track inventory or touchless faucets that prevent water waste. These aren’t just luxuries; they are signals to a buyer that the home has been maintained with an eye toward the future.

    However, don’t get so caught up in the digital bells and whistles that you neglect the foundational elements. I’ve seen investors blow their entire budget on high-tech gadgets only to realize they skimped on the actual cabinetry and countertop materials. If the stone is cheap and the cabinets are flimsy, a smart oven won’t save your resale value. You want a balance where the tech feels like a seamless extension of a high-quality build. Aim for tech that enhances the workflow, ensuring your renovation feels like a premium, turnkey investment rather than a collection of expensive toys.

    The Renovation Reality Check: 5 Ways to Protect Your ROI

    • Stop overspending on custom cabinetry; unless you’re buying a trophy house, high-quality semi-custom options offer the best balance of aesthetics and profit margins.
    • Lighting isn’t just about seeing what you’re chopping; layering your task, ambient, and accent lighting is the cheapest way to make a budget renovation look like a high-end designer job.
    • Don’t get distracted by trendy backsplash tiles that will look dated in two years; stick to timeless neutrals so your potential buyers don’t feel like they’re stepping into your personal mood board.
    • Prioritize the “Work Triangle”—if your sink, stove, and fridge are a logistical nightmare, no amount of marble countertops will save the layout or the resale value.
    • Focus on the hardware; swapping out cheap, builder-grade pulls for something with weight and a clean industrial finish is a low-cost move that adds immediate perceived value.

    The Bottom Line: Turning Your Kitchen Reno into Real Equity

    Don’t get distracted by flashy, high-end gadgets that won’t actually move the needle; focus your budget on a functional layout and high-impact finishes that buyers can actually visualize themselves using.

    Always prioritize the “work triangle” and storage solutions, because a kitchen that looks pretty but fails the usability test is just a wasted investment.

    Treat every renovation decision like a business transaction—if a specific upgrade doesn’t directly contribute to the property’s resale value or long-term utility, leave it alone and keep your capital for the next deal.

    ## Stop Seeing Old Cabinets, Start Seeing Equity

    “A dated kitchen isn’t a dealbreaker; it’s an opportunity. While most buyers see peeling laminate and outdated tile as a headache, I see a high-margin roadmap to increasing a property’s value.”

    Gareth Trelawny

    Turning Vision into Value

    Turning Vision into Value through remodeling.

    At the end of the day, a successful kitchen remodel isn’t just about picking out a pretty backsplash or a trendy faucet; it’s about the strategic marriage of form and function. We’ve looked at how a smart, modern layout can dictate the flow of a home and how integrating future-proof technology ensures your investment doesn’t become obsolete by next year. Remember, every decision—from the footprint of your island to the smart appliances you install—should be viewed through the lens of return on investment. If a design choice looks great but adds zero resale value, leave it on the mood board and move on. You have to prioritize high-impact upgrades that move the needle on your property’s appraisal.

    I know that looking at a gutted kitchen or a sea of dated, laminate countertops can feel overwhelming, especially when the dust starts settling and the budget starts creeping up. But that’s exactly where the opportunity lies. Don’t let the mess intimidate you; that’s just the price of entry for building real wealth. If you keep your eyes on the long game and approach every renovation with a disciplined, strategic mindset, you won’t just be fixing a room—you’ll be engineering equity. Now, grab your laser measurer and let’s get to work.

    Frequently Asked Questions

    How do I decide between a full gut renovation and just swapping out the surfaces to keep my ROI high?

    Look, there’s no one-size-fits-all answer, but I always run the numbers through a “functionality vs. aesthetics” lens. If the layout is awkward or the electrical is a nightmare, you have to gut it; you can’t polish a bad floor plan. But if the bones are solid and it’s just ugly, don’t overcapitalize. Swapping cabinets, counters, and hardware is your fastest path to a high ROI without bleeding your budget dry on structural changes.

    At what point does spending more on high-end appliances actually stop adding value to the resale price?

    Look, I’ve seen it happen too many times: an investor drops fifty grand on a professional-grade Sub-Zero setup for a mid-range fixer-upper, and they never see a dime of that money back at closing. There’s a ceiling. Once you move past high-quality, reliable brands into the “luxury collector” tier, you’re no longer building equity—you’re just subsidizing the next owner’s lifestyle. Aim for high-end performance, but don’t over-spec for a market that won’t pay for it.

    What are the biggest "hidden" costs that usually blow my budget during a kitchen rehab?

    Look, if you think your quote from the contractor is the final number, you’re already behind. The real budget killers are hiding behind those drywall sheets. I’m talking about outdated wiring that won’t meet code, plumbing that’s more rust than pipe, or finding subfloor rot once the old cabinets come up. Always set aside a 15% contingency fund. In this business, if you don’t plan for the surprises, the surprises will plan for your bankruptcy.

  • Fixing and Preparing Subfloors

    Fixing and Preparing Subfloors

    I still remember the sickening crunch of a hollow floorboard under my boot during my first solo flip. I was standing in what I thought was a “diamond in the rough,” only to realize that a slow, hidden leak had turned the foundation of the kitchen into a literal sponge. Most contractors would have looked me in the eye and quoted a figure that would make your heart stop, treating a standard subfloor repair like it was some high-stakes structural surgery. But here’s the truth: they love to overcomplicate the simple stuff to pad their margins, and if you aren’t careful, you’ll let a little moisture eat your entire profit margin before you even pick out the tile.

    I’m not here to give you a textbook lecture or some sanitized, theoretical guide that ignores the grit of a real job site. I’m going to show you exactly how to identify the rot, assess the damage, and execute a subfloor repair that actually holds up under pressure. My goal is to give you the practical, boots-on-the-ground tactics you need to fix the bones of a house without draining your renovation budget on unnecessary repairs. Let’s get to work.

    Table of Contents

    Spotting Plywood Subfloor Damage Before It Destroys Profit

    Spotting Plywood Subfloor Damage Before It Destroys Profit

    You can’t just look at a floor and assume it’s solid. I’ve walked into more “turnkey” properties only to find that the surface-level beauty was hiding a nightmare underneath. The first thing I do is grab my screwdriver and perform a quick tap test. If you hear a hollow, drum-like sound or feel a slight give when you step, you’re likely dealing with plywood subfloor damage. This is often the first red flag that moisture has been creeping in from a leaky pipe or a poorly sealed exterior, compromising the structural floor integrity before you even pull up the carpet.

    Don’t ignore the subtle signs, either. If you notice your furniture wobbling or see cracks forming in the grout of a tiled area, you might be looking at a deeper issue like settling or sagging joists. I always check the corners of rooms for any slight slope; if the floor isn’t level, you aren’t just looking at an aesthetic fix, you’re looking at a potential margin-killer. Catching these issues early is the difference between a quick weekend fix and a catastrophic budget blowout.

    Solving Subfloor Moisture Issues to Protect Your Investment

    Solving Subfloor Moisture Issues to Protect Your Investment

    If you find moisture trapped under your feet, you aren’t just looking at a nuisance; you’re looking at a ticking time bomb for your margins. Whether it’s a slow leak from a dated bathroom fixture or hydrostatic pressure pushing up through a concrete slab, subfloor moisture issues are the silent killers of a renovation budget. I’ve seen too many investors ignore a little dampness only to realize three weeks later that the entire floor system has turned into mush. You have to find the source first—don’t just slap down new boards and hope for the best.

    Once the leak is plugged, your priority shifts to restoring the structural floor integrity. This often means cutting out the compromised sections and replacing them with fresh, dry material. If the dampness has caused the wood to warp or sag, you might need to look into floor joist reinforcement to ensure the foundation is level again. I always tell my clients: it is much cheaper to spend the extra few hundred bucks on a proper moisture barrier and high-quality underlayment now than it is to tear everything out again when the new hardwood starts buckling in six months.

    My Golden Rules for Subfloor Repairs Without Blowing Your Budget

    • Never, ever cover up a soft spot with new flooring; if you feel a dip under your boots, you need to rip it up and see what’s happening underneath before the rot spreads.
    • Source your replacement plywood in bulk from a local supplier rather than running to a big-box store every time you find a hole, because those small trips will bleed your renovation timeline dry.
    • Use the right fasteners every single time—skimping on high-quality subfloor screws to save a few bucks is a rookie mistake that leads to squeaky floors and unhappy buyers later.
    • Always check the joists before you lay down new sheets; there’s no point in installing pristine plywood if the structural bones underneath are bowed or compromised.
    • Test your moisture levels with a meter before you seal everything up, because trapping dampness under a fresh layer of subfloor is the fastest way to turn a profitable flip into a total loss.

    The Bottom Line on Subfloors

    Never skim over soft spots during a walkthrough; a small patch of rot today is a massive margin-killer once you’ve already laid down expensive hardwood.

    Treat the source of the moisture, not just the symptom, because slapping new plywood over a leak is just a fast way to throw your renovation budget down the drain.

    Prioritize structural integrity over aesthetics every single time—you can’t stage a beautiful room if the floor feels like a sponge.

    ## The Hidden Margin Killer

    “A subfloor is the one thing you can’t afford to ‘eye-ball’ or gloss over; if you try to hide structural rot under a fancy new layer of LVP, you aren’t renovating, you’re just setting a trap for your own profit margins.”

    Gareth Trelawny

    Protecting Your Bottom Line

    Subfloor repair: Protecting Your Bottom Line.

    At the end of the day, subfloor repair isn’t just about fixing a squeaky plank or a soft spot in the kitchen; it’s about defending your margins. We’ve covered how to spot the early warning signs of plywood rot and, more importantly, how to tackle the moisture issues that cause the damage in the first place. If you ignore these red flags, you aren’t just looking at a minor repair cost—you’re looking at a structural nightmare that can bleed your renovation budget dry. Remember, a solid foundation is the one thing you can’t afford to cut corners on if you want your flip to actually pay off.

    I know that staring down a damaged subfloor can feel overwhelming, especially when you’re already juggling contractors and budget spreadsheets. But this is exactly where the profit is made. While other investors might see a crumbling floor and run for the hills, I want you to see it as an opportunity to build real, lasting equity. Don’t let a little bit of rot intimidate you. Tackle the problem head-on, do the work right the first time, and turn that neglected mess into a high-value asset. That is how you build wealth.

    Frequently Asked Questions

    How do I know if I can just patch a small section of the subfloor or if the damage is too widespread to save the room?

    Here’s the rule of thumb I use: if the damage is localized to a single sheet of plywood and the surrounding joists are bone-dry and structurally sound, you can patch it. But if you start seeing soft spots or “spongy” movement across multiple joist bays, stop. That’s a systemic issue. Patching a small hole in a room with widespread rot is just throwing good money after bad. Don’t gamble your margins on a quick fix.

    At what point does a subfloor issue become a "deal-breaker" that should make me walk away from a property entirely?

    Look, there’s a line between a “fixer-upper” and a “money pit,” and it usually involves the structural joists. If the damage is localized to a few plywood sheets, you fix it and move on. But if the rot has traveled into the main floor joists or the foundation itself, walk away. When the skeleton of the house is compromised, your renovation budget won’t just balloon—it’ll evaporate. Don’t let a structural nightmare kill your ROI.

    What are the most cost-effective materials to use for a subfloor replacement that won't eat up my entire renovation budget?

    Look, I’ve seen too many investors blow their entire margin on high-end materials where they don’t matter. For a subfloor, you aren’t looking for luxury; you’re looking for structural integrity. Stick with CDX plywood or OSB (Oriented Strand Board). OSB is often cheaper and performs incredibly well if the room stays dry. Just ensure you’re getting the right thickness—usually 3/4 inch—to prevent squeaks. Spend the savings on your finish flooring instead.

  • Advantages of Built in Furniture

    Advantages of Built in Furniture

    I was standing in the middle of a dusty, gutted living room in a drafty Victorian last Tuesday, staring at a massive, awkward alcove that was doing absolutely nothing for the floor plan. Most “design gurus” would tell you that you need a massive budget and a custom carpenter to fix a space like that, but honestly? That’s a load of crap. You don’t need to drop ten grand on bespoke pieces to make a room feel intentional. In my experience, the right built in furniture isn’t about luxury; it’s about strategic spatial management that makes a house feel like a high-end home rather than a collection of mismatched, heavy boxes.

    I’m not here to sell you on some Pinterest-perfect fantasy that’s impossible to execute on a real-world budget. I’m going to show you how to use built-ins to reclaim wasted square footage and, more importantly, how to do it in a way that actually adds value to your property. We’re going to talk about the practical, gritty side of construction—from selecting materials that won’t rot to the DIY hacks that look like a professional job. Let’s get to work on turning that dead space into solid equity.

    Table of Contents

    Custom Millwork Design Crafting Value From Empty Walls

    Custom Millwork Design Crafting Value From Empty Walls

    When I’m walking through a property that feels “small” or awkward, I don’t see a lack of square footage; I see a lack of intention. This is where custom millwork design becomes my secret weapon. Instead of letting a client clutter a room with mismatched, bulky cabinets that eat up floor space, I look for those dead zones—the alcoves under stairs or the awkward gaps between windows. By installing seamless, floor-to-ceiling woodwork, you aren’t just adding storage; you are fundamentally changing the architecture of the room. It makes the entire space feel intentional and high-end, which is exactly what buyers look for when they’re deciding if a house is worth the premium.

    I always tell my renovation clients that bespoke home organization is a massive equity driver. A well-executed built-in bookshelf or a sleek, integrated media unit can turn a cramped living area into a sophisticated lounge. It’s about creating integrated living room storage that disappears into the walls, rather than standing in the way of the flow. When you stop fighting the room and start working with its bones, you stop selling a house and start selling a lifestyle.

    Maximizing Small Room Space for Maximum Returns

    Maximizing small room space for maximum returns.

    When I’m walking through a cramped studio or a tiny guest room during a walkthrough, I’m not looking at the lack of square footage; I’m looking for wasted verticality. In these tight quarters, standard bulky furniture is the enemy of a good ROI. Instead, I lean heavily into bespoke home organization to reclaim that lost territory. By installing floor-to-ceiling units, you draw the eye upward, making a claustrophobic room feel much more intentional and airy.

    If you’re flipping a property with a layout that feels “off,” don’t just suggest more storage—suggest smarter storage. I love using integrated living room storage to eliminate the need for cluttered coffee tables or sideboards that eat up floor space. When you can hide the tech, the books, and the clutter behind seamless cabinetry, the entire room feels larger and more high-end. It’s a strategic move that transforms a “small, awkward room” into a “cozy, efficient sanctuary,” and that distinction is exactly what helps a property command a higher asking price.

    My Golden Rules for Built-ins: Adding Value Without Blowing the Budget

    • Stick to neutral, high-quality finishes; if you’re flipping, you want the buyer to imagine their own life in that space, not fight against a bold, custom-painted cabinet.
    • Prioritize “hidden” storage in high-traffic areas like mudrooms or entryways to tackle the clutter problem that often makes small houses feel even smaller.
    • Don’t skimp on the hardware—swapping out cheap plastic pulls for heavy, solid brass or matte black handles makes even a basic DIY built-in feel like a custom luxury install.
    • Use built-in window seats to turn awkward, dead corners into functional reading nooks that add that “lifestyle” element buyers crave during a walkthrough.
    • Always plan your electrical outlets before the carpentry begins; there’s nothing more frustrating than a beautiful custom desk with no way to plug in a laptop.

    The Bottom Line: Turning Wood and Hardware into Real Equity

    Focus on “perceived value” rather than just cost; a well-placed built-in library or mudroom nook makes a house feel custom-built, which allows you to justify a higher asking price during the flip.

    Don’t over-engineer the design; stick to clean, minimalist lines that appeal to the widest possible buyer pool, rather than getting bogged down in niche, overly ornate styles that won’t recoup their investment.

    Always budget for the “hidden” costs of millwork, like electrical for integrated lighting or structural reinforcement, so your “low-cost” upgrade doesn’t turn into a budget-killing headache mid-renovation.

    The Investor's Edge

    “Stop looking at empty walls as just dead space; when you install custom built-ins, you aren’t just decorating—you’re engineering square footage that buyers will pay a premium for.”

    Gareth Trelawny

    The Bottom Line on Built-ins

    The Bottom Line on Built-ins.

    At the end of the day, investing in built-in furniture isn’t just about making a room look “pretty” for a listing photo; it’s about strategic spatial engineering. We’ve looked at how custom millwork can transform a blank, wasted wall into a high-value architectural feature, and how clever built-ins can make even the smallest, most awkward floor plans feel expansive and functional. When you’re flipping a property, every square inch needs to pull its weight. By choosing permanent, integrated solutions over bulky, freestanding pieces, you are effectively increasing the perceived square footage of the home, which is exactly what buyers are willing to pay a premium for in today’s market.

    I know that looking at a gutted room or a cramped layout can feel overwhelming, especially when you’re staring down a renovation budget. But remember: the most profitable flips aren’t the ones where you just slap on a fresh coat of paint and call it a day. They are the ones where you identify the hidden potential that others are too lazy to see. Don’t be afraid to get a little creative with some custom woodwork. It might take a bit more planning and a little more sweat equity upfront, but that is how you turn crumbling walls into solid equity and build a portfolio that actually lasts.

    Frequently Asked Questions

    How do I figure out if the cost of custom millwork will actually be offset by the increase in the home's resale value?

    You have to run the numbers like a business, not an interior designer. I always look at the “comparable sales” in the neighborhood first. If you’re flipping in a high-end area, custom millwork is a standard expectation that protects your margin. But if you’re in a budget-friendly suburb, don’t over-engineer it. Aim for high-impact, low-cost built-ins—like a sleek media unit or pantry—that solve a visible problem without eating your entire profit margin.

    Are there specific materials I should avoid to ensure these built-ins don't look cheap or dated when I go to flip the property?

    Steer clear of anything that screams “DIY kit.” Avoid those flimsy, particle-board bookshelves with thin laminate finishes; they peel and look cheap within months. Also, stay away from high-gloss, dated cherry woods or overly ornate, heavy crown molding—it feels stuck in the 90s. If you want to protect your margins, stick to solid wood or high-quality MDF with a matte or satin paint finish. It looks intentional, high-end, and much more expensive than it actually was.

    Should I stick to neutral, minimalist designs for built-ins, or is there room to add more character without scaring off potential buyers?

    Stick to the neutrals for the bulk of the work, but don’t be afraid to let a little personality peek through. I always aim for a “high-end canvas” approach. Think clean lines and muted tones for the actual cabinetry, but maybe use a textured wood grain or a sophisticated, moody paint color for a single accent nook. You want buyers to see a designer’s touch, not a personal obsession that they’ll feel forced to repaint.

  • Choosing the Right Door Hardware

    Choosing the Right Door Hardware

    I was standing in the hallway of a fixer-upper I picked up last spring, staring at a set of hollow-core doors that felt like they were made of cardboard. I reached out to turn the knob, and the whole thing gave a sickening, metallic clunk—the kind of sound that tells you exactly how much the previous owner cut corners. It’s a rookie mistake that kills my blood pressure every time: treating door hardware as an afterthought or, worse, a place to save a few bucks by buying the cheapest bulk packs at a big-box store. When a potential buyer reaches for a handle and it feels flimsy or cheap, they don’t just see a bad knob; they see a house that hasn’t been cared for, and that perception can tank your asking price faster than a cracked foundation.

    I’m not here to sell you on some overpriced, designer gold-plated nonsense that won’t last two seasons. Instead, I’m going to show you how to select strategic, high-impact hardware that adds tangible value without blowing your renovation budget. We’re going to talk about weight, finish, and why the tactile experience of a door is actually one of your most underrated tools for building equity.

    Table of Contents

    Modern Door Handle Finishes That Signal High End Value

    Modern Door Handle Finishes That Signal High End Value

    When you’re walking through a property during a showing, the first thing a buyer does isn’t looking at the crown molding—it’s reaching for a handle. If that handle feels flimsy or looks like it came from a big-box clearance aisle, they’ve already mentally devalued the entire house. To signal real luxury, you need to lean into current modern door handle finishes that feel intentional. Right now, I’m seeing a massive shift away from the dated, shiny chrome of the early 2010s. Instead, I’m opting for matte black or brushed champagne gold to add a layer of sophistication that makes a standard renovation feel custom-designed.

    If you want to stay ahead of the curve, keep an eye on architectural door hardware styles that favor clean, geometric lines. A heavy, solid brass lever in a satin finish does more for the perceived value of a room than a dozen expensive paint colors ever could. It’s about that tactile weight; when a door closes with a solid, expensive-sounding thud, the buyer knows they aren’t just looking at a flip—they’re looking at quality craftsmanship.

    Selecting Durable Door Hardware Materials for Long Term Gains

    Selecting Durable Door Hardware Materials for Long Term Gains

    When I’m walking through a job site, I’m not just looking at the aesthetics; I’m looking at the lifecycle of the asset. If you’re flipping a property, you might be tempted to go with the cheapest zinc alloy handles you can find just to cross the finish line, but that’s a rookie mistake. You want to invest in durable door hardware materials like solid brass or stainless steel. These aren’t just about looks; they provide a weight and a “click” that tells a potential buyer the house was built to last. Cheap hardware feels hollow and flimsy, and once that finish starts peeling after six months, your reputation for quality takes a massive hit.

    I also tell my clients to pay close attention to the entryway security hardware. The front door is the first point of contact for a buyer, and it needs to feel substantial. If the deadbolt feels loose or the handle wobbles, they’ll immediately start questioning what else was cut corners on behind the drywall. Investing a little extra upfront in high-quality components is one of the easiest ways to ensure your renovation stands the test of time without constant maintenance calls.

    5 Pro Tips to Keep Your Hardware from Tanking Your ROI

    • Match your hardware to the room’s “vibe” rather than just picking one finish for the whole house. A sleek, matte black lever works wonders in a minimalist kitchen, but don’t be afraid to lean into aged brass for a more traditional, high-end study.
    • Test the weight before you buy. If a handle feels hollow or light in your hand, it screams “builder grade” to a potential buyer. You want something with a bit of heft that makes the door feel substantial when it opens.
    • Don’t ignore the hinges. I’ve seen too many flippers spend a fortune on designer knobs only to leave up those flimsy, squeaky silver hinges. If you’re upgrading the handles, match the hinge finish to keep the look seamless and professional.
    • Prioritize privacy sets in the right places. It sounds basic, but nothing kills a showing faster than a bathroom door that doesn’t actually lock properly or feels flimsy. It’s a small detail that signals the house is well-maintained and functional.
    • Think about the “touch points” for long-term durability. In high-traffic areas like mudrooms or laundry rooms, steer clear of overly delicate finishes that show every single fingerprint. Stick to brushed or textured metals there to save yourself a headache during the final walkthrough.

    The Bottom Line on Hardware ROI

    Stop treating door hardware as an afterthought; it’s a high-touch tactile detail that buyers use to subconsciously judge the quality of the entire renovation.

    Prioritize solid brass or heavy-duty alloys over hollow, lightweight alternatives to ensure the hardware feels substantial and signals durability to potential buyers.

    Stick to timeless, high-end finishes like matte black or brushed brass to avoid the “dated flip” look and ensure your investment holds its value long after the sale.

    ## The Psychology of the Handshake

    “When a potential buyer walks through a door, the hardware is their first physical handshake with the house. If that handle feels flimsy or looks dated, they’ve already decided the renovation was cheap—and once they think you cut corners, you’ve lost the sale.”

    Gareth Trelawny

    The Final Polish

    High-quality door hardware, The Final Polish.

    At the end of the day, choosing the right door hardware isn’t just about picking something that looks pretty on a spec sheet. It’s about the intersection of durability and design. We’ve covered how the right finish can instantly elevate a room’s perceived value and why opting for solid, high-quality materials is non-negotiable if you want to avoid a callback from a frustrated buyer. If you’re flipping, you want hardware that feels substantial in the hand; if you’re holding for long-term equity, you want pieces that won’t tarnish or fail after two years of heavy use. Remember, small details are the silent ambassadors of your renovation quality.

    I know that when you’re staring at a mountain of drywall dust and a budget that’s constantly creeping upward, it’s easy to view door handles as an afterthought. But don’t fall into that trap. These are the tactile touchpoints that tell a story about how much care you put into the bones of the house. Investing in these “small” wins is exactly how you bridge the gap between a basic remodel and a professional-grade asset. Stop looking at hardware as an expense and start seeing it as a tool for maximizing your ROI. Now, grab your laser measurer and go get to work.

    Frequently Asked Questions

    How do I know if I should go with a single-lever design versus a traditional knob for a rental property versus a flip?

    If you’re flipping, go with levers. They feel premium, look modern, and that tactile “click” of quality helps justify your asking price. For rentals, levers are non-negotiable for accessibility and durability—they handle heavy use better and won’t frustrate tenants. Save the traditional knobs for a niche, historic restoration where character trumps convenience. In this business, you aren’t just picking hardware; you’re choosing between ease of maintenance and perceived luxury.

    At what point in the renovation timeline should I actually be installing the hardware so it doesn't get damaged by contractors?

    Wait until the very end. I’ve seen too many beautiful matte black levers get scratched by a contractor’s tool belt or covered in drywall dust. You want your hardware installed during the final “punch list” phase—after the painters have finished, the floors are down, and the heavy construction is dead and buried. Protect your ROI by making hardware one of the final, polished touches in the room.

    Is it worth paying the premium for designer brands, or can I find high-end looking options at a big-box retailer that won't break after six months?

    Look, I’ve been in enough dusty job sites to know that brand names don’t always equal ROI. You don’t need a designer label to make a house feel expensive, but you do need weight. Avoid those hollow, lightweight handles at the big-box stores; they feel cheap the second a tenant or buyer touches them. My rule of thumb? Shop the big-box pro aisles for solid brass or heavy steel, and spend your saved premium on the finish instead.

  • Adding Window Shutters to a Room

    Adding Window Shutters to a Room

    I was standing in a gutted mid-century ranch last Tuesday, dust coating my boots and the smell of old drywall filling the air, when I realized the previous owner had completely botched the window treatments. They’d installed these flimsy, plastic faux-wood slats that looked absolutely pathetic against the original architecture. It’s a classic mistake: people think they can just slap any cheap decor on a property and call it a day, but cheap window shutters are one of the fastest ways to tank your perceived value. If you’re trying to build equity, you can’t afford to let low-quality finishes scream “budget renovation” to every potential buyer who walks through the door.

    I’m not here to sell you on some overpriced, designer-label nonsense that eats up your entire contingency fund. My goal is to show you how to select window shutters that actually provide a high-end look without the high-end markup. I’ll be breaking down which materials actually hold up during a heavy-use rental, which styles offer the best visual punch for your dollar, and how to avoid the common installation traps that turn a simple upgrade into a total headache. Let’s get to work.

    Table of Contents

    Custom Wood Shutters vs Faux Wood Choosing Long Term Value

    Custom Wood Shutters vs Faux Wood Choosing Long Term Value

    When you’re standing in a gutted living room staring at empty window frames, you have to decide if you’re playing the short game or the long game. If you’re looking for an immediate, budget-friendly fix to get a property market-ready, faux wood is tempting. It’s durable and handles humidity well, but let’s be real: it can feel a bit “builder-grade” if you aren’t careful.

    However, if your goal is to maximize your ROI and create a high-end feel that justifies a premium asking price, the debate of custom wood shutters vs faux wood usually ends with the real stuff. Real hardwood adds a layer of architectural soul that plastic just can’t mimic. While you do need to factor in some hardwood shutter maintenance to keep them looking sharp, the equity they add is tangible. They act as premium energy efficient window treatments, helping regulate temperature while providing that sophisticated, layered look that high-end buyers crave. In my experience, investing in quality materials early on is the difference between a quick flip and a truly high-value asset.

    Plantation Shutters Style Guide for Maximum Curb Appeal

    Plantation Shutters Style Guide for Maximum Curb Appeal

    If you’re looking to boost your property’s perceived value without a full-scale remodel, plantation shutters are your best friend. When I’m walking through a potential flip, I’m looking for those clean, architectural lines that make a room feel expensive. For a classic, high-end look that screams “luxury renovation,” I always lean toward larger louvers. They create a bold, structured statement that works perfectly with minimalist industrial chic. If you’re aiming for a more traditional or cottage vibe, smaller slats can add a layer of delicate detail that softens the space.

    Beyond just the look, you have to think about the practical side of the investment. I treat these as privacy and light control solutions that actually work for the homeowner. If you’re flipping a property in a sun-drenched area, emphasizing how these can act as energy efficient window treatments is a massive selling point. You aren’t just selling a pretty window; you’re selling a way to keep cooling costs down and light levels manageable. It’s all about showing the buyer that every design choice serves a dual purpose: aesthetics and long-term utility.

    5 Pro Tips for Picking Shutters That Actually Pay Off

    • Stop buying the cheapest plastic options you find at big-box stores; if they look flimsy, buyers will assume the rest of your renovation is cheap too.
    • Always measure twice and check for level before ordering, because nothing kills my mood faster than a set of shutters that hang crooked on a wonky window frame.
    • Think about the light—if you’re flipping a dark space, opt for shutters with louvers that allow for better light control so you aren’t fighting shadows during showings.
    • Match your shutter color to your trim rather than your siding to create a cohesive, high-end look that makes the whole house feel more expensive.
    • Don’t forget about maintenance; if you’re aiming for a quick flip, steer clear of high-maintenance materials that will require a fresh coat of paint before the house even hits the market.

    The Bottom Line: Maximizing Your ROI with Shutters

    Don’t chase the cheapest option just to save a few bucks on the initial rehab; invest in high-quality materials like real wood if you’re looking to boost the long-term appraisal value of the property.

    Curb appeal is your strongest selling tool, so use plantation-style shutters to create that instant “wow” factor that makes potential buyers fall in love before they even step through the front door.

    Always prioritize durability and timeless design over trendy patterns, because the goal is to create a space that feels high-end and polished, not one that looks dated by the time you’re ready to list.

    ## The ROI of the First Impression

    “When you’re walking a property, the windows are often the first thing a buyer notices—and cheap, flimsy shutters are a dead giveaway of a lazy renovation. If you want to actually build equity, invest in shutters that have some weight to them; you aren’t just decorating a window, you’re signaling to the buyer that the entire house has been handled with intention.”

    Gareth Trelawny

    Making the Final Call on Your Windows

    Making the Final Call on Your Windows.

    At the end of the day, choosing the right shutters isn’t just about picking a color from a swatch book; it’s a calculated decision about where you want to allocate your renovation budget. If you’re looking for that high-end, custom feel that screams quality to a potential buyer, go with the real wood. But, if you’re flipping a property on a tighter margin and need something durable that won’t warp in a humid climate, faux wood is a perfectly pragmatic choice. Remember, whether you’re opting for the timeless elegance of plantation shutters or a more modern look, your goal is to ensure that every dollar spent on your windows translates directly into increased property value.

    Don’t let the small details intimidate you. I know it feels overwhelming when you’re staring at a pile of contractor quotes and endless material samples, but that’s exactly where the profit is made. Real estate isn’t about the easy wins; it’s about having the vision to see how a simple upgrade can transform a house into a high-value asset. Stop overthinking it and start executing. Once you get these shutters installed and that curb appeal kicks in, you’ll realize that building equity is really just a series of smart, intentional decisions. Now, grab your laser measurer and let’s get to work.

    Frequently Asked Questions

    How do I figure out if the cost of installing shutters will actually be recouped when I go to sell the property?

    To figure this out, stop looking at the shutters as a decoration and start looking at them as a line item in your ROI calculation. I always run a quick comparative market analysis. Look at recent sales in your neighborhood—are they selling “turnkey” with high-end finishes, or are they priced for buyers who want to DIY? If you’re flipping for a quick margin, go for high-impact faux wood. If you’re holding for long-term equity, invest in the real deal.

    Are there specific shutter styles that look dated or "cheap" and might actually hurt my resale value?

    Look, I’ve seen too many flips ruined by “builder-grade” decisions. Avoid those flimsy, plastic-looking shutters that feel hollow when you touch them; they scream “low budget” to potential buyers. Also, steer clear of overly ornate, faux-Victorian styles unless you’re working on a true period home—they tend to look tacky rather than timeless. Stick to clean lines and substantial materials. If it looks like it belongs in a suburban McMansion from 2005, skip it.

    How much maintenance am I realistically looking at with real wood shutters versus the low-maintenance faux options?

    Look, if you’re chasing high ROI, you need to be honest about your bandwidth. Real wood is stunning and adds serious character, but it’s high-maintenance; you’ll be dusting, conditioning, and occasionally repainting to prevent warping or cracking. Faux wood is the “set it and forget it” winner. It’s virtually indestructible and handles humidity like a champ. If you want premium equity, go wood. If you want a hands-off asset, stick with faux.

  • Using Wall Paneling for Texture

    Using Wall Paneling for Texture

    I was standing in a drafty Victorian fixer-upper last November, my laser measurer in hand, staring at a room with nothing but peeling, water-stained drywall and a sense of impending doom. Most designers would have told me to rip it all out and spend five figures on custom plasterwork just to make the space “marketable.” But I knew better. I saw exactly how a strategic application of wall paneling could mask those structural imperfections while adding the high-end architectural character that buyers crave. You don’t need a massive budget to create a sense of luxury; you just need to know which tactical upgrades actually move the needle on your ROI.

    In this guide, I’m stripping away the fluff and the overpriced design trends that don’t actually add value. I’m going to show you how to use wall paneling to hide flaws, define spaces, and—most importantly—build instant equity without draining your renovation fund. We’re talking real-world applications, material choices that stand up to heavy use, and the exact methods I use on my own job sites to turn a dated shell into a high-value asset.

    Table of Contents

    Mastering Molding Installation Styles for Maximum Roi

    Mastering Molding Installation Styles for Maximum Roi

    When you’re looking at a room that feels “empty” or lacks character, you have to decide whether you’re playing the long game or going for a quick visual punch. If you’re aiming for a high-end resale, I usually lean toward traditional vs contemporary paneling debates based on the neighborhood’s vibe. In more established, classic suburbs, wainscoting or picture frame molding adds that sense of permanence that buyers crave. However, if I’m flipping a condo in a revitalized urban core, I’m looking for something much sleeker.

    For those modern urban spaces, I prioritize modern interior design trends like vertical slatting or geometric patterns. These act as high-impact textured wall treatments that turn a boring, flat surface into a focal point without needing a massive renovation budget. If you’re working on living room feature walls, don’t just throw up random strips of wood. You need a cohesive plan. The goal isn’t just to decorate; it’s to use these molding installation styles to create the illusion of architectural depth, which is exactly what makes a property feel expensive during a walkthrough.

    Choosing Textured Wall Treatments That Command Higher Rents

    Choosing Textured Wall Treatments That Command Higher Rents

    When you’re looking to scale a rental portfolio, you have to stop thinking like a decorator and start thinking like a strategist. If you want to attract high-quality tenants who don’t mind paying a premium, you need to move beyond flat, boring paint. I’ve found that incorporating textured wall treatments is one of the fastest ways to make a unit feel “custom” rather than “cookie-cutter.” Whether it’s a subtle lime wash or a more structured decorative wall cladding, adding depth to a room creates a sensory experience that photos alone can’t capture.

    I always steer my clients toward living room feature walls that lean into current modern interior design trends without being so niche that they become polarizing. For example, a slate-effect cladding or a reclaimed wood accent can turn a cramped space into a high-end sanctuary. The goal isn’t just to make it look pretty; it’s to create a focal point that justifies a higher monthly rent. When a tenant walks in and sees a room with actual character, they stop comparing your unit to the cheap apartment down the street and start seeing the value in the aesthetic.

    Pro-Tips for Paneling That Actually Pays Off

    • Don’t go overboard with the dark wood—unless you’re aiming for a library vibe, stick to lighter, neutral tones that make a room feel bigger and more expensive to potential buyers.
    • Always check the studs before you start nailing anything in; there is nothing more soul-crushing than realizing halfway through a feature wall that your expensive wainscoting is sagging because you missed the framing.
    • Focus your budget on the “eye-level zones”—investing in high-quality paneling in an entryway or dining room offers a much better return than wasting money on a hallway no one actually spends time in.
    • Use your laser measurer to ensure every single line is dead-on; in a minimalist industrial space, even a tiny gap or a crooked slat will scream “amateur DIY” rather than “high-end renovation.”
    • Mix your textures strategically by pairing smooth paneling with a bit of matte paint to create depth without making the room feel cluttered or dated.

    The Bottom Line for Your Next Flip

    Stop viewing paneling as a decorative luxury and start seeing it as a strategic tool to mask structural imperfections and hide expensive drywall repairs.

    Focus your budget on high-impact, tactile textures in common areas to justify higher rental premiums or a faster sale price.

    Always prioritize timeless, clean lines over trendy patterns to ensure your renovation adds long-term equity rather than becoming a dated headache for the next owner.

    ## The Real Value of Vertical Lines

    “Don’t look at wall paneling as just another decor choice; look at it as a strategic layer of equity. You aren’t just covering up old drywall—you’re using texture and depth to trick the eye into seeing a high-end custom build instead of a budget renovation.”

    Gareth Trelawny

    The Bottom Line on Wall Paneling

    The Bottom Line on Wall Paneling.

    At the end of the day, wall paneling isn’t just about making a room look pretty for a listing photo; it’s a strategic tool for increasing your property’s value. Whether you’re leaning into the high-end feel of classic molding to boost your resale price or using textured treatments to attract long-term, high-quality tenants, every choice you make should be driven by the math. Don’t get distracted by fleeting trends that won’t hold up in five years. Instead, focus on timeless, high-impact upgrades that turn a bland, empty shell into a space people can actually visualize themselves living in. If you execute these installs with precision, you aren’t just decorating—you are actively building equity one wall at a time.

    I know that staring at a room full of bare, uneven drywall can feel overwhelming, especially when you’re staring down a tight renovation budget. But remember, the most profitable flips aren’t the ones that look perfect on day one; they are the ones where the investor saw the potential beneath the mess. Don’t let a little bit of dust or a complicated installation scare you away from a massive opportunity. Grab your tools, trust your eye, and start turning those crumbling surfaces into solid assets. This is how you build a portfolio that lasts, and it all starts with the decision to see the value where others only see a headache.

    Frequently Asked Questions

    How do I figure out if a specific paneling style is actually going to add value to the house or if it's just going to be a headache for the next buyer?

    Look, don’t fall in love with a design just because it looks good on your Pinterest board. To avoid a headache, ask yourself: “Is this a classic or a trend?” If you’re installing heavy, dark wood paneling, you’re likely shrinking the room and alienating buyers. Stick to timeless, architectural details like wainscoting or slim Shaker styles. If it feels like a “statement piece” that requires a specific furniture set to work, skip it. Aim for versatility, not a niche vibe.

    Is it worth the extra time and money to do custom wainscoting, or should I just stick to something simpler and faster for a quick flip?

    If you’re on a tight timeline for a quick flip, skip the custom wainscoting. It’s a time sink that rarely recoups its cost in a fast-paced sale. You want speed and impact. Instead, grab some pre-primed picture frame molding kits. You get that high-end, architectural look for a fraction of the labor cost. Don’t get bogged down in custom carpentry; focus on the high-margin wins that get people through the door.

    What’s the best way to handle paneling in older fixer-uppers where the walls are already uneven or crumbling underneath?

    Look, I’ve been there—standing in a room with walls that look like a topographical map. Don’t try to fight the unevenness by nailing thin, flimsy paneling directly to the studs; you’ll just highlight every flaw. My rule of thumb? Level it out first. Use furring strips to create a flat plane, or better yet, install a cement board over the crumbling plaster. It’s more upfront work, but it ensures a professional finish that actually adds value.

  • Installing Baseboards and Skirting

    Installing Baseboards and Skirting

    I was standing in a dusty, half-finished hallway of a Victorian fixer-upper last Tuesday, staring at a gap between a freshly plastered wall and a piece of cheap timber, when it hit me: most people think skirting boards are just a way to hide messy floor edges. That’s a massive mistake. In my experience, a botched skirting board installation is one of the fastest ways to make a high-end renovation look like a budget DIY disaster. You can spend thousands on designer flooring, but if your trim is uneven or poorly fitted, you’re essentially flushing your potential equity down the drain.

    I’ve spent years on job sites learning that the difference between a “flip” and a “flop” lies in these exact finishing details. In this guide, I’m stripping away the fluff to give you the pragmatic, step-by-step process I use on my own investment properties. We’re going to cover everything from choosing the right profile to mastering the cuts, ensuring your skirting board installation adds real, tangible value to your home rather than just covering up a mistake.

    Table of Contents

    Guide Overview

    Total Time: 3-5 hours
    Estimated Cost: $50-$200
    Difficulty: Intermediate

    Tools & Supplies

    • Mitre saw or hand saw for cutting angles
    • Hammer or nail gun for fastening
    • Spirit level to ensure straightness
    • Measuring tape for accurate lengths
    • Skirting boards (length depends on room perimeter)
    • Wood adhesive or construction adhesive
    • Finishing nails or brad nails
    • Wood filler to cover nail holes

    Step-by-Step Instructions

    • 1. Before you even touch a saw, you need to prep your surfaces. I’ve seen too many investors try to hide bad plasterwork under expensive timber, and it’s a waste of money. Use your laser measurer to check for any significant bows in the walls and sand down any major lumps in the plaster. If your walls are wonky, your skirting will follow that line and look amateur.
    • 2. Once the walls are smooth, it’s time to measure and cut. Don’t just eyeball it; grab your tape measure and mark out every single run of wall. When you hit a corner, you’re going to need to master the mitre cut. I prefer using a sharp mitre saw for clean, crisp edges, because a jagged corner is a dead giveaway of a DIY job that’s cutting into your resale value.
    • 3. Now, let’s get those boards onto the wall. I usually opt for a high-quality construction adhesive paired with a few headless nails for extra security. Apply the adhesive in a zigzag pattern along the back of the board, then press it firmly against the wall. If you’re working on an older property with uneven walls, you might need to use a rubber mallet to gently tap the board into place without denting the wood.
    • 4. If you’re using nails to secure the boards, make sure you’re hitting the studs or using appropriate wall plugs if you’re dealing with masonry. I always aim to drive the nail heads just slightly below the surface of the wood. This creates a tiny indentation that we can easily hide later, rather than having a protruding nail head that makes sanding an absolute nightmare.
    • 5. Once the boards are physically attached, you need to address the gaps. No matter how precise your cuts are, there will always be tiny hairline cracks where the board meets the wall or the floor. Grab some high-quality decorators’ caulk and run a thin bead along these junctions. Use a damp finger to smooth it out—this is the secret to making the skirting look like it’s part of the architecture rather than just something stuck on top of it.
    • 6. The final step is the most satisfying: filling and sanding. Use a fine-surface wood filler to plug any nail holes or minor imperfections in the timber itself. Once it’s dry, give everything a light sand with a fine-grit sandpaper until the transitions are seamless. If you skip this, your paint job will highlight every single flaw, and nobody wants that when they’re trying to present a polished, high-end finish to a potential buyer.

    Preparing Walls for Trim to Avoid Costly Mistakes

    Preparing Walls for Trim to Avoid Costly Mistakes

    Before you even touch a saw, you need to address the reality of most fixer-uppers: walls are rarely as straight as they look on a blueprint. I’ve seen too many investors rush into a job only to realize their new trim looks like a wavy mess because they ignored the substrate. Preparing walls for trim means more than just a quick wipe-down; it means checking for bowing or uneven plaster that will fight your boards every step of the way. If your walls are significantly out of plumb, you’ll spend more time fighting the material than actually installing it.

    Once the surface is prepped, don’t overlook the transition points. If you aren’t confident with your mitre cutting techniques, you’re going to end up with unsightly gaps at the corners that scream “amateur hour.” Even with a perfect cut, you should always budget time for gap filling and caulking to create that seamless, high-end look that drives up property value. It’s these tiny, meticulous details that separate a quick flip from a professional-grade renovation that actually builds long-term equity.

    The Secret to Miter Saw Corner Joints and Mitre Cutting Techniques

    The Secret to Miter Saw Corner Joints and Mitre Cutting Techniques.

    If you want your renovation to look like a high-end designer did it rather than a DIY weekend warrior, you have to master your angles. I’ve seen so many investors lose money on “cheap” looking finishes because they rushed the corners. When you’re working with mitre cutting techniques, precision is everything. Don’t just trust the markings on your saw; I always double-check my angles with a protractor first. Even a half-degree error might look fine on one wall, but by the time you hit the third corner, that tiny mistake compounds into a massive, ugly gap that no amount of putty can hide.

    The real pro move for seamless miter saw corner joints is to cut slightly “long” rather than too short. It is much easier to shave a hair off a piece of timber with a fine-tooth blade than it is to fix a gap in a corner that’s already nailed in. If you’re dealing with older, wonky walls in a fixer-upper, remember that your angles won’t always be a perfect 90 degrees. You have to adapt to the house, not the other way around.

    Pro Tips to Protect Your Profit Margins and Finish Like a Pro

    • Don’t skimp on the adhesive; I’ve seen too many cheap renovations where the trim starts pulling away from the wall six months later, and nobody wants to deal with a callback or a devalued property.
    • Invest in a high-quality nail gun rather than relying solely on a hammer; it saves your hands and prevents those annoying, unsightly hammer marks that you’ll just end up having to sand out anyway.
    • Always check your floor level before you start; if your subfloor is wonky, you’ll need to scribe the bottom of the skirting to ensure a tight fit, otherwise, you’re just leaving gaps that scream “amateur job.”
    • Use a bit of flexible caulk in the expansion gaps between the trim and the wall; it hides those inevitable little imperfections and makes the entire installation look seamless and high-end.
    • Keep your eye on the scale—if you’re working on a room with high ceilings, don’t try to save a few bucks with flimsy, short skirting boards; go for something with more presence to actually add perceived value to the space.

    Bottom Line: Don't Let the Small Details Drain Your ROI

    Never rush the wall prep; if your plaster is uneven, no amount of expensive trim is going to hide those gaps, and you’ll end up wasting money on caulk and filler just to mask poor workmanship.

    Master your miter cuts before you start nailing anything down, because nothing screams “amateur flip” like visible gaps in your corners that kill the high-end feel of a room.

    Treat skirting boards as more than just decoration—they are a strategic finishing layer that protects your walls and adds that final layer of perceived value that buyers actually notice.

    ## The Equity in the Details

    “You can spend fifty grand on a kitchen remodel, but if your skirting boards are gapped or poorly mitred, you’re essentially telling every potential buyer that you cut corners. In this business, the details aren’t just aesthetics—they’re the difference between a quick sale and a massive headache.”

    Gareth Trelawny

    The Final Polish

    Professional skirting board installation: The Final Polish.

    At the end of the day, successful skirting board installation comes down to the details you can’t see as much as the ones you can. It’s not just about nailing wood to a wall; it’s about the prep work you did to ensure the surface was level, the precision of those mitered corners, and the patience required to get the spacing just right. If you’ve taken the time to prep your walls properly and mastered your saw techniques, you’ve already avoided the most common pitfalls that lead to expensive callbacks or a cheap-looking finish. Remember, those small, technical steps are exactly what separate a DIY disaster from a professional-grade renovation that holds its value.

    I know that staring at a pile of trim and a messy job site can feel overwhelming when you’re in the thick of it, but don’t lose sight of why you’re doing this. Every perfectly fitted piece of molding is a step closer to turning a neglected space into a high-value asset. Real estate investing isn’t always glamorous, and it definitely isn’t easy, but there is nothing quite like the feeling of seeing a room transform because you had the grit to do it right. Keep pushing through the messy parts; that’s exactly where the real equity is built.

    Frequently Asked Questions

    Should I use construction adhesive or just nails to secure the boards to my walls?

    If you want a finish that actually lasts, don’t choose one or the other—use both. I always recommend a “hybrid” approach. Apply a bead of high-quality construction adhesive to the back of the board to prevent it from ever pulling away, then use a nail gun to tack it in place while the glue sets. The nails act as your temporary clamps, while the adhesive provides the long-term bond that protects your equity.

    How do I deal with uneven floors so my skirting doesn't have those annoying gaps at the bottom?

    Look, uneven floors are the bane of every renovation, but they don’t have to ruin your margins. If the gap is minor, a bead of color-matched caulk is your best friend. If it’s a disaster, don’t fight it—scribe the bottom of the board. Trace the floor’s contour onto your trim and cut along that line. It takes more time, but it’s the only way to ensure a seamless, high-end finish.

    Is it better to install the skirting before or after I've finished painting the walls?

    Look, if you want to save your sanity and your margins, paint the walls first. I’ve seen too many renovators struggle to get a clean line between a fresh coat of paint and newly installed trim. It’s a nightmare of masking tape and wasted time. Get your walls finished, then nail in the skirting. It makes the final touch-up much easier and ensures you aren’t fighting a losing battle against messy edges.

  • Building a Durable Outdoor Patio

    Building a Durable Outdoor Patio

    I remember standing in the middle of a muddy, sloping backyard during my first major flip, staring at a patch of dead grass and a cracked, uneven concrete slab that looked like it had been there since the seventies. Most contractors were already trying to upsell me on a massive, multi-tiered stone staircase that would have eaten my entire renovation budget before I even touched the kitchen. They wanted me to believe that a high-end patio installation required a small fortune in premium materials, but I knew better. I didn’t need a monument; I needed a functional, high-ROI outdoor space that would make the property pop in listing photos without draining my capital.

    In this guide, I’m stripping away the fluff and the overpriced designer nonsense. I’m going to walk you through the actual mechanics of a smart patio installation, focusing on how to choose materials that look expensive but are actually budget-friendly and durable. We aren’t just talking about laying down pavers; we are talking about strategic design choices that turn a neglected backyard into a massive equity driver. If you’re ready to stop guessing and start building, let’s get to work.

    Table of Contents

    Smart Outdoor Living Space Design for Maximum Equity

    Smart Outdoor Living Space Design for Maximum Equity

    When you’re looking at a backyard, I don’t want you to just see a place to put a grill; I want you to see an extension of the home’s square footage. The secret to a high-ROI project is cohesive outdoor living space design that feels intentional rather than an afterthought. If you’re torn between a paver vs concrete patio, remember that while concrete is cheaper upfront, high-quality pavers offer that textured, premium look that buyers crave during a walkthrough. I always tell my clients to design in “zones”—a dining area, a lounge spot, and perhaps a fire pit zone—to make the space feel functional and high-end.

    However, don’t let the pretty aesthetics blind you to the technicalities. I’ve seen too many beautiful projects fail because the owner ignored drainage for outdoor patios. If water pools near your foundation, you aren’t building equity; you’re building a lawsuit. Before you start pouring or laying stone, ensure your grading is spot on. A smart layout that manages water flow seamlessly is what separates a DIY disaster from a professional-grade asset.

    Paver vs Concrete Patio Choosing Your Foundation

    Paver vs Concrete Patio Choosing Your Foundation

    When you’re staring down a blank slate in the backyard, the “paver vs concrete patio” debate is usually the first big hurdle. If you’re looking for the absolute lowest entry price, poured concrete is going to win that battle every time. It’s straightforward, fast, and keeps your initial budget lean. However, as someone who looks at every project through the lens of ROI, I see concrete as a bit of a gamble. It’s prone to hairline fractures and can look incredibly dated if you don’t invest in high-end finishes.

    On the flip side, pavers offer a level of flexibility that’s hard to beat. They allow for intricate patterns and much better drainage for outdoor patios, which is a massive deal if you’re dealing with a slope. While the patio cost per square foot is higher upfront due to the labor involved in setting the base, the long-term value is significantly higher. Pavers don’t just look more expensive; they are easier to repair if the ground shifts. You aren’t replacing a whole slab; you’re just swapping out a few stones. For a high-end flip, I’ll take the pavers every single time.

    Stop Wasting Money: 5 Rules for a High-ROI Patio Install

    • Don’t overbuild for your neighborhood. If you’re flipping a modest suburban ranch, a massive, multi-tiered stone masterpiece will never see a return. Stick to high-quality, clean lines that complement the existing footprint rather than trying to outdo the neighbors.
    • Prioritize drainage from day one. I’ve seen too many investors lose their shirt because they built a beautiful patio that essentially turned their backyard into a swimming pool every time it rained. If the grading isn’t perfect, your foundation—and your profit margin—is at risk.
    • Think about the “flow” of the house. A patio shouldn’t feel like an afterthought tacked onto the back of the property; it needs to feel like a natural extension of your indoor living space. If the transition from your sliding glass door to the pavers feels awkward, the design has failed.
    • Invest in the sub-base, not just the surface. It’s tempting to spend your entire budget on high-end natural stone, but if you skimp on the gravel and sand compaction underneath, those expensive pavers will be shifting and uneven within two seasons. You can’t hide a bad foundation with pretty stones.
    • Plan for lighting and power early. If you’re tearing up the ground for a new installation, now is the time to run conduit for low-voltage LED lighting or outdoor outlets. Adding these features later involves more digging and more headaches, both of which eat directly into your renovation budget.

    The Bottom Line on Your Backyard ROI

    Stop treating a patio like a luxury add-on; treat it as a strategic extension of your square footage that justifies a higher asking price.

    Prioritize durability over cheap aesthetics, because a cracked or uneven foundation will eat your profits faster than a bad kitchen remodel.

    Focus on “lifestyle design”—buyers aren’t just buying pavers, they’re buying the vision of hosting summer dinners and relaxing in a curated outdoor room.

    ## Stop Seeing Dirt, Start Seeing ROI

    “A lot of people treat a patio like an afterthought—just some concrete poured in the backyard to hold a grill. But if you’re looking to build real equity, you have to view outdoor living as a seamless extension of your square footage. I don’t just install pavers; I engineer lifestyle spaces that make a buyer fall in love before they even step through the front door.”

    Gareth Trelawny

    Turning Dirt into Dollars

    Turning Dirt into Dollars with patios.

    At the end of the day, a patio installation isn’t just about picking out some pretty stones or leveling out a patch of mud. It’s a strategic move. We’ve looked at how smart design choices can transform a useless backyard into a high-value outdoor living room, and we’ve weighed the long-term durability of pavers against the budget-friendly nature of concrete. Whether you go for the high-end aesthetic of interlocking pavers or the straightforward utility of a poured slab, the goal remains the same: creating a functional asset that justifies a higher asking price. Don’t let the technical details overwhelm you; just ensure that every dollar you sink into that ground is working toward increasing your overall property equity.

    I know that looking at a muddy, uneven backyard can feel like just another headache on an endless renovation to-do list. But I promise you, once that foundation is set and the vision starts coming together, it’s incredibly rewarding. Real estate isn’t about finding perfection; it’s about seeing the value where others see a mess. Stop viewing your outdoor space as a liability and start seeing it as your next big win. Get out there, measure twice, and start building the wealth you deserve, one square foot at a time.

    Frequently Asked Questions

    How much should I actually budget for a patio if I want to avoid cutting into my renovation margins?

    Look, if you’re trying to protect your margins, don’t guess. A safe rule of thumb for a mid-range patio is roughly 10% to 15% of your total outdoor renovation budget. If you’re going high-end with pavers or natural stone, expect to pay more per square foot. I always bake in a 15% contingency buffer for site prep—because once you start digging, you never know what kind of drainage nightmare you’re going to find.

    Is it worth hiring a pro for the base prep, or can I DIY the grading and gravel to save some cash?

    Look, I get the temptation to save a few hundred bucks by DIYing the grading, but here’s the reality: the base is the one thing you can’t fix easily once the pavers are down. If your slope is off by even a fraction, you’re looking at pooling water and a sinking patio within two seasons. If you aren’t confident with a laser level and a plate compactor, hire a pro for the prep. Don’t trade short-term savings for long-term structural headaches.

    When am I going to see a real return on investment—will a high-end patio actually move the needle on my resale price?

    Look, if you’re thinking about dropping fifty grand on imported Italian travertine just because you like the look, you’re going to kill your margins. You won’t see a return on “luxury” for luxury’s sake. But, if you invest in a high-quality, functional space that extends the living area, you’ll see that needle move during the appraisal. It’s about perceived square footage. Make it look like an intentional room, not just a slab of stone.