Author: Gareth Trelawny

  • Essential Bathroom Upgrades for House Flipping

    Essential Bathroom Upgrades for House Flipping

    I still remember the smell of damp drywall and old grout from my first solo flip—a cramped, 1970s ranch where the master ensuite looked more like a crime scene than a sanctuary. Most “experts” will tell you that a high-end bathroom renovation requires a six-figure budget and custom Italian marble to see a return, but honestly? That’s just expensive noise designed to separate you from your cash. I’ve stood in enough dusty job sites to know that the real money isn’t made in the gold-plated faucets; it’s found in the strategic decisions you make before the first tile is even laid.

    I’m not here to sell you on a lifestyle magazine fantasy or a list of overpriced trends that will be dated by next season. Instead, I’m going to show you how to approach a bathroom renovation with a cold, calculated eye for ROI. We’re going to talk about where to spend your hard-earned capital and, more importantly, where to cut corners safely to maximize your equity. If you’re ready to stop guessing and start building real wealth through smart, tactical rehabs, let’s get to work.

    Table of Contents

    Modern Bathroom Remodeling Ideas for Maximum Equity

    Modern Bathroom Remodeling Ideas for Maximum Equity

    When I’m walking through a potential flip, I’m not looking for a pristine master suite; I’m looking for the bones that can support a high-end finish. To hit those luxury bathroom aesthetic trends without draining your entire renovation budget, focus on high-impact, tactile elements. Think matte black fixtures paired with floating vanities to create a sense of airiness. If you’re dealing with a cramped layout, don’t panic—small bathroom space optimization is where the real money is made. Using large-format tiles can actually make a tiny room feel expansive, provided you choose the right grout color to minimize visual clutter.

    Don’t get distracted by flashy, expensive gadgets that won’t actually move the needle during a resale. Instead, prioritize the stuff that buyers can’t see but will definitely notice if it fails. I always tell my clients to budget for bathroom plumbing upgrades early in the process. It’s much better to swap out old, corroded pipes while the walls are open than to face a catastrophic leak six months after you’ve closed the deal. Solid, functional infrastructure is what turns a quick flip into a long-term asset.

    Navigating Your Bathroom Renovation Cost Estimator Without Breaking
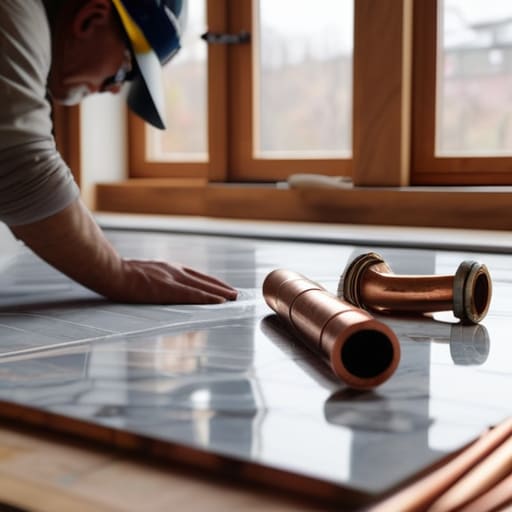
    Look, I’ve seen too many investors go into a project with a “vibe” and no actual math, only to end up bleeding cash before they even pick out a tile. Using a bathroom renovation cost estimator isn’t about being stingy; it’s about protecting your margins. When I’m walking a site, I’m not just looking at the pretty finishes; I’m looking at the guts. You have to account for the invisible stuff—like essential bathroom plumbing upgrades—that can easily blow a budget if you’re only focusing on the surface level.

    The trick is to categorize your spending into “equity builders” and “aesthetic fluff.” If you’re working with a tight budget, prioritize high-impact changes like new fixtures or better lighting over high-end stone that won’t actually move the needle on your resale price. I always tell my clients to build a 15% contingency buffer into their estimates. Whether you’re dealing with unexpected mold or a subfloor that’s seen better days, that buffer is the difference between a profitable flip and a financial sinkhole.

    My Golden Rules for Avoiding Renovation Money Pits

    • Prioritize the “wet” work first; I’ve seen too many investors waste money on high-end vanity installs only to have to tear them out because they ignored a hairline crack in the subfloor or a slow leak in the waterproofing.
    • Stop chasing trends and start looking at timeless durability; a trendy brass fixture might look great on Instagram today, but if it’s hard to clean or looks dated in two years, you’re eating that cost when it’s time to flip.
    • Don’t skimp on the lighting plan; a single, lonely overhead light makes even the most expensive tile look cheap, so always budget for layered lighting—task, ambient, and accent—to create that high-end boutique feel.
    • Think about the layout before you think about the aesthetics; moving a toilet or a drain is the fastest way to blow your budget, so if the current footprint works, keep it and pour that saved cash into premium finishes instead.
    • Always, always over-order your tile; there is nothing more soul-crushing than being three tiles short on a Sunday afternoon when the supplier is closed, and trust me, you’ll need those extras for future repairs once the house is sold.

    Bottom Line: Turning Tiles into Equity

    Stop chasing expensive trends; focus on high-impact, durable upgrades like modern fixtures and clean tiling that appeal to the widest range of buyers.

    Always keep a buffer in your renovation budget for the “hidden” issues—because once you peel back those old bathroom tiles, you never know what kind of water damage you’re actually dealing with.

    View every renovation through the lens of ROI, ensuring that every dollar spent on your bathroom is a calculated move toward increasing the property’s total market value.

    The Real Value of a Dirty Bathroom

    Stop looking at a cracked vanity and water-stained ceiling as a headache; look at them as a discount on your entry price. In this game, a messy bathroom isn’t a dealbreaker—it’s your biggest opportunity to manufacture equity before you even list the property.

    Gareth Trelawny

    The Bottom Line on Bathroom ROI

    The Bottom Line on Bathroom ROI.

    At the end of the day, a successful bathroom renovation isn’t about picking the most expensive marble slab or chasing every passing design trend. It’s about the strategic intersection of aesthetics and utility. We’ve walked through how to select modern fixtures that actually move the needle on appraisal, and more importantly, how to use a cost estimator to keep your budget from spiraling into a money pit. Remember, your goal isn’t just to create a pretty space; it’s to ensure every dollar you pour into those tiles and vanities translates into tangible, measurable equity. If you keep your eye on the numbers and your hands on the quality of the materials, you aren’t just remodeling—you are building an asset.

    I know that looking at a gutted bathroom with exposed pipes and outdated plumbing can feel overwhelming, but that’s exactly where the opportunity lives. Don’t let the dust and the chaos intimidate you. Every time I step onto a job site that looks like a disaster zone, I don’t see a mess; I see the future profit margin waiting to be unlocked. Real estate investing is a marathon, not a sprint, and mastering these high-impact renovations is how you win. So, grab your laser measurer, trust your gut, and get to work. It’s time to turn those crumbling walls into wealth.

    Frequently Asked Questions

    How do I decide whether to gut the entire bathroom or just swap out the fixtures to keep my margins high?

    Look at the bones first. If the plumbing is solid and the layout works, don’t go tearing out walls just for the sake of it—that’s how you bleed your margins dry. Swap the fixtures, refresh the tile, and go heavy on high-end hardware to create that “wow” factor. But, if you’re staring at moldy subfloors or ancient, leaking pipes, gut it. You can’t build equity on a shaky foundation.

    What are the biggest "hidden" red flags I should look for behind the walls before I commit to a renovation budget?

    Look, if you’re only looking at the pretty tile, you’re doing it wrong. Before you commit a dime to those mid-century fixtures, you need to know what’s lurking behind the drywall. I always check for water staining around the tub—that’s a sign of slow, systemic leaks. Also, watch for uneven flooring or cracks in the subfloor; that usually means structural rot or a failing joist. If the plumbing looks like a spaghetti mess of galvanized steel, budget for a total overhaul.

    At what point does spending more on high-end finishes stop being a smart investment and start eating into my actual profit?

    Look, I love a high-end matte black fixture as much as the next person, but there’s a hard ceiling. You stop seeing a return the moment you start buying for your own taste instead of the neighborhood’s ceiling price. If you’re in a mid-range suburb, installing a $3,000 designer soaking tub won’t magically jump your sale price by $5,000. You’re just subsidizing your hobby with your profit margin. Stick to high-quality, durable essentials and save the luxury splurges for your personal sanctuary.


  • An Introduction to Property Syndication

    An Introduction to Property Syndication

    I remember standing in the middle of a gutted mid-century bungalow last year, dust coating my lungs and the smell of damp drywall thick in the air, staring at a renovation budget that had just spiraled out of control. I had the vision, but I didn’t have the liquid capital to scale the project to the level I wanted. That’s when the industry gurus start throwing around terms like property syndication as if it’s some mystical, gatekept secret reserved for the ultra-wealthy. Let’s be real: most people talk about it like it’s a complex math equation designed to keep you out, but it’s actually just a way to pool resources so we can stop playing small.

    I’m not here to feed you a polished, corporate slideshow or some “get rich quick” fantasy. I’m going to pull back the curtain and show you how to actually use property syndication to leverage collective capital without losing your shirt. We’re going to skip the fluff and focus on the grit—the real, messy mechanics of how you can participate in larger deals and start building that generational wealth you’ve been working for.

    Table of Contents

    Real Estate Syndication Benefits Building Equity Without the Hard Labor

    Real Estate Syndication Benefits Building Equity Without the Hard Labor

    Look, I love a good renovation project as much as the next person—there’s nothing quite like the rush of seeing a gutted kitchen transform into a high-end centerpiece. But let’s be honest: I can’t be on three different job sites at once, and I certainly can’t manage a fifty-unit apartment complex by myself. This is where the real estate syndication benefits start to outweigh the DIY thrill. Instead of managing every plumber and electrician, you’re essentially stepping into a limited partnership real estate structure. You provide the fuel (the capital), and a professional team handles the heavy lifting, the permits, and the midnight calls about broken boilers.

    The biggest shift here is understanding the syndicator vs passive investor roles. In my usual flipping business, I am the one in the trenches. In a syndication, you’re the strategist. You aren’t losing the chance to build wealth; you’re just changing your method of delivery. You get exposure to large-scale multifamily real estate syndication deals that would be financially impossible to tackle solo, all without having to pick up a sledgehammer or deal with a single contractor.

    Syndication vs Direct Ownership Why You Dont Need to Hold the Hammer

    Syndication vs Direct Ownership Why You Dont Need to Hold the Hammer

    Look, I love a good renovation project as much as the next person. There is something incredibly satisfying about stripping old wallpaper or sourcing the perfect mid-century sideboard for a living room. But let’s be real: most people don’t have the time to manage a crew of contractors or the stomach for a plumbing disaster at 2:00 AM. This is where the core difference in syndication vs direct ownership becomes clear. When I buy a fixer-upper myself, I am the one dealing with the permits, the leaky roofs, and the endless supply runs. In a syndication, you aren’t the one holding the hammer; you’re the one providing the fuel for the engine.

    In a typical deal, the roles are clearly defined. The syndicator handles the heavy lifting—finding the deal, securing the financing, and managing the asset—while you step into a limited partnership real estate role. You get to benefit from the appreciation and cash flow of a large-scale project, like a massive apartment complex, without ever having to step foot on a dusty job site. It’s about choosing whether you want to be the person managing the chaos or the person profiting from the results.

    5 Ways to Vet a Syndication Deal Without Losing Your Shirt

    • Look past the shiny renderings. I’ve seen too many investors get blinded by high-end 3D models while ignoring a shaky foundation. Demand to see the actual inspection reports and the historical data on the asset before you even think about signing anything.
    • Audit the General Partner (GP) like they’re a contractor you’re hiring for a full gut rehab. You need to know their track record—not just what they did when the market was booming, but how they handled a crisis when things actually went sideways.
    • Get crystal clear on the “waterfall” structure. In my world, the math has to make sense. You need to know exactly when you start seeing your preferred return and how the profits are split once the sponsors hit their benchmarks.
    • Don’t ignore the exit strategy. A good deal needs a realistic way out, whether that’s a refinance or a sale in five years. If the sponsor’s plan for liquidity feels vague or overly optimistic, walk away. I’d rather miss a deal than get stuck in one.
    • Check the alignment of interests. I always want to see the sponsors putting their own skin in the game. If they aren’t investing their own capital alongside yours, they don’t have the same motivation to protect the asset when the renovation gets messy.

    The Bottom Line: Is Syndication Right for Your Portfolio?

    You can build serious real estate wealth without ever having to pick up a sledgehammer or deal with a midnight plumbing emergency.

    Syndication is the ultimate shortcut for investors who have the capital but lack the time or the desire to manage day-to-day renovations.

    While I love the grit of a hands-on flip, syndication allows you to scale your portfolio much faster by letting the pros handle the messy heavy lifting.

    ## Scaling Without the Scuff Marks

    “Syndication isn’t about stepping away from the game; it’s about playing it smarter. You don’t always have to be the one swinging the sledgehammer to profit from the renovation—sometimes, the most strategic move is providing the capital that turns a wreck into a masterpiece.”

    Gareth Trelawny

    The Bottom Line on Building Wealth

    The Bottom Line on Building Wealth.

    At the end of the day, syndication isn’t about avoiding the real estate game; it’s about choosing the right role within it. We’ve looked at how this model allows you to tap into massive deals, diversify your risk, and access professional management without having to spend your weekends arguing with a plumber or tracking down a missing permit. You don’t have to be the one swinging the hammer to benefit from the value created when a building is transformed. Whether you’re looking for passive cash flow or long-term appreciation, syndication provides a structured pathway to scale your portfolio in a way that direct ownership simply can’t match for someone with a busy schedule. It is about leveraging expertise rather than just leveraging your own manual labor.

    I know the idea of putting your capital into someone else’s project can feel intimidating—I’ve been there, standing on a dusty job site wondering if I’ve made a mistake. But remember, the goal isn’t just to own property; it’s to build generational wealth. You don’t need a massive inheritance or a background in construction to start making your money work as hard as you do. Stop waiting for the “perfect” time to buy a single-family fixer-upper and start looking at the bigger picture. Find your seat at the table, do your due diligence, and start turning vision into equity.

    Frequently Asked Questions

    How much capital do I actually need to get started, or is this only for people who are already wealthy?

    Look, I get it. You see the big numbers and assume you need a massive trust fund to play. You don’t. While direct flipping requires you to sink your own life savings into a single property, syndication lets you pool your resources with others. You’re looking for an entry point, not a mountain of cash. It’s about finding the right deal and the right partners, not having a million dollars sitting in the bank.

    How do I vet a syndicator to make sure they aren't just another person with a flashy pitch but no actual skin in the game?

    Look, I’ve seen enough flashy pitch decks to know a shark from a professional. To vet a syndicator, stop looking at their Instagram and start looking at their track record. Ask for a detailed breakdown of their “skin in the game”—how much of their own liquid capital is actually tied to the deal? If they aren’t co-investing alongside you, walk away. You want someone who feels the sting of a bad renovation just as much as you do.

    What happens to my money if the renovation goes sideways or the market takes a sudden dip?

    Look, I’ll be blunt: nothing in this game is a guaranteed win. If a renovation hits a massive snag or the market tanks, your capital is at risk. That’s why I don’t just jump into any deal. You have to vet the general partner’s track record and look for a healthy capital reserve in the budget. You aren’t swinging the hammer, but you still need to ensure there’s a safety net for when things get messy.

  • Ways to Find Undervalued Real Estate

    Ways to Find Undervalued Real Estate

    I still remember the smell of damp drywall and old cigarette smoke from my first solo project—a tiny, neglected bungalow that most people wouldn’t have looked at twice. While everyone else was chasing “turnkey” properties and fighting over polished condos in overpriced zip codes, I was standing in a dark hallway, clicking my laser measurer and seeing something they couldn’t: pure potential. The truth is, most people fail at finding undervalued real estate because they’re looking for a finished product, when the real money is actually hidden behind peeling wallpaper and outdated floor plans.

    I’m not here to sell you on some “get rich quick” algorithm or a magical way to bypass the hard work. What I am going to do is show you how to develop the eye for value that separates the hobbyists from the actual investors. I’ll walk you through the gritty, unglamorous reality of spotting a house with good bones and calculating whether a renovation is a goldmine or a money pit. If you’re ready to stop chasing the hype and start building real equity, let’s get to work.

    Table of Contents

    Mastering Distressed Property Acquisition Without a Fortune

    Mastering Distressed Property Acquisition Without a Fortune

    Most people think you need a mountain of cash to play in this game, but that’s exactly how the big players keep the margins for themselves. If you’re waiting for a polished listing to hit the MLS, you’ve already lost the race. To actually make money, you have to get comfortable with the grit. I focus heavily on off-market property sourcing because that’s where the real deals live—the ones tucked away in probate filings, behind overgrown lawns, or in the hands of tired landlords who just want out.

    It’s not about having a massive bank account; it’s about mastering the art of distressed property acquisition. You’re looking for the house that everyone else is driving past because the siding is peeling and the porch is sagging. While others see a disaster, I’m looking at the structural integrity and the property appreciation potential once the cosmetic mess is cleared away. You have to train your eyes to see past the grime and focus on the math. If the numbers work and the bones are solid, the mess is just an opportunity in disguise.

    Sourcing Off Market Property Secrets the Big Banks Miss

    Sourcing Off Market Property Secrets the Big Banks Miss.

    If you’re waiting for a shiny listing to pop up on Zillow with a “price reduced” tag, you’ve already lost the race. By the time a property hits the public market, the institutional investors and the big banks have already sniffed out the margin. To actually make money, you have to master off-market property sourcing before the competition even knows the house is for sale. I’ve found that the best deals aren’t found behind a computer screen; they’re found by walking the streets of neighborhoods that are just starting to see a shift.

    I spend a lot of my time looking for the “invisible” signs of distress—overgrown lawns, boarded-up windows, or even just a mailbox that hasn’t been touched in weeks. This is where you apply real real estate investment fundamentals. You aren’t just looking for a house; you’re looking for a motivated seller who might be overwhelmed by the upkeep. Building relationships with local wholesalers and even driving for dollars is how you uncover those gems. It’s more grunt work than most people want to do, but that’s exactly why the margins stay so high for those of us willing to put in the legwork.

    My Playbook for Spotting Gold in the Grime

    • Look for “cosmetic nightmares” rather than structural disasters. A house with hideous 1970s shag carpet and peeling wallpaper is a goldmine; a house with a cracked foundation is a money pit. I hunt for the stuff that looks scary to the average buyer but only requires a weekend of sweat equity and some fresh paint to fix.
    • Follow the “ugly” houses in the best neighborhoods. Most people want move-in ready, which means they bid up the prices of polished homes. I look for the house on the corner with the overgrown lawn and the outdated exterior. That’s where the margin is hiding.
    • Become a regular at local probate auctions and estate sales. When families are dealing with an inherited property, they often aren’t looking to stage a masterpiece; they just want the asset liquidated. That’s where you find motivated sellers who care more about a quick close than squeezing every last cent out of the sale.
    • Master the art of the “drive-by” audit. You can tell a lot about a property’s potential just by looking at the roofline and the window casings from the street. If the bones look straight but the curb appeal is non-existent, grab your laser measurer and get closer.
    • Don’t ignore the “tired” rental markets. Look for areas where long-term landlords are finally ready to exit. These properties often haven’t seen an update in twenty years, meaning you can implement a high-impact, minimalist renovation that instantly jumps the property value.

    The Bottom Line on Finding Your Next Flip

    Stop competing with the big players on the MLS; the real equity is hidden in the off-market deals you find by actually talking to people in the neighborhood.

    Don’t let a messy interior scare you off, but don’t ignore the bones—you can fix a bad kitchen, but you can’t fix a bad foundation without blowing your entire budget.

    Success in this game isn’t about how much capital you start with, it’s about your ability to see the potential in a wreck that everyone else is too afraid to touch.

    The Vision Over the Veneer

    Stop looking for the house that’s ready for a photoshoot and start looking for the one that makes you wince. The real money isn’t sitting in the pristine living rooms; it’s buried under layers of outdated wallpaper and bad decisions. If you can see past the mess to the equity underneath, you’ve already won.

    Gareth Trelawny

    The Bottom Line on Finding Your First Win

    The Bottom Line on Finding Your First Win

    Look, finding undervalued real estate isn’t about luck or having a massive inheritance waiting in a bank account. It’s about the legwork. We’ve talked about how you can master distressed acquisitions without breaking the bank and how to dig into those off-market secrets that the big institutional investors are too lazy to look for. It comes down to recognizing that a house with peeling paint and a dated layout isn’t a disaster—it’s an opportunity in disguise. If you can combine a sharp eye for structural potential with the ability to find deals outside the standard MLS loop, you are already ahead of ninety percent of the people playing this game.

    At the end of the day, the math only works if you have the stomach for the process. There will be days when a renovation feels like it’s falling apart around you, but remember that equity is built in the mess. Don’t let the fear of a little dust or a complicated permit process keep you on the sidelines. Real estate isn’t just about bricks and mortar; it’s about the grit you show when things get unpolished. Grab your measuring tape, get out there, and start turning those crumbling walls into the foundation of your future.

    Frequently Asked Questions

    How do I tell the difference between a house with "good bones" and one that's a money pit with structural issues I can't fix?

    Look, I’ve seen it all: a gorgeous mid-century facade hiding a foundation that’s basically a suggestion. To tell the difference, follow the lines. Check the door frames and window casings—if they’re skewed or cracked, you’re looking at foundation shifts that’ll eat your profit alive. I always look for straight vertical lines and a dry basement. If the “bones” require moving load-bearing walls or fixing massive structural rot, walk away. You want cosmetic messes, not structural nightmares.

    What’s the best way to approach a motivated seller without sounding like a predatory wholesaler?

    Look, if you walk in there with a script and a predatory vibe, you’ve already lost. I don’t approach people as “deals”; I approach them as neighbors with a problem I can solve. Instead of lowballing them immediately, lead with empathy. Ask about the property’s history or why they’re looking to move. You aren’t just hunting for equity; you’re offering a way out of a headache. Be human, be transparent, and lead with value.

    How much of a buffer should I actually build into my renovation budget to account for those inevitable "hidden" surprises behind the drywall?

    Look, if you’re budgeting with a 5% cushion, you’re dreaming. In my experience, anything less than 15% is just asking for a heartbreak. When you start tearing down drywall and realize the electrical is a fire hazard or the subfloor is rotting, that “small” surprise becomes a massive equity drain. I always aim for 20% if the property is a true fixer-upper. It’s not pessimism; it’s the only way to keep your profit margins from evaporating.

  • Guide to Installing Laminate Flooring

    Guide to Installing Laminate Flooring

    I was kneeling on a dusty subfloor in a drafty Victorian fixer-upper last Tuesday, staring at a gap in the planks that looked wide enough to swallow my laser measurer, wondering why I didn’t just hire a contractor. Most people will tell you that laminate flooring installation is a high-end luxury or a weekend DIY project for the faint of heart, but they’re wrong. In my experience, it is actually one of the fastest ways to inject instant equity into a property without draining your renovation budget. If you approach it with the right mindset, you aren’t just laying down planks; you’re building a margin.

    I’m not here to give you a sanitized, textbook version of how this works. I’m going to show you the gritty reality of how to execute a professional-grade laminate flooring installation that won’t buckle or creak the moment a tenant moves in. We’re going to cover the prep work that most rookies skip, how to avoid those expensive flooring mistakes that eat your profits, and the exact sequence I use to get the job done efficiently. Let’s stop staring at the subfloor and start building some real value.

    Table of Contents

    Guide Overview

    Total Time: 1-2 days per room
    Estimated Cost: $1.50-$4.00 per sq. ft.
    Difficulty: Beginner

    Tools & Supplies

    • Tape measure for precise floor dimensions
    • Rubber mallet for tapping planks into place
    • Spacers to maintain expansion gaps at walls
    • Utility knife or laminate cutter for trimming planks
    • Tapping block to prevent damage during installation
    • Laminate flooring planks based on total area
    • Underlayment rolls to cover the entire floor area
    • Transition strips for doorway thresholds
    • Moisture barrier if installing over concrete

    Step-by-Step Instructions

    • 1. Before you even crack open a box, you need to prep the subfloor like your ROI depends on it—because it actually does. Clear out every stray nail, pebble, or bit of dried drywall mud, then run your hand across the surface; if it feels uneven, you’re going to have major clicking issues later. Once it’s clean, lay down your underlayment, making sure the seams don’t overlap, or you’ll end up with a bouncy floor that feels cheap.
    • 2. Grab your laser measurer—mine is practically an extension of my arm at this point—and mark your starting line along the longest wall. You want to ensure the first row is perfectly straight, otherwise, that tiny error will snowball into a disaster by the time you reach the far side of the room. I always use a chalk line for this to keep things precise and professional.
    • 3. Start laying your first row of planks, but here’s the pro tip: don’t forget to leave an expansion gap between the flooring and the wall. Use spacers to keep that gap consistent—usually about 1/4 to 3/8 of an inch—because wood and laminate are going to expand and contract with the seasons. If you skip this, your beautiful new floor will buckle the first time the humidity spikes.
    • 4. When you get to the end of a row, take the leftover piece from the previous plank to start your next one. This “staggered” method is crucial for both structural integrity and making the floor look natural rather than grid-like. Just make sure your end joints are at least six to eight inches apart so you don’t create weak points in the layout.
    • 5. For those tricky cuts around door jambs or corners, don’t try to hack it with a standard saw. Use a jamb saw or a multi-tool to undercut the trim so the flooring can slide seamlessly underneath it. It’s a bit more work upfront, but it’s the difference between a DIY look and a high-end renovation that actually adds value to the property.
    • 6. Once the last plank is clicked into place, it’s time to hide those expansion gaps. Install your baseboards or quarter-round molding, but don’t nail them into the floor—only nail them into the wall. If you pin the flooring down with the trim, you’re essentially inviting the floor to warp and crack under its own pressure.
    • 7. Finally, give the whole floor a thorough sweep and a quick inspection. Walk every inch of it to check for any “hollow” sounds or uneven spots that might indicate a subfloor issue you missed. If it feels solid and looks clean, you’ve just successfully turned a budget-friendly material into a professional-grade asset.

    Leveling Subfloor for Laminate to Ensure Solid Equity

    Leveling Subfloor for Laminate to Ensure Solid Equity

    Look, I’ve seen too many rookies try to skip the prep work because they’re staring down a tight renovation timeline. They think they can just slap the planks over a bumpy floor and hope for the best. Let me tell you: that is a one-way ticket to a clicking, popping floor that will drive your future tenants insane. If you aren’t leveling subfloor for laminate properly, those joints in your click-lock flooring system are going to snap under pressure. You need a flat, clean canvas if you want this asset to actually hold its value.

    Grab a high-quality self-leveling compound and a good trowel. I always check the floor with a long straightedge first; if there’s a dip deeper than a 1/8th inch, you need to fill it. While you’re at it, don’t forget your laminate flooring moisture barrier. If you’re working on a concrete slab, skipping that layer is just asking for mold and ruined margins later. It’s about being pragmatic, not lazy. Spend the extra day on the subfloor now so you aren’t paying for a full replacement in eighteen months.

    The Click Lock Flooring System Fast Results for Small Budgets

    The Click Lock Flooring System Fast Results for Small Budgets

    When you’re racing against a renovation timeline, the click-lock flooring system is your best friend. I’ve seen too many investors blow their margins on expensive hardwoods when a high-quality laminate could have delivered the same aesthetic punch for half the cost. The beauty of this system is the speed; you aren’t messing around with messy adhesives or heavy staplers. You just angle the plank, drop it into the groove, and hear that satisfying click. It’s efficient, it’s clean, and most importantly, it’s easy to DIY if you’re trying to keep your labor costs low.

    However, don’t mistake “easy” for “careless.” If you ignore the technical details, you’re just building a headache into your floor. You absolutely have to account for laminate flooring expansion gaps along every single wall. I always keep a few spacers handy because if those planks don’t have room to breathe when the humidity shifts, your floor is going to buckle, and that’s money straight out of your pocket. Treat the installation with respect, leave the gaps, and you’ll have a finished product that looks like a custom build.

    5 Pro Moves to Protect Your Margins and Your Floors

    • Acclimatize your planks in the actual room for at least 48 hours; if you skip this, the temperature shift will warp your floor before you even close the deal.
    • Leave a generous expansion gap around the perimeter—I’m talking a solid 3/8 of an inch—because if you pin that floor too tight against the wall, it’ll buckle the moment the seasons change.
    • Don’t skimp on the underlayment; a high-quality moisture barrier is the difference between a smooth sale and a nightmare mold claim from a buyer.
    • Use a tapping block and a rubber mallet for every single row; if you’re just stepping on the edges to force them together, you’re going to snap the click-lock mechanism and waste money on replacement material.
    • Check your layout before you commit to the first row; stagger your seams by at least 8 to 12 inches so you don’t end up with a “staircase” pattern that looks amateur and kills your resale value.

    The Bottom Line on Laminate ROI

    Don’t cut corners on the subfloor; if your base isn’t level, your new floor will bounce, and that’s a callback you can’t afford if you’re trying to protect your margins.

    Treat click-lock systems as your best friend for quick flips, but make sure you leave those expansion gaps—skimping on them now means a buckled floor and a massive headache during inspection.

    Focus on the visual impact of the finish; you’re choosing laminate to boost equity fast, so pick a realistic texture that looks high-end without the high-end price tag.

    ## The Margin is in the Prep

    “Don’t get blinded by a pretty pattern; if you skip the subfloor prep to save a few bucks, those hollow clicks and shifting planks will eat your profit margins faster than a bad contractor can disappear.”

    Gareth Trelawny

    The Bottom Line on Your Floor Flip

    The Bottom Line on Your Floor Flip.

    At the end of the day, installing laminate isn’t just about slapping planks together; it’s about protecting your investment from the ground up. You’ve learned that a perfectly leveled subfloor is your foundation for success, and mastering that click-lock system is what allows you to keep your labor costs low and your timeline tight. If you skip the prep work or rush the installation, you aren’t saving money—you’re just inviting a headache that will eat directly into your margins later. Do it right, do it tight, and make sure every plank is locked in so you can stop worrying about the details and start looking at your ROI.

    Renovating can feel overwhelming when you’re staring at a gutted room, but these are the exact moments where wealth is built. Every square foot of flooring you install correctly is more equity sitting in your pocket and more proof that you have the grit to handle a real project. Don’t let the dust and the DIY stress intimidate you; embrace the mess, trust your eye for potential, and remember that every small win brings you one step closer to that massive portfolio. Now, grab your laser measurer, get to work, and let’s turn that outdated space into a profitable asset.

    Frequently Asked Questions

    How do I know if my subfloor is actually level enough, or am I just wasting time with a self-leveler?

    Grab your straightedge or a long level—don’t rely on your eyes, they’ll lie to you. Lay it across the subfloor and look for light underneath. If you’ve got gaps wider than 3/16 of an inch, you’re asking for clicking joints to snap and your margins to tank. Don’t get precious with it, though; if it’s just a tiny dip, patch it. If it’s a wave, pour the self-leveler. Better to spend the extra day now than replace the whole floor in six months.

    Is there a specific type of underlayment I should use to make cheap laminate feel more like high-end hardwood?

    If you want to stop that hollow, “clacking” sound that screams budget renovation, skip the thin, cheap foam rolls. Invest in a high-density acoustic underlayment—something with a decent rubber or cork component. It adds weight and dampens the sound, making the floor feel solid underfoot rather than bouncy. It’s a small upfront cost that makes a massive difference in perceived value when you’re trying to sell that “high-end” look.

    How do I handle transitions between laminate and existing tile without making the floor look like a patchwork mess?

    Nothing kills the vibe of a clean renovation faster than a clunky, oversized T-molding that looks like an afterthought. If you’re hitting a tile line, don’t just slap a generic transition strip down. Use a slim, color-matched transition piece that sits flush. If the height difference is significant, you might need a reducer, but keep it intentional. I always aim for a seamless flow; if it looks like a patchwork quilt, you’ve already lost your margins.

  • Planning for Property Divestment

    Planning for Property Divestment

    I was standing in the middle of a gutted mid-century ranch last Tuesday, the smell of damp drywall and old sawdust thick in the air, when I realized something: most people treat their real estate like a sentimental scrapbook instead of a business. They cling to properties that have stopped performing, praying for a market spike that never comes, while their capital sits trapped behind peeling wallpaper. This is the fundamental mistake in property divestment—treating the exit like a failure rather than a strategic pivot. You aren’t “losing” a house; you are liberating your cash so you can go hunt for the next diamond in the rough.

    I’m not here to give you some watered-down lecture on asset liquidation or high-level financial theory that doesn’t work in the real world. I’m going to show you how to identify when a project has reached its peak and how to execute a clean exit that maximizes your equity. We are going to talk about the gritty, practical steps of timing your sale and moving your money into assets that actually grow. No fluff, no hype—just the straight talk you need to stop sitting on dead equity and start building a real portfolio.

    Table of Contents

    Real Estate Asset Reallocation Moving From Decay to Growth

    Real Estate Asset Reallocation Moving From Decay to Growth

    When I’m walking through a site that’s been sitting stagnant for too long, I don’t just see peeling wallpaper and outdated electrical; I see trapped capital. Real estate asset reallocation isn’t just a fancy term for selling; it’s about recognizing when a property has reached its maximum potential under your current management. If you’ve already squeezed every bit of equity out through smart renovations, holding on just for the sake of “ownership” is a mistake. You need to be aggressive about moving that money into something that actually scales.

    The real trick is mastering the balance between divestment vs liquidation. You aren’t just dumping an asset because you’re tired of the headaches; you’re strategically exiting to fund your next big play. Before you sign anything, though, you have to look closely at the capital gains tax implications. There is no point in a successful flip if the government takes a massive chunk of your hard-earned profit. My rule of thumb? Always have your next target lined up before you even list the old one, ensuring your momentum never stalls.

    Maximizing Property Sale Value Before the Walls Crumble

    Maximizing Property Sale Value Before the Walls Crumble

    Before you list a property, you need to decide if you’re doing a quick exit or a strategic play. I’ve seen too many investors rush to the closing table only to realize they left six figures on the table because they skipped the “finish” phase. If you’re looking at maximizing property sale value, don’t just throw money at everything. Focus on the high-impact, low-cost wins: fresh neutral paint, updated hardware, and curb appeal. It sounds basic, but in a competitive market, those small details are what stop a buyer from lowballing your offer.

    However, you have to be smart about where that capital goes. I always run the numbers to ensure my renovation spend actually translates to a higher sale price rather than just eating into my margins. You also need to keep an eye on the bigger picture, specifically how capital gains tax implications might eat into your actual take-home profit once the dust settles. It’s not just about the sale price; it’s about how much actual equity stays in your pocket so you can reinvest it into your next project.

    My Playbook for Knowing When to Walk Away and Cash Out

    • Don’t fall in love with a lemon. I see it all the time—investors getting emotionally attached to a property that has become a bottomless pit of repair costs. If the math doesn’t work anymore, cut your losses and pivot.
    • Timing your exit is everything. You want to list when the market is hungry, but more importantly, you want to list right after you’ve finished those high-impact, high-ROI renovations. Don’t leave money on the table by selling a house that still looks like a construction zone.
    • Watch your holding costs like a hawk. Every month you spend debating whether to sell or keep a stagnant property, you’re bleeding money through taxes, insurance, and maintenance. If the equity isn’t growing faster than your expenses, it’s time to divest.
    • Know your “Why” for the next move. Divestment isn’t just about getting rid of something; it’s about freeing up capital. Before you sign that listing agreement, have a clear plan for where that cash is going—whether it’s a bigger multi-family unit or a fresh fixer-upper.
    • Audit your portfolio for “dead weight” annually. Not every property is a winner forever. I regularly look at my assets to see which ones are performing and which ones are just taking up space. If a property isn’t contributing to your goal of building generational wealth, it’s time to move it on.

    The Bottom Line: Don't Let Your Equity Rot

    Know when to walk away; if a property is draining your cash flow faster than you can renovate it, stop pouring money into the foundation and start looking for your next project.

    Prioritize high-impact, strategic repairs that actually move the needle on your sale price rather than getting lost in the weeds of cosmetic perfection.

    Treat every divestment as a strategic pivot to free up capital, ensuring you’re always moving from stagnant, depreciating assets into high-growth opportunities.

    Knowing When to Walk Away

    Knowing When to Walk Away from investments.

    “Divestment isn’t about giving up; it’s about knowing when a property has given you everything it can. Don’t let sentimentality turn a successful flip into a long-term liability—take your profit, strip the equity, and go find your next diamond in the rough.”

    Gareth Trelawny

    Knowing When to Walk Away

    At the end of the day, successful property divestment isn’t about being indecisive; it’s about knowing exactly when a project has reached its peak. We’ve talked about identifying when an asset is dragging down your liquidity, the importance of strategic reallocation, and how to squeeze every last drop of value out of a renovation before you list. You have to be willing to stop throwing good money after bad if the math no longer adds up. Don’t let an emotional attachment to a fixer-upper blind you to the reality that your capital is much better spent on a new, high-potential opportunity. Smart investing is as much about exiting as it is about entering.

    Building a real estate empire isn’t a sprint, and it certainly isn’t a straight line. It’s a series of calculated moves, some of which involve letting go of what you’ve built to make room for what’s next. I’ve learned the hard way that holding onto a stagnant asset is the fastest way to kill your momentum. Use the equity you’ve worked so hard to create to fund your next big win. Keep your eyes on the horizon, stay disciplined with your numbers, and remember that every sale is just a stepping stone toward the generational wealth you’re building. Now, go find your next diamond in the rough.

    Frequently Asked Questions

    How do I know if I should pour more money into a renovation or just cut my losses and sell the property as-is?

    Run the numbers, then run them again. I always look at the “ceiling”—the maximum price comparable homes in the area are actually fetching. If your projected renovation costs plus your purchase price are creeping too close to that ceiling, stop. Don’t chase a profit margin that isn’t there. If the math doesn’t leave room for a healthy buffer, cut your losses and sell as-is. I’d rather take a smaller win than sink more cash into a losing battle.

    At what point does a property stop being a growth asset and start becoming a drain on my liquid capital?

    You know you’ve crossed the line when the “opportunity cost” starts eating your lunch. If you’re spending more time chasing contractors and bleeding cash on emergency repairs than you are actually building equity, that property is no longer an asset—it’s a liability. When the monthly carrying costs and maintenance headaches begin to outpace your projected ROI, stop digging. Cut your losses, liquidate, and move that capital into something that actually scales.

    What are the biggest red flags that tell me it's time to divest rather than trying to fix another structural issue?

    Look, I love a good challenge, but you have to know when to walk. If you’re staring at a foundation that’s shifting more than a seasonal tenant, or if the cost of remediation starts eating into your projected profit margins, stop. When the “fix” requires a massive capital injection just to reach baseline safety, you aren’t investing anymore—you’re just subsidizing a disaster. Cut your losses, sell the shell, and move that equity into something that actually grows.

  • How to Build Property Equity

    How to Build Property Equity

    I was standing in a kitchen that smelled like thirty years of damp drywall and regret, clutching my laser measurer while staring at a floor plan that most people would have walked away from. The previous owner saw a disaster, but as I traced the lines of the original layout, I didn’t see a mess—I saw the hidden property equity buried under layers of cheap, outdated laminate and peeling wallpaper. Most “gurus” will tell you that building wealth is about timing the market or having a massive pile of liquid cash, but they’re selling you a fantasy. Real wealth isn’t found in a bull market; it’s found in the grit and sweat you put into a house that everyone else has given up on.

    I’m not here to give you a lecture on high-level macroeconomics or some polished, textbook theory. I’m going to show you the actual, unvarnished mechanics of how to identify value where others see nothing but chaos. We’re going to talk about how to strategically renovate to maximize your returns and, more importantly, how to ensure every dollar you spend on a job site is directly contributing to your bottom line.

    Table of Contents

    Calculating Home Equity Beyond the Surface Level

    Calculating Home Equity Beyond the Surface Level

    Most people make the mistake of thinking their equity is just a static number sitting in a bank account. They see the value of their house and subtract what they owe, calling it a day. But if you want to play the long game like an investor, you have to look deeper than just the equity vs mortgage balance math. You need to understand how much of that value is “trapped” and how much is actually working for you.

    When I’m scouting a new project, I’m not just looking at the current market price; I’m looking at the real estate appreciation impact over a five-to-ten-year horizon. True wealth isn’t just about having a high valuation on paper; it’s about understanding how much liquid capital you can actually access through smart equity release strategies once the renovation is complete. If you aren’t accounting for the delta between your purchase price, your renovation spend, and the projected market shift, you aren’t calculating wealth—you’re just guessing.

    Mastering Equity vs Mortgage Balance in Messy Markets

    Mastering Equity vs Mortgage Balance in Messy Markets

    When the market starts feeling volatile, it’s easy to get spooked by headlines, but you have to look at the math, not the noise. Understanding the nuance of equity vs mortgage balance is what separates the hobbyists from the real investors. It’s one thing to see a high valuation on a Zillow estimate; it’s another thing entirely to know how much of that value is actually yours once you subtract what you owe the bank. If you’re sitting on a property where the debt is eating up most of the value, you don’t have much of a cushion for a renovation or a market dip.

    I’ve seen too many people mistake a rising market for guaranteed profit. Just because your neighbor’s house sold for a premium doesn’t mean your real estate appreciation impact is as high as you think, especially if you’re carrying high-interest debt. To truly build wealth, you need to monitor that gap between your loan and the market value constantly. That spread is your actual fuel—it’s what allows you to pivot, fund your next project, or weather a downturn without losing your shirt.

    5 Ways I Force Equity to Grow (Without Waiting for the Market)

    • Stop chasing vanity upgrades. I’ve seen too many people blow their budget on high-end marble countertops that don’t actually move the needle. If you want to build real equity, focus on the “high-impact” zones: kitchens, bathrooms, and curb appeal. You want to spend money on things that change the perceived value of the home, not just your personal aesthetic.
    • Master the art of the “cosmetic flip.” You don’t always need to tear down load-bearing walls to see a return. Sometimes, all it takes is fresh paint, updated lighting fixtures, and refinishing those old hardwood floors to bridge the gap between a “dated” house and a “turn-key” asset.
    • Don’t ignore the bones. I always tell my clients: you can fix a bad layout with clever design, but you can’t fix a bad foundation or a failing roof without eating all your profit. Before you commit, use that laser measurer and get into the guts of the house. True equity lives in a structure that is sound, not just one that looks pretty in photos.
    • Leverage your sweat equity. If you have the grit to handle a messy renovation yourself—or at least manage the subs personally—you are essentially paying yourself a wage. Every hour you spend sanding a banister or tiling a backsplash is money that stays in your pocket and translates directly into your home’s valuation.
    • Keep a sharp eye on your debt-to-equity ratio. It’s easy to get cocky when your home value spikes, but I treat my equity like a strategic tool, not a piggy bank. Before you tap into a HELOC for your next project, make sure you aren’t over-leveraging yourself in a way that leaves you vulnerable if the market takes a sudden dip.

    The Bottom Line: Turning Potential into Profit

    Stop looking at your home’s value as a static number on a bank statement; equity is a dynamic tool that you actively grow through strategic, high-ROI renovations.

    Don’t get blinded by a high market appraisal—always prioritize the gap between your mortgage balance and your actual liquid equity to ensure you have the breathing room to handle unexpected job site costs.

    Real wealth isn’t found in pristine, turnkey properties; it’s built by identifying undervalued “bones” and having the grit to sweat through the messy middle of a rehab to unlock hidden value.

    The Real Value of a Fixer-Upper

    “Equity isn’t just a number on a bank statement; it’s the profit hidden behind peeling wallpaper and outdated floor plans, waiting for someone with enough grit to go in and claim it.”

    Gareth Trelawny

    The Bottom Line on Building Equity

    The Bottom Line on Building Equity.

    At the end of the day, understanding property equity isn’t just about staring at a spreadsheet or checking your mortgage balance once a year. It’s about recognizing the gap between what a house is worth today and what it could be worth after you’ve put in the sweat equity. We’ve covered how to look past the surface-level numbers and how to navigate those messy market shifts without losing your cool. Whether you are calculating your current position or planning your next strategic renovation, remember that equity is a moving target. You have to stay proactive, keep your eye on the real value of the bones, and never let a high interest rate or a fluctuating market blind you to the long-term potential of your assets.

    Building a real estate portfolio isn’t a sprint, and it certainly isn’t a clean, polished process. There will be dust, there will be unexpected plumbing disasters, and there will be days when you wonder why you didn’t just stick to a desk job. But that’s where the wealth is made. You aren’t just buying bricks and mortar; you are buying the opportunity to create something from nothing. Stop waiting for the “perfect” market or a massive windfall to get started. Grab your tools, find a property with a bit of grit, and start turning those crumbling walls into solid equity. The wealth is there—you just have to go out and build it.

    Frequently Asked Questions

    How do I figure out if a renovation is actually going to boost my equity or if I'm just throwing good money after bad?

    Before you swing a single sledgehammer, run the numbers through an ARV (After Repair Value) calculation. I never touch a project without knowing the ceiling for the neighborhood. If a $30k kitchen remodel only bumps your value by $20k, you’re just burning cash. You need to ensure the forced appreciation outweighs your renovation costs plus a healthy margin for error. If the math doesn’t scream profit, walk away. Don’t let ego drive your budget.

    If the market dips right after I finish a rehab, am I stuck with a massive loan and no real way to tap into that equity?

    Look, I’ve been in those trenches. A market dip feels like a gut punch when you’ve just poured your sweat into a rehab. But here’s the reality: equity isn’t just about what a buyer will pay today; it’s about the value you’ve baked into the asset. If you can’t tap the equity through a HELOC because of the dip, you pivot to a long-term hold. Don’t panic-sell a winner just because the market is acting moody.

    What’s the best way to use my equity to fund my next flip without getting completely overleveraged?

    Don’t go all-in on a single HELOC if you can avoid it. I prefer using a strategic combination of a Home Equity Line of Credit for liquidity and a hard money lender for the actual acquisition. This keeps your primary residence’s safety net intact while giving you the speed needed to snag a deal. Just remember: always leave a massive buffer in your renovation budget. If you overleverage, one unexpected plumbing disaster can sink your entire portfolio.

  • Techniques for Managing a Real Estate Portfolio

    Techniques for Managing a Real Estate Portfolio

    I was standing in a damp, unfinished basement last Tuesday, clutching my laser measurer and staring at a cracked foundation, when it hit me: most of the “expert” advice out there regarding real estate portfolio management is absolute garbage. You’ll see these gurus on social media preaching about high-level diversification and complex tax shelters as if you’re already managing a hundred units. It’s exhausting. They make it sound like you need a Wall Street degree and a mountain of seed money just to get started, but that’s a total lie. Real growth doesn’t come from following a textbook; it comes from knowing how to scale when things get messy.

    I’m not here to sell you a dream or some overcomplicated spreadsheet that takes ten hours a week to update. I’m going to show you how I actually build equity, one strategic rehab at a time. We’re going to strip away the fluff and talk about the gritty reality of managing assets, from deciding when to hold a fixer-upper and when to flip it, to the unfiltered truth about cash flow. Let’s get to work.

    Table of Contents

    Smart Real Estate Investment Strategies for the Scrappy Investor

    Smart Real Estate Investment Strategies for the Scrappy Investor

    If you’re working with a limited budget, you can’t afford to play the game like the institutional giants. You have to be surgical. Instead of trying to buy a pristine turnkey property that eats up all your liquidity, look for the “ugly ducklings”—the houses with outdated kitchens or cracked floorboards that scare off the average buyer. My go-to approach involves a deep dive into rental property ROI analysis before I even pick up a hammer. I need to know if the cost of a new HVAC system and a cosmetic refresh will actually move the needle on my monthly cash flow.

    Once you find that diamond in the rough, it’s all about how you distribute your capital. I don’t dump every cent into a single high-end renovation; I focus on the high-impact areas that drive value. This kind of strategic real estate asset allocation ensures you aren’t over-improving for the neighborhood. You want to hit that sweet spot where the renovation costs are minimized, but the property value jumps significantly. It’s about being smart with your cash, not just being willing to spend it.

    Maximizing Rental Yields Without a Massive Inheritance

    Maximizing Rental Yields Without a Massive Inheritance

    If you’re working with limited capital, you can’t afford to just throw money at a property and hope for the best. You have to be surgical. Instead of chasing flashy luxury builds, I focus on the “bread and butter” assets—think duplexes or small single-family homes in up-and-coming neighborhoods. The secret to maximizing rental yields isn’t necessarily raising the rent every six months; it’s about increasing the utility of the space. I’ve seen massive returns just by converting an awkward, unfinished basement into a functional home office or adding a third bedroom to a cramped layout. These are high-impact, low-cost tweaks that shift the property into a higher rent bracket.

    Before you pick up a hammer, though, you need to run a rigorous rental property ROI analysis. I don’t care how much you love the mid-century crown molding in a living room; if the math doesn’t support the renovation cost, walk away. You need to know exactly how much every dollar spent on a kitchen refresh will actually add to your monthly cash flow. It’s about being disciplined with your real estate investment strategies so that every renovation step is a calculated move toward building equity, not just a way to satisfy your design itch.

    The Scrappy Investor’s Playbook: 5 Rules for Managing Your Portfolio

    • Stop obsessing over perfection and start focusing on cash flow; a flawless kitchen doesn’t pay the mortgage, but a reliable rental stream does.
    • Keep a “renovation contingency” fund that actually exists—I’ve learned the hard way that when a pipe bursts mid-rehab, you need liquid cash, not a prayer.
    • Don’t let your equity sit idle; once you’ve built enough value in a flip, look into leveraging that equity to fund your next acquisition rather than just letting it rot in the walls.
    • Treat your property management like a business, not a hobby, which means having a vetted list of contractors on speed dial before you actually need them.
    • Diversify your asset types, not just your locations; having a mix of long-term rentals and quick-turn flips keeps your portfolio resilient when the market shifts.

    The Bottom Line: Turning Sweat Equity into Real Wealth

    Stop waiting for the perfect market; start looking for the perfect project where you can manufacture value through smart, strategic renovations.

    Focus on high-impact, low-cost upgrades—like modernizing a kitchen or fixing curb appeal—rather than getting lost in expensive, unnecessary luxury finishes.

    Treat every renovation as a math problem, not an art project; your goal is to ensure the equity you build far outweighs the headache of the job site.

    ## The Real Secret to Scaling

    “Portfolio management isn’t about chasing the shiny new builds; it’s about having the grit to manage the messy ones and the discipline to turn sweat equity into long-term stability.”

    Gareth Trelawny

    Turning Vision into Value

    Turning Vision into Value through real estate.

    At the end of the day, managing a real estate portfolio isn’t about having a mountain of cash sitting in a bank account; it’s about how you leverage the assets you actually have. We’ve talked about finding those scrappy investment opportunities, maximizing your rental yields through smart design, and knowing when to pull the trigger on a renovation. Whether you are focusing on high-yield rentals or hunting for that perfect mid-century modern fixer-upper, the goal remains the same: constant, strategic growth. Don’t get paralyzed by the complexity of the math. Focus on the fundamentals—location, layout, and leverage—and you’ll find that even the most neglected property can become a cornerstone of your wealth.

    I know it can feel overwhelming when you’re staring at a cracked foundation or a stack of unpaid contractor invoices, but that’s exactly where the profit lives. Most people walk away from a mess, but that is where we see the equity waiting to be unlocked. Building a portfolio is a marathon, not a sprint, and it requires a certain level of grit that you simply can’t learn in a classroom. Stop waiting for the “perfect” market or a massive windfall to get started. Grab your tools, sharpen your eye, and start turning those crumbling walls into solid equity one project at a time.

    Frequently Asked Questions

    How do I decide when to stop pouring money into a renovation and just accept the current value?

    You have to stop chasing perfection and start chasing math. I call it the “Diminishing Returns Wall.” If you’re spending $5,000 on custom backsplash tile just to potentially add $2,000 in property value, you’re not investing—you’re decorating. Before you buy one more box of flooring, run your numbers again. If the projected After Repair Value (ARV) doesn’t absorb the cost plus a healthy margin, put the hammer down and walk away.

    What’s the best way to balance my cash flow between paying for new property acquisitions and keeping my existing ones maintained?

    Look, this is the classic tug-of-war. If you dump every cent into a new acquisition, your current portfolio starts looking like a neglected squat, and that kills your equity. I follow a strict “maintenance reserve” rule. Before I even look at a new deal, I ensure my existing properties have a dedicated percentage of monthly cash flow set aside for CapEx. Don’t chase the next shiny thing if it means your current assets are crumbling.

    At what point does it make more sense to scale up to commercial properties instead of just sticking to single-family fixers?

    You scale when your single-family flips start feeling like a second full-time job rather than a growth engine. Once you’ve mastered the rhythm of residential rehabs and have a reliable crew, look toward commercial. It’s less about the “pretty” design work and more about the math—square footage, triple net leases, and cap rates. If you’re tired of chasing individual tenants and want bigger, more predictable cash flow, that’s your signal to pivot.

  • Proper Techniques for Interior Wall Painting

    Proper Techniques for Interior Wall Painting

    I was standing in the middle of a gutted Victorian bungalow last Tuesday, staring at a wall that looked more like a topographical map than a flat surface, realizing I’d just wasted three hundred dollars on high-end pigment. I had followed every “easy” tutorial online, yet the finish was streaky, uneven, and frankly, looked cheap. Most people think that if you buy the most expensive gallon of paint at the big-box store, you’re halfway to a professional finish, but that’s a lie that kills your margins. The truth is, your ROI isn’t determined by the brand on the can, but by mastering specific interior painting techniques that ensure a smooth, high-end look every single time.

    I’m not here to give you a fluff piece on color psychology or how to pick a “cozy” shade. I’m here to show you the grit and the precision required to turn a DIY job into a professional-grade asset. In this guide, I’m breaking down the exact methods I use on my job sites—from proper edge cutting to the secret of managing drying times—so you can stop wasting money on redo’s and start forcing equity through flawless execution.

    Table of Contents

    Guide Overview

    Total Time: 1-2 days
    Estimated Cost: $100-250
    Difficulty: Beginner

    Tools & Supplies

    • Angled brush for cutting in edges
    • Roller frame and covers for large surfaces
    • Paint tray for holding and loading paint
    • Extension pole for high walls and ceilings
    • Painter's tape for protecting trim and edges
    • Sandpaper for smoothing wall imperfections
    • Interior paint (1-3 gallons depending on area)
    • Painter's primer (1-2 gallons)
    • Drop cloths (2-3 sheets)
    • Spackle (1 small container)
    • Cleaning sponge (1 unit)

    Step-by-Step Instructions

    • 1. First, you have to get obsessive about the prep work because a cheap paint job is just a way to waste your capital. Clear the room entirely if you can, but if not, move everything to the center and cover it with heavy-duty canvas drop cloths—never use thin plastic, as it shifts and tears under your feet. Scrape off any loose flakes, sand down the rough patches, and use a high-quality caulk to seal those annoying gaps between the baseboards and the walls. If you skip this, you’re just painting over problems that will show through the second the light hits the wall.
    • 2. Next, grab your painter’s tape and get surgical with your lines. I don’t care how steady your hands are; use a sharp utility knife to score the edge of the tape once you’ve applied it to ensure you don’t peel the drywall off when you’re finished. Run a damp cloth over the tape edges to press them down firmly, which prevents that dreaded paint bleed. This is where you separate the amateur look from the professional finish that actually adds value to a property.
    • 3. Now, it’s time to “cut in,” which is the most tedious but vital part of the process. Instead of jumping straight to the roller, use a 2.5-inch angled sash brush to paint a border around the ceiling, the corners, and the trim. Don’t try to do the whole room at once; work in manageable sections so the “wet edge” stays consistent. If you let your cut-in lines dry before you start rolling, you’ll end up with a distracting texture mismatch that screams “DIY disaster” to any potential buyer.
    • 4. Once your borders are set, grab a high-quality microfiber roller and a tray to start the heavy lifting. Start from the top of the wall and work your way down in a “W” or “M” pattern to distribute the paint evenly before filling in the gaps. Avoid the temptation to press too hard; you want to apply even pressure rather than squeezing every last drop of moisture out of the nap. This technique ensures the coverage is thick and uniform, which is the secret to high-end results.
    • 5. You absolutely cannot cut corners on the second coat, even if the wall looks “good enough” after the first pass. Most high-quality paints require two coats to truly achieve the depth of color and the durability needed for a rental or a flip. Wait for the first coat to be completely dry—check the can for specific drying times—and then repeat your cutting and rolling process. This second layer is what transforms a flimsy-looking wall into a solid, premium surface that commands a higher asking price.
    • 6. Finally, the most satisfying part: the reveal. Peel your painter’s tape off while the paint is still slightly tacky to avoid cracking the dried film. If you find a small drip or a missed spot, don’t panic and try to fix it with a massive brush; use a small artist’s brush or a tiny foam roller to spot-correct the error seamlessly. Once everything is clean and the tools are washed, take a step back and look at the room through the eyes of an investor—you’re looking for flawless, consistent coverage that makes the space feel brand new.

    Wall Surface Preparation Fixing the Mess Before the Magic

    Wall Surface Preparation Fixing the Mess Before the Magic

    Look, I’ve seen too many rookies rush straight to the color palette only to realize their “fresh” coat looks like textured sandpaper because they skipped the prep. If you want to build real equity, you have to treat the substrate with respect. Most of the “cracks” you see in a finished flip aren’t bad paint; they are failures in wall surface preparation. Spend the extra time sanding down those old drywall patches and filling every divot with a high-quality spackle. If you don’t get the surface level, even the most expensive designer paint will highlight every single imperfection.

    Once the walls are smooth, don’t underestimate the power of a solid base. My go-to primer application tips always involve using a high-hide primer if you’re covering dark colors or dealing with fresh patch jobs. This ensures your topcoat adheres perfectly and gives you that flawless, high-end look that buyers crave. It’s about creating a uniform canvas so your actual color work can shine without fighting the wall underneath. Remember, in this business, the work you do before the first drop of color hits the wall is what actually protects your profit margins.

    Achieving a Smooth Finish With Professional Painting Tools

    Achieving a Smooth Finish With Professional Painting Tools

    Look, you can spend all day on perfect wall surface preparation, but if you try to finish the job with a cheap, $5 brush from a big-box store, you’re going to sabotage your margins. I’ve seen too many investors lose money because their “quick flip” looked amateurish under bright lighting. To really nail achieving a smooth finish, you need to invest in high-quality synthetic brushes and high-density foam rollers. These aren’t just luxuries; they are the difference between a textured, streaky mess and a surface that looks like it was sprayed by a pro.

    When you move into the actual application, pay close attention to cutting in edges before you hit the main walls with a roller. If you rush this part, you’ll end up with visible “picture framing” where the edges don’t blend with the field. I always keep a small tray and a dedicated angled sash brush handy to ensure those lines are crisp. Also, don’t skip the step of preventing paint drips by working in smaller sections; if you try to cover too much ground at once, the paint will sag, and you’ll spend more time sanding out mistakes than you would have spent just doing it right the first time.

    Five Pro-Level Moves to Protect Your Margins and Your Finish

    • Stop skimping on the primer; if you’re painting over a dark color or a patchy repair, a high-quality primer is the only way to ensure you aren’t wasting money on three extra coats of expensive finish paint.
    • Master the “cut-in” before you even touch a roller, because if your edges are jagged and messy, no amount of high-end finish can hide the fact that the job was rushed.
    • Watch your lighting like a hawk while you work; I always bring a portable work light to catch those nasty shadows and uneven patches that a standard ceiling fixture will completely miss.
    • Don’t try to be a hero with cheap rollers—invest in high-density microfiber nap so you aren’t fighting texture streaks and “orange peel” effects that make a renovated house look amateur.
    • Always work in small, manageable sections to maintain a “wet edge,” otherwise you’ll end up with those dreaded lap marks that scream “DIY disaster” to any potential buyer.

    The Bottom Line: Don't Skimp on the Details

    Never cut corners on prep work; if you try to paint over a crack or a patch of grease, you’re just wasting expensive product and risking a callback from a buyer.

    Invest in high-quality rollers and brushes—it’s a small upfront cost that pays for itself in the time you save and the professional finish that actually drives up your resale value.

    Master your technique to force equity; a flawless, even coat of paint is one of the cheapest ways to make a dated, neglected room look like a high-end designer space.

    ## The Margin is in the Details

    “Anyone can slap a coat of beige over a cracked wall, but if you want to actually force equity, you have to treat painting like a structural investment—fix the imperfections first, master your technique second, and never let a sloppy finish eat your profit margins.”

    Gareth Trelawny

    Turning Fresh Paint Into Real Equity

    Turning Fresh Paint Into Real Equity

    At the end of the day, a high-end paint job isn’t just about picking a trendy color; it’s about the discipline you put into the process. We’ve covered everything from the grit required for proper wall prep to selecting the right professional-grade tools that prevent those dreaded streaks and drips. If you skip the sanding or try to cheap out on a low-quality roller, you aren’t saving money—you’re just sacrificing your profit margins in the long run. Remember, the magic happens in the preparation, and the value is found in the details that make a room feel intentional rather than just “newly painted.”

    Renovating can be exhausting, and there will be days when you’re covered in dust and wondering why you didn’t just stick to a desk job. But when you step back and see those clean lines and that flawless finish, you’re seeing more than just aesthetics; you’re seeing built-in equity. Every brushstroke is a step toward building that portfolio we all want. Don’t let a little mess intimidate you. Grab your tools, trust your eye, and go turn those tired walls into a high-value asset.

    Frequently Asked Questions

    How do I know if I should spend the extra money on premium paint or if a budget brand will still give me enough ROI on this flip?

    Look, don’t let a cheap bucket of paint eat your margins, but don’t go overboard either. If you’re doing a high-end flip in a luxury zip code, buy the premium stuff; buyers in that bracket spot a patchy finish from a mile away. For a standard rental or a quick mid-market flip, a decent mid-tier brand is your sweet spot. You want high coverage so you aren’t paying for extra coats in labor.

    When am I dealing with heavy water damage or old nicotine stains, what’s the best way to prime so the mess doesn't bleed through the new coat?

    If you see yellow nicotine stains or water damage, standard primer is a waste of your money. It’ll bleed right through your expensive finish and ruin your margins. You need a high-quality shellac-based primer—think Zinsser BIN. It’s the heavy hitter for sealing in odors and stubborn stains. It dries fast and creates an impenetrable barrier, so you aren’t constantly repainting. Don’t skimp here; sealing that mess correctly is how you protect your equity.

    How can I tell if a contractor is actually cutting corners on the prep work versus just rushing through the actual painting?

    Look, I’ve seen it a hundred times: a contractor shows up, slaps on two coats of premium paint, and calls it a day while the clock is ticking. To catch them, ignore the color and watch the prep. If they aren’t sanding the walls between coats, using painter’s tape properly, or actually patching those hairline cracks I spotted during my walkthrough, they’re cutting corners. If the surface feels gritty or uneven, they skipped the most important part.

  • Choosing Durable Flooring for Rental Properties

    Choosing Durable Flooring for Rental Properties

    I was standing in the middle of a gutted ranch-style fixer-upper last Tuesday, the smell of damp subflooring and old sawdust thick in the air, when I realized I was staring at a total profit killer. Most people see a dated, stained carpet and think they can just steam it or lay a cheap rug over the mess, but they’re dead wrong. If you want to actually see a return on your investment, you have to stop treating flooring replacement like an optional cosmetic tweak and start seeing it as a foundational equity builder. I’ve seen too many rookie investors bleed cash by choosing materials that look great in a showroom but crumble under the reality of a rental or a high-traffic flip.

    I’m not here to sell you on some high-end, boutique designer trends that will eat your margins alive. Instead, I’m going to give you the straight truth on which materials actually hold up and which ones are just expensive distractions. I’ll show you how to navigate the chaos of a job site to pick flooring that maximizes your resale value without breaking your bank account. Let’s get to work.

    Table of Contents

    Navigating Flooring Installation Costs Without Breaking the Bank

    When you’re looking at a spreadsheet of potential renovation expenses, it’s easy to get paralyzed by the numbers. I’ve seen investors blow their entire profit margin because they chased a luxury aesthetic without calculating the true flooring installation costs. You have to look past the price per square foot and account for the hidden killers—specifically, the labor and the prep work. If your joists are uneven or the old adhesive is caked on, your subfloor preparation for new floors is going to eat your budget alive before you even unbox a single plank.

    My rule of thumb? Don’t buy for the look; buy for the math. If you’re flipping a rental or a high-turnover property, you need to prioritize the flooring material lifespan over everything else. I rarely touch cheap laminate that’s going to buckle in six months. Instead, I lean toward waterproof flooring solutions like high-grade LVP. It’s durable, it’s easy to install, and most importantly, it won’t force you back into a costly rehab two years down the line. Focus on materials that offer the best ROI, not just the lowest upfront sticker price.

    Selecting Home Renovation Flooring Options That Command Premium Rents

    Selecting Home Renovation Flooring Options That Command Premium Rents

    If you’re looking to maximize your ROI, you have to stop thinking like a homeowner and start thinking like a landlord. When I’m scouting a new flip or a rental, I’m not looking for what I personally like; I’m looking for what won’t result in a maintenance call six months after a tenant moves in. This is where choosing the right home renovation flooring options becomes a strategic play rather than a design choice.

    For high-end rentals, I almost always lean toward luxury vinyl plank (LVP). It’s easily the best flooring for high traffic areas because it can take a beating from pets, spilled wine, and heavy foot traffic without losing its luster. If you’re aiming for a premium price point, don’t skimp on the quality—invest in waterproof flooring solutions that mimic the look of hardwood. It gives your tenants that high-end aesthetic they crave while ensuring the flooring material lifespan actually justifies your initial investment. You want something that looks expensive but is functionally indestructible.

    My Non-Negotiable Rules for Flooring That Actually Pays Off

    • Stop chasing trends with trendy patterned tiles; stick to neutral, high-quality tones like light oak or slate grey that appeal to the widest possible pool of buyers or renters.
    • Always factor in a 10% waste buffer for your materials, because nothing kills my profit margins faster than running short on planks halfway through a job and paying a premium for emergency shipping.
    • Don’t skimp on the underlayment—if you’re installing LVP, a solid subfloor and high-quality padding are what prevent those annoying squeaks and gaps that make a house feel “cheap” during a walkthrough.
    • Prioritize durability over everything else; if you’re flipping a rental, skip the delicate hardwoods and go for high-grade luxury vinyl plank that can survive a spilled glass of wine or a heavy pet.
    • Check your subfloor before you even order the new stuff—I’ve seen too many investors blow their budget by trying to lay expensive flooring over uneven, rotting plywood that should have been replaced weeks ago.

    The Bottom Line on Flooring ROI

    Stop chasing trends; stick to durable, neutral materials like LVP that can withstand heavy foot traffic and won’t look dated by the time you’re ready to sell.

    Always buffer your budget for the “hidden” costs, because once you rip up that old carpet, you’re almost guaranteed to find subfloor issues that need fixing before the new stuff goes down.

    View flooring as a tool for equity, not just an aesthetic choice—if a material doesn’t actively increase your property value or decrease your maintenance headaches, it’s a waste of capital.

    The Margin is in the Materials

    Don’t treat flooring like an afterthought or a way to save a buck; if you pick cheap, flimsy materials just to get the job done, you’re essentially throwing your profit margin straight into the landfill.

    Gareth Trelawny

    Making the Call on Your Next Floor

    Making the Call on Your Next Floor.

    At the end of the day, flooring isn’t just about picking a color from a swatch book; it’s a calculated move in your investment strategy. You’ve looked at the numbers, weighed the installation costs against your budget, and identified the specific materials that will actually make a tenant stop scrolling and start applying. Remember, the goal isn’t to create a museum-quality masterpiece that eats your entire profit margin. It’s about finding that sweet spot between durability and aesthetics. Don’t get paralyzed by choice—pick a high-quality, hard-wearing option that looks expensive but stays within your projected ROI, and then get the installers in there so you can move on to the next task.

    Renovating is messy, loud, and occasionally frustrating, but that’s exactly where the money is made. While everyone else is looking at a house and seeing outdated carpet and scratched hardwoods, you’re seeing the hidden equity waiting to be unlocked. Every square foot of new flooring you lay down is a brick in the foundation of your financial future. Stop overthinking the perfect shade of grey and start building your portfolio. Get your laser measurer out, grab your contractor, and start turning those crumbling surfaces into solid assets.

    Frequently Asked Questions

    How do I know if my subfloor is actually worth saving or if I'm just throwing money into a structural nightmare?

    Look, I’ve seen too many investors get blinded by a pretty tile sample only to realize their foundation is a disaster. Grab your laser measurer and check for level. If you find soft spots, water staining, or significant bowing, stop right there. That’s not a “minor fix”; that’s a structural nightmare. Don’t patch over rot to save a buck today if it means losing your entire margin to a subfloor failure tomorrow.

    Which flooring materials actually hold up to heavy foot traffic without looking trashed after six months?

    If you’re looking for durability that won’t tank your margins, skip the cheap laminate. It looks trashed the second a heavy boot hits it. I swear by Luxury Vinyl Plank (LVP) for my rentals; it’s waterproof, scratch-resistant, and handles heavy foot traffic like a champ. If you have a higher budget, engineered hardwood is the gold standard. It gives you that premium feel while standing up to real life, ensuring your equity stays intact.

    Is it better to go with a high-end hardwood that costs more upfront, or a durable LVP that protects my margins?

    Look, if you’re playing the long game for a high-end rental or a luxury flip, hardwood is the gold standard for equity. But if you’re looking to protect your margins and minimize headache, go with high-quality LVP. It’s virtually indestructible, waterproof, and much easier on the budget. For most of my mid-range rehabs, I choose LVP—it keeps the tenants happy and prevents the costly floor replacements that eat my profits alive.

  • Using Leverage in Real Estate Investing

    Using Leverage in Real Estate Investing

    I remember standing in the middle of a gutted mid-century ranch last November, the smell of damp drywall and old sawdust thick in the air, staring at a bank statement that told me I couldn’t afford the project. Most “gurus” will tell you that you need a mountain of cash to play in this game, but they’re selling you a lie designed to keep you on the sidelines. The truth is, you don’t need a massive inheritance to win; you just need to master real estate leverage. It’s not about being rich; it’s about using the tools available to make your money work harder than you do, even when the walls are literally crumbling around you.

    I’m not here to give you some polished, theoretical lecture on debt-to-equity ratios that sounds like it came out of a textbook. I’m going to show you how I actually use it to turn grit into equity. We’re going to strip away the jargon and talk about the real-world mechanics of using borrowed capital to scale your portfolio without losing your shirt. If you’re ready to stop playing small and start building something tangible, let’s get to work.

    Table of Contents

    The Loan to Value Ratio Explained for the Scrappy Investor

    The Loan to Value Ratio Explained for the Scrappy Investor

    If you’re looking at a fixer-upper, you aren’t just looking at the floor plan; you’re looking at the math. This is where the loan-to-value ratio explained becomes your best friend or your worst enemy. Simply put, LTV is the relationship between the amount you borrow and the actual value of the property. If I’m eyeing a distressed ranch that’s valued at $300k, but I’m only putting down $60k, my LTV is 80%. As an investor, I want that ratio to work for me, not against me.

    The goal is to use that borrowed capital to control a larger asset, but you have to be careful not to trip over your own feet. I see too many newcomers ignore the risks of over-leveraging property, thinking more debt always equals more profit. If the market dips or your renovation budget blows out, being spread too thin can turn a smart flip into a financial nightmare. You want enough skin in the game to stay motivated, but enough breathing room to handle a plumbing disaster without losing your shirt.

    Smart Equity Building Strategies Beyond the Bank Balance

    Smart Equity Building Strategies Beyond the Bank Balance

    Look, if you’re waiting until you have a mountain of cash sitting in a high-yield savings account to start flipping, you’re going to be waiting forever. The real magic happens when you use the house itself to fund your next move. One of my favorite equity building strategies is the BRRRR method—buy, rehab, rent, refinance, repeat. By taking a distressed property, fixing the bones, and forcing appreciation through smart design, you can pull your initial capital back out through a refinance. This allows you to keep moving, even if your bank balance hasn’t hit seven figures yet.

    However, you have to be careful not to get too greedy with the math. I’ve seen plenty of ambitious investors get tripped up by the risks of over-leveraging property. If you push your debt too high to chase a massive project, a sudden dip in the local market can leave you underwater. You need to keep a close eye on your numbers—specifically how much skin you actually have in the game versus what the bank owns. It’s about being strategic, not reckless.

    5 Ways to Play the Leverage Game Without Getting Crushed

    • Don’t overextend on a single property; I’ve seen too many investors sink every cent into one “dream” renovation only to realize they have zero liquidity left for the next deal.
    • Use the BRRRR method to recycle your capital—buy, rehab, rent, refinance, repeat—so you can keep pulling your initial investment back out to fund your next project.
    • Always keep a “messy renovation” buffer in your financing; if you leverage up to your absolute limit, one unexpected plumbing disaster will turn your equity into a debt trap.
    • Look for properties with “forced equity” potential rather than just market appreciation, because using a loan to buy a finished house is expensive, but using a loan to buy a fixer-upper is where the real math works in your favor.
    • Master your debt-to-income ratio before you walk into a bank; you need to prove to the lenders that you aren’t just a dreamer, but a pragmatic operator who can handle the monthly carry.

    The Bottom Line: Making Leverage Work for You

    Leverage isn’t just a fancy banking term; it’s the tool that lets you control a massive asset with a relatively small amount of your own cash.

    Don’t let a low bank balance scare you off—focus on increasing your LTV by adding real, physical value through smart renovations.

    Use debt strategically to scale, but always keep a pragmatic eye on your margins so a messy job site doesn’t turn into a financial sinkhole.

    ## Leverage is Your Secret Weapon

    “Leverage isn’t just a fancy banking term; it’s the bridge between the house you can afford today and the portfolio you want to own tomorrow. You aren’t just borrowing money—you’re borrowing the bank’s capital to amplify your own vision.”

    Gareth Trelawny

    The Bottom Line on Building Leverage

    The Bottom Line on Building Leverage.

    At the end of the day, mastering real estate leverage isn’t about playing high-stakes games with money you don’t have; it’s about understanding the math behind the potential of a property. We’ve walked through how the Loan-to-Value ratio acts as your roadmap and how you can build equity through strategic sweat equity rather than just a massive down payment. Remember, leverage is a tool, much like a heavy-duty sledgehammer—it can help you break through barriers and build something incredible, but you have to know exactly how to swing it so you don’t end up hurting yourself. Control your debt, don’t let it control you.

    Look, I know the idea of taking on loans to fund a renovation feels heavy. It’s intimidating to stand in a dusty, half-demolished kitchen and realize you’re betting on your own vision. But if I had waited until I felt “perfectly safe” to buy my first fixer-upper, I’d still be stuck in that corporate staging office. Real wealth is built in the messy middle, between the initial inspection and the final sale. Stop waiting for the perfect market or a windfall of cash to land in your lap. Grab your laser measurer, find a house with ugly walls and good bones, and start turning that grit into actual equity.

    Frequently Asked Questions

    How much personal skin in the game do I actually need before a lender will take my renovation plans seriously?

    Look, I’m going to be blunt: lenders aren’t in the business of charity. They want to see that if the market tanks, you’re going down with the ship. While every bank has different thresholds, you should generally aim to bring at least 20% to the table. If you’re trying to pull off a heavy rehab, showing skin in the game proves you aren’t just chasing a fantasy—it shows you’re actually invested in the outcome.

    At what point does using leverage stop being a smart growth strategy and start becoming a dangerous risk to my equity?

    Leverage is a tool, not a personality trait. It stops being smart the moment your debt service eats your entire monthly cash flow. If a single unexpected plumbing disaster or a three-month vacancy turns your profit into a personal deficit, you’re overleveraged. I always aim for a buffer. If you’re playing “all-in” on every single renovation without a contingency fund, you aren’t investing; you’re gambling with your equity.

    Can I use leverage to fund the actual renovation costs, or am I strictly limited to the initial purchase price?

    The short answer? Absolutely. You aren’t stuck just financing the dirt and the bones. If you’re looking at a heavy rehab, you should be looking into renovation loans or construction financing. I often use hard money lenders or HELOCs to bridge that gap between the purchase and the finished product. Don’t let a lack of liquid cash stop you from tackling a bigger project—just make sure your exit strategy accounts for the higher interest rates.