Author: Gareth Trelawny

  • Creating a Realistic House Flipping Budget

    Creating a Realistic House Flipping Budget

    I still remember standing in the middle of a gutted ranch in East Austin, the smell of damp drywall and old dust thick in the air, staring at a stack of invoices that looked more like a horror novel than a renovation plan. I had my laser measurer gripped so tight in my hand I thought it might snap, realizing that my initial house flipping budget was about as accurate as a weather forecast in a hurricane. Most gurus will tell you to just “factor in a contingency,” but that’s a lazy way of saying they don’t actually know where your money is going to bleed out.

    I’m not here to sell you some polished, theoretical spreadsheet that falls apart the second a subfloor turns out to be rotten. Instead, I’m going to show you how to build a battle-tested budget that accounts for the real-world chaos of a job site. We’re going to talk about where to aggressively allocate your cash to maximize ROI and, more importantly, where to hold back so you don’t end up house poor before the paint is even dry.

    Table of Contents

    A Brutal Property Renovation Breakdown for Real Results

    A Brutal Property Renovation Breakdown for Real Results

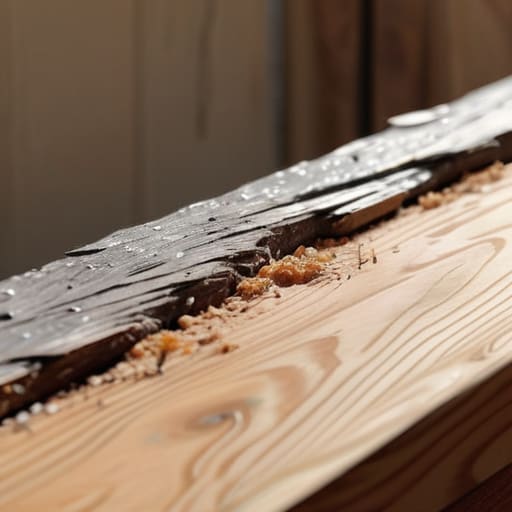
    Look, if you want to see actual money at the end of a project, you have to stop guessing and start auditing every single nail and floorboard. I’ve seen too many rookies walk into a demo phase with a “vibe” and a prayer, only to realize halfway through that they’ve bled out their entire margin. A real property renovation breakdown isn’t just a list of materials; it’s a granular autopsy of what that house actually needs to reach its maximum potential. You need to categorize your expenses into the “non-negotiables”—the plumbing, the electrical, the structural stuff that keeps the inspector from laughing you out of the room—and the “aesthetic upgrades” that actually drive your after repair value calculation.

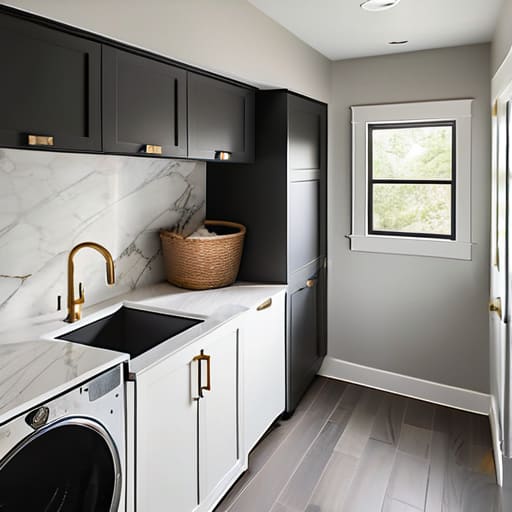
    Don’t let the small stuff slip through the cracks, either. Those “minor” cosmetic fixes like hardware, lighting fixtures, and fresh paint can eat your lunch if you aren’t tracking them. I always tell my clients that if you don’t account for the unexpected, you aren’t investing; you’re gambling. You have to balance your desire for high-end finishes with the cold, hard reality of your fix and flip profit margins. If a custom marble countertop is going to tank your ROI, swap it for a high-quality quartz and put that cash toward something that actually moves the needle on the final sale price.

    Calculating Your After Repair Value Calculation With Precision

    Calculating Your After Repair Value Calculation With Precision

    Calculating your ARV isn’t about guesswork or wishful thinking; it’s about cold, hard data. I’ve seen too many rookies walk into a deal thinking they’ve found a goldmine, only to realize they’ve overshot the market ceiling. To get this right, you need to look at recent sales—not just anything, but comparable properties that have undergone similar high-end renovations within a half-mile radius. If you’re aiming for a mid-century modern aesthetic, don’t compare your projected value to a house with dated linoleum and beige carpet. You need to find the ceiling of the neighborhood so you know exactly where your profit margin will cap out.

    Precision here is what separates a successful flip from a financial sinkhole. If your after repair value calculation is off by even 5%, it can completely wipe out your intended fix and flip profit margins. I always run three different scenarios: a conservative, a realistic, and an aggressive estimate. This helps me understand my risk if the market shifts mid-renovation. Remember, you aren’t just buying a house; you’re buying a future mathematical equation. If the numbers don’t scream potential, walk away.

    Where Most Flips Bleed Cash (and How to Stop It)

    • Build a “Oh Sh*t” fund that actually works. I don’t care what your contractor promises; once you rip up those old subfloors, you’re going to find something nasty hiding underneath. Always set aside a 15% contingency buffer specifically for the things you can’t see behind the drywall.
    • Stop obsessing over high-end finishes. You aren’t designing your forever home; you’re designing for a buyer’s psychological sweet spot. Spend your money on the “touch points”—solid hardware, clean countertops, and great lighting—and save your cash by skipping the designer marble that won’t add a cent to your ROI.
    • Get three quotes, not one. I’ve seen too many rookies take the first estimate they get just to get the job started. A cheap quote often hides a lack of experience, while a massive quote might just be a contractor who doesn’t want the headache. Compare them side-by-side to find the real market rate.
    • Watch your holding costs like a hawk. Every month that house sits empty, you’re bleeding money through taxes, insurance, utilities, and interest. A slow renovation is a slow death for your profit margins, so keep the timeline tight and the crew moving.
    • Don’t let “scope creep” eat your equity. It’s easy to get carried away thinking, “Oh, while we’re at it, let’s just redo the whole backyard.” Stop. If it wasn’t in the original budget and it doesn’t directly increase the After Repair Value, leave it alone and get to the closing table.

    The Bottom Line: Don't Leave Your Equity to Chance

    Stop guessing and start measuring; use a laser measurer and hard data to ensure your material costs don’t bleed your profit margins dry.

    Always build a “messy renovation” buffer into your budget to cover the inevitable surprises hiding behind old drywall.

    Your ARV isn’t a wish list—it’s a reality check that dictates exactly how much you can afford to sink into the rehab.

    The Golden Rule of the Rehab

    “A budget isn’t just a spreadsheet of numbers; it’s your survival guide. If you don’t account for the hidden rot behind those drywall sheets, you aren’t investing—you’re just gambling with your own equity.”

    Gareth Trelawny

    The Bottom Line on Your First Flip

    The Bottom Line on Your First Flip.

    At the end of the day, a successful flip isn’t about luck; it’s about the math you do before you even pick up a sledgehammer. You’ve looked at the renovation breakdown, accounted for the hidden costs that always seem to pop up behind old drywall, and you’ve pinned down a realistic ARV. Don’t let the sheer scale of the numbers intimidate you. If you stay disciplined with your renovation budget and refuse to chase aesthetic trends that don’t add value, you’re already ahead of 90% of the amateurs out there. Remember, every dollar you spend needs to be a calculated move toward equity, not just a way to make a house look pretty for a weekend.

    I know it sounds daunting—staring at a spreadsheet while your bank account feels exposed—but this is exactly how wealth is built. You aren’t just buying old lumber and outdated plumbing; you are buying the opportunity to create something from nothing. There will be days when the dust is thick and the unexpected repairs feel like they’re draining your soul, but keep your eyes on the long-term goal. Once that first profitable exit hits your account, you’ll realize that those crumbling walls were actually the foundation of your future. Now, grab your laser measurer and get to work.

    Frequently Asked Questions

    How much of a contingency fund should I actually set aside for those "hidden" disasters once I tear into the walls?

    Look, if you’re planning on tearing into old walls, you have to assume something ugly is hiding behind them. I never touch a project without a 15% to 20% contingency fund. If it’s a standard cosmetic refresh, 10% might cut it, but if you’re dealing with a total gut job or an older home, aim higher. That extra cushion is the difference between a profitable flip and a personal financial disaster.

    Should I prioritize high-end finishes to boost my resale value, or keep things basic to protect my profit margins?

    Look, I’ve seen too many investors go broke trying to turn a fixer-upper into a luxury showroom. Don’t fall into that trap. Your goal isn’t to build your dream home; it’s to maximize your margin. Stick to high-quality, durable basics that appeal to the widest buyer pool. A clean, modern kitchen with solid hardware beats a marble waterfall island every single time when you’re trying to protect your equity.

    How do I distinguish between a necessary structural repair and an aesthetic upgrade that won't actually move the needle on my ARV?

    Here’s the rule of thumb I live by: if it keeps the house standing or keeps the water out, it’s a structural necessity. I’m talking foundation, roof, or electrical. You can’t skip these, but they won’t necessarily spike your ARV—they just protect your investment. Aesthetic upgrades, like quartz countertops or mid-century lighting, are what actually move the needle. Don’t overspend on “pretty” if the bones are rotting; fix the bones first, then sell the dream.

  • Improving the Exterior Look of a Home

    Improving the Exterior Look of a Home

    I remember standing on a cracked concrete driveway last October, staring at a listing that looked like a total disaster on paper. The overgrown weeds were choking out the front door, and the peeling paint made the whole structure look tired and defeated. Most “experts” would have told you that you needed a five-figure landscaping budget and a custom stone entryway to fix the problem, but they’re selling you a dream that eats your margins. In reality, curb appeal isn’t about how much money you can throw at a house; it’s about identifying the high-impact, low-cost pivots that stop a buyer in their tracks.

    I’m not here to give you a Pinterest board of expensive, impractical trends that won’t actually move the needle on your ROI. Instead, I’m going to show you how to strategically target the neglect that’s currently suppressing your property’s value. We are going to talk about the grit and the practicalities of making a house look intentional and well-maintained without breaking the bank. My goal is to help you turn that initial visual friction into instant equity through smart, decisive upgrades.

    Table of Contents

    Mastering First Impression Home Aesthetics for Maximum Profit

    Mastering First Impression Home Aesthetics for Maximum Profit

    When I’m walking up to a potential flip, I’m not just looking at the structure; I’m reading the story the exterior tells. If the entryway looks tired, buyers subconsciously assume the plumbing and electrical are just as neglected. To maximize your margins, you need to focus on first impression home aesthetics that signal quality. This isn’t about a full-scale overhaul; it’s about strategic, high-impact moves. For instance, I always look at the front door first. You don’t need a custom mahogany slab to make a statement—simply leaning into current front door color trends, like a deep navy or a muted sage, can act as a visual anchor that pulls the whole facade together.

    Beyond the door, don’t underestimate the power of greenery. I’m a huge advocate for low maintenance garden design because, let’s be real, most buyers aren’t looking to spend their weekends weeding. Think hardy perennials and clean mulch lines that suggest order and care. If you have a little extra room in the budget, adding some subtle outdoor lighting design can make the property look expensive even during twilight showings. It’s about creating an atmosphere of stability that makes a buyer feel like they’ve already found home.

    Smart Exterior Home Renovation Ideas for the Savvy Investor

    Smart Exterior Home Renovation Ideas for the Savvy Investor

    When you’re looking at a property through an investor’s lens, you aren’t just looking at flowers; you’re looking at ROI. I always tell my clients to focus on high-impact, low-cost exterior home renovation ideas that scream “well-maintained” the moment a buyer pulls up to the curb. For me, that starts with the entryway. You don’t need a full structural overhaul to change the vibe; sometimes, just leaning into current front door color trends—think a moody navy or a sophisticated sage—can act as a visual anchor that pulls the whole facade together.

    Beyond the hardware, don’t overlook the power of strategic landscaping for home value. I’m not talking about a botanical garden that requires a full-time gardener; I’m talking about a low maintenance garden design that looks intentional and clean. Think hardy perennials, fresh mulch, and crisp edging. If you want to take it a step further without breaking the bank, a simple outdoor lighting design using solar-powered path lights can make a property feel safe and high-end during evening showings. It’s about making the house look like an asset, not a liability.

    Five High-ROI Moves to Stop the Scroll and Start the Bidding War

    • Stop ignoring the entryway; a fresh coat of high-contrast paint on the front door and updated hardware can act as a psychological magnet for potential buyers.
    • Don’t dump money into complex landscaping if the basics are failing—clean up the edges, throw down fresh mulch, and prune back anything that looks like it hasn’t seen shears in a decade.
    • Lighting isn’t just for safety; swapping out those dated, plastic porch lights for something with a clean, industrial edge instantly signals that the home has been well-maintained.
    • Clean your windows until they shine; it sounds basic, but removing the grime and oxidation makes the whole structure look more expensive and well-kept from the curb.
    • Tackle the driveway and walkways—if they’re stained or cracked, a deep power wash or a strategic patch job can make a tired property look brand new without a full repave.

    The Bottom Line on Curb Appeal

    The Bottom Line on Curb Appeal.

    Stop overspending on high-end finishes that don’t move the needle; focus your budget on high-impact, visible upgrades like a fresh front door or clean landscaping that scream “well-maintained” to a buyer.

    Treat the exterior like a sales pitch—if the first thing a potential buyer sees is a cracked walkway or overgrown weeds, they’ve already mentally devalued the entire property before they even step inside.

    Always run the numbers on your exterior repairs to ensure you aren’t just spending money, but actually building equity; every dollar spent on curb appeal should be a strategic move to widen your profit margins.

    The Margin is in the Details

    “Don’t mistake curb appeal for just picking out a pretty front door; it’s about strategic sweat equity that stops a buyer in their tracks before they even see the floor plan.”

    Gareth Trelawny

    The Bottom Line on Curb Appeal

    At the end of the day, curb appeal isn’t about spending a fortune on high-end landscaping or custom masonry; it’s about strategic execution. We’ve covered how a fresh coat of paint, a manicured lawn, and updated lighting can completely shift a buyer’s perception from “this is a headache” to “this is my future home.” Remember, every dollar you sink into the exterior needs to serve a purpose: increasing perceived value and minimizing friction during the initial walkthrough. If you focus on the high-impact, low-cost wins we discussed, you aren’t just fixing up a house—you are protecting your margins and ensuring your renovation pays for itself.

    Real estate investing is rarely a clean, easy process, and the exterior of a property will often be the messiest part of the job. But that’s exactly where the opportunity lies. While other investors are scared off by peeling siding or overgrown bushes, you’re seeing the equity hiding underneath. Don’t let the dust and the dirt intimidate you. Use your eye for detail, trust your gut, and remember that every crumbling wall is just a stepping stone toward building that portfolio you’ve been dreaming of. Now, grab your laser measurer and get to work.

    Frequently Asked Questions

    At what point does spending more on landscaping become a case of diminishing returns for my ROI?

    Look, I’ve seen it happen: you start with a fresh layer of mulch and end up installing a $15,000 Japanese maple that does nothing for your margins. You hit diminishing returns the moment your landscaping costs exceed the perceived “wow factor” for a buyer. Stop chasing perfection. Once the lawn is green, the edges are crisp, and the entryway looks intentional, put your money back into the kitchen. Curb appeal gets them through the door; the interior closes the deal.

    Which exterior upgrades actually move the needle on appraisal value versus what just looks good for photos?

    Look, there’s a massive difference between “Instagrammable” and “appraisal-ready.” A trendy, oversized front door looks great in a listing photo, but it won’t move the needle like a fresh roof or updated siding will. If you want to see real equity growth, focus on the structural bones and high-impact essentials: windows, garage doors, and landscaping. Don’t waste your margins on boutique lighting if the foundation or roof is screaming for attention. Invest in what appraisers actually check.

    How do I balance high-end aesthetic upgrades with a tight renovation budget when I'm trying to protect my margins?

    Look, I get it. It’s easy to get carried away with high-end finishes, but if you overspend on the “wow” factor, you’re just eating your own profit. My rule is simple: spend big on the things people touch and see immediately—like a heavy, designer front door or matte black hardware—and save on the stuff that’s hidden. Use high-impact, mid-range materials and let smart lighting do the heavy lifting. Don’t buy luxury; buy perceived value.

  • Explaining the Brrrr Method for Investors

    Explaining the Brrrr Method for Investors

    I was standing in a kitchen that smelled like thirty years of damp drywall and regret, clutching my laser measurer like a lifeline, when it finally clicked. Most gurus online talk about the brrrr method as if it’s some sterile, mathematical equation you can solve on a spreadsheet while sipping a latte. They make it sound like a clean, automated wealth machine, but they conveniently leave out the part where you’re covered in dust, arguing with a plumber at 7:00 AM, and praying the appraisal comes in high enough to make the math work. It isn’t a magic trick; it’s a gritty, hands-on process of turning a disaster into a high-performing asset.

    I’m not here to sell you on a get-rich-quick fantasy or some complex algorithm. My goal is to strip away the fluff and show you how I actually use the brrrr method to build a portfolio from the ground up. I’m going to walk you through the real-world mechanics—from identifying undervalued shells to the crucial moment of refinancing—so you can stop dreaming about equity and start actually building it.

    Table of Contents

    The Art of Forced Equity Creation

    The Art of Forced Equity Creation.

    This is where the real magic happens—and where most people get intimidated. Forced equity creation isn’t about luck; it’s about seeing the value that’s currently hidden under layers of peeling wallpaper and outdated linoleum. When I walk into a property, I’m not just looking at a kitchen; I’m looking at a way to instantly jump the property’s value. My goal is to execute renovations that move the needle on the after repair value calculation without blowing my entire budget on aesthetics that don’t actually add worth. You have to be surgical about it.

    If you spend $20k on a high-end marble backsplash that only adds $5k in value, you haven’t built equity—you’ve just made an expensive mistake. I focus on the heavy hitters: updated flooring, fresh neutral paint, and functional kitchen upgrades. You want to create enough spread between your total investment and the new appraisal so that your cash-out refinance strategies actually work. It’s about being strategic with every dollar you pull from your bank account to ensure that when you go to the bank, the numbers tell a story of massive, undeniable growth.

    Calculating Your After Repair Value Accurately

    Calculating Your After Repair Value Accurately.

    Here is where most rookies trip up and lose their shirts. You can’t just walk into a dilapidated bungalow, look at the peeling paint, and “feel” like it’ll be worth six figures once you’re done. That’s how you end up stuck with a money pit instead of a portfolio piece. A proper after repair value calculation requires you to look past the current wreckage and study the comps—the houses that have actually sold in the last six months within a half-mile radius. I’m talking about properties that look exactly like what your finished product will look like, not what it looks like now.

    Don’t rely on Zillow’s automated estimates; they’re notoriously optimistic and don’t account for the specific finishes that drive value in a competitive market. I always pull the raw data myself to ensure my margins are airtight. If your math is off by even 5%, it can completely derail your cash-out refinance strategies later on. You need to know exactly how much value you’re adding so that when you go to the bank, you aren’t praying for a loan—you’re presenting a proven asset.

    Don't Get Burned: 5 Rules for Staying Profitable

    • Don’t get cute with your renovation budget. I’ve seen too many investors blow their margins because they didn’t account for the “hidden” stuff—the mold behind the drywall or the outdated wiring that only shows up once you start swinging a hammer. Always leave a 15% contingency fund; it’s not a suggestion, it’s survival.
    • Focus your sweat equity on the high-ROI zones. I’m not talking about high-end custom cabinetry that won’t move the needle. I’m talking about kitchens and bathrooms. If you want to force equity, you make the spaces where people spend their time look modern, clean, and functional.
    • Your exit strategy needs to be airtight before you even pick up a sledgehammer. Are you refinancing to hold as a rental, or are you prepping for a quick flip? Knowing your end game dictates whether you invest in long-term durability or quick-fix aesthetic upgrades.
    • Nail your lender relationship early. The “Refinance” part of BRRRR is where most people trip up. If your lender isn’t comfortable with the type of property you’re flipping or the specific way you’re calculating value, you’ll find yourself stuck with a house you can’t pull cash out of.
    • Stop chasing “pretty” and start chasing “profitable.” It’s easy to get carried away picking out mid-century modern light fixtures for your own taste, but if those fixtures don’t help you hit your target After Repair Value (ARV), they’re just expensive distractions. Every dollar you spend must have a clear path to increasing the home’s appraised value.

    The Bottom Line on BRRRR

    The Bottom Line on BRRRR strategy.

    Don’t get blinded by the renovation process; your entire profit margin lives or dies by how accurately you nail that After Repair Value (ARV) before you even swing a hammer.

    Forced equity is your real engine for growth—you aren’t just fixing a house, you’re strategically manufacturing value that the market will pay for.

    The goal isn’t just to finish a flip; it’s to recycle your capital so you can move on to the next project without being stuck with all your cash tied up in a single property.

    The Real Truth About BRRRR

    “The BRRRR method isn’t some magic trick for getting rich overnight; it’s about having the grit to see value where everyone else just sees a mess, and the discipline to turn that sweat equity into a scalable machine.”

    Gareth Trelawny

    The Bottom Line on BRRRR

    At the end of the day, mastering the BRRRR method isn’t about chasing a get-rich-quick scheme; it’s about the disciplined execution of a proven cycle. We’ve talked about the necessity of forced equity—that sweet spot where your sweat equity turns a disaster into a dream—and the absolute non-negotiable requirement of an accurate After Repair Value. If your math is off, or if you underestimate the cost of those inevitable renovation surprises, the whole house of cards can come tumbling down during the refinance stage. You have to be precise, you have to be prepared, and you have to know your numbers before you ever pick up a sledgehammer.

    Look, I know the idea of managing a renovation while juggling bank appraisals and refinancing paperwork feels overwhelming. There will be days when you’re standing in a dusty kitchen, staring at a plumbing disaster, wondering why you didn’t just stick to a 9-to-5. But that is exactly where the wealth is built. Real estate isn’t for the faint of heart, but for those willing to embrace the mess, it is the most reliable vehicle for building lasting equity. Stop waiting for the perfect market or a massive windfall. Find a fixer-upper, do the work, and start building your empire one brick at a time.

    Frequently Asked Questions

    How much of a cushion should I actually keep in my bank account to handle those inevitable renovation surprises?

    Look, if you’re planning a renovation with zero margin for error, you’re not investing—you’re gambling. I never step onto a job site without a 15% to 20% contingency fund sitting in liquid cash. Whether it’s a hidden mold issue or an electrical panel that’s seen better decades, those surprises will happen. Don’t let a plumbing disaster eat your entire profit margin. Build that cushion into your math from day one.

    Is it better to go for a massive overhaul to maximize value, or should I stick to smaller, high-impact cosmetic fixes?

    Look, I’ve seen people blow their entire budget on a gut renovation only to realize they overbuilt for the neighborhood. Don’t do that. My rule of thumb? Aim for high-impact cosmetic fixes that drive the most “wow” factor per dollar spent. Focus on kitchens, bathrooms, and fresh paint. Unless the bones are actually rotting, a massive overhaul usually eats your margins. You want to maximize equity, not just spend money for the sake of it.

    How do I know if I’m actually hitting my target equity once the refinance process begins?

    You’ll know you’ve hit the mark when the appraisal numbers actually align with your math—not your hopes. I always keep a close eye on the debt service coverage ratio during the refinance. If your new mortgage payment is comfortably covered by the rental income and you’ve successfully pulled out enough capital to cover your initial investment, you’ve won. If the bank’s valuation comes in low, it’s a signal you over-improved or miscalculated your ARV.

  • Best Practices for Tiling Surfaces

    Best Practices for Tiling Surfaces

    I still remember the exact moment I realized that most “expert” advice in the renovation world is just a way to pad a contractor’s invoice. I was standing in a cramped, dimly lit bathroom of a fixer-upper I’d just picked up, staring at a crooked, cracked backsplash that looked like it had been laid by someone in a blindfold. I had spent hours scouring the internet for professional tiling tips, only to find endless, fluff-filled articles suggesting I needed a thousand-dollar specialized kit just to handle a basic subway tile. It was infuriating. People act like tiling is some mystical art form reserved for the elite, when in reality, it’s just about smart preparation and not cutting corners when nobody is watching.

    I’m not here to sell you on expensive gadgets or complicated theories that don’t work in a real-world job site. Instead, I’m going to give you the straight talk on how to execute a flawless finish without draining your renovation budget. We’re going to dive into the gritty, practical side of things—from leveling your subfloor to mastering your grout lines—so you can turn a mediocre bathroom into a high-equity asset. If you want the truth about what actually makes a tile job look expensive versus what just wastes your time, you’re in the right place.

    Table of Contents

    Subfloor Preparation for Tile Building on a Solid Foundation

    Subfloor Preparation for Tile Building on a Solid Foundation

    Look, I’ve seen more beautiful, expensive tile jobs ruined by a lazy subfloor than I care to admit. You can buy the most stunning marble slabs on the market, but if your base is uneven or bouncy, you’re essentially throwing money down the drain. Proper subfloor preparation for tile isn’t just about making things look pretty; it’s about structural integrity. If you’re working over plywood, you need to ensure it’s rock-solid and securely fastened to the joists. Any flex in that floor is going to telegraph through your grout lines and eventually crack your tiles.

    Before you even think about opening a bag of thin-set, grab your laser measurer and check for level. If you have dips or high spots, use a self-leveling underlayment to flatten the field. This is the single most important step for preventing lippage during tiling, which is that annoying, uneven lip where one tile sits higher than its neighbor. Trust me, when a potential buyer runs their foot over a lip in a high-end renovation, they don’t see “character”—they see a lack of professional craftsmanship.

    Choosing the Right Tile Adhesive for Long Term Value

    Choosing the Right Tile Adhesive for Long Term Value

    Look, I’ve seen too many beautiful, high-end renovations fall apart because someone tried to cut corners on the thin-set. If you’re looking at a heavy porcelain slab or a natural stone, you can’t just grab the cheapest bucket on the shelf and hope for the best. Choosing the right tile adhesive is about more than just sticking things to the floor; it’s about ensuring that your investment doesn’t start popping loose six months after the closing date. If you’re working with large-format tiles, you need a high-performance, polymer-modified mortar that can handle the weight and the slight shifts in the structure.

    One of the biggest tiling mistakes to avoid is using an adhesive that doesn’t match your tile’s absorption rate. If you use a standard mortar for a highly absorbent stone, the tile will suck the moisture right out of the bond, leaving you with a hollow, crunchy mess underfoot. I always tell my clients: don’t skimp here. A premium adhesive might cost a few extra bucks upfront, but it’s a small price to pay for preventing lippage during tiling and ensuring those floors stay rock-solid for the next twenty years.

    The Details That Separate a Flip from a Fail: 5 Tiling Essentials

    • Stop obsessing over the pattern and start focusing on the layout. I’ve seen too many rookies start in a corner only to realize they’ve left themselves with a tiny, ugly sliver of tile against the far wall. Find your centerline first and dry-lay your tiles to ensure your cuts are balanced and intentional.
    • Don’t skimp on the grout quality. If you’re looking to build long-term equity, you want a grout that actually resists staining and cracking. I always lean toward high-performance, pre-mixed or polymer-modified grouts because I don’t have time to come back to a property six months later to scrub out discoloration.
    • Check your leveling constantly. A single tile sitting a millimeter higher than its neighbor—what the pros call “lippage”—is a massive red flag for any savvy buyer. Use a leveling clip system; it’s a small upfront investment that saves you from a botched job and a much lower appraisal.
    • Respect the drying time. I know it’s tempting to rush into grouting because you want to see the finished product, but if that adhesive hasn’t fully cured, you’re asking for disaster. Patience in the curing phase is what prevents tiles from shifting and ruining your margins.
    • Plan your grout lines with the end goal in mind. If you’re working with large-format tiles, keep those grout lines minimal to create that sleek, seamless look that sells. But if you’re using handmade or textured tiles, give them some breathing room so the natural imperfections don’t look like mistakes.

    The Bottom Line: Don't Cut Corners on the Foundation

    Never skip the subfloor prep; a level base is the difference between a high-end finish and a cracked, money-losing disaster.

    Invest in high-quality adhesive because cheap glue is a shortcut that will eventually cost you double in repairs and lost equity.

    Treat every tile installation as a long-term asset play—if the prep work isn’t professional, the ROI won’t be either.

    ## The Real Cost of Cutting Corners

    “If you try to save a few hundred bucks by rushing the layout or skimping on the thinset, you aren’t actually saving money—you’re just pre-ordering a massive repair bill that’ll eat your entire profit margin on the flip.”

    Gareth Trelawny

    The Bottom Line on Better Tiling

    The Bottom Line on Better Tiling.

    At the end of the day, tiling isn’t just about picking out a pretty pattern at the showroom; it’s about the grit you put in before the first piece even touches the floor. If you skimp on the subfloor prep or grab the cheapest adhesive just to save a few bucks on the budget, you aren’t saving money—you’re just scheduling a future disaster. I’ve seen too many investors lose their margins because they tried to cut corners on the technical stuff. Remember, the goal is to create a finish that looks high-end and, more importantly, stays that way long after the paint has dried. Invest in the prep, and the profit will follow.

    I know that staring at a bare, dusty room can feel overwhelming, especially when you’re midway through a renovation and things are getting messy. But don’t let the dust intimidate you. Every perfectly leveled tile and every clean grout line is a step toward increasing your property’s value and building that generational wealth we’re all after. It’s about seeing the vision through the chaos. Take your time, measure twice, and don’t be afraid to get your hands dirty. You aren’t just laying tile; you are building equity, one square foot at a time.

    Frequently Asked Questions

    How do I figure out if I should go with a standard grout or an epoxy grout to avoid staining issues down the line?

    Look, if you’re renovating a high-traffic area like a kitchen backsplash or a shower floor, just bite the bullet and go with epoxy. Standard grout is basically a sponge; it’ll soak up every drop of grease or soap scum until it looks filthy, and then you’re stuck scrubbing for hours. Epoxy is more expensive and a total pain to apply, but it’s non-porous. It stays clean, which means less maintenance and better long-term value.

    What’s the best way to choose a tile pattern that actually makes a small, cramped bathroom feel more expensive?

    Stop thinking about what looks “pretty” and start thinking about visual lines. If you want to trick the eye into seeing space, go with a large-format tile and minimal grout lines; it reduces visual clutter and makes the floor feel continuous. If you’re feeling bold, a vertical stack pattern can draw the eye upward, making low ceilings feel much higher. Just remember: keep the grout color close to the tile to avoid a choppy, cramped look.

    When am I actually going to see a return on investment from high-end tile versus just using something budget-friendly?

    Look, if you’re flipping a budget rental, don’t waste the capital on hand-painted Moroccan cement tiles. You won’t see that money back. But if you’re targeting the mid-to-high-end market, that’s where the ROI lives. High-end tile in high-impact zones—like a primary ensuite or a kitchen backsplash—creates that “wow” factor in listing photos. It signals quality and tells buyers the house hasn’t been skimped on, allowing you to push your asking price higher.

  • Finishing Window Frames With Trim

    Finishing Window Frames With Trim

    I was standing in a dusty, gutted living room in a mid-century ranch last October, staring at a set of water-damaged, peeling casings, when my contractor suggested we pull the whole window assembly to “do it right.” I nearly laughed in his face. Most people think you need to spend thousands on custom-milled millwork to make a renovation look high-end, but that is a massive waste of capital that eats directly into your margins. The truth is, you don’t need a custom budget to fix bad window trim; you just need to know which specific profiles actually add value and which ones are just expensive filler.

    I’m not here to sell you on a Pinterest-perfect fantasy that leaves your bank account empty. Instead, I’m going to give you the straightforward, boots-on-the-ground truth about selecting, installing, and finishing trim that maximizes your ROI. We’re going to talk about how to spot the difference between a cheap fix and a strategic upgrade, ensuring every dollar you spend on those frames is actually building equity rather than just burning cash.

    Table of Contents

    Choosing Window Trim Material Types That Last

    Choosing Window Trim Material Types That Last

    When you’re staring down a renovation budget, it’s tempting to grab the cheapest MDF you can find at the big-box store. But if you’re looking to build real equity, you need to think about longevity. For high-traffic areas or rooms prone to moisture, I always lean toward solid wood or high-quality polyurethane. Wood gives you that authentic, substantial feel that buyers can actually sense when they walk through a room, but it requires a bit more love in terms of sanding and painting.

    If you’re aiming for a sleeker, more streamlined look, exploring different window trim material types is essential to matching your overall design intent. For instance, if I’m working on a mid-century modern rehab, I might opt for thinner, more precise profiles that don’t scream “builder grade.” You don’t want to pick a material that warps or peels in two years; that’s just throwing your profit margin down the drain. Instead, focus on selecting architectural window detailing that complements the structural integrity of the house, ensuring the finish stays crisp long after the closing papers are signed.

    Finding Value in Decorative Window Frame Profiles

    Finding Value in Decorative Window Frame Profiles

    When you’re walking through a neglected property, the bones tell you a lot, but the details tell you the profit margin. I always tell my clients to look closely at the existing architectural window detailing. If you’re dealing with a house that has character—think Craftsman or Victorian—ripping out heavy, ornate profiles to install basic, flat stock is a rookie mistake that kills your resale value. You want to find a profile that respects the home’s era while feeling intentional. Sometimes, all it takes is a bit of sanding and a fresh coat of paint to make a vintage profile look high-end rather than dated.

    On the flip side, if you’re flipping a mid-century minimalist space, you want to lean into clean, sharp lines. In these cases, I look for modern window trim design ideas that emphasize geometry over fluff. A slim, flat casing can instantly elevate a room from “old fixer-upper” to “curated contemporary.” The goal isn’t just to cover the gap between the wall and the frame; it’s about using those shapes to frame the view like a piece of art. That’s how you turn a standard renovation into a high-value asset.

    My Pro Tips for Getting Window Trim Right the First Time

    • Don’t skimp on the quality of your caulk; if you leave gaps between the trim and the wall, the whole room looks amateur, and you’ll be back fixing it in six months.
    • Always measure your window openings twice before ordering any custom profiles—nothing kills my profit margin faster than a piece of expensive millwork that’s a quarter-inch too short.
    • Think about the paint job, not just the wood; if you’re working with a tight budget, choose a smooth MDF trim that takes paint beautifully so you can save on material costs without sacrificing the look.
    • Use the trim to hide your mistakes, specifically where the drywall meets the window casing, so you don’t have to spend extra hours on perfect plasterwork.
    • Stick to classic, timeless profiles rather than anything too trendy; I want these flips to look high-end for years, not like they were stuck in a specific design fad from three years ago.

    The Bottom Line on Window Trim

    Don’t overspend on high-end exotic woods; focus on durable, moisture-resistant materials like primed MDF or composite that can handle the wear and tear of a new homeowner.

    Prioritize profile over prestige—a clean, modern trim profile can make a dated room feel instantly renovated without the cost of custom millwork.

    Treat trim as the finishing touch that seals the deal; it’s the bridge between your paint job and your walls, so don’t skimp on the quality if you want that “finished” look that drives equity.

    The Small Detail That Protects Your Margin

    “When you’re staring down a renovation budget, it’s easy to want to skip the window trim to save a few bucks, but don’t. It’s one of those small, inexpensive details that bridges the gap between a house that looks ‘rehabbed’ and a home that looks high-end. If you leave the old, beat-up casing in place, you’re essentially leaving equity on the table.”

    Gareth Trelawny

    The Bottom Line on Trim and ROI

    The Bottom Line on Trim and ROI.

    At the end of the day, window trim isn’t just a finishing touch; it’s a strategic decision that bridges the gap between a “renovated house” and a “designer home.” We’ve covered how picking the right material—whether it’s durable MDF or high-end wood—can prevent future maintenance headaches, and how selecting a profile that complements your architectural style can significantly boost perceived value. Don’t let yourself get distracted by the big-ticket items like kitchen islands and forget that it is often these small, structural details that catch a buyer’s eye during a walkthrough. If you invest the time to get the trim right, you aren’t just covering up gaps; you are solidifying the equity you’ve worked so hard to build.

    I know that when you’re staring at a gutted room with dust in your lungs, it’s easy to feel overwhelmed by the minutiae. But remember, every successful flip is just a series of smart, calculated choices stacked on top of one another. You don’t need a perfect, untouched house to start building wealth; you just need the grit to fix the parts that are broken. Treat every piece of molding and every corner bead as an opportunity to transform a liability into an asset. Keep your eyes on the prize, keep your laser measurer handy, and go turn those crumbling walls into real profit.

    Frequently Asked Questions

    How do I figure out if the existing trim is worth saving or if it’s faster to just rip it all out?

    Look, I’ve been there—staring at a wall wondering if I’m about to waste a weekend or save a fortune. If the trim is solid wood and has a profile that isn’t totally dated, save it. It adds character that new MDF just can’t mimic. But if it’s water-damaged, crumbling, or made of cheap, flimsy material, don’t fight the battle. Rip it out. Your time is better spent on things that actually drive equity.

    Is it worth spending more on high-end casing if I'm planning to flip the house in under a year?

    If you’re flipping in under a year, don’t go overboard on custom-milled, high-end casing. You’ll eat your margins before you even hit the closing table. Instead, aim for the “sweet spot”: high-quality, pre-primed MDF with a substantial profile. It looks expensive in listing photos and handles the rigors of a renovation better than cheap pine, but it won’t drain the equity you’re trying to build. Keep it clean, keep it classy, but keep it profitable.

    What's the best way to handle trim installation if the walls in this old fixer-upper are completely unlevel?

    Look, I’ve been in plenty of houses where the walls look like they’re leaning mid-collapse. If the walls are unlevel, do not try to force the trim to follow those crooked lines—you’ll end up with massive, ugly gaps. Instead, use a slightly wider profile to mask the wonkiness and rely on high-quality caulk and wood filler to bridge the seams. It’s all about making the eye believe the line is straight.

  • Ways to Organize a Garage Workshop

    Ways to Organize a Garage Workshop

    I was standing in the middle of a fixer-upper last Tuesday, staring at a garage that looked less like a storage space and more like a graveyard for broken dreams and rusted lawnmowers. The smell of damp concrete and old oil was thick enough to choke on, and as I pulled my laser measurer from my bag, I realized the owner had spent thousands on fancy, aesthetic shelving units that were already buckling under the weight of literal junk. Most people think garage organization is about buying a matching set of plastic bins from a big-box store to make things look pretty, but let me tell you: if you haven’t audited your inventory, you’re just organizing your mess.

    I’m not here to sell you on some overpriced, Pinterest-perfect lifestyle hack that falls apart the moment you actually try to park a car inside. Instead, I’m going to show you how to approach garage organization like a real estate investor would—by focusing on functional square footage and maximizing every inch of usable space. We’re going to cut through the fluff and talk about heavy-duty systems, strategic zones, and the kind of ruthless decluttering that actually builds equity in your home.

    Table of Contents

    Mastering Garage Decluttering Tips to Reclaim Your Square Footage

    Mastering Garage Decluttering Tips to Reclaim Your Square Footage

    Before you even think about buying a single bin or installing a shelf, you have to face the music: most people are hoarding junk they haven’t touched in three years. If you want to actually reclaim your square footage, you need to be ruthless. I’ve seen too many investors blow their budget on fancy shelving only to realize they just organized their trash. Grab some heavy-duty contractor bags and start sorting everything into three piles: keep, donate, or trash. If you haven’t used it since your last move, it’s probably just taking up valuable equity.

    Once the floor is clear, it’s time to think vertically. This is where you stop treating your garage like a dumping ground and start treating it like a workspace. I’m a huge advocate for wall mounted organizers because they keep your tools accessible without eating into your parking space. If you’re dealing with a tight footprint, look into overhead storage racks for those seasonal items you only need once a year. The goal is to get as much off the floor as possible so you can actually utilize the space you’re paying for.

    Maximizing Small Garage Space With High Yield Storage Layouts

    Maximizing Small Garage Space With High Yield Storage Layouts

    If you’re working with a tight footprint, you have to stop thinking about the floor as your primary real estate. Every square inch of concrete covered by a plastic bin is wasted potential. To truly master maximizing small garage space, you need to look up. I always tell my clients that the ceiling is your best friend; installing overhead storage racks for seasonal items like holiday decor or camping gear clears the floor and instantly makes the room feel larger.

    When you can’t go up, you go vertical. I’m a huge advocate for wall mounted organizers because they keep your high-frequency tools within arm’s reach without creating a tripping hazard. Don’t settle for flimsy plastic shelving that bows under pressure, either. If you’re storing power tools or heavy bins, invest in heavy duty garage storage systems. It might cost a bit more upfront, but it’s a strategic move that prevents the constant cycle of replacing cheap gear and keeps your workflow streamlined. Treat your garage like a high-yield asset, not a junk drawer.

    Stop Wasting Equity: 5 High-Impact Moves to Optimize Your Garage

    • Go Vertical or Go Home: If your floor is covered in stuff, you’re losing money. Invest in heavy-duty slatwalls or industrial shelving units to get everything off the ground and up the walls.
    • Zone Your Chaos: Stop treating the garage like a catch-all junk drawer. Create dedicated zones—one for garden tools, one for automotive gear, and one for seasonal storage—so you aren’t hunting for a screwdriver for twenty minutes.
    • The “One-Year” Purge Rule: I see this on every job site; if you haven’t touched a piece of equipment or a box of “maybe” items in twelve months, it’s not an asset, it’s clutter. Sell it, donate it, or toss it to make room for things that actually matter.
    • Clear Bin Strategy: Stop using opaque cardboard boxes that hide your inventory. Use heavy-duty, clear plastic bins so you can actually see what’s inside without having to dig through a mountain of plastic every time you need a specific tool.
    • Lighting is Everything: You can’t organize what you can’t see. Swap out that single, dim bulb for bright, LED shop lights; it changes the entire vibe from a dark cave to a functional workspace that actually adds perceived value to the property.

    The Bottom Line: Turning Your Garage from a Junk Drawer into an Asset

    Stop viewing your garage as a graveyard for old junk; treat it like a high-value square footage opportunity where every organized inch contributes to your property’s overall market appeal.

    Invest in vertical storage and smart layouts rather than just buying more bins—you want to reclaim your floor space, not just hide the mess under more clutter.

    Focus on high-impact, functional organization that actually works for your lifestyle, because a garage that’s easy to maintain is a garage that stays valuable.

    ## Stop Seeing a Junk Room, Start Seeing Square Footage

    “Most people look at a cluttered garage and see a headache; I look at it and see wasted equity. If you aren’t organizing that space, you’re literally leaving money on the table by letting functional square footage rot under a pile of old cardboard boxes.”

    Gareth Trelawny

    Stop Treating Your Garage Like a Junk Drawer

    Stop Treating Your Garage Like a Junk Drawer.

    At the end of the day, organizing your garage isn’t just about finding a place for the lawnmower or making sure your tools aren’t buried under a mountain of cardboard boxes. It’s about strategic spatial management. We’ve covered how to aggressively declutter the dead weight, how to implement high-yield layouts that actually work for your lifestyle, and how to make every single square inch count. If you follow these steps, you aren’t just tidying up; you are reclaiming lost square footage that adds tangible value to your property. Stop looking at that mess as an inevitable part of homeownership and start seeing it as an inefficient use of your most valuable asset.

    I know it feels overwhelming when you first pull that garage door up and see the chaos, but remember that every major renovation starts with a single, messy step. You don’t need a massive budget or a professional crew to transform this space; you just need the discipline to execute a plan. Don’t let another season pass while your potential equity sits buried under clutter. Grab your measuring tape, pick a corner, and start building something better. You have the vision to see what this space could be—now go out there and make it a reality.

    Frequently Asked Questions

    How do I decide which items are worth keeping and which are just taking up valuable square footage?

    Look, I’ve seen it all during a gut rehab: garages filled with “maybe one day” junk that actually eats your equity. Here’s my rule of thumb: if you haven’t touched it in a year and it doesn’t have a specific, high-value utility, it’s gone. Don’t get sentimental over broken tools or old hobby gear. If it isn’t functional or worth more than the space it’s occupying, it’s just dead weight. Toss it or sell it.

    Are there specific storage systems that actually hold up during a heavy renovation, or is it all just aesthetic fluff?

    Look, if you’re planning a renovation, don’t waste a dime on those flimsy plastic bin systems you see at big-box stores. They’re aesthetic fluff and they’ll crack the moment you toss a heavy power tool in them. I swear by heavy-duty, wall-mounted steel slatwall systems or industrial metal shelving. You want gear that can handle the dust, the impact, and the chaos of a job site without buckling. Build for utility, not just for the ‘gram.

    What’s the most cost-effective way to add vertical storage without blowing my entire renovation budget?

    If you’re looking to maximize your ROI without draining your rehab budget, skip the high-end custom cabinetry. That’s a money pit. Instead, go for heavy-duty industrial metal shelving or a wall-mounted slatwall system. You can grab sturdy steel racks at a hardware store for a fraction of the cost of built-ins. It’s all about utilizing that vertical real estate to clear the floor, making the space feel larger and significantly increasing the property’s perceived value.

  • Maximizing Your Renovation Roi

    Maximizing Your Renovation Roi

    I was standing in a gutted mid-century bungalow last Tuesday, knee-deep in sawdust and smelling nothing but stale drywall dust, when I realized something: most people are absolutely throwing money away on their flips. I see it all the time on HGTV—people ripping out perfectly good bones to install $20,000 marble countertops that won’t actually move the needle on the appraisal. They’re chasing aesthetics when they should be chasing renovation roi. If you’re spending your capital on vanity projects instead of high-impact structural or functional upgrades, you aren’t investing; you’re just decorating a very expensive mistake.

    I’m not here to give you a polished, theoretical lecture on interior design trends. I’m here to show you how to look at a dilapidated kitchen and see exactly where the profit margins are hiding. Over the next few sections, I’m going to strip away the fluff and give you the hard truth about which upgrades actually build equity and which ones are just expensive distractions. We’re going to focus on strategic, high-yield rehabs that turn crumbling walls into real, tangible wealth.

    Table of Contents

    Highest Return on Investment Home Improvements for Beginners

    Highest Return on Investment Home Improvements for Beginners

    If you’re just starting out, don’t go chasing a total gut renovation on day one. You’ll bleed cash before you even see a dime of profit. Instead, focus on the heavy hitters. For most beginners, the highest return on investment home improvements fall into two categories: the kitchen and the master bath. I always tell my clients to look at the bones. You don’t need custom Italian marble to see a massive bathroom renovation impact on resale; sometimes, it’s just about swapping out dated vanities, updating the hardware, and installing a modern, neutral tile.

    The kitchen is where the real magic happens, but you have to be smart about the math. I spend a lot of time analyzing kitchen remodeling cost vs value before I ever sign a contract. If you’re overspending on high-end appliances that the local market won’t pay a premium for, you’re just burning your margin. My rule of thumb? Aim for cost-effective home upgrades like painting cabinets, upgrading light fixtures, and installing quartz countertops. These changes give that “wow” factor without the soul-crushing price tag of a full structural overhaul.

    Cost Effective Home Upgrades That Actually Move the Needle

    Cost Effective Home Upgrades That Actually Move the Needle

    If you aren’t ready to gut a whole kitchen, don’t panic. You don’t always need a massive budget to see a real shift in property value. Sometimes, the smartest move is focusing on the “facelift” approach. I’m talking about swapping out dated, brass hardware for matte black fixtures or replacing those chunky, old-school laminate countertops with something sleeker like quartz. These are cost-effective home upgrades that change the entire vibe of a room without the massive headache of a full demolition. When I’m walking a site, I’m looking for those small, high-impact visual wins that make a buyer feel like they’re walking into a modern home rather than a time capsule.

    Don’t overlook the power of lighting and paint, either. A fresh, neutral color palette can instantly make a cramped space feel airy and expensive. It’s one of the most underrated property value enhancement strategies in my toolkit. By upgrading to recessed lighting or adding statement pendants, you’re not just brightening a room; you’re directing the eye to the features you want to sell. It’s about working smarter, not harder, to ensure every dollar you spend is actively building your equity.

    My Golden Rules for Protecting Your Profit Margins

    • Stop chasing “luxury” and start chasing “necessity.” I’ve seen too many rookie investors blow their budget on high-end marble countertops when the real issue is a leaky roof or outdated electrical. Buyers will forgive a lack of gold fixtures, but they won’t forgive a house that feels unsafe or broken.
    • The “Neutral Base” strategy is your best friend. I love my bold mid-century pieces as much as the next person, but when I’m flipping, I keep the bones neutral. You want the potential buyer to see their own life in the space, not feel like they’re walking into one of my personal design mood boards.
    • Never underestimate the power of a fresh coat of paint and decent lighting. It’s the cheapest way to mask a mediocre floor plan. If a room feels dark and cramped, don’t tear down a load-bearing wall immediately—swap out the old yellowing fixtures for something clean and bright. It changes the entire vibe for a fraction of the cost.
    • Focus on the “First Impression” zones. The entryway and the kitchen are where the emotional sale happens. If the front door looks tired or the kitchen feels cluttered and dated, the buyer’s brain starts calculating the cost of repairs before they’ve even seen the master suite. Win them over in the first thirty seconds.
    • Always, always budget for the “Oh Sh*t” factor. I keep my laser measurer in my bag, but I keep a contingency fund in my bank account for a reason. Once you peel back those old layers of wallpaper or rip up a floor, you’re going to find something you didn’t expect. If you don’t have a 10-15% buffer, you aren’t investing; you’re gambling.

    The Bottom Line: Don't Overbuild, Just Optimize

    Focus on the “bones” and the basics—investing in high-impact areas like kitchens and bathrooms will always beat a high-end custom build that pushes your property past its neighborhood ceiling.

    Stop chasing perfection and start chasing profit; sometimes a fresh coat of paint and some smart mid-century styling can do more for your equity than an expensive, unnecessary structural overhaul.

    Always keep your laser measurer and your budget close—knowing exactly what you’re working with prevents the “scope creep” that turns a profitable flip into a money pit.

    The Golden Rule of the Flip

    Stop chasing vanity upgrades that look pretty in a catalog; if a renovation doesn’t solve a structural headache or fix a functional flaw, you’re just spending money to decorate your losses. Real equity is built in the guts of the house, not the gold plating on the faucets.

    Gareth Trelawny

    The Bottom Line on Building Equity

    The Bottom Line on Building Equity.

    At the end of the day, maximizing your renovation ROI isn’t about throwing money at every shiny new fixture you see on Pinterest. It’s about being strategic. We’ve talked about how high-impact updates like fresh paint, updated lighting, and smart kitchen refreshes can do the heavy lifting without draining your entire contingency fund. Remember, the goal is to focus on the functional and aesthetic essentials that buyers actually care about. If an upgrade doesn’t clearly add value to the property or solve a glaring problem, leave it alone. Keep your eye on the budget, stay disciplined with your contractor, and always, always measure twice and cut once.

    I know that looking at a gutted kitchen or a cracked floor can feel overwhelming, but don’t let the chaos shake your confidence. Every fixer-upper I’ve ever flipped started out looking like a disaster zone, but that’s exactly where the profit lives. You aren’t just buying a house; you are buying the opportunity to create value where others only see decay. If you have the grit to manage the mess and the vision to see past the peeling wallpaper, you will find that wealth is built one renovation at a time. Now, grab your laser measurer and get to work.

    Frequently Asked Questions

    How do I know if I'm over-improving for the neighborhood and killing my potential profit margin?

    Look at the comps—and I mean really look at them. If every house on the block is selling with butcher block counters and you’re installing Calacatta marble, you’re bleeding money. You aren’t “adding value”; you’re just subsidizing your own hobby. Before you swing a hammer, find the neighborhood ceiling. Your goal is to be the best house on the street, not a mansion in a bungalow zone. Don’t overbuild; just outshine.

    Is it actually worth spending the extra cash on high-end finishes, or should I stick to the basics to keep my margins safe?

    Look, I’ve seen too many investors blow their margins trying to turn a flip into a luxury showroom. Here’s the truth: don’t chase high-end finishes just for the sake of vanity. Stick to high-quality basics that feel durable and clean. If you’re going to splurge, do it on “touchpoints”—the things buyers actually feel, like solid hardware or a sleek faucet. Keep the rest standard; your profit margin will thank you.

    When a renovation goes sideways and the budget starts creeping up, how do I decide which upgrades to cut without tanking the resale value?

    When the budget starts bleeding, you have to play defense. My rule is simple: never cut the “bones” or the “function.” If you compromise on the HVAC, the roof, or the electrical, you’re just building a ticking time bomb that will kill your resale value. Instead, trim the fat on the aesthetics. Swap the custom marble for a high-end quartz, or ditch the designer lighting for something more standard. Save the equity, not the ego.

  • How to Stage a House for Sale

    How to Stage a House for Sale

    I remember standing in the middle of a dusty, gutted living room in East London, clutching my laser measurer and staring at a pile of discarded drywall. A client had just spent five figures on a high-end staging company, thinking they could mask the structural bones of the property with expensive velvet sofas and overpriced art. It was a total waste of capital. They were treating staging a house like a luxury fashion show rather than a strategic financial move. If you’re trying to build real equity, you don’t need a showroom; you need a way to show buyers how they’re going to actually live in the space without breaking your budget.

    I’m not here to sell you on the idea that you need a designer’s full catalog to get a deal done. My goal is to give you the straight talk on how to maximize your ROI through smart, intentional placement. I’ll show you how to strip away the clutter and use design to highlight the potential that’s hiding behind those dated walls. We’re going to focus on the high-impact, low-cost tactics that turn a “fixer-upper” into a must-have asset.

    Table of Contents

    Decluttering for Home Sales Clearing the Path to Profit

    Decluttering for Home Sales Clearing the Path to Profit

    Before you even think about picking up a paintbrush or calling in professional home staging services, you need to get ruthless with your belongings. I’ve seen too many investors blow their margins because they tried to stage a house that was still overflowing with the previous owner’s junk. You aren’t just cleaning; you are decluttering for home sales to create a sense of scale. When every surface is covered in knick-knacks, rooms feel smaller and cramped. I want potential buyers to walk into a space and feel like they can breathe, not feel like they’re intruding on someone else’s cluttered life.

    My rule of thumb? If it doesn’t serve a functional purpose or contribute to a clean, intentional aesthetic, it goes into a storage unit or the donation bin. By stripping the rooms down to their essentials, you’re actually enhancing natural lighting by removing the visual obstacles that block the sun. This creates that open, airy vibe that makes people start mentally moving their own furniture in. You have to clear the physical noise so the true potential of the layout can finally shine through.

    Enhancing Natural Lighting to Reveal Hidden Potential

    Enhancing Natural Lighting to Reveal Hidden Potential

    Once you’ve cleared the junk out of the way, the next thing I look at is how light moves through a room. Shadows are the enemy of a good flip; they make spaces feel cramped and, frankly, depressing. When I’m walking through a potential acquisition, I’m looking for ways of enhancing natural lighting to make those small, dark rooms feel expansive. If a room feels like a cave, don’t just reach for a lamp—think about the windows. I always recommend stripping away heavy, dated drapes and replacing them with sheer fabrics that let the sun actually do its job.

    Lighting isn’t just about brightness, though; it’s about creating an emotional connection with buyers. You want them to walk into a room and feel an immediate sense of warmth and openness. If you’re dealing with a particularly dim space, consider swapping out old, amber-tinted bulbs for something that mimics daylight. It’s a small, low-cost tweak that can make a massive difference in how the square footage is perceived. When the light hits the right angles, the buyer isn’t just seeing a room; they’re seeing their future home.

    Beyond the Surface: 5 Strategic Staging Moves to Maximize Your ROI

    • Neutralize the palette to let the bones shine. I’ve seen too many sellers cling to their “personality” colors, but if you want a buyer to see themselves living there, you need to swap those bold accent walls for soft, sophisticated neutrals that act as a blank canvas.
    • Focus on the “flow” rather than just the furniture. It’s not about how much stuff you can fit in a room; it’s about how the space moves. Arrange your pieces to create clear walkways and functional zones so buyers can intuitively sense the layout’s potential.
    • Invest in high-impact, low-cost sensory details. A house shouldn’t just look good; it should feel intentional. Fresh, high-quality towels in the bathroom or a subtle, clean scent can make a renovated space feel premium without breaking your rehab budget.
    • Highlight the architectural “wins” with strategic placement. If you’ve spent weeks fixing up original crown molding or a beautiful fireplace, don’t bury them behind a massive bookshelf. Position your furniture to frame these features, not hide them.
    • Use “lifestyle staging” to tell a story, not just fill a room. Instead of a cluttered dining table, set a single, elegant place setting. You aren’t just selling a house; you’re selling the idea of a life lived in a beautiful, well-organized space.

    The Bottom Line: Turning Presentation into Profit

    Stop treating staging like a decoration project; treat it like an investment strategy designed to maximize your exit price.

    Focus on the high-impact, low-cost wins—like light and space—to make sure buyers see the potential rather than the flaws.

    Remember that every piece of clutter you remove is a way to let the property’s actual square footage and value breathe.

    The Real Goal of Staging

    Staging isn’t about making a house look pretty for a magazine spread; it’s about stripping away the visual noise so a buyer can actually see the equity hiding behind those dated walls.

    Gareth Trelawny

    The Bottom Line on Staging for Profit

    The Bottom Line on Staging for Profit.

    At the end of the day, staging isn’t about making a house look “pretty” for a magazine spread; it’s about strategic asset management. We’ve talked about how clearing out the clutter removes the visual noise that distracts buyers, and how maximizing natural light can make a cramped room feel like a premium space. When you combine these elements, you aren’t just decorating—you are removing the friction between a potential buyer and their decision to make an offer. Every intentional choice you make, from the way the light hits the floorboards to the amount of breathing room in the hallway, is designed to protect your margins and ensure that the equity you’ve worked so hard to build doesn’t walk out the door with a low-ball offer.

    I know that when you’re staring at a renovation budget that’s bleeding red, spending extra on staging can feel like a luxury you can’t afford. But trust me, I’ve seen more deals fall through because of poor presentation than because of structural issues. Don’t view this as an extra expense; view it as your final tool for extraction. You’ve done the hard work of fixing the bones and the guts of the property. Now, it’s time to show the world why this house is worth every single cent of your asking price. Get in there, clear the path, and go get your profit.

    Frequently Asked Questions

    Is it actually worth spending money on professional staging if I'm on a tight budget for the renovation?

    Look, if your budget is razor-thin, don’t go dropping thousands on a full-service staging firm. That’s a quick way to drain your contingency fund. Instead, think like an investor: focus on “micro-staging.” Grab a few key pieces from your thrift finds—a mid-century credenza here, a sculptural lamp there—to anchor the rooms. You aren’t buying luxury; you’re buying visual cues that help buyers see the lifestyle, not just the empty, echoing floorboards.

    How do I figure out which pieces of my own furniture to keep and which ones are just cluttering up the sale?

    Look at your furniture through the lens of square footage, not sentiment. If a piece is oversized, heavily patterned, or screams “my personality,” it’s working against you. I always tell my clients: if it doesn’t help a buyer visualize themselves living in the space, it’s just noise. Keep the clean, neutral staples that define a room’s function, and move the rest to storage. Don’t let your favorite velvet armchair shrink a living room.

    At what point in the rehab process should I actually start the staging process to maximize my ROI?

    Don’t even think about staging until the dust has settled and the heavy lifting is done. You want your painters, floor refinishers, and contractors out of the house before a single mid-century chair arrives. Staging is your final, high-impact move to bridge the gap between a “renovation” and a “home.” If you bring in furniture while there’s still drywall dust in the air, you’re just risking damage and wasting precious time.

  • How to Perform Real Estate Market Analysis

    How to Perform Real Estate Market Analysis

    I was standing in a damp, half-finished basement last Tuesday, the smell of mildew heavy in the air, when I realized most people are looking at real estate all wrong. They’re staring at shiny spreadsheets and paying consultants thousands of dollars for a “professional” real estate market analysis that’s nothing more than recycled data and wishful thinking. Honestly? You can’t find the soul of a neighborhood—or its true profit potential—by staring at a glowing screen in a climate-controlled office. You find it by walking the streets, noticing the new coffee shop popping up on a corner, and seeing which houses are being gutted for renovations while others sit stagnant.

    I’m not here to feed you the polished, sanitized version of investing that you see on HGTV. My goal is to give you the unfiltered truth about how to actually read a market using grit and intuition rather than just expensive software. I’m going to show you how to spot the subtle shifts in a neighborhood before the big players do, so you can stop guessing and start building real equity from the ground up.

    Table of Contents

    Decoding the Real Estate Cyclicality of Distressed Assets

    Decoding the Real Estate Cyclicality of Distressed Assets.

    When you’re looking at a distressed property, you aren’t just looking at a house; you’re looking at a snapshot of a much larger economic engine. Understanding real estate cyclicality is what separates the professionals from the hobbyists who get wiped out during a downturn. Most people panic when they see headlines about rising costs, but I see those shifts as signals. When the market swings, the distressed assets—the ones with the peeling paint and the outdated layouts—often become the most resilient because they offer a built-in margin of safety that turnkey homes simply don’t have.

    You can’t just rely on gut feeling, though. I always dive into a deep comparable sales analysis to see how similar fixer-uppers in the area have performed over the last few cycles. I’m looking for patterns in how quickly properties move and how much value is being recovered post-renovation. If you can time your rehab to hit just as the market begins its next upswing, you aren’t just flipping a house; you are strategically capturing equity that others are too afraid to touch.

    Reading Between the Lines of Housing Inventory Levels

    Reading Between the Lines of Housing Inventory Levels

    When I’m walking through a neighborhood that’s clearly due for a facelift, I’m not just looking at the houses; I’m looking at the empty signs. Most people see low housing inventory levels and panic, thinking the market is too tight to move. But for a flipper, that scarcity is a signal. It means that when I finally finish a high-quality rehab, I won’t be sitting on the sidelines waiting for a buyer to wander by. I’ll have a captive audience.

    However, you can’t just rely on gut feeling. I always dive into a comparable sales analysis to see how long those few available homes are actually sitting on the market. If the houses are moving fast, even with the current mortgage interest rate impact weighing on buyers’ minds, it tells me the demand is resilient. You want to find those pockets where supply is thin but the local demand is hungry. That’s where the real equity is hiding—in the gap between what’s available and what people actually need.

    My Cheat Sheet for Reading the Market Before You Sign the Contract

    • Stop obsessing over national headlines and start looking at your specific zip code; a booming national market means nothing if your local inventory is stagnant and overpriced.
    • Watch the “Days on Market” metric like a hawk to gauge buyer urgency—if houses are sitting for sixty days instead of ten, you’ve lost your leverage to negotiate a deep discount.
    • Don’t just look at what houses are selling for, look at what they aren’t selling for; the properties with stale listings are often where the real equity is hiding if you’re willing to do the work.
    • Keep a close eye on local zoning changes and upcoming infrastructure projects, because a new transit line or a commercial rezoning can turn a mediocre fixer-upper into a goldmine overnight.
    • Always factor in the “renovation premium” by comparing distressed sale prices to the ceiling of renovated homes in the area; if the math doesn’t leave room for a profit margin after my contractor’s bill, I walk away.

    The Bottom Line: Turning Data into Equity

    Stop obsessing over the national headlines and start looking at local inventory; a low supply in a specific zip code is a much better indicator of your next flip than some vague federal report.

    Don’t let market volatility freeze you up; distressed assets often hit their stride during cyclical shifts, meaning the “messy” periods are actually your best opportunities to grab undervalued property.

    Success in this game isn’t about timing the market perfectly, it’s about having the vision to see the equity hiding behind the high interest rates and the outdated layouts that scare everyone else away.

    ## Data vs. Dirt

    “Most people get paralyzed by spreadsheets and macro-economic forecasts, but real market analysis isn’t just about studying graphs; it’s about looking at a distressed property and seeing the equity that everyone else is too intimidated to touch.”

    Gareth Trelawny

    The Bottom Line on Market Strategy

    The Bottom Line on Market Strategy analysis.

    At the end of the day, analyzing the market isn’t about staring at spreadsheets until your eyes bleed; it’s about connecting the dots between high-level cycles and the actual grit of the street. We’ve looked at how distressed assets move through economic cycles and how inventory levels dictate your negotiating power, but remember that data is just a tool. You have to combine those macro trends with a boots-on-the-ground perspective to see where the real opportunity lies. If you can understand the rhythm of the market and the supply constraints currently shaping it, you won’t just be reacting to changes—you’ll be anticipating the next move before the rest of the crowd even realizes the tide has turned.

    Don’t let the complexity of market analysis paralyze you. It’s easy to get lost in the noise of interest rates and inflation reports, but the most successful investors I know are the ones who stay focused on the fundamentals of value. Real estate is messy, unpredictable, and occasionally frustrating, but that is exactly where the profit lives. Stop waiting for the “perfect” market conditions to arrive, because they rarely do. Instead, sharpen your eye, trust your research, and start looking for that hidden equity waiting behind the next crumbling wall. Build your future one renovation at a time.

    Frequently Asked Questions

    How do I tell the difference between a temporary market dip and a long-term crash before I sink my capital into a renovation?

    Look at the fundamentals, not the headlines. A temporary dip is a correction—prices wobble, but demand stays steady and people are still moving for jobs. A crash is different; that’s when inventory explodes and unemployment spikes. If I’m looking at a fixer-upper, I check the absorption rate. If houses are still moving, even if slower, I’m buying. I don’t fear a dip; I hunt for the equity it creates.

    When looking at low inventory numbers, how do I know if it's a genuine opportunity for me or just a sign that the market is too overpriced to enter?

    Look, low inventory is a double-edged sword. If you’re just looking at the sticker price, you’ll get spooked. But here’s my rule: stop looking at the “sold” prices and start looking at the “days on market” versus the “list price.” If houses are sitting but still fetching high prices, the market is overheated. But if inventory is low and things are moving fast, look for the outliers—the neglected properties that need sweat equity to bridge that price gap.

    What specific red flags should I look for in local market data that suggest a neighborhood is actually declining rather than just needing a little TLC?

    Watch the turnover rate and the “days on market” closely. If houses are sitting for months and selling significantly below list price, that’s a warning sign. But the real kicker? Look at the permits. If you see a sudden drop in building permits or a surge in code violations rather than renovation filings, the neighborhood isn’t just aging—it’s stagnating. Don’t mistake a lack of investment for a bargain; sometimes, the rot goes deeper than the drywall.

  • Managing Major Structural Repairs in Investment Properties

    Managing Major Structural Repairs in Investment Properties

    I still remember the smell of damp earth and old sawdust from my first solo flip—a tiny bungalow that looked like it was held together by nothing but prayer and peeling wallpaper. I was standing in the basement, my laser measurer gripped tight in my hand, staring at a foundation crack that looked wide enough to swallow my entire career. Most “experts” would have looked at those structural repairs and told me to run for the hills, quoting astronomical quotes just to scare a novice. But I didn’t see a disaster; I saw a math problem waiting to be solved.

    I’m not here to give you the polished, sanitized version of real estate you see on HGTV. I’m here to tell you that while structural repairs can feel like a punch to the gut, they are actually the most direct path to building real, tangible equity. I’m going to walk you through the grit of identifying what’s truly broken versus what’s just cosmetic, so you can stop fearing the heavy lifting and start mastering the mechanics of a profitable renovation.

    Table of Contents

    Spotting the Signs of Foundation Settling Early

    Spotting the Signs of Foundation Settling Early.

    When I’m walking through a potential flip, I’m not just looking at the backsplash or the crown molding; I’m looking at the bones. One of the biggest red flags I watch for is the subtle, creeping evidence of signs of foundation settling. You might notice it first in the way a door sticks in its frame or if you spot tiny, diagonal cracks snaking up from the corners of window casings. It’s easy to dismiss these as “old house quirks,” but if you aren’t careful, those little cracks can turn into a massive capital drain that eats your entire profit margin.

    Another thing that always sets off my internal alarm is a floor that feels just a bit off underfoot. If you’re walking through a room and feel a slight dip, you might be looking at the early stages of remedying sagging floors later on. I always tell my clients: don’t ignore a slope. If the floor isn’t level, the house is trying to tell you something. Catching these shifts early—before they compromise the actual stability of the build—is the difference between a profitable rehab and a total money pit.

    The Vital Home Structural Integrity Assessment

    The Vital Home Structural Integrity Assessment.

    Once you’ve identified those initial red flags, you need to stop guessing and start investigating. I’ve learned the hard way that trying to “eye-ball” a load-bearing issue is a fast track to a money pit. This is where a formal home structural integrity assessment becomes your best friend. You aren’t just looking for cosmetic cracks; you’re looking for the skeletal truth of the house. I always tell my clients that skipping this step is like trying to perform surgery without an X-ray—you might think you’re fixing a minor issue, but you’re actually just masking a disaster.

    If the assessment uncovers something serious, don’t panic, but do get professional. At this stage, I never DIY a fix. I immediately call in for a structural engineer consultation to get a definitive scope of work. Whether we are looking at remedying sagging floors in a Victorian or reinforcing a basement wall, you need a blueprint that guarantees safety and long-term value. My goal isn’t just to make the house look pretty for a quick flip; it’s about ensuring every dollar I sink into the foundation is backed by rigorous engineering standards.

    My Non-Negotiable Rules for Tackling Structural Repairs

    • Never, and I mean never, DIY a structural fix just to save a few bucks; call in a licensed structural engineer before you even think about picking up a sledgehammer.
    • Budget for the “unknown unknowns” by setting aside a 15% contingency fund specifically for structural surprises that inevitably hide behind drywall.
    • Prioritize the bones over the aesthetics; a gorgeous marble backsplash won’t mean a thing if your floor is sloping toward the kitchen sink.
    • Document every single repair with photos and professional reports, because that paper trail is what turns a “fixer-upper” into a high-value asset during a resale.
    • Watch your moisture levels like a hawk, because most structural nightmares start with a simple, neglected leak that’s been rotting your joists for years.

    The Bottom Line on Structural Stability

    Don’t panic when you see a crack; learn to distinguish between cosmetic settling and a structural red flag that will actually eat your profit margins.

    Always budget for a professional inspection early in the due diligence phase—it’s much cheaper to walk away from a money pit than to try and fix a sinking foundation mid-renovation.

    Treat structural repairs as an investment in equity, not just a cost, because a rock-solid boneset is what ultimately secures your ROI and protects your buyer’s long-term value.

    The Real Cost of Ignoring the Bones

    “A fresh coat of paint can hide a multitude of sins, but it’ll never fix a failing foundation. I’d rather spend my budget on reinforcing the bones of a house today than watching my equity sink into a cracked basement tomorrow.”

    Gareth Trelawny

    Turning Structural Setbacks into Strategic Wins

    Turning Structural Setbacks into Strategic Wins.

    At the end of the day, mastering structural repairs isn’t about being a master carpenter; it’s about being a master of observation. We’ve covered how to spot those subtle foundation shifts before they become catastrophic, and why you should never, ever skip a professional integrity assessment. Remember, those cracks in the plaster or the uneven door frames are just data points telling you the story of the house. If you can learn to read those signals and approach them with a calculated, pragmatic plan rather than panic, you’re already ahead of most amateur flippers. Don’t let a messy basement or a sloping floor derail your vision; instead, treat these issues as the necessary groundwork for the equity you’re about to build.

    I know it can feel overwhelming when you’re standing in a room that looks like it’s slowly folding in on itself, but that’s exactly where the profit lives. The most lucrative opportunities aren’t found in pristine, move-in-ready estates; they are hidden behind the peeling paint and the sagging joists of properties that others were too intimidated to touch. Stay disciplined, keep your laser measurer handy, and trust your eye for potential. Building a real estate portfolio is a marathon, not a sprint, and every structural hurdle you clear is just another brick in your path toward generational wealth. Now, get out there and go find your next project.

    Frequently Asked Questions

    How do I tell the difference between a cosmetic crack in the drywall and a serious foundation issue that’s going to eat my entire renovation budget?

    Look, I’ve been there—staring at a crack in a fixer-upper and wondering if I’m looking at a cheap patch job or a financial nightmare. Here’s the rule of thumb: if it’s a hairline crack in the drywall, it’s usually just the house settling and nothing to sweat. But if that crack is diagonal, wider than a nickel, or if you see it traveling through the masonry or door frames, stop everything. That’s not cosmetic; that’s a budget-killer.

    At what point does a structural repair stop being a "fixer-upper opportunity" and start becoming a money pit that kills my ROI?

    It stops being an opportunity the second the math stops working. I look at it through a cold, hard lens: if the cost of the structural stabilization—plus the necessary cosmetic repairs—eats up more than 30% of your projected profit margin, walk away. When you’re fighting a sinking foundation and a failing roof and outdated electrical, you aren’t flipping a house anymore; you’re just subsidizing a contractor’s lifestyle. Protect your equity.

    When I'm walking through a potential property, should I be looking for a structural engineer immediately, or can I trust my own eye for the initial assessment?

    Trust your eyes for the initial walk-through, but don’t mistake a gut feeling for a professional diagnosis. Use your eyes to spot the red flags—stair-step cracks in brickwork, doors that won’t latch, or sloping floors. That’s your triage phase. However, the moment you see something that looks like more than just “character,” call in a structural engineer. I’ve seen too many investors lose their shirts because they tried to eyeball a foundation issue they should have outsourced.