Author: Gareth Trelawny

  • The Process of Property Acquisition

    The Process of Property Acquisition

    I still remember the smell of damp drywall and stale cigarette smoke from my first “big” project—a tiny, neglected bungalow that most people wouldn’t have looked at twice. While the polished gurus on Instagram were busy preaching about high-leverage luxury flips and massive seed funding, I was standing in a mud-caked kitchen with a laser measurer in my hand, realizing that true property acquisition isn’t about having a mountain of cash. It’s about having the vision to see past the rot and the guts to step into a house that everyone else has already written off as a lost cause.

    I’m not here to sell you a dream of overnight millions or some complicated, high-finance strategy that requires a degree in economics. My goal is to give you the actual, unvarnished blueprint for finding value where others see nothing but rubble. I’m going to show you how to identify the bones of a solid investment, how to negotiate when the stakes feel high, and how to turn a messy, stressful search into a calculated move toward equity. Let’s stop chasing the hype and start building something real.

    Table of Contents

    Mastering Asset Acquisition Strategies for the Scrappy Investor

    Mastering Asset Acquisition Strategies for the Scrappy Investor

    Look, if you’re playing the game like everyone else, you’re going to end up fighting over the same polished, overpriced turnkey properties that offer zero margin for error. To actually build something, you have to get comfortable with the unconventional. Mastering asset acquisition strategies isn’t about outbidding the big developers; it’s about finding the cracks in the market that they’re too lazy to look into. I’m talking about the distressed single-family homes or the neglected multi-unit buildings that look like a nightmare on paper but are actually goldmines once you strip away the grime.

    Before you ever sign a contract, you have to respect the grind of the real estate due diligence process. I’ve seen too many rookies get blinded by a “great deal” only to realize halfway through that the foundation is shot or the zoning is a mess. You need to be clinical. Use every property valuation method in your toolkit—from comps to detailed repair estimates—to ensure the math actually works. If the numbers don’t leave you enough breathing room for the inevitable renovation surprise, walk away. Staying scrappy means knowing when to strike and, more importantly, when to stay on the sidelines.

    Sharpening Your Property Valuation Methods to Spot Hidden Equity

    Sharpening Your Property Valuation Methods to Spot Hidden Equity

    Most people walk into a house and see the peeling wallpaper or the dated linoleum and immediately check out. That’s where they lose the game. To build a real estate portfolio that actually moves the needle, you have to train your eyes to look past the mess. I don’t just look at what a house is; I look at what it could be once the structural bones are stabilized and the layout is optimized. This requires mastering specific property valuation methods that go deeper than a quick glance at Zillow. You need to calculate the “after-repair value” (ARV) against your projected renovation budget before you even think about making an offer.

    The real magic happens during the real estate due diligence process. This is where you get granular. I’m talking about checking the age of the HVAC, sniffing out foundation issues, and verifying that the square footage isn’t just a landlord’s optimistic estimate. If you skip this step to save time, you aren’t investing; you’re gambling. You have to account for every unexpected expense—from plumbing surprises to those pesky closing costs and financing fees—to ensure your margin for error stays wide enough to actually turn a profit.

    5 Ways to Find the Gold Before the Competition Does

    • Stop looking at the “pretty” houses on Zillow. If you want real equity, you have to hunt for the properties with bad curb appeal, overgrown landscaping, or outdated interiors that scare off the average buyer. That’s where the margin is hidden.
    • Learn to read a floor plan like a map of future possibilities. I don’t see a cramped 1970s kitchen; I see an opportunity to knock out a non-load-bearing wall and create an open-concept living space that doubles the home’s perceived value.
    • Build a “boots on the ground” network. Don’t just rely on digital listings. Start talking to local wholesalers, contractors, and even the neighbors. Often, the best deals are the ones that never even hit the public market.
    • Master the art of the “as-is” inspection. You need to be able to walk into a room and quickly distinguish between a cosmetic fix, like peeling wallpaper, and a structural nightmare, like a cracked foundation. Knowing the difference keeps your budget from exploding.
    • Don’t get emotionally attached to a property. I’ve seen too many investors fall in love with a mid-century modern layout and overpay just because they liked the vibe. Treat every acquisition as a math problem, not a dream home.

    The Bottom Line for Your Next Acquisition

    Stop looking for turnkey perfection; the real profit is hidden in the properties that look like a disaster to everyone else.

    Master your math before you pick up a hammer—if you can’t accurately value the potential equity during the walkthrough, you’re just gambling, not investing.

    Build your portfolio through grit and strategy, not luck, by focusing on assets that allow you to manufacture value through smart, targeted renovations.

    The Real Secret to Finding Deals

    “Stop looking for the perfect, move-in-ready house that everyone else is bidding on. You aren’t going to build wealth there. You need to find the place with the outdated layout and the cracked driveway—the place that makes most people turn their heads in disgust—because that’s where the real equity is hiding.”

    Gareth Trelawny

    Building Your Foundation

    Building Your Foundation through disciplined property acquisition.

    At the end of the day, successful property acquisition isn’t about luck or stumbling into a goldmine; it’s about the discipline of your process. We’ve covered how to refine your acquisition strategies so you aren’t just chasing every shiny listing, and more importantly, how to sharpen your valuation methods so you can see the actual value buried under layers of dated wallpaper and cracked floorboards. You have to move past the surface-level aesthetics and start looking at the bones of a house. If you can master the math and develop a sharp eye for potential, you stop being a spectator and start becoming a serious player in this game.

    Look, I know the idea of diving into a messy renovation or bidding on a neglected property feels intimidating. There will be days when the dust is thick, the budget is tight, and you wonder if you made a mistake. But remember: equity is built in the grit. Every crumbling wall you fix and every overlooked corner you revitalize is a step toward the generational wealth you’re working for. Don’t wait for the perfect market or a massive windfall to get started. Grab your tools, trust your training, and go find that first project that everyone else is too afraid to touch.

    Frequently Asked Questions

    How do I actually secure financing for a fixer-upper when the property is in such bad shape that traditional banks won't touch it?

    Look, if the house is a wreck, a standard mortgage is off the table. Most big banks want “move-in ready,” and a crumbling kitchen isn’t that. You need to look at hard money lenders or private money partners. It’s more expensive upfront, but they care about the deal’s potential, not the current state of the drywall. Once you’ve stabilized the property and added value, you can refinance into a traditional loan.

    What are the red flags I should look for during a walkthrough that signal a "money pit" rather than a high-equity opportunity?

    Look, there’s a massive difference between a cosmetic disaster and a structural nightmare. If you see fresh paint in one corner but smell heavy mildew or see water stains on the ceiling, run. I always check the electrical panel and the foundation first; if the bones are shot, your “equity” will vanish into repair bills. If the cracks are wide and diagonal, or the sewage smells like a basement from hell, walk away. Don’t let a pretty kitchen distract you from a failing foundation.

    How much of a cash cushion should I realistically keep on hand for those inevitable, mid-renovation surprises that blow the budget?

    Look, if you aren’t planning for disaster, you aren’t planning. I never step onto a job site without a 15% to 20% contingency fund tucked away. Between finding outdated wiring behind a drywall or discovering dry rot in a subfloor, “surprises” are the only thing you can actually count on. Don’t touch that cash for upgrades or fancy fixtures; that money is strictly for the things that keep the house standing and the project moving.


  • Developing Effective Real Estate Exit Strategies

    Developing Effective Real Estate Exit Strategies

    I was standing in a kitchen three years ago, knee-deep in sawdust and smelling nothing but damp drywall, staring at a budget that had just evaporated. I had spent months obsessing over the perfect mid-century light fixtures, but I had completely neglected to plan my exit strategies for when the plumbing decided to revolt. Most gurus will tell you that the “exit” is just a simple sale at the end of a beautiful renovation, but they’re selling you a fairy tale. In the real world, if you don’t decide how you’re getting your money out before you swing the first sledgehammer, you aren’t investing—you’re just gambling with your life savings.

    I’m not here to give you some polished, theoretical lecture on market trends. I want to talk about the gritty, practical ways to actually capture your equity so you can stop working for your houses and start making your houses work for you. I’m going to walk you through the different ways to play this game, from quick flips to long-term rentals, and more importantly, how to recognize the exact moment you need to stop renovating and start cashing out. Let’s get to work.

    Table of Contents

    Maximizing Return on Investment Through Strategic Market Timing

    Maximizing Return on Investment Through Strategic Market Timing

    Timing isn’t just about the weather on your closing day; it’s about reading the pulse of the neighborhood. I’ve seen too many investors rush to list a property just because they’re tired of living in a construction zone, only to realize they sold right before a seasonal spike. If you want to succeed at maximizing return on investment, you have to stop looking at your renovation through a vacuum and start looking at the broader economic cycle. Are interest rates climbing? Is a new tech hub moving in two blocks away? You need to align your completion date with peak buyer demand to ensure you aren’t leaving money on the table.

    It’s also vital to keep an eye on the tax implications of your move. I always tell my clients that market timing for property sales isn’t just about the highest sale price, but about your net walk-away number. If you sell during a year where you’ve already realized significant gains, your real estate capital gains tax could eat a massive chunk of that hard-earned equity. Sometimes, holding a property for an extra six months to hit a new tax year is the smartest design choice you can make for your portfolio.

    Proven Property Divestment Methods for the Savvy Renovator

    Proven Property Divestment Methods for the Savvy Renovator

    When you’ve spent months living in a cloud of drywall dust and living on takeout, the finish line is finally in sight. But don’t just list it and hope for the best. You need to decide which of the various property divestment methods actually aligns with your long-term goals. If you’re looking to scale quickly, a traditional sale is your bread and butter. You flip the keys, take your profit, and immediately hunt for the next distressed asset. This keeps your cash flow moving and prevents you from becoming a stagnant landlord.

    However, if the neighborhood is on a massive upward trajectory, you might want to consider equity extraction techniques instead of a total exit. Why sell the whole house when you can use a HELOC or a cash-out refinance to pull out the profit you’ve built? This allows you to keep the asset while freeing up the capital needed to fund your next renovation. It’s a more sophisticated approach to real estate portfolio management, but it’s how you truly build that generational wealth I’m always talking about. Just make sure you’ve crunched the numbers on the real estate capital gains tax before you make your move.

    Five Rules for Not Getting Stuck in a Money Pit

    • Run your numbers for both a flip and a rental before you even pick up a sledgehammer. I’ve seen too many investors get blinded by a quick sale profit and realize too late that the long-term rental math actually would have built more wealth.
    • Don’t get emotionally attached to the design. I love a good mid-century piece as much as the next person, but if a trendy backsplash is going to eat into your margin or alienate the buyer pool, leave it out. Keep the aesthetic clean, functional, and broadly appealing.
    • Always have a “Plan B” for your financing. If the market shifts or your renovation hits a massive unforeseen snag—like finding rot behind a load-bearing wall—you need to know if you can afford to hold that property for an extra six months without bleeding out.
    • Know your exit threshold. Before you start demolition, decide on the minimum net profit that makes the headache worth it. If the numbers drop below that line during the rehab, you need the discipline to pivot your strategy rather than just throwing good money after bad.
    • Watch the local inventory, not just the headlines. A sudden influx of new construction nearby can tank your resale value overnight. If you see a wave of new builds coming, you might want to skip the “hold for appreciation” route and go for a quick, clean exit.

    The Bottom Line: Don't Get Stuck in the Mud

    Never fall in love with a project so much that you lose sight of the numbers; your exit strategy should be decided before you even swing the first sledgehammer.

    Diversify your exit options by weighing the immediate cash injection of a quick flip against the long-term, passive cash flow of a rental property.

    Watch the market like a hawk, because the best time to realize your equity isn’t when you’re tired of the renovation, but when the timing maximizes your profit.

    The Hard Truth About Closing the Deal

    “A beautiful renovation is just a hobby if you don’t have an exit plan; real wealth isn’t built in the demolition phase, it’s built when you successfully convert that sweat equity into cold, hard cash.”

    Gareth Trelawny

    The Final Blueprint

    Executing The Final Blueprint for profit.

    At the end of the day, your exit strategy isn’t just some theoretical math problem you solve on a spreadsheet; it’s the most critical tool in your kit. We’ve looked at how timing the market can make or break your margins and explored the different ways you can actually pull your capital out of a project once the dust has settled. Whether you decide to flip for a quick win or hold a renovated gem for long-term rental income, you have to be intentional from day one. Don’t let a beautiful kitchen distract you from the fact that you haven’t decided how you’re actually going to realize that profit.

    Renovation is messy, exhausting, and occasionally heartbreaking when a subfloor turns out to be rotten, but that’s exactly why the rewards are so significant. You aren’t just moving drywall; you are building a foundation for your future. Every smart decision you make regarding your exit ensures that your hard work translates into actual, liquid wealth. Stop looking at these houses as just buildings and start seeing them as the vehicles for your financial freedom. Grab your tools, keep your eyes on the numbers, and let’s go turn some equity into reality.

    Frequently Asked Questions

    How do I decide between a quick flip for immediate cash flow versus holding a renovated property as a long-term rental?

    It really comes down to your immediate goals and your appetite for management. If you need a quick injection of capital to fund your next big rehab, go for the flip. Get that cash out and move on. But if you’re looking to build that generational wealth I’m always talking about, hold it. A solid rental provides steady, long-term cash flow and lets your equity grow while you sleep.

    At what point in the renovation process should I actually start marketing the property to avoid sitting on dead capital?

    You need to start marketing the second you hit the “cosmetic” phase—specifically once the heavy demolition is done and the new surfaces are going in. Don’t wait for the final walkthrough to snap photos. Get your professional shots the moment the space looks clean and intentional. If you wait until the house is 100% finished, you’re just letting your capital sit idle. Start building that buzz early so you can hit the ground running.

    What are the red flags that tell me it's time to cut my losses and sell a project rather than sinking more money into a money pit?

    Listen, I’ve been there—staring at a cracked foundation or a mold issue that keeps growing every time I open a wall. If your renovation budget has ballooned by 30% and you’re still finding “surprises” every week, stop. When the cost to fix the structural or systemic issues starts eating your projected profit margin, you aren’t investing anymore; you’re just subsidizing a building. If the math doesn’t work, cut your losses and move on.

  • Calculating and Improving Rental Yields

    Calculating and Improving Rental Yields

    I was standing in a dusty, half-demolished kitchen last Tuesday, wiping grit off my laser measurer, when I realized how much people overcomplicate this. Most “gurus” will try to sell you on some complex, spreadsheet-heavy formula for calculating rental yields that makes it sound like you need a PhD in finance just to buy a studio apartment. They focus so much on the theoretical math that they completely miss the human reality of the property. I’ve seen “perfect” high-yield models fall apart the second a tenant realizes the plumbing is ancient or the neighborhood is changing, leaving investors holding a bag of nothing but debt and headaches.

    I’m not here to feed you polished, academic theories that only work on paper. I want to show you how to find the real money hidden beneath the surface of a messy renovation. Over the next few sections, I’m going to break down how to actually measure your returns by looking at the dirt, the bones, and the true market demand. We’re going to talk about turning sweat equity into predictable cash flow, without all the unnecessary fluff.

    Table of Contents

    Mastering the Property Investment Roi Calculation

    Mastering the Property Investment Roi Calculation.

    Look, I’ve seen too many beginners dive headfirst into a deal because the sticker price looked attractive, only to realize six months later that they’re actually bleeding cash. You can’t just eyeball the potential; you need to get surgical with your property investment ROI calculation. It’s easy to get blinded by the top-line numbers, but if you aren’t accounting for the grit and the grind, you’re just gambling, not investing.

    The biggest mistake I see? Confusing gross vs net rental yield. Anyone can calculate a return based on the total rent collected, but that’s a fantasy number. To see the real truth, you have to strip away the property management expenses, maintenance reserves, and those inevitable little surprises that pop up during a renovation. I always tell my clients to treat their math like a blueprint: if it isn’t precise, the whole structure is going to fail. You need to factor in everything from local taxes to the reality of rental property vacancy rates. Only when you’ve accounted for the “messy” costs can you actually see if that crumbling fixer-upper is a goldmine or a money pit.

    Gross vs Net Rental Yield Seeing Past the Surface

    Gross vs Net Rental Yield Seeing Past the Surface

    When you’re looking at a listing, it’s incredibly easy to fall into the trap of looking at the big, shiny number the agent puts in the brochure. That’s your gross yield, and frankly, it’s often a beautiful lie. It only accounts for the annual rent divided by the purchase price, ignoring the reality of what it actually costs to keep those keys turning. If you only focus on the top line, you’re going to end up with a massive headache when the first unexpected repair bill hits your desk.

    To get a real sense of your potential profit, you have to dig into the gross vs net rental yield distinction. I always tell my clients to look at the “leakage”—those pesky property management expenses, maintenance costs, and insurance premiums that eat away at your margins. You also have to factor in rental property vacancy rates; if your unit sits empty for a month between tenants, that’s a chunk of your projected income gone. I don’t hunt for properties based on what they could make on paper; I hunt for the ones that actually put cash in my pocket after the dust settles.

    Beyond the Spreadsheet: 5 Ways I Protect My Yields

    • Don’t get blinded by the sticker price; a cheap property with high maintenance costs is just a money pit in disguise. I always factor in a “sanity buffer” for those unexpected plumbing surprises that eat your monthly margins alive.
    • Focus on the “renovation lift” to boost your long-term yield. By spending a bit more upfront on durable, high-quality finishes rather than cheap laminate, you’ll spend less on turnover repairs and can command a higher rent from day one.
    • Location isn’t just about being near a trendy coffee shop; it’s about proximity to reliable transit and employment hubs. I look for areas where the rental demand is constant, even if the property value appreciation is slower, because consistent cash flow is my North Star.
    • Watch your vacancy rates like a hawk. A property sitting empty for two months while you hunt for the “perfect” tenant can absolutely wreck your annual yield calculations, so I prioritize efficient, streamlined tenant screening processes.
    • Always account for the “hidden” leaks in your cash flow, like property management fees, insurance hikes, and local tax adjustments. If your yield looks too good to be true on paper, it’s usually because someone forgot to subtract the cost of actually running the business.

    The Bottom Line: What to Watch Before You Sign

    Stop obsessing over the gross numbers you see on real estate portals; if you aren’t factoring in the “unseen” costs like maintenance, management, and vacancy, your projected yield is just a fantasy.

    High yield doesn’t always mean high profit—I’ve seen plenty of investors get burned by high-yield properties that required so much constant repair they actually bled cash.

    Look for the sweet spot where smart renovations meet stable demand, because the best way to protect your yield is to invest in quality finishes that keep tenants happy and minimize your long-term upkeep.

    ## Don't Get Blinded by the Top Line

    A high gross yield looks great on a spreadsheet, but if you aren’t accounting for the cost of that leaky roof or the inevitable maintenance spike, you’re just playing house—not building wealth. Real profit lives in the net, not the noise.

    Gareth Trelawny

    The Bottom Line on Your Bottom Line

    The Bottom Line on Your Bottom Line.

    At the end of the day, understanding rental yields isn’t about memorizing complex formulas; it’s about developing the discipline to look deeper than the sticker price. We’ve covered why you can’t just rely on gross figures and why mastering your ROI calculation is the only way to ensure a renovation actually adds value rather than just draining your bank account. If you aren’t accounting for those sneaky maintenance costs or the reality of vacancy periods, you aren’t investing—you’re gambling. Always remember that a high gross yield is just a vanity metric if your net profit doesn’t leave you with actual cash flow at the end of the month.

    Look, I know the numbers can feel overwhelming when you’re staring at a stack of contractor quotes and a property that looks like it hasn’t seen a paintbrush since the nineties. But don’t let the math intimidate you into inaction. Every massive portfolio I’ve built started with a single, calculated decision to see past the peeling wallpaper and the outdated layouts. Real estate is a marathon of strategic patience and grit. Stop waiting for the “perfect” market and start looking for the potential that others are too afraid to touch. That’s where the real equity is hiding.

    Frequently Asked Questions

    How much of a "buffer" should I actually build into my net yield calculations to account for those unexpected renovation cost overruns?

    Look, if you aren’t budgeting for the “unexpected,” you aren’t investing—you’re gambling. I always bake a 15% to 20% contingency buffer directly into my renovation estimates before I even touch a net yield calculation. Plumbing surprises or structural rot aren’t possibilities; they’re certainties. If your deal only makes sense with a razor-thin margin, walk away. You need that cushion to ensure a mid-renovation crisis doesn’t turn your equity into a deficit.

    At what point does a high gross yield become a red flag for a property that’s actually a money pit?

    If a gross yield looks too good to be true, it usually is. When I see a massive jump in percentage, my first instinct isn’t excitement—it’s reaching for my laser measurer. A sky-high yield often masks “hidden” costs like structural rot, outdated electrical, or a neighborhood in decline. If the math only works on paper but ignores the inevitable repair bills, you aren’t investing; you’re just subsidizing a money pit. Always hunt for the why.

    Should I be prioritizing high monthly cash flow or long-term capital appreciation when I'm looking at these yield numbers?

    Look, there’s no one-size-fits-all answer, but you have to decide what kind of investor you want to be. If you need the monthly cash flow to keep your head above water and pay the mortgage, focus on those high-yield numbers. But if you’re playing the long game, I’d rather hunt for a property with lower immediate yields that sits in a gentrifying area. I’ll take a bit of sweat equity today for massive capital appreciation tomorrow.

  • Upgrading Kitchen Cabinet Hardware

    Upgrading Kitchen Cabinet Hardware

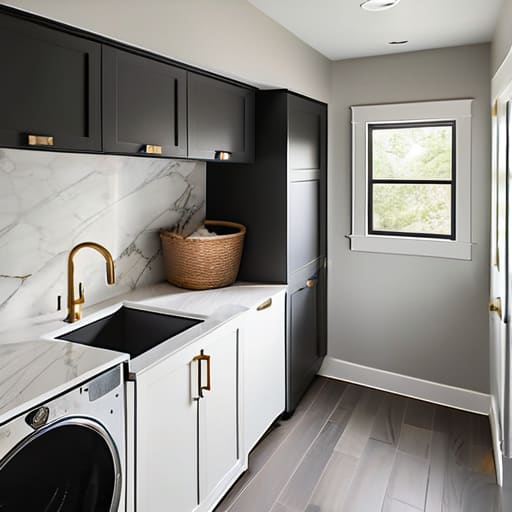
    I was standing in a gutted kitchen in a fixer-upper last Tuesday, staring at a set of mid-century cabinets that looked like they’d seen better decades. Most “design gurus” would tell you that a full custom cabinetry overhaul is the only way to save a room like that, but honestly? That’s just a fast track to bleeding your renovation budget dry. I’ve seen too many amateur investors blow their entire margin on expensive wood because they didn’t realize that the right cabinet hardware can do the heavy lifting for them. You don’t need a total gut job to create a high-end feel; you just need to stop overpaying for things that don’t actually move the needle on your property value.

    I’m not here to sell you on some overpriced, trendy aesthetic that will look dated by next season. Instead, I’m going to show you exactly how I select pieces that bridge the gap between “cheap flip” and “designer home.” We’re going to talk about weight, finish, and placement—the real technical details that turn a standard renovation into a high-ROI asset.

    Table of Contents

    Upgrading Kitchen Aesthetics Without Breaking the Bank

    Upgrading Kitchen Aesthetics Without Breaking the Bank

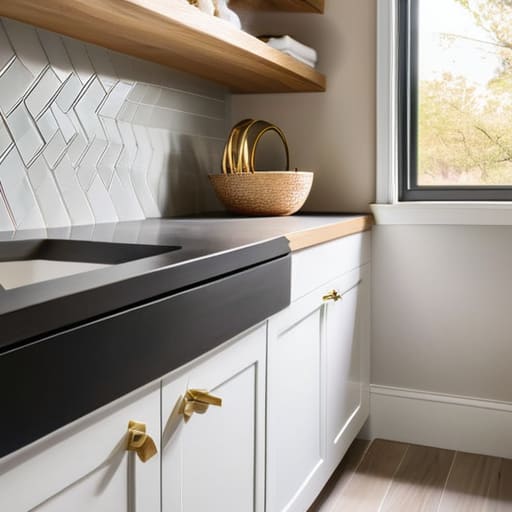
    When I’m walking through a property that’s clearly been neglected, I’m not looking at the outdated backsplash or the chipped laminate; I’m looking at the bones. If the layout works, you can perform a massive facelift without touching a single sledgehammer. One of my favorite ways to handle upgrading kitchen aesthetics on a tight budget is to focus on the touchpoints. If the cabinets are structurally sound but look like they belong in 1994, don’t bother replacing the boxes. Instead, swap out the old, dated pulls for something that feels intentional.

    The real trick to making a budget renovation look high-end is choosing the right finish. Right now, I’m seeing a huge shift in cabinet hardware trends 2024, where people are moving away from the overly polished looks of the past. You’ll often find yourself debating brushed nickel vs matte black hardware; while nickel is a safe, classic bet, matte black offers that sharp, industrial edge that makes a kitchen feel custom. Just make sure you’re measuring center to center distance before you order anything, or you’ll end up drilling unnecessary new holes in your beautiful new doors.

    Modern Kitchen Cabinet Accents for Maximum Roi

    Modern Kitchen Cabinet Accents for Maximum Roi

    When I’m walking through a property, I’m looking for those small, high-impact pivots that signal “luxury” to a potential buyer. Right now, modern kitchen cabinet accents are doing a lot of the heavy lifting in mid-range flips. If you want to tap into current buyer psychology, you have to look at the finish. While I still see a lot of dated chrome, the real money is in the contrast. I’ve been leaning heavily into the brushed nickel vs matte black hardware debate, and for most of my industrial-chic renovations, matte black is the clear winner. It provides that sharp, intentional line against lighter cabinetry that makes a kitchen look curated rather than just “remodeled.”

    However, don’t let a trendy finish mask a sloppy installation. If your pulls are crooked or misaligned, the buyer will feel it immediately. Before you order a single piece, grab that laser measurer and double-check your measuring center to center distance on every single door. Nothing kills the ROI of a high-end renovation faster than uneven spacing that makes a custom kitchen look like a DIY disaster.

    The Investor’s Cheat Sheet: 5 Hardware Rules for a High-Margin Flip

    • Stop buying the “everything” sets from big-box stores. If you want a kitchen to feel custom rather than cookie-cutter, mix your textures—try matte black pulls on shaker cabinets, but keep the finish consistent across the whole room to avoid visual clutter.
    • Scale matters more than you think. I’ve seen too many flips where tiny, dainty knobs are placed on massive, heavy drawer fronts, and it makes the whole kitchen look cheap. Go for longer, substantial pulls to give the cabinetry a sense of weight and quality.
    • Don’t ignore the “touch points.” If you’re aiming for a high-end feel, avoid hollow or lightweight hardware that rattles when you pull it. Real weight in a handle translates to a sense of durability in a buyer’s mind, even if the cabinets underneath are budget-friendly.
    • Alignment is your best friend. There is nothing that screams “amateur DIY” like crooked handles. I always keep my laser measurer handy for this; ensure your spacing is mathematically perfect, or the eye will catch the error immediately, even if they can’t pin down why the kitchen feels “off.”
    • Think about the “after-market” look. Choose finishes that are trending but not volatile. While I love a good mid-century brass moment, avoid overly experimental shapes that might date the house in three years. You want hardware that looks like it belongs in a timeless, well-curated home.

    The Bottom Line: Hardware as a Strategic Asset

    Stop thinking of handles as just decor; treat them as a high-leverage tool to distract buyers from dated cabinetry and drive up perceived value.

    Prioritize weight and texture—investing in solid brass or matte black finishes over hollow, lightweight alternatives is the fastest way to signal quality in a walkthrough.

    Consistency is your best friend for a professional finish; stick to a cohesive hardware theme across the kitchen and surrounding living areas to make the renovation feel intentional rather than patched together.

    The ROI of the Small Details

    “If you’re trying to squeeze every ounce of equity out of a flip, stop obsessing over the expensive backsplash for a second and look at the hardware. Swapping out generic, builder-grade pulls for something heavy, tactile, and intentional is the fastest way to make a budget kitchen feel like a custom build.”

    Gareth Trelawny

    The Bottom Line on Hardware

    The Bottom Line on Hardware strategy.

    At the end of the day, choosing the right cabinet hardware isn’t about following every fleeting trend you see on Pinterest; it’s about making calculated decisions that serve your bottom line. We’ve talked about how swapping out dated pulls for something more intentional can breathe new life into a kitchen, and how selecting high-quality finishes can mask a budget-friendly cabinet refresh. Remember, your goal is to create a space that feels cohesive and high-end without draining your renovation budget. Focus on the strategic impact of every knob and handle you install, because in this business, those small details are what ultimately drive your appraisal upward.

    Don’t let the scale of a renovation intimidate you. It’s easy to get lost in the big-ticket items like countertops or flooring, but I’ve learned through countless job sites that the magic is often in the finishing touches. Real estate investing is a game of margins, and mastering these low-cost, high-impact wins is how you build that solid equity we’re all chasing. Grab your laser measurer, pick out some hardware that actually has some weight to it, and start turning those neglected spaces into profitable assets. You have the eye for it—now go out there and build your portfolio, one detail at a time.

    Frequently Asked Questions

    How do I know if I should go with a matte black finish or something more classic like brushed brass to ensure the house appeals to the widest range of buyers?

    If you’re flipping for maximum resale, play it safe with brushed brass. It’s the “Goldilocks” of hardware—it feels high-end and intentional, but it doesn’t feel like a trend that will look dated in two years. Matte black is punchy and looks great in my personal industrial-chic projects, but it can feel a bit aggressive to some buyers. Stick to the classic finishes to keep the widest net possible for your exit strategy.

    Is it worth the extra labor to drill new holes for a different style of handle, or should I just stick to the existing drill pattern to save time on the flip?

    Look, if you’re chasing a tight margin, the temptation to stick with the existing holes is real. But here’s the truth: if the current pattern feels dated or forces you into “safe” but boring hardware, drill the new holes. It’s a minor labor cost compared to the value of a cohesive, modern look. A mismatched or awkward layout screams “cheap flip.” Do it right once; don’t let a few drill holes kill your equity.

    At what point does spending more on high-end, heavy hardware stop being a smart investment and start eating into my actual profit margins?

    Look, there’s a massive difference between “luxury” and “value.” You hit the diminishing returns wall the moment you start buying designer hardware just for the brand name. If you’re spending $50 per pull on a kitchen with mid-range cabinets, you’re just burning equity. Aim for weight and tactile quality—solid brass or matte black steel that feels substantial—but stop once the cost exceeds 1% of your total kitchen budget. If it doesn’t move the needle on the appraisal, it’s a vanity project, not an investment.

  • Creating a Functional Mudroom

    Creating a Functional Mudroom

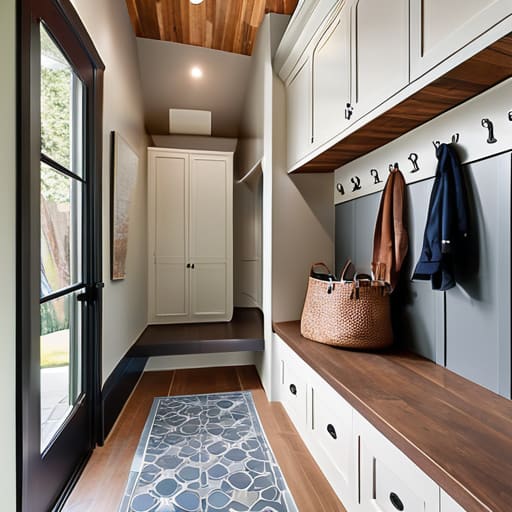
    I was standing in the entryway of a fixer-upper last Tuesday, staring at a pile of muddy boots and discarded school bags that looked like they’d survived a natural disaster. It’s the same scene I see in almost every mid-range property I scout: a chaotic, disorganized entryway that makes the whole house feel cheap. Most designers will try to sell you on a $15,000 custom cabinetry package, but let’s be real—you don’t need a massive budget to fix a mess. A strategic mudroom installation isn’t about buying expensive, pre-fabricated furniture; it’s about creating a functional transition zone that protects the rest of your investment from the daily grind of real life.

    I’m not here to give you a Pinterest-perfect fantasy that falls apart after six months of heavy use. Instead, I’m going to show you how to approach a mudroom installation with a renovator’s mindset, focusing on durable materials and smart layouts that actually add value to your property. We’re going to cut through the fluff and talk about high-impact, low-cost solutions that turn a cluttered entryway into a streamlined asset.

    Table of Contents

    Mastering Small Mudroom Layout Planning for Maximum Value

    Mastering Small Mudroom Layout Planning for Maximum Value

    When you’re working with a tight footprint, every square inch needs to pull its weight. I’ve seen too many investors blow their budget on oversized features that actually make a small space feel cramped and claustrophobic. For effective small mudroom layout planning, you have to think vertically. Instead of bulky, freestanding furniture that eats up floor space, I always lean toward built-in entryway lockers. By integrating storage directly into the walls, you maintain a clean, streamlined aesthetic that makes a narrow hallway feel intentional rather than cluttered.

    Don’t just throw some hooks on a wall and call it a day. If you want to maximize the ROI on a renovation, you need to invest in custom cabinetry for entryways that offers specific zones for shoes, bags, and seasonal gear. A well-planned layout prevents the “pile-up” effect that kills a home’s first impression. I always tell my clients: if the storage isn’t smart, the renovation isn’t working. Aim for a design that hides the chaos behind closed doors, ensuring that the transition from the driveway to the living room feels like a premium experience rather than a logistical nightmare.

    Choosing Durable Flooring for Mudrooms That Withstand Real Life

    Choosing Durable Flooring for Mudrooms That Withstand Real Life

    Look, I’ve seen too many investors blow their margins by picking “pretty” floors that fall apart after one season of salt, slush, and muddy paws. If you’re looking to build equity, you need durable flooring for mudrooms that can actually handle the abuse of daily life. I personally lean toward luxury vinyl plank (LVP) or porcelain tile. LVP is a lifesaver for flips because it’s waterproof, scratch-resistant, and gives you that high-end look without the fragile price tag of natural stone. If you go the tile route, make sure you’re using a high-rated slip resistance; there’s nothing that kills a home’s vibe faster than a slick, dangerous entryway.

    While you’re finalizing your material choices, don’t forget how the floor interacts with your storage. I always tell my clients that the floor is the foundation for your entire mudroom organization ideas strategy. If you’re planning on installing built-in entryway lockers or heavy custom cabinetry, ensure your subfloor is rock solid and level. A slight dip in the floor might not matter in a living room, but it will make your expensive cabinetry look cheap and misaligned. Choose materials that work as hard as you do.

    Don't Overbuild: 5 Strategic Moves to Maximize Your Mudroom ROI

    • Prioritize “Drop Zones” over aesthetics; a high-end bench looks great, but if it doesn’t have integrated hooks for heavy backpacks or charging stations for tech, it’s just a piece of expensive furniture that won’t solve the daily chaos.
    • Invest in heavy-duty hardware because cheap handles and hinges are the first thing a picky buyer will notice; if the cabinet doors feel flimsy, they’ll assume the entire renovation was a rush job.
    • Plan for lighting that actually works; ditch the single, weak overhead bulb and install recessed LED task lighting so you aren’t fumbling for your keys in a dark corner every single morning.
    • Go custom with your storage dimensions; standard shelving is a waste of square footage, so measure twice and build cubbies specifically sized for the boots and bins that actually live in your house.
    • Keep your finishes “high-traffic friendly” by choosing semi-gloss or satin paints; you need a surface that can take a wipe-down from muddy handprints without looking like a disaster after three months.

    The Bottom Line: Turning Your Mudroom into a High-ROI Asset

    Stop treating the mudroom as an afterthought; a well-planned, functional entryway is a high-impact way to boost perceived home value and buyer appeal.

    Prioritize materials that can actually handle a beating—investing in durable, easy-to-clean flooring now prevents costly repairs and protects your equity later.

    Maximize every square inch by focusing on smart, vertical storage solutions that turn a chaotic transition zone into a streamlined, organized asset.

    The ROI of the Entryway

    “Don’t view a mudroom as just another renovation expense; view it as a strategic barrier that protects your high-end finishes from the daily grind, effectively preserving the equity you worked so hard to build.”

    Gareth Trelawny

    Turning Chaos Into Capital

    Turning Chaos Into Capital with mudrooms.

    At the end of the day, a successful mudroom installation isn’t just about picking out pretty cubbies or a trendy backsplash; it’s about strategic utility. You’ve looked at how to master a layout that actually works for a family’s flow and how to select flooring that won’t look like a disaster zone after one rainy afternoon. When you combine smart spatial planning with materials that can actually handle the heavy lifting of daily life, you aren’t just fixing a room—you are protecting your investment. Every dollar you spend on durable, well-designed organizational systems is a dollar that directly bolsters your home’s resale value by solving a problem most buyers are desperate to avoid.

    Don’t let the mess of a renovation intimidate you or make you settle for a mediocre, “good enough” solution. I know firsthand that the dust and the logistics can feel overwhelming, but remember that the most profitable flips are built on these exact types of functional, high-impact details. Stop viewing the entryway as a wasted corner and start seeing it as a high-value asset waiting to be unlocked. Get in there, do the work, and turn that chaotic transition zone into a seamless part of your wealth-building strategy.

    Frequently Asked Questions

    How do I balance high-end aesthetic choices with the heavy-duty durability needed for a high-traffic entryway?

    Look, I’ve seen too many investors blow their margins on high-end finishes that crack after one season of salt and slush. You don’t have to sacrifice style for grit. My rule of thumb? Invest heavily in the “hard” surfaces—think porcelain tile that mimics high-end stone or luxury vinyl plank—and save your “pretty” budget for the cabinetry and hardware. That way, you get the designer look without the maintenance nightmare.

    Is it worth investing in custom built-ins, or can I get the same ROI using modular storage solutions?

    Look, if you’re chasing maximum ROI, don’t get blinded by the “custom” label. Custom built-ins look stunning in staging photos, but they’re a massive upfront hit to your budget. For most flips, I lean toward high-quality modular solutions. They give buyers that organized, intentional feel without the custom price tag. Unless you’re working on a high-end luxury build where bespoke is expected, modular storage is the smarter way to add value without bleeding equity.

    What are the biggest red flags I should look for during a renovation that might blow my mudroom budget?

    Watch out for hidden subfloor rot or uneven joists once you pull up the old flooring. If the foundation isn’t level, your custom cabinetry will look crooked, and fixing that mid-install is a budget killer. Also, keep a sharp eye on electrical placement; if you realize too late that you need more outlets for charging stations or smart lighting, you’re looking at expensive, unplanned rewiring. Don’t let these “surprises” eat your profit margins.

  • Techniques for Professional Property Sourcing

    Techniques for Professional Property Sourcing

    I still remember standing in a damp, unheated basement three years ago, clutching my laser measurer while a contractor explained why the “perfect” deal I’d just found was actually a structural nightmare. Most people think property sourcing is some glamorous, high-stakes game played by guys in tailored suits sipping espresso in glass skyscrapers. They’ll tell you that you need a massive network of elite brokers or a six-figure scouting budget to even get a seat at the table. Honestly? That’s a load of rubbish. Real estate isn’t won in a boardroom; it’s won by the people willing to get their boots muddy and look past the obvious red flags that scare everyone else away.

    I’m not here to sell you on some overnight wealth fantasy or a complicated algorithm. Instead, I’m going to show you how to actually find the gems—the ones with the peeling wallpaper and the outdated layouts that are just waiting for a vision. I’ll be sharing the gritty, unvarnished reality of how I vet deals, spot hidden equity, and navigate the messy process of finding properties that actually make sense for a growing portfolio. No fluff, no hype, just straightforward tactics built from years of getting my hands dirty.

    Table of Contents

    Finding Off Market Real Estate Before the Crowd Arrives

    Finding Off Market Real Estate Before the Crowd Arrives

    If you’re waiting for a polished listing to pop up on a major real estate portal, you’ve already lost the race. By the time a property hits the open market, every hungry investor in a five-mile radius has their notifications turned on, and the bidding wars turn the margins razor-thin. To actually build wealth, you have to get comfortable with the unconventional. I spend a huge chunk of my time driving through neglected neighborhoods, looking for the tell-tale signs of a tired landlord or a house that’s been sitting vacant for a season too long. Finding off-market real estate is about being proactive rather than reactive; it’s about spotting the dented roof or the overgrown lawn before anyone else even knows the house is for sale.

    Building a successful property sourcing business model means cultivating a network that operates beneath the radar. I’m talking about building real relationships with local solicitors, managing agents, and even the folks who run the local hardware stores. These people are the gatekeepers to the best deals. When you’re sourcing properties for investors, your value isn’t just in finding a house—it’s in finding the opportunity that hasn’t been commoditized by the mass market yet.

    Sourcing Properties for Investors Who Demand Real Value

    Sourcing Properties for Investors Who Demand Real Value

    If you’re looking for instant gratification, you’re in the wrong business. Real value isn’t found in the polished listings on the major portals where every other amateur investor is fighting over the same crumbs. To actually see a margin that makes the sweat equity worth it, you have to change your approach to sourcing properties for investors who aren’t afraid of a little grit. I’m talking about the houses that look like a disaster on the surface but sit on goldmine locations. You aren’t just looking for a building; you’re looking for a mathematical advantage that the general market has overlooked.

    This is where the real work happens. Whether you are building a scalable property sourcing business model or just hunting for your next personal flip, you have to become a detective. It’s about connecting with local agents who have “problem” listings sitting in their back pockets, or even knocking on doors in neighborhoods that are just starting to see a resurgence. You have to be willing to look past the dated carpets and the smell of old damp to see the structural bones underneath. Precision matters here—if you miss a single detail during your initial walkthrough, that profit margin will evaporate before the first sledgehammer even hits the wall.

    My Field-Tested Tactics for Snagging the Best Deals

    • Stop scrolling Zillow and start driving. The real gold is in the neighborhoods where the houses look a little tired but the bones are solid. I spend a lot of my weekends just driving through target zip codes, looking for those overgrown lawns or boarded-up windows that signal a motivated seller is hiding behind that door.
    • Build a real relationship with local contractors and tradespeople. These guys are on job sites every single day and they hear things before anyone else does. If a plumber tells you a homeowner is looking to offload a property fast because the repairs are too daunting, you take that lead and run with it.
    • Master the art of the “direct mail” approach, but keep it personal. I don’t send out flashy, corporate-looking postcards. I send simple, handwritten notes to owners of properties that clearly need some TLC. It shows you’re a real person looking for a project, not just another faceless investment firm.
    • Learn to read the “neighborhood pulse” to spot gentrification early. I look for the small signs—a new coffee shop opening up, a local boutique moving in, or even just a sudden uptick in street cleaning. You want to source your properties in the path of progress, not just where the party is already happening.

    • Don’t be afraid to get your hands dirty with probate leads. Dealing with an estate can be messy and emotional for the heirs, which is exactly why they are often willing to sell at a discount. It requires a lot of empathy and a very straightforward approach, but it’s one of the most consistent ways I’ve found to secure high-equity deals.

    The Bottom Line on Sourcing Smart

    Stop competing for the polished listings on Zillow; the real equity is buried in the properties that look like a headache to everyone else.

    Success in sourcing isn’t about luck, it’s about building a network of boots-on-the-ground contacts who tell you about a deal before the sign even hits the yard.

    Always look past the cosmetic mess to the structural bones, because you can fix peeling wallpaper, but you can’t fix a bad location or a flawed foundation.

    ## The Real Secret to the Hunt

    “Forget the glossy listings and the polished open houses; if you’re waiting for a property to look perfect, you’ve already lost the margin. Real wealth is found in the dirt, the outdated layouts, and the houses that everyone else is too afraid to touch.”

    Gareth Trelawny

    The Bottom Line on Finding Your Next Play

    The Bottom Line on Finding Your Next Play

    At the end of the day, successful property sourcing isn’t about waiting for a perfect listing to pop up on a polished real estate portal. It’s about being proactive, whether that means digging through off-market leads or learning how to spot the undervalued gems that everyone else is too intimidated to touch. You’ve learned that the real profit lives in the gaps between the mainstream data—in those messy, unlisted, or slightly neglected properties that require a bit of grit to uncover. Remember, the goal isn’t just to find a house; it’s to find equity hiding in plain sight before the bidding wars drive the margins into the ground.

    Look, I know the process can feel overwhelming when you’re staring at a mountain of data or a house that looks like it’s seen better decades. But don’t let the fear of a little dust or a complicated deal stop you from building something real. Real estate isn’t a spectator sport, and you won’t build a portfolio by playing it safe in the sidelines. Grab your tools, trust your eye, and start hunting for those opportunities that others are too lazy to see. This is how you turn crumbling walls into solid wealth, one smart acquisition at a time.

    Frequently Asked Questions

    How do I know if a property's "potential" is actually a money pit once I get past the initial walkthrough?

    Look, the “potential” you see during a walkthrough can quickly turn into a nightmare if you aren’t looking at the bones. I always tell my clients: don’t just look at the ugly wallpaper; look at the foundation and the electrical. If you spot sagging floorboards, water stains on the ceiling, or outdated knob-and-tube wiring, your “dream flip” just became a money pit. If the structural issues exceed your margin, walk away. No deal is worth a bankruptcy.

    Is it actually worth paying for a sourcing agent, or am I better off doing the legwork myself to save on my margins?

    Look, if you’re just starting out and every penny counts toward your first renovation budget, do the legwork yourself. You need to build that “eye” for potential anyway. But, if you’re looking to scale and your time is better spent managing contractors or scouting your next deal, pay the agent. A good sourcer isn’t an expense; they’re a shortcut to deals you’d never find on a public portal. Just vet them hard first.

    What are the red flags I should look for that tell me a deal is too messy to be profitable, even with a smart renovation plan?

    Look, I love a messy renovation, but there’s a line between “potential” and a “money pit.” If you walk in and see sagging foundation lines or smell heavy sewage, run. Structural issues and outdated electrical systems can eat your margins before you even pick up a sledgehammer. If the cost to stabilize the bones exceeds the projected equity gain, it’s not a flip—it’s a donation to the contractor. Know your limits.

  • Fixing and Maintaining Window Sills

    Fixing and Maintaining Window Sills

    I was standing in the middle of a drafty Victorian fixer-upper last Tuesday, staring at a piece of wood that looked more like wet cardboard than a structural component. Most rookies see a soft, crumbling ledge and immediately start calling expensive contractors, thinking they need a full window replacement to save the house. But here’s the truth: that rot isn’t a death sentence for your budget, and a proper window sill repair is often the difference between a massive headache and a massive profit margin. I’ve seen too many investors walk away from goldmines just because they were intimidated by a little moisture damage.

    I’m not here to give you some polished, theoretical lecture that works in a textbook but fails on a real job site. Instead, I’m going to walk you through the gritty, hands-on reality of identifying rot, stripping it back, and sealing it up so it actually lasts. We’re going to cover the exact tools you need—and the ones you don’t—to tackle window sill repair without blowing your renovation budget. By the time we’re done, you’ll know how to stop the decay in its tracks and turn that crumbling detail into solid, protected equity.

    Table of Contents

    Guide Overview

    Total Time: 2-4 hours
    Estimated Cost: $30-60
    Difficulty: Beginner

    Tools & Supplies

    • Putty knife for scraping and applying filler
    • Sandpaper (various grits) for smoothing surfaces
    • Caulking gun for sealing gaps
    • Wood filler or epoxy putty (1 tube/container)
    • Exterior grade caulk (1 tube)
    • Sandpaper pack (medium and fine grit)
    • Paint or wood stain (small can)

    Step-by-Step Instructions

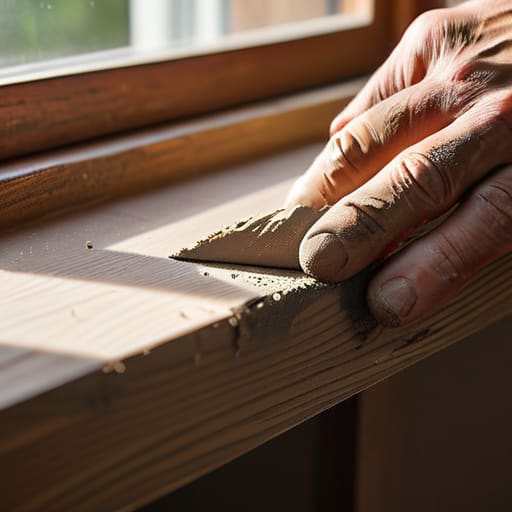
    • 1. First, you need to grab your scraper and a screwdriver to get aggressive with the rot. Don’t just skim the surface; you need to dig out every single bit of soft, crumbling wood until you hit something that actually feels solid. If you leave even a tiny pocket of moisture-soaked timber behind, you’re basically inviting the decay to come back for a second helping in six months.
    • 2. Once you’ve cleared the debris, take a shop vac and suck up every speck of dust, then wipe the area down with a damp cloth. You want a surface that is bone dry and completely clean before you move on. Any lingering sawdust or grit will prevent your repair materials from bonding properly, and in this business, a bad bond is a waste of money.
    • 3. Now, if the damage is significant—and let’s be real, in these older fixer-uppers, it usually is—you might need to swap in a new piece of wood. Measure twice with that laser measurer of mine, cut your replacement piece to fit snugly, and secure it with exterior-grade screws. You want a tight, seamless fit because gaps are just open invitations for water infiltration.
    • 4. For the smaller divots and surface-level damage, it’s time to break out the high-quality wood filler or two-part epoxy. I always prefer the epoxy for window sills because it acts more like a structural replacement than just a cosmetic patch. Spread it on firmly, smoothing it out with a putty knife until it’s flush with the surrounding wood, and then let it cure completely according to the package directions.
    • 5. Once everything is hard and level, grab some medium-grit sandpaper and start smoothing out the transitions. You’re looking for a surface that feels as continuous as the original wood; if you can feel a bump with your fingertip, the buyer will definitely notice it during their walkthrough. Aim for a flawless, seamless finish that won’t scream “cheap patch job” once it’s painted.
    • 6. Before you even think about touching a paintbrush, apply a high-quality, penetrating wood primer. This is the most underrated step in the whole process, but it’s what actually seals the wood and prevents future moisture issues. If you skip this, you’re just painting over a ticking time bomb of rot.
    • 7. Finally, seal the deal with a durable, exterior-grade paint that can handle the elements. Don’t skimp here; use a premium product that offers superior UV and moisture protection. A well-executed sill isn’t just a repair; it’s a way to show any future buyer that you actually take care of the bones of the house.

    Fixing Rotten Wood Window Sills Before They Sink Your Roi

    Fixing Rotten Wood Window Sills Before They Sink Your Roi

    When I’m walking a property during a walkthrough, I’m not just looking at the layout; I’m looking at the edges. A soft, spongy window sill is a massive red flag that tells me the previous owner likely skipped basic exterior window maintenance. If you find rot, don’t just slap some caulk over it and hope for the best—that’s how you end up with a much bigger structural headache six months later. You need to dig in, scrape out the decayed sections, and ensure you’re working with solid, healthy substrate before you even think about applying any patches.

    If the damage is localized, using a high-quality wood filler for windows can be a lifesaver for your margins. However, my rule of thumb is to always prioritize preventing window sill decay through proper sealing. Once you’ve stabilized the wood, invest in a high-grade sealant. It’s a small upfront cost that acts as insurance for your renovation. If you neglect this, you aren’t just losing a piece of trim; you’re potentially inviting moisture into the wall cavity, which is a fast track to eroding your hard-earned equity.

    Waterproofing Window Frames to Stop Future Decay in Its Tracks

    Waterproofing Window Frames to Stop Future Decay in Its Tracks

    Once you’ve finished the heavy lifting of fixing rotten wood window sills, you can’t just walk away and hope for the best. If you don’t seal the deal, you’re basically inviting the next rainstorm to start the decay process all over again. I’ve seen too many investors pour money into a beautiful rehab only to watch moisture creep back into the frame because they skipped the final defense. True waterproofing window frames isn’t just about slapping on a coat of paint; it’s about creating a continuous, impenetrable barrier between the elements and your newly repaired wood.

    I always recommend a multi-layered approach. Start by ensuring your caulk lines are pristine—use a high-quality, solar-resistant sealant where the frame meets the siding. If you’re working with natural wood, don’t skimp on a high-grade exterior stain or a marine-grade sealant. This is the core of smart exterior window maintenance. It might feel like an extra step when you’re exhausted from a long day on the job site, but protecting your investment now is much cheaper than replacing a whole unit in two years.

    Pro Tips for Keeping Your Sills Sharp and Your Equity High

    • Don’t just patch the surface; use a moisture meter to find the hidden rot deep inside the wood before you even touch a scraper, or you’ll be paying for the same repair twice in six months.
    • When you’re replacing sections, always opt for rot-resistant wood like cedar or even composite materials—it costs a little more upfront, but it’s a massive win for long-term maintenance costs.
    • Stop treating caulk like a magic wand; if your substrate is crumbling, the caulk won’t hold, so make sure you’ve stabilized the wood structure first to ensure a seamless, professional finish.
    • Invest in high-quality, exterior-grade wood filler for those smaller divots, but never use it as a structural fix for a sill that’s lost its integrity—know when to swap the wood and when to just skin it.
    • Always check your window’s “slope” after a repair; if the sill isn’t angled slightly outward to shed water, you’re basically building a little pond that will rot your new work out from under you.

    The Bottom Line on Window Sill Repairs

    Don’t just slap some putty over a soft spot; if the wood is compromised, you need to strip it back to the healthy stuff or replace it entirely to protect your investment.

    Prevention is cheaper than a full-scale rehab, so prioritize high-quality waterproofing and sealant application to stop moisture from turning a minor fix into a structural nightmare.

    Treat every repair as an opportunity to build equity—fixing these small, neglected details correctly ensures you aren’t leaving money on the table when it’s time to sell.

    The Hidden Cost of Neglect

    “A rotting window sill isn’t just a maintenance headache; it’s a leak in your profit margin. If you ignore the small stuff like wood rot, you’ll eventually find yourself paying for much bigger, much more expensive structural failures.”

    Gareth Trelawny

    Don't Leave Your Equity to Rot

    Don't Leave Your Equity to Rot.

    At the end of the day, window sill repair isn’t just about aesthetics; it’s about protecting the structural integrity of your investment. We’ve covered how to identify the early signs of decay, the right way to tackle rotten wood before it spreads, and the essential waterproofing steps needed to ensure your hard work actually lasts. If you skip these steps or try to slap a layer of paint over a soft spot, you aren’t saving money—you’re just delaying a much more expensive disaster down the road. Treating these small details with the respect they deserve is what separates a successful flip from a money pit.

    I know that staring down a crumbling window frame can feel overwhelming when you’re in the middle of a renovation, but don’t let it shake your confidence. These are the exact moments where you separate the amateurs from the pros. Every time you patch a sill or seal a frame, you are actively building equity one inch at a time. Real estate investing is a game of patience and precision, and mastering these “unsexy” repairs is precisely how you turn a neglected fixer-upper into a high-performing asset. Grab your tools, get to work, and let’s get that ROI where it belongs.

    Frequently Asked Questions

    At what point should I stop patching the wood and just bite the bullet on a full window replacement?

    Look, I’ve been there—staring at a patch job and wondering if I’m just masking a disaster. Here’s my rule of thumb: if you’ve scraped away the rot and the remaining structural wood is soft, spongy, or crumbling like a stale biscuit, stop patching. If the damage compromises the window’s ability to seal or hold weight, you’re just throwing money into a black hole. Bite the bullet and replace it. Protecting your ROI means knowing when a fix is just a band-aid.

    How can I tell if the rot is just surface-level or if it’s actually compromised the structural integrity of the entire frame?

    Here’s how I vet it on-site: grab a flathead screwdriver and give the wood a firm poke. If it sinks in like butter or the wood flakes away in chunks, you’re dealing with deep rot. If it’s just a little soft on the surface but feels solid underneath, you can likely save it with wood filler. But if the whole frame feels spongy or the window won’t even sit level, walk away—that’s a structural nightmare.

    Which specific wood filler or epoxy works best for a seamless finish that won't crack after the first seasonal temperature shift?

    If you’re looking for something that won’t crack the moment the temperature drops, skip the cheap hardware store wood putty. You need a two-part wood epoxy—I personally swear by Abatron LiquidWood and WoodEpox. It’s a bit more expensive, but it actually bonds to the fibers rather than just sitting on top. It expands and contracts with the wood, meaning you won’t be back there sanding and re-filling the same spot next spring.

  • Managing Mold Issues in Investment Properties

    Managing Mold Issues in Investment Properties

    I’ll never forget the smell of my first solo flip—a damp, heavy stench that hit me the second I cracked the seal on a basement door in East Nashville. It wasn’t just a bad odor; it was the unmistakable, suffocating scent of a structural nightmare. Most people see a patch of fuzz on a drywall corner and immediately start panic-calling expensive remediation companies that charge a fortune just to spray some bleach. But let me tell you, dealing with mold shouldn’t mean watching your entire profit margin evaporate before you’ve even swung a hammer.

    I’m not here to sell you on some overpriced, “miracle” chemical spray or tell you to run for the hills every time you see a dark spot. I’m here to give you the straight-talk blueprint for identifying what’s a superficial nuisance and what’s a deal-breaker. We’re going to walk through how to assess the damage, fix the actual source of the moisture, and manage the cleanup without losing your mind—or your shirt. I promise to show you how to turn these messy, damp setbacks into solid equity through smart, strategic action.

    Table of Contents

    Spotting the Rot Understanding Common Mold Growth Causes

    Spotting the Rot Understanding Common Mold Growth Causes

    If you want to make money in this game, you have to look past the fresh paint and check the bones. Most of the time, the real culprit behind a funky smell isn’t just bad luck; it’s a failure in the building’s envelope. I’ve seen countless deals stall because a seller ignored a slow leak in the roof or a poorly sealed window frame. When moisture gets trapped behind drywall, you aren’t just looking at a surface issue—you’re looking at a structural liability. Understanding these mold growth causes is the difference between a profitable flip and a money pit.

    Don’t just assume it’s a simple fix, either. Sometimes the issue is deeper, like a faulty HVAC system or a crawlspace that hasn’t seen a dehumidifier in a decade. While I’m all for getting my hands dirty, I’ve learned that improperly addressing a leak only leads to a repeat performance six months later. You need to identify the source of the dampness before you even think about cleaning. If you can’t pinpoint why the moisture is there, you’re just putting a band-aid on a broken limb.

    Mastering Black Mold Identification Before You Sign

    Mastering Black Mold Identification Before You Sign.

    When you’re walking through a potential flip, you can’t just rely on your eyes; you have to use your nose. If you catch that heavy, musty scent in a basement or a windowless guest room, your internal alarm should be screaming. I’ve learned the hard way that a fresh coat of paint is often used to mask a much deeper issue. Real black mold identification requires looking behind the scenes—literally. I always bring my flashlight to check the corners of drywall, the undersides of sinks, and the perimeter of window frames. If you see fuzzy black spotting or slimy textures, don’t just assume it’s surface level; it’s likely deep in the substrate.

    Before you pull the trigger on a contract, you need to decide if this is a quick fix or a deal-breaker. If the infestation looks widespread or is embedded in the HVAC system, stop thinking about DIY scrubbers and start looking into professional mold removal services. Trying to DIY a massive reclamation project can tank your timeline and your budget. My rule of thumb? If the rot is localized, it’s an opportunity to build equity; if it’s systemic, it’s a financial sinkhole you need to walk away from.

    My Battle Plan: How to Tackle Mold Without Losing Your Shirt

    • Don’t just scrub the surface and call it a day. If you don’t find the source—whether it’s a leaky pipe behind the drywall or a failing window seal—that mold is coming back to haunt your margins. Fix the leak first, or you’re just throwing money down the drain.
    • Invest in a high-quality HEPA air scrubber. When you’re ripping out contaminated drywall, you’re going to kick up spores that will settle in every corner of that house. If you don’t contain the dust, you’re essentially spreading the problem to the “clean” parts of the house.
    • Know when to call in the pros and when to grab a sponge. If it’s a small patch in a bathroom vanity, you can handle it. But if you see it spreading across a large area of the basement, don’t try to be a hero. A professional remediation team is cheaper than a lawsuit or a failed inspection.
    • Use the right chemistry, not just whatever is under the sink. Bleach is a common mistake; it often only kills surface mold while leaving the roots alive in porous materials. Look for professional-grade antimicrobial cleaners that actually penetrate the surface.
    • Document every single step of the remediation process. I need a paper trail of the cleaning, the drying, and the repair for my records and for future buyers. Showing a potential buyer a professional remediation receipt is a massive trust builder that protects your exit strategy.

    The Bottom Line: Don't Let Mold Kill Your ROI

    Never treat mold as just a cosmetic issue; if you don’t trace it back to the source—be it a leaky pipe or a failed roof—you’re just painting over a ticking time bomb that will tank your resale value later.

    Use your inspection period to get aggressive; if you find significant growth, don’t just ask for a credit, demand a professional remediation plan so you aren’t inheriting someone else’s structural nightmare.

    View mold remediation as a strategic investment rather than a sunk cost, because fixing the moisture problem properly is exactly how you transform a liability into a clean, high-equity asset.

    ## Turning Rot into Revenue

    “Look, I’m not here to scare you away from a fixer-upper just because there’s some fuzz in the corner of the basement. But if you don’t treat mold like a structural threat rather than an aesthetic nuisance, you aren’t investing—you’re just subsidizing someone else’s disaster. Fix the source, kill the spores, and turn that damp corner into the equity you actually came here for.”

    Gareth Trelawny

    Don't Let the Rot Stop Your Hustle

    Don't Let the Rot Stop Your Hustle.

    At the end of the day, dealing with mold isn’t about being scared of a little dampness; it’s about being smart enough to identify the root cause before you ever swing a hammer. We’ve talked about tracking down those sneaky leaks, understanding the difference between surface mildew and the nasty black mold that can tank your ROI, and why you need to always check the foundation and ventilation during your walkthroughs. If you can spot the signs early and factor the remediation costs into your initial offer, you aren’t just fixing a house—you are protecting your margins and ensuring that your next renovation project is a win rather than a money pit.

    Look, I know seeing spores on a basement wall can feel like a gut punch when you’re trying to build your portfolio, but don’t let it derail your vision. Every fixer-upper has its demons, and mold is often just one more hurdle between you and that massive equity jump. If you approach these issues with a pragmatic mindset and a solid plan, you’ll realize that these problems are actually opportunities in disguise. Keep your eyes sharp, keep your budget realistic, and remember: we aren’t just cleaning walls, we are building generational wealth one solid, dry room at a time.

    Frequently Asked Questions

    How much is this mold going to actually tank my renovation budget?

    Look, I’m not going to sugarcoat it: mold is a budget killer if you aren’t prepared. If it’s just surface level, you’re looking at a few hundred for supplies and a weekend of heavy-duty scrubbing. But if it’s deep in the subfloor or eating your studs? You’re looking at thousands for professional remediation and structural repairs. Always bake a “mystery rot” contingency of at least 10% into your rehab math—it’s better than getting blindsided mid-demo.

    Can I just patch over the mold and keep moving, or is that a dealbreaker?

    Look, I get the temptation. You’re staring at a tight deadline and a budget that’s already bleeding, and a quick patch feels like a shortcut to profit. But let me be blunt: patching over mold is a rookie mistake that will haunt your ROI. If you don’t kill the source, that rot will just eat through your new drywall and turn your “renovation” into a massive liability. Don’t bury the problem; fix it properly or walk away.

    Do I need to hire a professional remediation crew, or can I tackle this myself to save on costs?

    Here’s the truth: if it’s a small patch of surface mildew from a leaky bathroom sink, grab a scrub brush and some vinegar; it’s a quick win for your budget. But if you’re looking at a massive colony behind a drywall or smelling that heavy, musty scent in the basement, call the pros. Don’t risk your lungs—or your investment—trying to DIY a structural nightmare. Sometimes paying for remediation is the smartest way to protect your equity.

  • Performing Due Diligence in Real Estate

    Performing Due Diligence in Real Estate

    I still remember the smell of damp rot and stale cigarette smoke hitting me the second I stepped into that split-level in East Austin three years ago. On paper, it was a “charming vintage gem,” but as I pulled my laser measurer from my bag, I realized the floorboards were bowing more than any floor should. That was my first real lesson in real estate due diligence: if you don’t look past the fresh coat of beige paint, you aren’t buying an investment, you’re buying a nightmare. Most people treat this phase like a boring checkbox on a legal form, but in my world, it’s the difference between building wealth and flushing your savings down a literal hole in the ground.

    I’m not here to give you a dry lecture or a list of legal definitions you can find in any textbook. I want to show you how to actually see a property for what it is before you sign on the dotted line. I’m going to walk you through my personal, boots-on-the-ground approach to real estate due diligence, focusing on the gritty details that actually impact your bottom line. We’re going to talk about spotting the red flags that the listing agents won’t mention, so you can walk into every deal with absolute confidence.

    Table of Contents

    Using a Property Inspection Checklist to Spot Hidden Gold

    Using a Property Inspection Checklist to Spot Hidden Gold.

    I don’t walk into a potential flip without my clipboard and a heavy-duty property inspection checklist in hand. While most buyers are distracted by the granite countertops or a fresh coat of paint, I’m looking at the stuff that actually matters: the foundation, the electrical panel, and the age of the HVAC system. You have to train your eyes to see past the staging. If the floorboards are uneven or there’s a faint scent of mildew in the basement, that’s not just a “character quirk”—it’s a massive red flag that could eat your entire profit margin before you even swing a hammer.

    Think of your checklist as your first line of defense against a total catastrophe. I’ve seen too many rookies skip the granular details only to realize halfway through a rehab that they’re dealing with outdated wiring or structural rot. You aren’t just looking for cosmetic fixes; you are hunting for structural integrity. By being meticulous now, you ensure that the “gold” you think you’ve found isn’t actually just a very expensive pile of debris waiting to happen.

    The Title Search Importance Protecting Your Hard Earned Equity

    The Title Search Importance Protecting Your Hard Earned Equity

    Look, I’ve seen it happen to the best of us: you find a gorgeous mid-century ranch, the numbers make perfect sense, and you’re already mentally picking out the new kitchen tile. But if you skip the paperwork, you’re playing a dangerous game. Understanding the title search importance isn’t just about being a stickler for bureaucracy; it’s about making sure the person selling you that dream actually has the legal right to do so. You don’t want to pour your entire renovation budget into a property only to find out there’s an old, undisclosed lien or a long-lost heir claiming they own half the lot.

    Think of this as the ultimate layer of commercial real estate risk mitigation, even if you’re just flipping a single-family home. A clean title ensures that once the keys are in your hand, the equity you’re working so hard to build is actually yours. I always tell my clients to treat the title search as non-negotiable. It’s much easier to walk away from a deal during the contingency period than it is to fight a legal battle over a property you thought you owned.

    5 Ways to Keep Your Investment From Turning Into a Nightmare

    • Don’t skip the zoning check; there is nothing worse than falling in love with a property only to realize you can’t legally add that ADU or shop space you planned for your exit strategy.
    • Dig into the permit history like your bank account depends on it, because if those “new” additions were done without a permit, you’re the one who’s going to be paying to fix them later.
    • Get a handle on the neighborhood’s trajectory by looking at more than just the house next door; check local development plans to see if a new highway or a massive warehouse is about to ruin your resale value.
    • Always get a hard look at the utility costs and the age of the major systems—HVAC and electrical aren’t just line items on a budget, they are the silent killers of your profit margins.
    • Vet your contractors and suppliers before you even sign the closing papers, because a renovation is only as solid as the people you’re trusting to execute your vision.

    The Bottom Line: Don't Buy a Headache

    Never trust a fresh coat of paint; always dig into the bones of a property to ensure you’re investing in structural equity rather than just masking a money pit.

    Treat your title search like your insurance policy—clearing up liens and ownership disputes early is the only way to guarantee that the profit you work for actually stays in your pocket.

    Use a systematic checklist to turn your gut feelings into hard data, because in this business, an educated guess is just a fast way to lose your shirt.

    The Cost of Cutting Corners

    “In this business, your profit isn’t made when you sell the house; it’s made when you buy it. If you skip the gritty, unglamorous work of due diligence, you aren’t investing in an asset—you’re just subsidizing someone else’s mistake.”

    Gareth Trelawny

    Don't Leave Your Equity to Chance

    Don't Leave Your Equity to Chance.

    Look, I know due diligence feels like a mountain of tedious paperwork and endless walkthroughs, but that’s exactly where the real work happens. We’ve covered why you can’t skip a rigorous inspection checklist to find those structural deal-breakers, and why a clean title search is your only real defense against legal nightmares that could swallow your investment whole. If you skip these steps, you aren’t investing; you’re just gambling. You have to know the bones of the property before you ever pick up a sledgehammer, or you’ll find yourself spending your entire profit margin just trying to fix mistakes you should have seen coming.

    At the end of the day, building a portfolio isn’t about finding the perfect, turnkey house—it’s about having the discipline to verify the reality behind the marketing photos. Every crumbling wall and every legal hiccup is just another hurdle on the way to building your wealth. It’s going to be messy, and it’s definitely going to be exhausting sometimes, but that’s the price of entry. Keep your eyes sharp, your measurements precise, and your due diligence airtight. That is how you turn a risky renovation into a solid, life-changing asset.

    Frequently Asked Questions

    What's the absolute red flag that should make me walk away from a deal immediately, even if the price is perfect?

    If you see major structural failure—specifically a sagging foundation or significant load-bearing wall issues—walk. I’ve seen “perfect” prices lure people into nightmares where the cost to stabilize the bones exceeds the potential equity. A cracked tile is a nuisance; a shifting foundation is a financial sinkhole. If the skeleton of the house is compromised, you aren’t just renovating; you’re fighting a losing battle against physics. Don’t let a bargain price blind you to a structural catastrophe.

    How do I figure out which inspection items are just cosmetic fixes and which ones are going to eat my entire renovation budget?

    Here’s the rule of thumb I live by: if it’s behind a wall or under the floor, it’s a budget killer. Cosmetic issues—think dated wallpaper, scratched hardwoods, or ugly tile—are just opportunities for me to add value with a weekend of sweat equity. But if the inspection flags the electrical panel, the foundation, or the plumbing stack, stop everything. Those aren’t “renovations”; those are structural liabilities that can swallow your entire profit margin whole.

    If I find a major issue during due diligence, how do I approach the seller to negotiate a price drop without losing the house?

    Don’t go in swinging. If you find a cracked foundation or ancient wiring, treat it as a collaborative problem-solving session rather than a confrontation. Approach the seller with the inspection report in hand and say, “I love this house, but this specific issue is going to cost $X to fix to make it safe/marketable.” Present the repair estimate clearly. You aren’t being difficult; you’re just adjusting the price to reflect the reality of the bones.

  • Optimizing Your Laundry Room Design

    Optimizing Your Laundry Room Design

    I was standing in the middle of a damp, windowless basement last Tuesday, staring at a stack of mismatched plastic bins and a washing machine that sounded like a jet engine taking off. Most “design gurus” will tell you that a high-end laundry room remodel requires custom Italian cabinetry and a marble backsplash just to be considered successful. Honestly? That’s a load of crap. I’ve seen plenty of investors blow their entire margin on frivolous aesthetics that do absolutely nothing to increase the actual appraisal value of a home.

    I’m not here to sell you on a lifestyle magazine fantasy; I’m here to talk about smart equity. In this guide, I’m stripping away the fluff to show you how to approach a laundry room remodel with a developer’s mindset. We’re going to focus on high-impact, functional upgrades—think clever storage solutions and durable finishes—that make a buyer feel like they’re stepping into a luxury space without draining your bank account. I’ll show you how to maximize your ROI by focusing on what actually matters, turning a cluttered utility nightmare into a streamlined, high-value asset.

    Table of Contents

    Maximizing Value With Efficient Laundry Room Floor Plans

    Maximizing Value With Efficient Laundry Room Floor Plans

    When I’m walking through a fixer-upper, I don’t just look at the aesthetic; I look at the flow. A poorly planned layout can turn a simple chore into a daily headache, which is exactly what kills resale value. To get the most bang for your buck, you need to focus on efficient laundry room floor plans that prioritize movement. If you’re working with a tight footprint, I always recommend a galley-style setup or a single-wall run. This keeps your appliances, sink, and folding station within arm’s reach, preventing that awkward dance around a pile of dirty linens.

    Don’t let a cramped space dictate your potential, either. I’ve seen some incredible transformations where smart small laundry room organization turned a dead corner into a high-functioning zone. Think about incorporating verticality; if you can’t expand outward, go up. Integrating custom shelving or even some simple laundry room cabinetry trends—like floating wood tones against a minimalist backdrop—can hide the clutter while adding that high-end, designer feel that buyers crave. It’s about making the space work as hard as you do.

    Modern Laundry Room Cabinetry Trends That Command Higher Rents

    When I’m walking through a fixer-upper, I’m always looking at the cabinetry to see if the previous owner played it safe or played it smart. For a high-yield rental or a quick flip, you want to move away from those dated, builder-grade oak cabinets that scream “1990s suburban basement.” Instead, I’m seeing a massive shift toward flat-panel, minimalist cabinetry in muted tones like sage green or charcoal. These styles feel intentional and high-end without the custom price tag. If you’re working with limited square footage, look into floating shelves or slim-profile cabinets; they keep the space feeling airy while providing essential small laundry room organization that tenants actually value.

    Don’t forget that functionality is what drives the rent premium. I always tell my clients to integrate deep, pull-out drawers rather than standard lower cabinets. It’s much easier for a tenant to manage heavy detergent bottles in a drawer than to be on their hands and knees digging in a dark corner. Integrating these laundry room cabinetry trends with clean lines and durable hardware makes the entire utility space feel like a curated part of the home rather than a neglected afterthought.

    Five Ways to Squeeze More Equity Out of Your Laundry Space

    • Stop treating the laundry room like a dead zone; if you have the footprint, add a folding station or a built-in countertop. It’s a small upgrade that makes the space feel intentional rather than just a place to hide the dirty clothes.
    • Lighting is your best friend when you’re dealing with windowless utility closets. Swap out those dim, flickering overheads for bright, recessed LED lighting so buyers can actually see what they’re doing without feeling like they’re in a basement dungeon.
    • Don’t skimp on the flooring. While I love a good aesthetic, this area takes a beating from moisture and heavy machines, so go for something durable like luxury vinyl plank that looks high-end but can handle a leak without ruining your ROI.
    • Invest in smart storage that hides the chaos. I’m talking pull-out hampers and slim rolling carts that fit between the machines; if a potential buyer can’t see the clutter, they’re more likely to fall in love with the layout.
    • Upgrade your plumbing and electrical before you get fancy with the decor. There is nothing that kills a deal faster than an outdated washer hookup or a lack of dedicated outlets for modern, high-efficiency appliances.

    The Bottom Line on Laundry Room Equity

    Stop treating the laundry area like an afterthought; a smart, functional layout is one of the easiest ways to bump your property’s perceived value during a walkthrough.

    Invest in durable, high-end cabinetry that looks expensive but stands up to daily abuse—renters and buyers both want utility that doesn’t look cheap.

    Focus on the marriage of aesthetics and workflow, because if a renovation doesn’t make a chore easier, it’s just wasted capital.

    ## The Equity in the Utility Room

    “Stop treating the laundry room like an afterthought; if you treat it like a high-utility workspace instead of a dark corner for junk, you aren’t just fixing a room—you’re building instant equity.”

    Gareth Trelawny

    Turning Utility into Equity

    Laundry remodel: Turning Utility into Equity.

    At the end of the day, a laundry room remodel isn’t just about picking out a pretty backsplash or a trendy shaker cabinet; it’s about strategic asset management. We’ve looked at how a smart, efficient floor plan can transform a cramped corner into a functional powerhouse, and how investing in high-quality cabinetry can significantly boost your property’s appeal to high-end renters or buyers. If you focus on these high-impact areas, you aren’t just fixing a room—you are maximizing your return on investment by addressing one of the most overlooked functional spaces in a home.

    Don’t let the dust and the inevitable plumbing headaches intimidate you. Every time I step onto a job site and see a gutted, outdated utility space, I don’t see a mess; I see hidden equity waiting to be unlocked. Real estate isn’t about finding the perfect, turnkey property; it’s about having the vision to see what a space could become once you apply some sweat equity and smart design. So, grab your laser measurer, get your contractor on speed dial, and start turning those cramped closets into profitable square footage.

    Frequently Asked Questions

    How do I decide whether to stick with a side-by-side washer and dryer setup or go for a stacked unit to save floor space?

    Look, it comes down to the footprint you’re working with and your target demographic. If you’re flipping a compact condo or a tiny bungalow, go stacked. It frees up floor space for extra cabinetry or a folding station, which adds massive perceived value. But, if you’re renovating a family home where the buyer wants heavy-duty machines, a side-by-side setup with a continuous countertop is king. Always measure twice; that extra counter space is pure gold.

    Is it actually worth the extra investment to upgrade my plumbing and electrical while the walls are already open?

    If the walls are already open, you’re sitting on a goldmine of opportunity. Do not—I repeat, do not—patch that drywall just to save a few bucks today. Upgrading the guts of the house is the ultimate insurance policy for your investment. New electrical and plumbing prevent catastrophic failures down the line, and they’re massive selling points for savvy buyers. It’s not just a renovation; it’s about securing the structural integrity of your equity.

    What kind of durable countertop materials should I choose if I want a folding station that can actually handle heavy daily use?

    If you’re building a folding station, don’t even think about cheap laminate; it’ll peel or swell the second a damp basket hits it. I always lean toward quartz for my flips. It’s non-porous, practically indestructible, and handles heavy laundry loads without staining. If you’re on a tighter budget but still want durability, go with a high-quality solid surface. You need something that can take a beating and still look high-end for the next tenant.