Author: Gareth Trelawny

  • Optimizing Floor Plans for Better Flow

    Optimizing Floor Plans for Better Flow

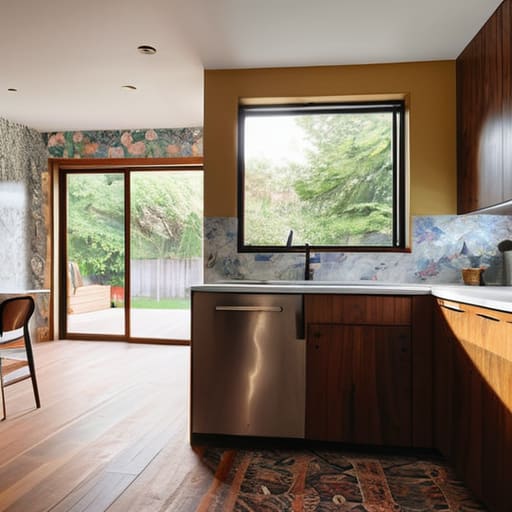
    I was standing in the middle of a cramped, 1970s ranch last Tuesday, the smell of stale dust and old carpet thick in the air, staring at a hallway that felt more like a claustrophobic tunnel than a home. Most “experts” will try to sell you on a massive, budget-draining expansion to fix a bad layout, but that’s just a fast track to bleeding cash. Real floor plan optimization isn’t about adding more square footage; it’s about having the guts to stop treating every wall like it’s load-bearing and actually looking at how people move through a space.

    I’m not here to give you some polished, theoretical lecture from a design textbook. I’m going to show you the unfiltered reality of how I identify wasted space and reconfigure layouts to squeeze every ounce of value out of a property. We’re going to talk about strategic demolition, fixing broken flows, and making smart cuts that actually turn into solid equity. If you’re ready to stop looking at what a house is and start seeing what it could be, let’s get to work.

    Table of Contents

    Maximizing Square Footage in Crumbling Spaces

    Maximizing Square Footage in Crumbling Spaces.

    When I walk into a neglected property, I’m not looking at the peeling wallpaper or the dated linoleum; I’m looking at the wasted space. Most old houses are a graveyard of tiny, claustrophobic rooms that serve no modern purpose. To really see the profit potential, you have to focus on improving residential spatial efficiency by identifying where the footprint is being choked by unnecessary partitions. It’s about finding those awkward, dead-end hallways and realizing they are just stolen square footage that could be better utilized in a living area or a pantry.

    I’m a firm believer that you don’t always need to add an extension to increase value. Often, the win lies in rethinking the architectural circulation patterns to ensure people aren’t constantly walking through the middle of a conversation just to get to the kitchen. Instead of just blindly swinging a sledgehammer for an open concept, I look for ways to create functional zoning in residential design. This allows you to maintain a sense of intimacy while still giving the home that airy, expansive feel that buyers are willing to pay a premium for.

    Improving Residential Spatial Efficiency for Better Equity
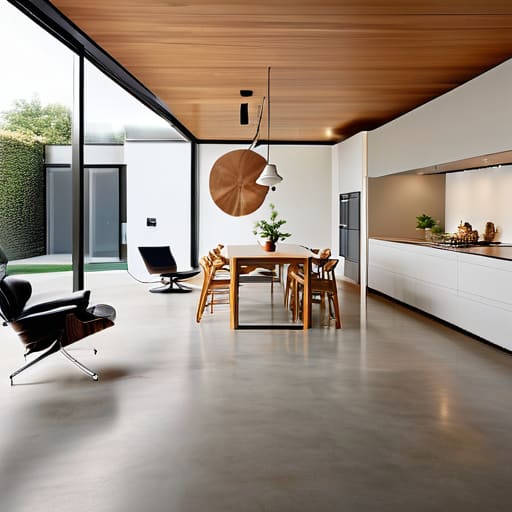
    Improving Residential Spatial Efficiency for Better Equity

    When you’re walking through a house that feels cramped, it’s rarely about the actual dimensions and almost always about how the space is being used. I see this constantly in older builds: long, narrow hallways and tiny, disconnected rooms that eat up your usable area. To really drive up the appraisal, you need to focus on improving residential spatial efficiency by eliminating those dead zones. Instead of just adding more rooms, look at how people actually move through a house. If you can streamline the architectural circulation patterns, you stop wasting square footage on transit and start dedicating it to living.

    It’s not just about ripping out every single wall to create a massive, empty box, either. The “open concept vs traditional layouts” debate is a trap if you don’t have a plan. A successful flip uses functional zoning in residential design to create distinct areas for dining, lounging, and working without needing heavy partitions. I always tell my clients: if you can define a space through lighting or a subtle change in flooring rather than a stud wall, you’ve won. You’re creating a home that feels intentional, not just hollow.

    My Go-To Moves for Turning Bad Layouts into High-Value Assets

    • Kill the hallway creep. I see so many older homes with long, dark corridors that do nothing but eat up usable square footage. If I can knock down a non-load-bearing wall to turn that wasted passage into part of the living area, I’m doing it every single time.
    • Prioritize the “Golden Triangle” in kitchen reconfigs. It’s not just about aesthetics; if the workflow between the sink, stove, and fridge feels like a marathon, the house won’t sell. I aim for a layout that feels intuitive, not forced.
    • Stop ignoring the “dead” corners. Most people overlook those awkward alcoves or weirdly shaped nooks, but those are prime real estate for built-in workstations or reading benches. Small, smart additions like these make a floor plan feel intentional rather than accidental.
    • Open the sightlines, but keep the zones. You want that airy, open-concept feel that buyers crave, but don’t just dump everything into one giant room. I use subtle transitions—like a change in flooring or a slight drop in ceiling height—to define the dining area from the lounge without blocking the view.
    • Light is a structural element. If a room feels cramped, it’s often because it’s dark. I look for opportunities to reposition doorways or even swap out solid doors for glass-paneled ones to let natural light travel deeper into the floor plan. It makes a tiny room feel twice its actual size.

    The Bottom Line: Turning Layouts into Leverage

    Stop obsessing over total square footage and start focusing on usable space; a well-flowed 1,200-square-foot home will always out-sell a cramped, poorly partitioned 1,500-square-foot house.

    Prioritize the “high-traffic” zones—the kitchen and the primary living area—because that’s where your renovation budget needs to work the hardest to create a sense of openness.

    Always keep an eye on the structural bones before you start swinging a sledgehammer; the goal is to optimize the flow, not to spend your entire profit margin on complex engineering fixes.

    ## The Real Value of a Wall

    Don’t get blinded by the total square footage; a massive, poorly laid out house is just a collection of wasted corners. Real profit lives in the flow—when you tear down those awkward, dark hallways and open up the sightlines, you aren’t just moving walls, you’re unlocking the equity that was hiding in plain sight.

    Gareth Trelawny

    The Bottom Line on Layouts

    The Bottom Line on Layouts for profit.

    At the end of the day, floor plan optimization isn’t about making a house look like something out of a glossy magazine; it’s about making a house work for the modern buyer. We’ve talked about reclaiming lost square footage, cutting through the clutter of outdated partitions, and ensuring that every single inch of that footprint contributes to the home’s overall value. When you stop looking at a house as a collection of closed-off rooms and start seeing it as a series of functional zones, you stop seeing limitations and start seeing profit margins. Don’t get distracted by the cosmetic stuff until you’ve mastered the flow, because a beautiful kitchen means nothing if the layout makes the rest of the house feel like a labyrinth.

    I know it can feel overwhelming when you’re standing in the middle of a dusty, gutted living room wondering if you’ve made a massive mistake. But remember, the most profitable flips aren’t the ones that were easy; they’re the ones where you had the guts to reimagine the bones of the property. Every wall you knock down and every awkward hallway you eliminate is a direct investment in your future equity. Stay pragmatic, trust your eye for potential, and keep pushing through the mess. You aren’t just moving drywall; you are building wealth, one square foot at a time.

    Frequently Asked Questions

    How do I know if a wall is load-bearing before I start swinging a sledgehammer?

    Look, I know the urge to just start swinging is real once you see that awkward layout, but please—don’t play guessing games with your structural integrity. First, check the joists above; if they run perpendicular to the wall, it’s likely load-bearing. Also, look for walls that run directly above or below others in the house. Honestly? If you aren’t 100% sure, hire a structural engineer. It’s a small upfront cost to avoid a total collapse.

    At what point does an open floor plan go too far and start hurting the resale value?

    Look, I love a good open concept as much as the next person, but don’t go swinging that sledgehammer blindly. You cross the line when you lose all sense of defined zones. If a house feels like one giant, echoing cavern where you can hear the dishwasher from the bedroom, you’ve gone too far. Buyers want flow, but they also want privacy and acoustic separation. If you kill every nook and cranny, you’re killing your resale value.

    Is it actually worth the extra cash to add a bathroom if the footprint is already tight?

    Look, I’ve been in this position more times than I can count. If you’re fighting for every inch, it’s tempting to skip it, but don’t. In my experience, a second bathroom is often the difference between a property that sits and one that flies. Even in a tight footprint, a compact powder room adds massive resale value. It’s not about the extra square footage; it’s about the lifestyle upgrade that buyers are willing to pay a premium for.


  • Analyzing Current Real Estate Market Trends

    Analyzing Current Real Estate Market Trends

    I was standing in a damp, half-finished basement last Tuesday, clutching my laser measurer and staring at a cracked foundation, when I realized how much the “experts” on TV are lying to you. They love to drone on about complex real estate market trends and macroeconomic shifts as if you need a PhD to understand why a house isn’t selling. Honestly, most of that high-level noise is just a smokescreen for people who don’t actually know how to read a room—or a floor plan. While the pundits are busy debating interest rate percentages in air-conditioned studios, they’re completely missing the actual movement happening on the ground in our neighborhoods.

    I’m not here to give you a lecture on theoretical data or feed you the usual industry hype. My goal is to strip away the jargon and show you how to spot the real opportunities hidden beneath the surface of these shifting numbers. I’m going to teach you how to look past the headlines and find the equity that everyone else is too distracted to see. We aren’t just watching the market; we are going to learn how to work it.

    Table of Contents

    Navigating Housing Market Volatility Without Losing Your Shirt

    When the headlines start screaming about housing market volatility, most people freeze. They see a fluctuating graph and assume it’s time to park their cash in a high-yield savings account and wait for the “perfect” moment. But here’s the thing: perfection is a myth that keeps investors broke. While everyone else is paralyzed by the news, I’m looking at the real estate supply and demand dynamics on the ground. If a neighborhood has limited inventory and a steady stream of buyers, a temporary dip in interest rates won’t change the fundamental value of that dirt.

    You have to stop looking at the macro noise and start focusing on the micro reality. I don’t care what the national average is doing if I’m looking at a distressed property in an up-and-coming pocket where the fundamentals are still rock solid. Instead of obsessing over every percentage point, pay attention to the interest rate impact on property availability. High rates often cool down the competition, meaning you might actually have more leverage to negotiate a better deal on a fixer-upper than you would in a bidding war. It’s about being calculated, not reactive.

    Reading Residential Real Estate Indicators to Spot Hidden Gold

    Reading Residential Real Estate Indicators to Spot Hidden Gold

    You can’t just walk onto a street and “feel” if a deal is good; you need to look at the data points that most people ignore. I’m constantly looking at residential real estate indicators that signal a shift before the mainstream media even picks up the story. For me, it’s about watching the local inventory levels and the speed at which homes are moving. If I see a neighborhood where days-on-market are creeping up, but the actual quality of the homes is decent, that’s my cue. That’s where the real opportunity lies—finding the gap between what people think a house is worth and what a motivated buyer will actually pay once the dust settles.

    I also keep a very close eye on urban vs suburban migration patterns. We’ve seen a massive shift lately, with people fleeing cramped city centers for more breathing room, which completely reshapes local demand. When you combine those movement patterns with a deep dive into local school ratings and transit developments, you start to see the blueprint of the next high-growth pocket. It isn’t about chasing the hype; it’s about anticipating where the life is moving before the prices skyrocket.

    My Playbook for Spotting Real Value in a Shifting Market

    • Stop chasing the hype and start looking for the “ugly ducklings.” While everyone else is fighting over the polished, turnkey homes that have zero margin, I’m looking for the properties with outdated kitchens and cracked floorboards. The real trends aren’t in the shiny new builds; they’re in the undervalued assets that just need a strategic facelift to unlock equity.
    • Watch the inventory, not just the headlines. News outlets love to scream about interest rates, but I keep my eyes on how many houses are actually hitting the market in my target zip codes. If supply is tightening while demand stays steady, that’s your signal to move—but only if you’ve already crunched the numbers on a renovation budget.
    • Prioritize “lifestyle” upgrades over luxury fluff. Trends move fast, but the need for functional space doesn’t. Right now, I’m seeing massive returns on homes that can be easily adapted for home offices or multi-generational living. Don’t waste your rehab budget on gold-plated faucets; invest in the square footage and layouts that people actually need to live their lives.
    • Learn to read the local neighborhood “vibe” shifts. Real estate isn’t just about national data; it’s about what’s happening three blocks away. Is a new coffee shop moving in? Is the local school district improving? I track these micro-trends because they are the most reliable indicators of where property values are going to climb before the rest of the market catches on.
    • Always build a “chaos buffer” into your math. Market trends can flip overnight, and a sudden spike in material costs or labor shortages can eat your profit margins alive. I never enter a deal without a contingency fund that accounts for the messiness of a real-world renovation. If the deal doesn’t work with a 15% cushion, it’s not a smart investment—it’s a gamble.

    The Bottom Line: Turning Data into Dollars

    Stop obsessing over the national headlines and start looking at local inventory; the real money isn’t in the broad market trends, but in the specific pockets where distressed properties are hitting the market.

    Volatility isn’t your enemy—it’s your opportunity to find motivated sellers who are ready to move, provided you have the liquidity and the stomach to act when others are panicking.

    Always prioritize “bones over beauty”; use your indicators to find undervalued structures where you can manufacture equity through smart design rather than just riding a wave of market appreciation.

    ## Stop Chasing the Hype

    “Stop obsessing over every headline about interest rates or market dips; the real money isn’t made by following the crowd into a bidding war, it’s made by looking past the scary numbers to find the house everyone else is too afraid to touch.”

    Gareth Trelawny

    The Bottom Line

    Understanding market shifts: The Bottom Line.

    Look, the data and the market indicators I’ve laid out aren’t just numbers on a spreadsheet; they are your roadmap through the noise. We’ve covered how to weather the volatility without panicking and, more importantly, how to look past the surface-level chaos to find those pockets of opportunity that others are too scared to touch. Success in this game isn’t about timing the market perfectly with a crystal ball; it’s about understanding the underlying shifts and having the discipline to act when the math makes sense. You have to be able to distinguish between a temporary dip and a fundamental shift in value, because that is where the real profit margins are hidden.

    At the end of the day, real estate isn’t a spectator sport. You can study every trend and every indicator until you’re blue in the face, but none of that matters if you don’t have the guts to pull the trigger on a property. Stop waiting for the “perfect” moment when everything feels safe and predictable—it isn’t coming. Instead, focus on building your knowledge, sharpening your eye for potential, and preparing yourself to turn sweat equity into lasting wealth. The market will always be messy, but if you have the vision to see the structure behind the decay, you’ll find that the best opportunities are often found right in the middle of the chaos.

    Frequently Asked Questions

    How do I know if a sudden dip in local property values is a genuine buying opportunity or just the start of a long-term crash?

    Look, don’t panic-sell or panic-buy based on a single headline. I check the fundamentals: absorption rates and days on market. If inventory is creeping up but people are still bidding on well-maintained homes, it’s likely a correction—a buying window. But if you see massive foreclosure spikes and local employment cratering, that’s a red flag for a crash. I look for “good bones” houses that are temporarily undervalued, not neighborhoods in a death spiral.

    When interest rates are this unpredictable, how should I adjust my renovation budget to ensure I don't overleverage myself?

    When rates are bouncing around like a loose floorboard, you have to stop budgeting for the “ideal” scenario and start planning for the mess. I always build a 15-20% contingency buffer into my rehab costs—not just for unexpected plumbing issues, but to protect my cash flow if my financing terms shift mid-project. Don’t overextend on high-end finishes; focus on the structural essentials that drive equity. Keep your debt low and your liquidity high.

    Are there specific neighborhood indicators I should be looking for that signal a "fixer-upper" area is about to see a massive equity surge?

    Look for the “coffee shop precursor.” When you see high-end specialty cafes, boutique fitness studios, or artisanal bakeries moving into a zip code, the gentrification engine is already idling. I also track permit activity; a sudden spike in minor renovation permits usually means people are testing the waters before the big flips start. If you see those signs combined with a lack of updated housing stock, you’ve found your gold mine.

  • Managing Risk in Property Investment

    Managing Risk in Property Investment

    I still remember standing in the middle of a damp, gutted kitchen in East London, the smell of mold and old copper piping hitting me like a physical punch to the gut. I had just realized the “structural issue” I’d overlooked was actually a massive foundation crack that was going to eat my entire contingency fund before I even picked up a sledgehammer. That was my first real, unvarnished lesson in property investment risk—it’s rarely the big, theoretical market crashes that break you, but the hidden, messy realities lurking behind a fresh coat of paint.

    I’m not here to sell you some polished, textbook fantasy about effortless passive income. I’ve spent enough time on job sites to know that real wealth is built through grit and calculated decisions, not luck. In this guide, I’m going to strip away the jargon and give you the straight talk on how to spot the red flags before they become financial nightmares. We’re going to talk about how to weigh the hazards, manage your margins, and ultimately turn those intimidating risks into solid, tangible equity.

    Table of Contents

    Weathering Real Estate Market Fluctuations Without Losing Your Shirt

    Weathering Real Estate Market Fluctuations Without Losing Your Shirt

    Look, I’m not going to sugarcoat it: the market is a roller coaster. One month you’re seeing record-breaking sales, and the next, interest rates spike and everything feels like it’s stalling. When you’re dealing with real estate market fluctuations, the biggest mistake you can make is panicking and selling at the bottom. I’ve seen too many people get spooked by a temporary dip and walk away from a property that was actually a goldmine. You have to play the long game. If your math is solid and your margins are healthy, a bad quarter shouldn’t break you.

    The secret to surviving the dips is focusing on cash flow over hype. I always tell my clients that if you aren’t prioritizing rental income stability, you’re essentially gambling. I’d much rather own a modest, well-located duplex that pays my mortgage every month than a flashy luxury condo that sits empty for half the year. By building a portfolio that focuses on reliable tenants and steady monthly checks, you create a buffer that protects you when the broader economy takes a hit.

    Protecting Your Rental Income Stability Through Every Storm

    Protecting Your Rental Income Stability Through Every Storm

    When you’re playing the long game, your cash flow is your lifeline. It’s easy to get caught up in the excitement of a beautiful renovation, but if you aren’t prioritizing rental income stability, you’re building on sand. I’ve seen too many investors get blinded by the potential for massive capital appreciation and completely ignore the reality of vacancy rates. If a tenant leaves and you don’t have a buffer, that “dream fixer-upper” can quickly turn into a massive monthly drain on your bank account.

    To stay ahead of the curve, you have to treat your properties like a business, not a hobby. This means staying on top of property management challenges before they become crises—think proactive maintenance instead of reactive repairs. I always tell my clients that a well-maintained building attracts higher-quality tenants who stay longer, which is the simplest way to hedge against an economic downturn impact on property values. Don’t just hope for the best; build a system that keeps the checks coming in, regardless of what the broader market is doing.

    My Non-Negotiables: How I Mitigate Risk Before I Sign the Deed

    • Always, and I mean always, build a massive contingency fund into your renovation budget. I’ve seen too many investors go belly-up because they found a single plumbing disaster and realized they didn’t have the liquid cash to fix it without tapping into their mortgage.
    • Never buy based on emotion; buy based on the math. I love a beautiful mid-century modern layout as much as the next person, but if the numbers don’t support the exit strategy, I walk away. Your gut might love the house, but your bank account needs the spreadsheets to make sense.
    • Get a professional inspection that actually digs deep. Don’t just skim the surface to save a few hundred bucks; you need to know if those cracks in the foundation are cosmetic or if the whole structure is a money pit. I’d rather lose a deal than inherit a catastrophe.
    • Diversify your exit strategies from day one. Don’t just bank on a quick flip; make sure the property can also work as a long-term rental if the market cools down. Having a Plan B—and a Plan C—is what keeps you in the game when the economy gets shaky.
    • Vet your contractors like they’re part of your inner circle. A bad crew can turn a three-month rehab into a twelve-month nightmare, and time is literally money in this business. If they can’t show me a solid track record and a clear contract, they aren’t stepping foot on my job site.

    The Bottom Line: How to Keep Your Portfolio Bulletproof

    Never bet the farm on a single property; true stability comes from diversifying your assets so one bad renovation or a sudden vacancy doesn’t sink your entire net worth.

    Build a massive “oh crap” fund into every single budget, because in this business, the unexpected plumbing leak or the structural surprise isn’t a possibility—it’s a guarantee.

    Stay obsessed with the numbers, not just the aesthetics; a beautiful kitchen won’t save a deal if your margins are too thin to survive a market dip.

    ## The Real Cost of Playing It Safe

    “Risk isn’t some monster hiding under the bed; it’s just the price of admission. If you’re too terrified of a little volatility or a messy renovation to pull the trigger, you’ll spend your whole life watching other people build the equity you were too scared to chase.”

    Gareth Trelawny

    Turning Risk into Reality

    Turning Risk into Reality through strategic management.

    At the end of the day, managing property investment risk isn’t about finding a way to avoid every single problem; it’s about building a toolkit so you can handle them when they inevitably show up. We’ve talked about buffering yourself against market swings, keeping your rental income steady even when things get rocky, and knowing when to pull the trigger on a renovation versus when to walk away. You have to respect the numbers and never underestimate the cost of a surprise repair, but you can’t let the fear of a leaky roof or a dip in interest rates keep you on the sidelines forever. It’s all about calculated moves and strategic buffers.

    Look, I know it can feel overwhelming when you’re staring at a crumbling foundation or a volatile market report. But remember why you started this: you’re not just buying bricks and mortar; you’re building a foundation for your future. The most successful investors I know aren’t the ones who never faced a setback, but the ones who stayed determined and pragmatic when the dust started flying. Don’t let the fear of a messy renovation stop you from seeing the massive equity hiding behind those cracked walls. Get out there, do your homework, and start building.

    Frequently Asked Questions

    How much of a cash cushion should I actually keep on hand to cover those "surprise" renovation costs that inevitably pop up?

    Look, if you’re planning a renovation with zero margin for error, you’re not investing—you’re gambling. I always tell my clients to set aside at least 15% to 20% of the total project budget as a dedicated contingency fund. Whether it’s finding out the electrical is shot or discovering rot behind a bathroom wall, those “surprises” are practically guaranteed. Keep that cash liquid and untouchable; it’s the only thing standing between a successful flip and a total financial meltdown.

    When a market starts to dip, how do I know if it's time to hold steady or if I need to cut my losses and sell?

    Look, there’s a massive difference between a temporary market dip and a fundamental shift in the neighborhood’s value. Before you panic-sell, check your math. If your debt service is covered and the property still holds long-term appreciation potential, hold steady. But if the “fixer-upper” is bleeding cash faster than you can patch the leaks, it might be time to cut bait. Don’t let ego keep you anchored to a sinking ship.

    Is it better to go all-in on one big fixer-upper, or should I be spreading my capital across a few smaller, lower-risk properties?

    Here’s the truth: if you’re just starting out, don’t put all your eggs in one basket. Going all-in on a massive fixer-upper feels cinematic, but one bad structural surprise or a contractor walking off the job can wipe you out. I’d rather see you scale by acquiring a few smaller, manageable properties. It diversifies your risk and lets you learn the ropes without betting your entire future on a single set of crumbling walls.

  • Methods for Increasing Property Value Through Renovations

    Methods for Increasing Property Value Through Renovations

    I still remember the smell of damp drywall and old sawdust from my first solo flip—a cramped, single-story bungalow that everyone else called a “tear-down.” While the gurus on social media were busy preaching about waiting for the perfect market cycle or riding the wave of interest rate shifts, I was standing in a kitchen with peeling linoleum, realizing that waiting is a losing game. If you want to build real wealth, you can’t just hope for the market to hand you a profit; you have to manufacture it. That’s the raw reality of forced appreciation. It isn’t some magical financial algorithm; it’s the sweat equity you pour into a property to make it worth more than what you paid for it.

    I’m not here to sell you on some overnight success fantasy or complicated spreadsheets that don’t account for a broken HVAC system. Instead, I’m going to show you how to identify the bones of a house that are worth saving and how to execute renovations that actually move the needle on your ROI. We are going to talk about strategic rehabs, smart design choices, and the grit required to turn a crumbling asset into a goldmine.

    Table of Contents

    Manufacturing Equity Through Grit and Smart Renovation

    Manufacturing Equity Through Grit and Smart Renovation

    When I walk into a distressed property, I’m not looking at the peeling wallpaper or the outdated linoleum; I’m looking for the structural potential that everyone else is too intimidated to touch. Most people think wealth in this game is just about waiting for a neighborhood to gentrify, but that’s passive and slow. I prefer a more aggressive approach to equity building through remodeling. By identifying high-impact upgrades—like opening up a cramped kitchen or updating a dated electrical system—you aren’t just fixing a house; you are actively engineering value that didn’t exist when you signed the closing papers.

    The secret lies in knowing the difference between capital improvements vs repairs. If you’re just patching a hole in the drywall, you’re spending money to maintain the status quo. But if you’re installing a high-end backsplash or upgrading the flooring to something durable and modern, you are maximizing property ROI. You have to be surgical with your budget. I don’t waste a dime on cosmetic fluff that won’t move the needle; I invest in the bones and the finishes that make a buyer—or a tenant—instantly fall in love.

    Maximizing Property Roi Beyond the Curb Appeal

    Maximizing Property Roi Beyond the Curb Appeal

    Look, everyone knows how to slap on a fresh coat of paint and some trendy hardware to boost curb appeal, but if you want to truly move the needle on your margins, you have to look deeper. You need to distinguish between simple maintenance and strategic capital improvements vs repairs. Fixing a leaky faucet is a necessity, but it won’t skyrocket your valuation. If you want to see real movement in your numbers, you have to invest in the systems that people actually feel every day—think updated electrical, high-efficiency HVAC, or a complete kitchen reconfiguration. These are the moves that drive home renovation value long after the initial “wow factor” of a new front door has faded.

    I always tell my clients that the goal isn’t just to make a house look pretty; it’s about maximizing property ROI through functional upgrades. If I’m looking at a rental play, I’m focusing on durability and layout changes that allow for increasing rental yield by attracting higher-quality tenants. It’s about being surgical with your budget. Don’t just throw money at a property; invest it where it creates the most friction-less living for the next owner or occupant.

    My Five Non-Negotiables for Manufacturing Value

    • Focus on the “unsexy” bones first. You can slap on some trendy backsplash later, but if the electrical is shot or the floor plan is a labyrinth, you’re just putting expensive makeup on a corpse. Fix the structural issues that buyers fear, and you’ve already won half the battle.
    • Stop obsessing over high-end finishes and start looking at floor plan optimization. Sometimes the biggest jump in value isn’t a marble countertop; it’s knocking down a single non-load-bearing wall to turn a cramped galley kitchen into an open-concept space that actually breathes.
    • Master the art of the “strategic upgrade.” I don’t waste money on custom-built cabinetry when high-quality semi-custom options do the job. I put my money where it shows—think updated lighting fixtures and clean, modern hardware—rather than over-improving for a neighborhood that won’t pay the premium.
    • Don’t ignore the “invisible” equity in utility. Adding a third bedroom or upgrading a basement into a functional living space is often much cheaper than buying a larger lot, but it adds massive value to your appraisal. It’s about increasing the usable square footage without the massive price tag of a new build.
    • Always run the numbers on the “exit” before you swing the first hammer. Before I commit to a heavy renovation, I need to know exactly what the ceiling is for the neighborhood. There is no point in manufacturing $50k in equity if the local market cap prevents you from ever realizing it.

    The Bottom Line for Your Next Flip

    Stop looking for “turnkey” properties if you want real margins; the real money is hidden behind the ugly wallpaper and outdated layouts that scare off the average buyer.

    Focus your budget on structural integrity and high-impact functional upgrades rather than chasing every passing design trend that won’t hold its value.

    Equity isn’t something you wait for in a bull market—it’s something you physically build by making smart, calculated improvements that force the property value upward.

    The Real Secret to Wealth

    “Stop praying for the market to spike and start looking for the houses that need a little sweat equity. You can’t control interest rates, but you can absolutely control the value of a property by tearing down a bad layout and building something people actually want to live in.”

    Gareth Trelawny

    The Bottom Line on Building Real Equity

    The Bottom Line on Building Real Equity.

    At the end of the day, forced appreciation isn’t some magic trick or a stroke of luck; it’s the result of calculated decisions and a willingness to get your hands dirty. We’ve talked about why you can’t just rely on market trends to lift your property value. You have to be the one driving that growth by fixing the structural bones, optimizing the layout, and making those high-impact interior upgrades that actually move the needle. It’s about moving past the superficial “lipstick on a pig” approach and focusing on strategic, value-adding renovations that transform a liability into a high-performing asset. When you control the renovation, you control the equity.

    I know it can feel overwhelming when you’re staring at a gutted kitchen or a floor plan that makes no sense, but that’s exactly where the opportunity lives. The most profitable deals aren’t found in pristine, turnkey homes; they are found in the properties everyone else is too afraid to touch. Don’t let the mess intimidate you. If you have the vision to see past the peeling wallpaper and the grit to manage the chaos, you can build a legacy that lasts. Stop waiting for the perfect market conditions to fall into your lap and start manufacturing your own wealth one renovation at a time.

    Frequently Asked Questions

    How do I know when I’ve hit the ceiling on a renovation and am just throwing money down a hole?

    You hit the ceiling the moment your renovation costs start eating your projected profit margin. I always run a “stop-loss” number before I even pick up a sledgehammer. If you’re debating whether a high-end marble backsplash is worth an extra $4k when the neighborhood comps only support quartz, stop. You aren’t adding value anymore; you’re just over-improving. If the math doesn’t move the needle on the final sale price, walk away.

    Is it better to focus on cosmetic upgrades like paint and flooring, or should I be looking at structural changes like knocking down walls?

    Look, if you want a quick win, paint and flooring are your best friends—they’re low risk and high impact. But if you’re serious about manufacturing real equity, you have to be willing to pick up a sledgehammer. Knocking down a non-load-bearing wall to create an open floor plan changes the entire DNA of a house. Cosmetic fixes polish a property, but structural changes redefine its value. Aim for the bones.

    How do I calculate whether the cost of a specific renovation will actually result in a high enough increase in the property's appraisal value?

    You can’t just guess based on a feeling; you need to run the numbers against local comps. Look for recently sold properties within a half-mile radius that feature the exact upgrades you’re planning. If a kitchen remodel costs you $40k, but the highest-priced neighbor with a similar kitchen only fetched a $25k premium, you’re burning cash. Always aim for a 2:1 ratio—for every dollar you sink into the renovation, you want at least two dollars in added appraisal value.

  • Common Financing Options for Real Estate

    Common Financing Options for Real Estate

    I remember standing in the middle of a gutted Victorian in East London, dust coating my boots and a damp smell clinging to my hair, staring at a pile of debris that was supposed to be my first big win. I had the vision, I had the floor plans, and I had the grit—but I didn’t have the liquid cash to bridge the gap between the purchase and the renovation. That’s when the crushing reality of real estate financing options hit me: most of the advice out there is either designed for institutional whales or is just plain nonsense meant to scare you off. You don’t need a massive inheritance to play this game, but you do need to know which levers to pull when the bank tells you “no.”

    I’m not here to sell you on some overnight wealth fantasy or drown you in banking jargon. My goal is to give you the straightforward, battle-tested truth about how to actually fund your projects. We’re going to strip away the fluff and look at the real ways to leverage capital, from hard money to private lending, so you can stop staring at crumbling walls and start building solid equity.

    Table of Contents

    Mastering Real Estate Investment Funding Strategies

    Mastering Real Estate Investment Funding Strategies guide.

    When you’re standing in a dusty, gutted living room, staring at a floor plan that’s more dream than reality, the math is what keeps you grounded. You can’t just wing it; you need a solid grasp of various real estate investment funding strategies before you even sign a contract. I’ve learned the hard way that your strategy has to match the specific project on hand. If you’re looking at a single-family fixer-upper, you’re likely navigating the world of residential loans, but once you scale up to multi-unit buildings or strip malls, the rules shift entirely toward commercial vs residential financing. Knowing which lane you’re in determines your leverage and your risk.

    One of the most critical metrics I track is the loan-to-value ratio explained through the lens of my actual renovation budget. Lenders aren’t just looking at what the house is worth today; they’re looking at what it’ll be worth once I’ve replaced that rotting subfloor and installed the mid-century lighting I found at a thrift shop. If your ratio is too tight, you’ll run out of cash mid-rehab, and running out of liquidity is the fastest way to turn a profitable flip into a total nightmare.

    Navigating Debt Financing for Property Acquisition strategies.

    When you’re looking at debt financing for property acquisition, you have to stop thinking like a homeowner and start thinking like an investor. Most people walk into a bank and ask for a standard loan, but if you’re hunting for a fixer-upper, that approach will leave you stranded. You need to understand the nuances of commercial vs residential financing before you even step foot in a branch. Residential loans are great if you’re living in the property, but the second you decide to flip it or rent it out, the rules change. I’ve seen too many rookies get blindsided by terms they didn’t realize were tied to the property’s intended use.

    One of the most critical numbers you’ll encounter is the loan-to-value ratio explained in simple terms: it’s essentially how much the bank is willing to lend against the property’s appraised value. If you’re eyeing a distressed property with a low purchase price but high renovation costs, a high LTV might be your best friend, but it comes with higher risks. Don’t just settle for the first offer you get; I always insist on a thorough mortgage interest rates comparison to ensure my margins stay healthy enough to cover those inevitable mid-renovation surprises.

    My Rules of Thumb for Not Going Broke While Funding a Flip

    • Don’t mistake a low interest rate for a good deal; if the terms don’t account for the messy, unpredictable reality of a renovation, that “cheap” loan will bleed you dry before you even hit the framing stage.
    • Always keep a “chaos buffer” in your financing plan—I never start a project without enough liquidity to cover at least 15% more in costs than my initial estimate, because something always breaks behind a wall.
    • Leverage your equity instead of just your credit; if you’ve already built up value in a primary residence, using a HELOC can often be a much faster, more flexible way to fund a down payment than chasing a traditional bank loan.
    • Get crystal clear on the exit strategy before you sign a single piece of paper, because a hard money lender doesn’t care about your “vision” for a mid-century modern kitchen—they only care about how you’re paying them back.
    • Stop trying to fund every single project with your own cash; the goal is to use other people’s money (OPM) strategically so you can scale your portfolio instead of sitting on a pile of stagnant capital.

    The Bottom Line on Funding Your Vision

    Don’t let a lack of liquid cash stop you; the right mix of debt and equity is what actually builds a portfolio.

    Always prioritize funding that aligns with your specific renovation timeline so you aren’t bleeding interest while waiting for a contractor to finish.

    Focus on the math of the equity gain, not just the monthly payment, to ensure your financing strategy actually builds long-term wealth.

    The Real Cost of Playing it Safe

    “Don’t let a lack of liquid cash paralyze you. In this game, your ability to leverage the right financing is just as important as your ability to spot a solid floor plan; it’s the difference between staring at a crumbling house and actually owning the equity inside it.”

    Gareth Trelawny

    Turning Strategy Into Equity

    Turning Strategy Into Equity through smart financing.

    At the end of the day, there isn’t a one-size-fits-all solution when it comes to funding your next project. Whether you’re leveraging traditional debt to secure a steady rental or tapping into private money to move fast on a high-stakes flip, the goal remains the same: matching the right capital to the right renovation plan. You’ve looked at the numbers, weighed the risks of different loan structures, and hopefully, you now see that financing isn’t just a hurdle to clear—it is a strategic tool that determines how much skin you have in the game and how much profit you actually walk away with once the dust settles.

    Don’t let the fear of a complex loan application or a messy construction timeline keep you on the sidelines. Real estate investing is rarely a clean, linear process, and the most successful investors I know aren’t the ones with the most money upfront; they are the ones who know how to leverage what they have to build something bigger. Stop waiting for the “perfect” financial moment to arrive. Grab your measuring tape, find a property with bones worth saving, and start turning those crumbling walls into solid equity today.

    Frequently Asked Questions

    How much of my own cash should I actually keep in reserve versus putting it all into the renovation budget?

    Look, I’ve seen too many investors go bust because they treated their renovation budget like a math problem instead of a living, breathing entity. Never, ever dump every cent into the project. I always aim to keep at least 15-20% of my total capital in a liquid reserve. Renovations are messy; you’ll hit unexpected mold, outdated wiring, or structural surprises that weren’t on the blueprint. That cash buffer is your lifeline between a profitable flip and a total disaster.

    Are hard money loans really worth the high interest rates if I'm planning a quick turnaround?

    Look, I get the hesitation. Those interest rates can feel like a gut punch when you’re looking at your margins. But here’s the reality: hard money isn’t a long-term mortgage; it’s a tool for speed. If a quick loan lets you snatch up a distressed property before a cash buyer swoops in, the equity gain usually dwarfs the interest cost. Just ensure your exit strategy is airtight and your renovation timeline is aggressive. Speed is your leverage.

    How do I know if a property's potential equity is high enough to justify taking on more debt?

    Look, I’ve been there—staring at a gutted kitchen wondering if the math actually works. Don’t guess. You need to run a strict After Repair Value (ARV) projection against your all-in costs. I always look for a healthy margin; if the projected equity doesn’t cover your debt service, renovation surprises, and a decent profit buffer, walk away. If the numbers are tight, the risk isn’t worth the headache. Trust the math, not the “vibe.”

  • Preparing Walls for Professional Painting

    Preparing Walls for Professional Painting

    I was standing in the middle of a gutted colonial in South Philly, covered in a fine layer of white dust and nursing a bruised ego, staring at a corner that refused to look anything but amateur. Most people think drywall installation is just about screwing boards to studs and hoping for the best, but they’re dead wrong. If you treat it like a mindless chore rather than a precision skill, you’re essentially painting a target on your future resale value with every uneven seam and visible patch. I learned the hard way that a botched job here doesn’t just look bad—it eats your profit margins alive when you’re trying to flip a property.

    I’m not here to give you some polished, theoretical lecture that works in a showroom but fails on a real job site. Instead, I’m going to walk you through the gritty, practical reality of a professional-grade drywall installation that actually holds up under scrutiny. We’re going to cover everything from the initial hanging to the secret of getting those compound joints perfectly seamless. By the time we’re done, you’ll have the confidence to turn those ugly, crumbling walls into the smooth, high-end surfaces that drive equity.

    Table of Contents

    Guide Overview

    Total Time: 1-3 days
    Estimated Cost: $200-500
    Difficulty: Intermediate

    Tools & Supplies

    • Drywall saw for cutting outlets and holes
    • T-square for straight edge cutting
    • Joint knife set for applying compound
    • Sanding sponge for smoothing joints
    • Drill/Driver for hanging screws
    • Drywall sheets (size depends on room area)
    • Drywall screws (1-1/4 inch)
    • Joint compound (all-purpose)
    • Drywall tape (paper or mesh)
    • Corner bead for external edges

    Step-by-Step Instructions

    • 1. Before you even touch a sheet of drywall, you need to prep the skeleton. Check every single stud to ensure they are plumb and level; if your framing is wonky, your walls will look like a nightmare once you hit the paint stage. I always carry my laser measurer to double-check these dimensions because there is nothing more expensive than realizing you’re short on material halfway through a job.
    • 2. Next, measure and cut your sheets. I prefer using a utility knife and a straight edge for a clean score, but if you’re dealing with a massive renovation, a drywall saw is your best friend for those tricky cutouts around electrical boxes. Make sure you leave a tiny bit of breathing room around the edges—precision at this stage saves you hours of headache during the taping process.
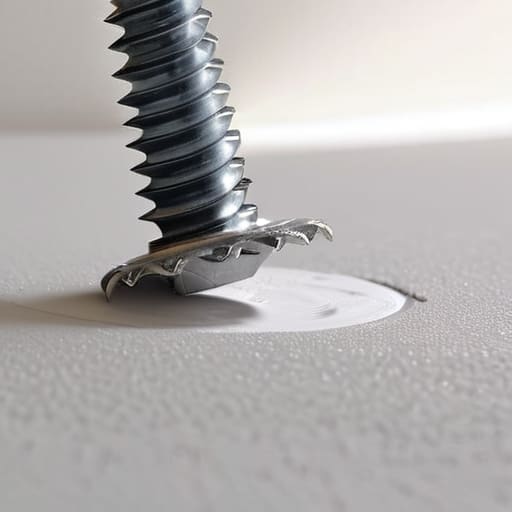
    • 3. Now, it’s time to hang the boards. Start from the ceiling and work your way down, or start with the corners of the room to establish your perimeter. Use drywall screws, not nails, and make sure you drive them just deep enough to create a tiny dimple without tearing the paper. If you break the paper surface, you’ve compromised the strength of the sheet, and you’ll have to patch it later.
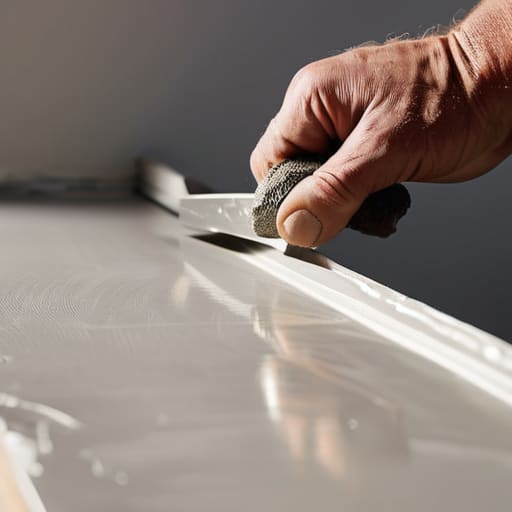
    • 4. Once the boards are up, grab your joint compound and your taping knife. This is where the magic—and the mess—actually happens. Apply a thin layer of mud over the seams and press your paper tape into it, smoothing out any air bubbles. You want to be methodical and patient here; rushing the first coat is the fastest way to end up with visible ridges that scream “amateur renovation.
    • 5. After that first coat dries, you’re going to need to feather out the edges. This means applying wider and wider layers of compound as you move away from the seam to create a smooth transition between the joint and the rest of the wall. I always say that wide, thin coats are infinitely better than thick, heavy ones that take forever to sand down.
    • 6. The final stretch is the sanding, and trust me, you’ll want to wear a mask. Use a fine-grit sanding sponge to smooth out everything until the transitions are virtually invisible to the touch. Once you’re happy with the smoothness, wipe the walls down with a damp cloth to remove the dust. If you get the finish right now, your paint job will look like a million bucks instead of a cheap flip.

    Mastering Drywall Hanging Techniques for a Flawless Foundation

    Mastering Drywall Hanging Techniques for a Flawless Foundation

    Here is the secret most rookies miss: the magic isn’t just in the hanging, it’s in the prep. When I’m walking onto a job site, I’m looking at how the sheets meet the studs. If your drywall screw installation is sloppy—meaning you’ve either driven them too deep and popped the paper or left them sitting proud—you are essentially setting yourself up for a nightmare during the finishing stage. You want those screws to sit just a hair below the surface. It’s about creating a perfectly level plane before you even touch a bucket of mud.

    Once the boards are up, don’t rush the transition to the taping and mudding process. I’ve seen too many investors try to save time by slapping on thick layers of compound to hide gaps, but that’s a rookie mistake that leads to massive cracks once the house settles. Instead, focus on thin, consistent passes. If you want that high-end, designer look that commands a premium resale price, you have to invest the time in meticulous layering. A flawless foundation is the only way to ensure your final coat looks like a solid wall rather than a patchwork quilt.

    The Taping and Mudding Process Building Your Equity Layer by Layer

    The Taping and Mudding Process Building Your Equity Layer by Layer

    This is where the real magic—and the real frustration—happens. You can have the most perfect drywall hanging techniques in the world, but if you rush the taping and mudding process, you’re essentially painting a masterpiece over a cracked foundation. I’ve seen too many rookies try to hide imperfections with thick layers of mud, only to realize later that they’ve just created a wavy, uneven mess that screams “amateur.” The secret is patience. You need to apply your drywall joint compound in thin, manageable layers, letting each one dry completely before you even think about the next pass.

    Think of this stage as building your equity layer by layer. If you want that high-end, seamless look that commands a premium resale price, you cannot skip the discipline of proper drying times. Once you’ve built up the levels, the final stretch is all about the drywall sanding for smooth finish. Don’t get aggressive with the sander; you want to be light and precise. A little extra elbow grease here ensures that when the light hits those walls in the new house, there isn’t a single shadow revealing your hard work.

    Pro Moves to Save Your Sanity (and Your Margin)

    • Don’t skimp on the joint compound; using a cheap, fast-drying mud might save you twenty minutes today, but it’ll cost you hours of sanding and frustration when you realize the finish is uneven.
    • Invest in a high-quality sanding pole rather than trying to hand-sand everything; if you want those walls to look seamless under high-end lighting, you need a consistent, professional grit.
    • Always check your studs with a high-quality stud finder before you even think about hanging a sheet; there is nothing more soul-crushing than realizing your layout is off by half an inch mid-install.
    • Keep your workspace obsessively clean between coats; even a tiny bit of dried mud grit falling into your wet layer will create bumps that show up like a sore thumb once you start painting.
    • Master the “light test” by holding a work light parallel to the wall; it’s the only way to catch those tiny imperfections and dips before they become expensive mistakes in your final finish.

    The Bottom Line: Turning Drywall into Dollars

    Don’t rush the drying process; I’ve seen too many rookies try to sand down wet mud just to save a day, only to end up with wavy walls that kill your resale value.

    Invest in quality tape and joint compound because cutting corners on your foundation is the fastest way to turn a high-margin flip into a money pit of endless repairs.

    Treat every seam and screw head like it’s a potential red flag for a home inspector—smooth, seamless drywall is the invisible work that proves you know how to build real equity.

    ## The Hidden Value in the Walls

    “New investors often obsess over the high-end finishes, but I’ll tell you a secret: your profit margins are actually won or lost in the prep work. If your drywall isn’t hung straight and your mudding isn’t seamless, no amount of expensive paint is going to hide a lack of discipline, and that’s exactly where you lose your equity.”

    Gareth Trelawny

    Turning Dust and Mud into Real Value

    Turning Dust and Mud into Real Value

    At the end of the day, a successful drywall job isn’t just about making a room look pretty; it’s about the discipline of the process. We’ve covered everything from the precision required in the initial hanging to the tedious, repetitive nature of taping and mudding. If you’ve cut corners on your measurements or rushed the drying time between coats, it’s going to show the second the sunlight hits those walls. Remember, the goal is a seamless, professional finish that doesn’t scream “DIY project.” When you master these fundamentals, you aren’t just fixing a wall; you are ensuring that your renovation stands the test of time and scrutiny.

    I know there were moments during this process where you probably wanted to throw your mud pan across the room and walk away. Trust me, I’ve been there more times than I can count. But that’s where the real profit is made. While other investors are running away from the mess and the dust, you are leaning in and doing the work. Every smooth surface you create is a step closer to building tangible equity and a portfolio you can be proud of. Don’t let the grit get to you—keep sanding, keep refining, and keep building that wealth, one layer at a time.

    Frequently Asked Questions

    How do I know if I can actually patch these old plaster walls, or am I better off ripping everything out to start fresh with modern drywall?

    Look, I’ve been there—staring at a wall, wondering if I’m saving money or just wasting time. Here’s my rule of thumb: if the plaster is just hairline cracked or has minor impact damage, patch it. It’s faster and keeps your margins high. But if you see crumbling, moisture damage, or the lath is rotting behind it? Rip it out. Don’t chase a sinking ship; sometimes a clean slate is the only way to guarantee a professional finish.

    What’s the best way to handle those inevitable cracks that pop up after the first coat of mud dries?

    Look, I’ve been there—standing in a half-finished living room, staring at a hairline crack that wasn’t there an hour ago. Don’t panic; it’s part of the process. First, scrape out the loose debris so you aren’t just burying the problem. If it’s a structural movement issue, you might need mesh tape. Otherwise, just apply a thin skim coat of setting-type compound. Patience is your best tool here; multiple thin layers beat one thick, cracking mess every time.

    Is it worth investing in high-end joint compound for a flip, or can I get away with the cheaper stuff and just sand it more aggressively?

    Look, I get the temptation to cut corners to protect your margins, but don’t make that mistake. In a flip, your finish is everything. Cheap compound is often sandier and harder to feather, meaning you’ll spend twice as much on labor and sandpaper trying to hide the flaws. Save your time and your sanity—invest in the decent stuff. A smoother application means less sanding, fewer callbacks, and a much faster path to closing.

  • Process for Replacing an Old Bathtub

    Process for Replacing an Old Bathtub

    I was standing in a cramped, dimly lit bathroom in a 1970s bungalow last Tuesday, staring at a stained, avocado-green relic that looked like it belonged in a museum of bad decisions. Most people see a cracked, dated tub and think, “Ugh, that’s a massive, expensive headache I should just ignore.” But in my world, that eyesore is actually a golden opportunity. A strategic bathtub replacement isn’t just about fixing a leak or updating a color palette; it’s one of the fastest ways to wipe out that “old house” smell and inject immediate, tangible value into a property.

    I’m not here to give you some polished, theoretical lecture on plumbing. I want to show you how to actually get your hands dirty without draining your entire renovation budget. In this guide, I’m breaking down the real-world logistics of a bathtub replacement, from choosing materials that actually hold their value to the messy reality of demolition. I’ll teach you how to spot the red flags before you tear out the tile and how to execute a swap that makes your next inspection—and your bank account—very happy.

    Table of Contents

    Guide Overview

    Total Time: 1-2 days
    Estimated Cost: $300-$1,000
    Difficulty: Advanced

    Tools & Supplies

    • Reciprocating saw for cutting old tub or pipes
    • Adjustable wrench for disconnecting plumbing
    • Crowbar for removing wall tiles or surround
    • Caulk gun for sealing edges
    • New bathtub (1 unit)
    • Drain assembly and overflow kit (1 set)
    • Silicone sealant (1-2 tubes)
    • Plumber's putty (1 container)
    • Plumbing tape (1 roll)

    Step-by-Step Instructions

    • 1. First, you need to clear the deck. Shut off the water supply to the entire house or at least the specific line feeding the bathroom—don’t be the person who ends up with a flooded floor because you skipped this. Once the water is off, use a crowbar and a hammer to strip away the old surround. I’m talking about ripping out the old tiles, the drywall, and the old tub itself. You want to get down to the studs and the subfloor so you can see exactly what kind of damage or rot you’re actually dealing with before you spend a dime on new materials.
    • 2. Inspect the “guts” of the bathroom while everything is exposed. This is where most amateur flippers fail; they slap a new tub in without checking if the old drain or the copper piping is corroded. Check the floor for any soft spots that suggest water damage, and if you find them, replace that subfloor immediately. It’s much cheaper to fix a structural issue now than to have your brand-new, expensive tub sag or leak in six months.
    • 3. Prep the plumbing and the new drain assembly. Once you’re sure the pipes are solid, position your new tub (or at least the rough-in) to ensure the drain lines align perfectly. I always keep my laser measurer handy here because if that drain is even half an inch off, you’re going to have a nightmare during installation. Secure the tub according to the manufacturer’s specs, usually involving a mortar bed underneath to prevent that annoying “flexing” sound when someone steps into the bath.
    • 4. Install the new surround or tiling. If you’re going for a high-end look to boost your resale value, this is the time to lay down your tile. Make sure you use a high-quality waterproof membrane—don’t cut corners on waterproofing. I’ve seen too many “pretty” renovations ruined by mold because someone thought they could skip the proper sealing layers. Once the tile is set, get your grout ready and ensure your lines are straight and clean.
    • 5. Mount the hardware and the trim kit. Now that the heavy lifting is done, it’s time for the “jewelry.” Install your new faucet, the tub spout, and the showerhead. This is where you can really lean into that minimalist industrial chic look I love. Tighten everything down, but be careful not to over-torque the fixtures; you want them secure, not stripped.
    • 6. The final test and cleanup. Before you call it a day, turn the water back on and run the tub for a good ten minutes. Watch the drain, check the base of the tub, and inspect the seams of your new tile for any signs of weeping. Once you’ve confirmed there are zero leaks, clean up the debris and wipe down the fixtures. A clean, functional bathroom is a massive value-add that makes your property stand out the second a buyer walks in.

    Removing Old Bathtub Safely Without Destroying Your Progress

    Removing Old Bathtub Safely Without Destroying Your Progress

    This is where most DIYers lose their nerve, and honestly, I don’t blame them. If you’re replacing old cast iron tubs, you aren’t just dealing with a fixture; you’re dealing with a literal ton of heavy metal. Do not try to manhandle this alone. I’ve seen too many rookies try to muscle a heavy unit out of an alcove, only to end up cracking the surrounding tile or, worse, injuring themselves. My rule of thumb? Use a reciprocating saw to cut the tub into manageable sections. It’s loud, it’s messy, and it feels a bit sacrilegious, but it is the only way to ensure you aren’t destroying your progress before the new unit even arrives.

    Once the tub is out, your focus needs to shift immediately to what lies beneath. This is the moment where you check for rot or mold in the subfloor. Before you even think about the next phase of your alcove bathtub installation steps, make sure you are waterproofing bathroom surfaces thoroughly. If the floor feels soft or looks suspicious, fix it now. It’s much cheaper to replace a piece of plywood today than to deal with a structural failure six months down the line.

    Replacing Old Cast Iron Tubs for Maximum Return

    Replacing Old Cast Iron Tubs for Maximum Return

    If you’re looking at a heavy, decades-old cast iron unit, don’t let the sheer weight intimidate you. While these beasts are built to last, they are often the biggest culprits behind outdated, “grandma-style” bathrooms that kill your resale value. When I’m replacing old cast iron tubs in one of my flips, I’m not just looking for a cosmetic upgrade; I’m looking for a way to modernize the entire footprint. These old units are often set into uneven subfloors, so once you get the old one out, pay close attention to bathtub leveling and support. If your new tub isn’t perfectly stable, you’re just inviting leaks and cracks down the road, which is a nightmare for your margins.

    Once the heavy lifting is done, focus on the invisible stuff that actually protects your investment. I never skip the step of waterproofing bathroom surfaces before the new unit goes in. It’s a small upfront cost in time and materials, but it prevents the kind of mold issues that turn a profitable flip into a total loss. Getting the foundation right ensures that your “quick fix” actually holds up under scrutiny during a home inspection.

    Pro Tips to Protect Your Profit Margin

    • Don’t skimp on the valve. While it’s tempting to just swap the tub and call it a day, if you’re opening up the walls, replace that old, crusty mixing valve now. It’s a cheap fix today that prevents a massive, equity-draining leak next year.
    • Check your subfloor before the new tub hits the floor. Once that old unit is out, you’re staring at the bones of the house. If the wood is soft or rotting from a slow leak, fix it immediately. Installing a heavy new tub on a compromised floor is a recipe for a disaster that will eat your entire profit.
    • Go for a timeless aesthetic over “trendy” tile. I see too many flippers go overboard with crazy patterns that date the house in six months. Stick to classic subway tile or large-format neutrals; they look expensive, they’re easy to clean, and they appeal to the widest pool of buyers.
    • Measure twice, buy once—and then measure a third time. I keep my laser measurer in my bag for a reason. There is nothing more soul-crushing than getting a beautiful new alcove tub delivered only to realize your framing is off by half an inch.
    • Invest in a high-quality drain assembly. It’s the one part of the renovation no one sees, but it’s the one that fails most often. A solid, reliable drain kit ensures your “freshly renovated” bathroom doesn’t become a nightmare of standing water and foul smells for your new owners.

    The Bottom Line on Tub Replacements

    Don’t get paralyzed by a heavy cast iron tub; once you’ve mastered the demolition, it’s just a quick way to swap a dated liability for a high-value asset.

    Always prioritize quality over the absolute cheapest option—investing in a solid, modern unit pays for itself the moment you see the appraisal bump.

    Protect your margins by doing the dirty work yourself or supervising closely, ensuring you aren’t paying a premium for mistakes that eat into your equity.

    ## The Equity in the Tub

    “A lot of rookie investors walk away from a house because they see a dated, stained bathtub and think ‘headache.’ I see it differently. A bathtub replacement isn’t just a plumbing job; it’s one of the fastest, most surgical ways to strip away that ‘old house’ smell and replace it with high-end perceived value.”

    Gareth Trelawny

    The Bottom Line on the Tub Flip

    The Bottom Line on the Tub Flip.

    At the end of the day, replacing a bathtub isn’t just about swapping out old porcelain for something shiny; it’s about precision and protecting your investment. We’ve covered the heavy lifting—from the guts of the demolition process to the strategic decision of whether you’re dealing with heavy cast iron or a lighter acrylic unit. Remember, the goal isn’t just to make it look pretty for the listing photos, but to ensure that the plumbing and structural integrity are rock solid underneath. If you skip the prep work or rush the waterproofing, you aren’t building equity—you’re just building a future leak that will eat your profits alive.

    I know that looking at a gutted bathroom can feel overwhelming when you’re standing there in the dust, but don’t let the mess intimidate you. Every crumbling tile and outdated fixture is just an opportunity to manufacture value where others only see a headache. Real estate investing is a game of grit, and mastering these mid-level renovations is exactly how you bridge the gap between a hobbyist and a professional. Take the measurements, do the work, and go turn those old, dated bathrooms into the high-margin assets your portfolio deserves.

    Frequently Asked Questions

    How do I know if my subfloor is actually rotted underneath the old tub before I commit to a new one?

    Before you drop a dime on a new tub, you have to check the foundation. Once the old unit is out, grab a screwdriver and poke the wood around the perimeter and the drain area. If the wood feels soft, spongy, or gives way easily, you’ve got rot. Don’t ignore it—if you tile over a compromised subfloor, that beautiful new investment will crack within months. Better to fix the rot now than pay for it twice later.

    Is it worth it to go with a high-end alcove tub, or should I stick to a standard acrylic model to keep my margins high?

    Look, if you’re flipping for a quick exit, stick to a solid, standard acrylic model. It’s cost-effective, easy to install, and most buyers won’t blink at it. However, if you’re targeting a premium rental or a high-end resale, a high-end alcove tub can be the “wow” factor that justifies a higher asking price. My rule of thumb? Don’t over-improve for the neighborhood, but never sacrifice quality just to save a few bucks on margins.

    How much should I realistically budget for plumbing surprises once the old unit is out of the way?

    Look, if you’re banking on a perfect outcome, you’re already losing money. Once that old tub is out, you’re likely to find corroded valves or outdated piping that wasn’t visible before. I always tell my clients to set aside an extra $500 to $1,000 specifically for “plumbing contingencies.” It sounds painful now, but it’s much better than having your entire renovation budget stall because a single rusted pipe decided to give up the ghost.

  • Managing Property Investment Risks

    Managing Property Investment Risks

    I still remember the smell of damp rot and old sawdust hitting me the moment I stepped into my first “fixer-upper” on Oak Street. I had my laser measurer in hand, feeling invincible, only to realize three days later that the subfloor was a complete disaster. Most gurus will tell you that real estate is a passive path to wealth, but they conveniently leave out the gritty reality of property investment risks that can turn a dream renovation into a financial sinkhole. I learned the hard way that if you aren’t looking for the structural nightmares hiding behind a fresh coat of paint, you aren’t just investing—you’re gambling.

    I’m not here to sell you a fantasy or a polished slideshow of marble countertops. My goal is to pull back the curtain on the messy, unglamorous side of this business so you can build your portfolio on a foundation that actually holds. I’m going to walk you through how to identify the red flags that most amateurs miss, from hidden foundation issues to predatory market shifts. This is about smart, strategic equity, and I promise to give you the straight talk you need to protect your capital before you ever swing a hammer.

    Table of Contents

    Dodging Interest Rate Fluctuations and Market Cycles

    Dodging Interest Rate Fluctuations and Market Cycles.

    Look, I’ve seen enough market shifts to know that the economy doesn’t care about your renovation timeline. One week you’re celebrating a closed deal, and the next, interest rate fluctuations are eating your projected margins alive. When rates climb, your borrowing power shrinks, and suddenly that “dream fixer-upper” is costing you way more in monthly debt service than you initially modeled. I always tell my clients: never bank on a static interest rate. You have to build a buffer into your math so a sudden spike doesn’t turn your equity project into a cash-flow nightmare.

    You also can’t ignore the broader real estate market cycles. I’ve been through the booms and the inevitable cooling periods. During a downturn, it’s not just about finding a deal; it’s about realizing that exit strategies might take longer than planned. You might find yourself holding a property through a slump, waiting for the right buyer to emerge. It’s not about panic; it’s about having the liquidity to weather the storm without being forced to sell at a loss just because the market hit a temporary dip.

    Watching Out for Capital Depreciation Risks

    Watching Out for Capital Depreciation Risks.

    One thing I’ve learned from years of pulling permits and managing crews is that a building is a living, breathing thing—and it’s constantly trying to lose value. You can’t just walk away once the paint is dry. Capital depreciation risks are the silent killers of your ROI. If you aren’t proactive about maintenance, that “charming” mid-century layout you fell in love with will quickly turn into a money pit of deferred upkeep. I’ve seen investors get blindsided when a neglected roof or a failing HVAC system wipes out an entire year’s worth of equity in a single season.

    It’s not just about the physical structure, either; it’s about the rate of decay versus your renovation budget. If you’re cutting corners on high-quality materials just to save a few bucks upfront, you’re essentially setting a timer on your profit margins. You have to treat every renovation as a defensive play against the inevitable wear and tear of time. If you aren’t budgeting for long-term structural integrity, you aren’t building wealth—you’re just managing a slow decline.

    Don't Get Blindsided: 5 Ways to Protect Your Equity

    • Get comfortable with a “worst-case” contingency fund. I never start a rehab without a 15-20% buffer on top of my material costs; if you don’t account for the inevitable plumbing disaster or the termite damage hiding behind that mid-century wallpaper, you’re not investing, you’re gambling.
    • Learn to read the bones, not just the paint. A fresh coat of Benjamin Moore white can hide a lot of sins, but it won’t fix a structural issue or a failing foundation. Always bring a professional inspector in before you sign the dotted line—don’t let your ego get in the way of a bad deal.
    • Stop chasing “aesthetic” and start chasing numbers. It’s easy to get swept up in the vision of a gorgeous open-concept kitchen, but if those high-end finishes don’t align with the neighborhood’s ceiling price, you’re just burning your profit margin for the sake of your portfolio’s Instagram feed.
    • Vet your contractors like your bank account depends on it—because it does. I’ve seen too many rookie investors lose their shirts because they hired the cheapest guy in town. A low bid usually means they’ll cut corners or disappear halfway through the tiling, leaving you with a half-finished mess and a massive headache.
    • Understand your exit strategy before you even pick up the hammer. Are you flipping this for a quick profit, or are you holding it as a long-term rental? If you don’t know exactly how you’re getting your money out, you’re likely to get stuck with a property that’s more of a liability than an asset.

    The Bottom Line: Don't Let the Risks Blind You to the Potential

    Stop obsessing over market volatility and start focusing on the numbers; if your margins can survive a rate hike, you’ve got a winner.

    Never ignore the physical reality of a property—a cheap purchase price is a trap if you haven’t factored in the long-term cost of structural decay.

    Build a buffer into every single renovation budget to account for the “unknown unknowns” that inevitably pop up once you tear down that first wall.

    The Real Cost of Ignoring the Red Flags

    “A beautiful kitchen backsplash won’t save your margins if you ignored a crumbling foundation or a shifting market. In this game, you aren’t just investing in square footage; you’re investing in your ability to see the disaster hiding behind the fresh coat of paint.”

    Gareth Trelawny

    Turning Risk into Real Equity

    Turning Risk into Real Equity through strategy.

    At the end of the day, navigating property investment isn’t about finding a “perfect” deal where nothing can go wrong; it’s about knowing exactly where the pitfalls are so they don’t catch you off guard. We’ve talked about everything from the headache of shifting interest rates to the slow drain of capital depreciation. If you aren’t accounting for these variables, you aren’t investing—you’re gambling. You have to look past the fresh coat of paint and the staged living room to see the actual structural and financial realities underneath. By keeping a sharp eye on market cycles and being realistic about your renovation budget, you turn those potential disasters into calculated, manageable risks.

    I know that looking at a list of everything that can go wrong feels heavy, but don’t let it paralyze you. Every seasoned investor I know started with a healthy dose of skepticism and a few scars from their first projects. The goal isn’t to avoid the mess; it’s to develop the grit to work through it. If you do the homework, trust your gut, and keep your eyes on the long-term math, you won’t just survive the renovation process—you’ll thrive in it. Stop waiting for the “perfect” moment and start building your foundation for generational wealth one smart, calculated move at a time.

    Frequently Asked Questions

    How much of a cash buffer should I actually keep on hand to handle those unexpected "hidden" renovation costs?

    Look, if you’re banking on every dollar being accounted for in your initial budget, you’re asking for a disaster. I never step onto a job site without a 15% to 20% contingency fund sitting in a liquid account. Between finding outdated wiring behind a drywall or discovering rot under a subfloor, those “hidden” costs are a guarantee, not a possibility. Treat that buffer as your lifeline, not an optional extra.

    At what point does a property's structural damage stop being a "fixer-upper opportunity" and start being a financial sinkhole?

    It’s the line between a cosmetic headache and a structural nightmare. If you’re looking at a cracked drywall, that’s an opportunity; if you’re looking at a sagging foundation or widespread subsidence, you’re staring at a sinkhole. I always tell my clients: if the cost to stabilize the bones of the house starts eating more than 30% of your projected profit margin, walk away. Don’t let a “project” turn into a money pit that kills your equity.

    How do I distinguish between a temporary market dip and a genuine sign that I've bought into a declining neighborhood?

    Look at the fundamentals, not the headlines. A temporary dip is a market-wide hiccup—think interest rate spikes or seasonal slumps. But a declining neighborhood? That’s systemic. I look for “broken windows” indicators: rising vacancy rates, neglected storefronts, or a sudden exodus of the “anchor” demographics. If the local school ratings are tanking and the neighbors are boarding up windows, walk away. A dip is an opportunity; a decline is a trap.

  • Improving Curb Appeal With Exterior Paint

    Improving Curb Appeal With Exterior Paint

    I still remember standing on a ladder in the pouring rain three years ago, staring at a mid-century ranch that looked like it had been through a war zone. The previous owner had tried to save a few bucks by using some cheap, bargain-bin exterior paint that was already bubbling and peeling off the siding like dead skin. It wasn’t just an eyesore; it was a massive drain on my margins because I was spending more time scraping old flakes than actually building equity. Most people think a fresh coat is just about aesthetics, but if you pick the wrong product, you’re essentially throwing your renovation budget into a black hole.

    I’m not here to sell you on some overpriced, “designer” color palette that looks great on Instagram but fails in the real world. My goal is to show you how to select the right exterior paint that actually protects your investment and survives the elements without breaking the bank. I’m going to give you the no-nonsense breakdown on durability, sheen, and cost-effectiveness so you can stop wasting money on cosmetic fixes that don’t last. Let’s turn that crumbling facade into a high-value asset.

    Table of Contents

    Mastering How to Prep Exterior Surfaces for Lasting Value

    Mastering How to Prep Exterior Surfaces for Lasting Value

    If you skip the prep work, you’re essentially throwing money directly into the gutter. I’ve seen too many novice flippers rush into a weekend project only to watch their margins evaporate when the finish starts bubbling six months later. Learning how to prep exterior surfaces is the difference between a high-end renovation and a cheap DIY disaster. You need to start with a deep clean to remove any biological growth or grit that could compromise adhesion. If you’re dealing with old cedar or pine, finding the best paint for wood siding is useless if you haven’t sanded down the rough patches and addressed any rot first.

    Once the surface is clean and dry, your focus shifts to sealing the envelope. This is where you invest in quality; don’t skimp on primers or high-performance weatherproof paint coatings. I always tell my clients that the prep phase is where the real structural equity is built. If you ignore the cracks or fail to caulk the window perimeters properly, you aren’t just risking an ugly facade—you’re inviting moisture to compromise the very bones of the house.

    Choosing Exterior Paint Color Trends That Command Premium Prices

    When you’re looking at a fixer-upper, you have to stop thinking like a homeowner and start thinking like an investor. You aren’t picking a color because it makes you feel cozy on a Sunday morning; you’re picking a color that makes a buyer reach for their checkbook. Right now, exterior paint color trends are leaning heavily into sophisticated, moody neutrals—think deep charcoals, muted sage, or warm, earthy terracottas. These shades provide a high-end, designer feel that makes a property stand out in a sea of boring beige suburban sprawl.

    However, don’t get so caught up in the aesthetic that you ignore the science. A trendy color is useless if it starts flaking off after one harsh winter. If you’re dealing with older structures, finding the best paint for wood siding is non-negotiable to ensure that your stylistic choices actually hold their value. I always tell my clients: aim for “timeless with a twist.” You want a palette that feels current enough to command a premium, but stable enough that the house doesn’t look dated by the time you’ve closed the sale.

    Stop Guessing and Start Strategizing: 5 Pro Tips for Exterior Paint ROI

    • Don’t skimp on the primer; I’ve seen too many investors try to save a few hundred bucks only to watch their premium topcoat peel off within six months because they ignored the substrate.
    • Check the weather window like your margins depend on it—because they do—and never schedule a paint job if there’s even a hint of humidity or rain in the forecast.
    • Test your color swatches in actual sunlight, not just under your kitchen lights, because a “sophisticated charcoal” can quickly turn into a “depressing abyss” once it hits direct midday sun.
    • Prioritize high-traffic trim and door areas with higher-quality finishes; these are the high-touch points that buyers notice first when they’re walking up your driveway.
    • Always keep a small, labeled jar of your specific mix for touch-ups; nothing kills a professional finish faster than a scuff during the final walkthrough that you can’t perfectly match.

    The Bottom Line on Exterior Paint Strategy

    Never skimp on the prep work; if you don’t scrape and prime correctly, you’re literally throwing your renovation budget into the wind.

    Focus on neutral, high-end palettes that appeal to the widest buyer pool rather than chasing personal color whims that could tank your resale value.

    Treat your exterior paint as a strategic investment in curb appeal, not just a maintenance task, because first impressions dictate your final sale price.

    The ROI of a Fresh Coat

    “Stop looking at exterior paint as just a maintenance cost; in this business, it’s one of the highest-leverage tools you have to transform a neglected property into a high-value asset before the first buyer even steps foot on the porch.”

    Gareth Trelawny

    The Bottom Line on Curb Appeal

    The Bottom Line on Curb Appeal.

    At the end of the day, exterior paint isn’t just about making a house look pretty for the neighbors; it’s a strategic move to protect your investment and maximize your exit price. We’ve covered the heavy lifting—from the non-negotiable prep work that prevents future rot to selecting a color palette that screams high-end sophistication rather than “cheap flip.” If you skip the sanding or rush the prime coat, you aren’t saving money; you’re just inviting a costly maintenance headache that will eat directly into your margins. Treat your exterior finish like the protective skin of your asset, and it will pay dividends in the form of increased equity and buyer interest.

    I know the idea of standing on a ladder or staring at fifty different shades of “off-white” can feel overwhelming, especially when you’re managing a dozen other renovation tasks. But remember, every major transformation starts with these foundational layers. You aren’t just slapping color on a wall; you are signaling to the market that this property is cared for, polished, and ready for its next chapter. Don’t let the mess of the process distract you from the ultimate goal of building wealth. Get the prep right, pick the right tones, and watch how a simple can of paint turns a neglected structure into a high-performing asset.

    Frequently Asked Questions

    How do I decide between a budget-friendly paint brand and a premium one when I'm trying to protect my renovation margins?

    Look, I get the urge to squeeze every cent out of the budget, but don’t cheap out on the actual liquid in the can. If you’re flipping, you want a finish that holds up through a humid summer without fading or peeling. I usually opt for a premium brand for high-exposure areas like siding and trim. It costs more upfront, but it saves you from a costly repaint call-back or a diminished sale price.

    Is it actually worth investing in professional power washing, or can I just DIY the prep work to save some cash?

    Look, I get the urge to DIY everything to protect your margins, but don’t skimp on the prep. If you can rent a decent power washer and spend a full Saturday doing it right, go for it. But if you’re worried about stripping the siding or leaving streaks that ruin your finish, hire a pro. A bad DIY job creates a nightmare for your paint adhesion, and a failed paint job is the fastest way to burn through your ROI.

    How can I tell if my siding needs a full replacement versus just a high-quality repaint to maintain the property's value?

    Look, don’t waste money painting over rot; that’s just burying a corpse. If your siding is warping, cracking, or feels soft to the touch, a repaint won’t save your margins—you need a full replacement to protect the structure. However, if the material is structurally sound but just looks tired or faded, a high-quality paint job is your best friend. It’s the cheapest way to manufacture instant equity without the heavy lifting.

  • How to Replace a Toilet

    How to Replace a Toilet

    I was standing in a cramped, half-gutted bathroom in a fixer-upper I’d just picked up, staring at a cracked porcelain base and a puddle of mystery water, when it hit me: most people think a professional plumber is the only way to save a project’s budget. But here’s the truth—a botched toilet installation is usually just a result of rushing the prep work, not a lack of specialized tools. I’ve spent years learning that the difference between a high-end renovation and a money pit often comes down to these small, unglamorous details that most people try to skip.

    I’m not here to give you a sanitized, theoretical lecture that ignores the reality of a messy job site. Instead, I’m going to walk you through the unfiltered, practical steps of a successful install, from prepping the flange to ensuring a rock-solid seal. My goal is to give you the confidence to handle this task yourself, so you can stop burning cash on service calls and start turning those small repairs into solid equity.

    Table of Contents

    Guide Overview

    Total Time: 1-3 hours
    Estimated Cost: $150-400
    Difficulty: Beginner

    Tools & Supplies

    • Adjustable wrench for tightening bolts
    • Putty knife for scraping old wax
    • Level to ensure proper seating
    • Sponge and bucket for absorbing excess water
    • New toilet unit (bowl and tank)
    • Wax ring with flange bolt kit
    • New braided water supply line
    • Silicone caulk for base sealing
    • Toilet mounting bolts/closet bolts

    Step-by-Step Instructions

    • 1. First, clear the deck. You can’t build equity if you’re tripping over old porcelain. Get your old toilet out, but more importantly, scrub that floor until it’s spotless. I’ve seen too many rookies try to slap a new wax ring over old, dried-up grime, and trust me, that’s a recipe for a leak that’ll tank your renovation budget before you even get started.
    • 2. Inspect the flange. This is the part where most people get nervous, but it’s actually the most critical step. Check if the flange is cracked or sitting too low. If it’s broken, you’ll need a repair ring, because trying to force a fit with a damaged flange is just asking for a disaster down the road.
    • 3. Prep the new wax ring. Don’t just toss it on there; be intentional. I usually prefer the ones with a plastic flange to help with alignment, but regardless of which you choose, make sure it’s centered perfectly over the flange. You want a tight, airtight seal that’s going to hold up against years of heavy use.
    • 4. Set the bowl. This is the part that requires a bit of muscle and a lot of finesse. Lift your new toilet bowl and lower it straight down onto the flange, making sure it seats right onto that wax ring. Give it a gentle, even downward pressure to compress the wax—don’t rock it side-to-side or you’ll break that seal you just worked so hard to create.
    • 5. Secure the bolts. Take your closet bolts and slide them through the base, then tighten the nuts. Here’s my golden rule: do not overtighten. I’ve seen plenty of beautiful, high-end toilets crack because someone thought “tight” meant “impossible to move.” Tighten them just enough so the toilet doesn’t wiggle when you nudge it.
    • 6. Hook up the water line. Connect your supply line to the fill valve, but before you call it a day, check your work. Turn the water on slowly and watch for any drips around the base or the supply connection. A quick test with a dry paper towel is the best way to ensure you aren’t leaving a hidden leak behind your new, renovated walls.

    Replacing a Toilet Step by Step for Maximum Roi

    Replacing a Toilet Step by Step for Maximum Roi

    When you’re flipping a property, every dollar spent needs to work twice as hard. I don’t just swap out an old porcelain unit for a shiny new one; I look at it as a way to signal quality to potential buyers. To ensure you aren’t calling a plumber back two weeks after closing, you need a solid new toilet installation checklist. Start by inspecting the flange; if it’s cracked or sitting too low, no amount of caulking will save you. I always make sure the floor is perfectly clean and dry before I even think about setting the new base down.

    The real secret to a professional finish—and avoiding those nightmare callbacks—is all in the toilet seal leak prevention. Don’t skimp on a high-quality wax ring or, better yet, a modern rubber gasket. Once the unit is seated, pay close attention to how to level a toilet by using plastic shims if your subfloor is even slightly uneven. A level toilet prevents stress on the supply line and ensures the tank lid sits flush, giving that high-end, intentional look that buyers crave.

    Preventing Toilet Base Leaks and Avoiding Costly Damage

    Preventing Toilet Base Leaks and Avoiding Costly Damage

    Listen, I’ve seen more subfloor rot in my career than I care to admit, and 90% of it comes down to a single, lazy mistake: skimping on the wax ring. If you’re rushing through replacing a toilet step by step, you might be tempted to just slap the new unit down and call it a day. Don’t do that. A faulty seal is a ticking time bomb that will eventually turn your beautiful new bathroom floor into a soggy, expensive mess. For true toilet seal leak prevention, make sure your flange is sitting flush and isn’t cracked or broken before you even think about setting the bowl.

    Once the toilet is positioned, pay close attention to how to level a toilet using plastic shims if your floor isn’t perfectly flat. If the base rocks even a fraction of an inch, it puts uneven pressure on the seal, which is a recipe for a slow, silent leak that eats your profit margins. I always tell my clients: never rely on tightening the floor bolts to fix a wobble. Tightening those bolts too hard can actually crack the porcelain or compromise the seal you just worked so hard to install.

    Pro-Tips for a Flawless Install (And Avoiding the Call-Backs)

    • Don’t skimp on the wax ring; I’ve seen too many “budget” flips ruined by a cheap seal that failed three months after closing. Invest in a high-quality, heavy-duty wax ring or a modern rubber gasket to ensure that seal is airtight and permanent.
    • Check your floor level before you even unbox the new porcelain. If your subfloor is uneven—which happens more often than you’d think in older fixer-uppers—you’ll need to shim the base to prevent the toilet from rocking, which eventually breaks the seal and causes leaks.
    • Clean that flange like your ROI depends on it. If there’s old wax or debris stuck to the flange, your new seal won’t seat properly, and you’ll be back to square one with a messy, expensive mistake.
    • Tighten those closet bolts with a light touch. It’s tempting to crank them down to feel secure, but over-tightening is the fastest way to crack the porcelain base, and once that happens, you aren’t just replacing a toilet—you’re replacing a whole unit.
    • Always test the new install with a “flood test” before you call it a day. Flush it ten times in a row and watch the base closely for any sign of moisture; I’d much rather catch a tiny weep now than deal with a rotted subfloor during a walkthrough later.

    The Bottom Line: Turning a Simple Swap into Real Value

    Don’t cut corners on the wax ring or the flange; a cheap mistake here can lead to subfloor rot that will absolutely tank your renovation budget.

    View every bathroom upgrade as a strategic move toward equity, focusing on clean installs and modern fixtures that appeal to the widest pool of buyers.

    Master the fundamentals of the DIY install to keep your overhead low, because every dollar you save on labor is a dollar that goes straight into your profit margin.

    The Hidden Margin in the Small Stuff

    “A lot of people overlook the bathroom, thinking it’s just plumbing and porcelain, but a clean, professional toilet install is one of the cheapest ways to erase that ‘neglected’ feeling and instantly boost a property’s perceived value.”

    Gareth Trelawny

    Turning Small Fixes into Big Wins

    Turning Small Fixes into Big Wins.

    At the end of the day, a successful toilet installation comes down to the details that most people overlook. It isn’t just about dropping a new porcelain unit onto the floor; it’s about ensuring that the wax ring is seated perfectly, the flange is secure, and your plumbing connections are tight enough to prevent a catastrophic leak down the line. When you take the time to do the dirty work right—from prepping the floor to testing the flush—you aren’t just fixing a bathroom; you are protecting your investment from the kind of water damage that can gut your profit margins in a single afternoon.

    I know that staring at a pile of tools and a leaking base can feel overwhelming when you’re in the middle of a renovation, but don’t let the small stuff intimidate you. These are the exact moments where you separate the hobbyists from the real investors. Every time you master a task like this, you are adding another tool to your belt and building the confidence needed to tackle even bigger projects. Keep your eye on the prize, stay patient through the mess, and remember that every small renovation is a strategic step toward building your long-term wealth.

    Frequently Asked Questions

    How do I know if I need to replace the entire flange or if I can just work around a broken one?

    Look, I’ve seen too many investors lose their shirts to a single bad flange repair. If the plastic is cracked or the bolts are stripped and won’t hold, don’t play games—replace it. If the flange is sitting too low or is structurally compromised, you’re looking at a full replacement to ensure that bathroom stays dry. A cheap fix now is just a massive, water-damaged headache waiting to eat your profit margins later.

    Is it worth spending the extra cash on a high-efficiency model, or should I stick to the cheapest option to keep my margins high?

    Look, if you’re flipping for a quick exit, the cheapest unit might tempt you, but don’t fall for it. I always lean toward high-efficiency models. Buyers today are savvy; they see a low-flow, modern toilet as a selling point for lower utility bills. A cheap, noisy unit feels like a “contractor grade” afterthought, which can actually hurt your perceived value. Spend the extra fifty bucks—it’s a small investment to protect your margins and your reputation.

    What’s the best way to tell if my old wax ring is actually failing before it starts ruining my subfloor?

    Don’t wait for a puddle to appear on your bathroom floor; by then, your subfloor is likely already rotting. Keep an eye out for a persistent, faint sewage smell or any discoloration around the base of the porcelain. If you notice the toilet feels slightly unstable or “wobbles” when you sit down, that’s a massive red flag. It means the seal has likely compromised, and you need to pull that toilet up immediately.